Posts Tagged ‘Womenswear’
Those who follow me on Instagram will have seen my announcement a while ago that I have joined the Adam Ross Blogger Network and this is my first post for them. Adam Ross Fabrics are a UK based fabric company with a wide range of fabrics at great prices. They’ve recently launched a new brand: Pound Fabrics with loads of great bargains. They very kindly sent me some free fabric of my choosing, in exchange for this blog post. However, all of the opinions in this post are my own honest opinions. The lilac unicorn jersey I chose is unfortunately not available on the new website but there are a lot of other bargains available at https://poundfabrics.co.uk/
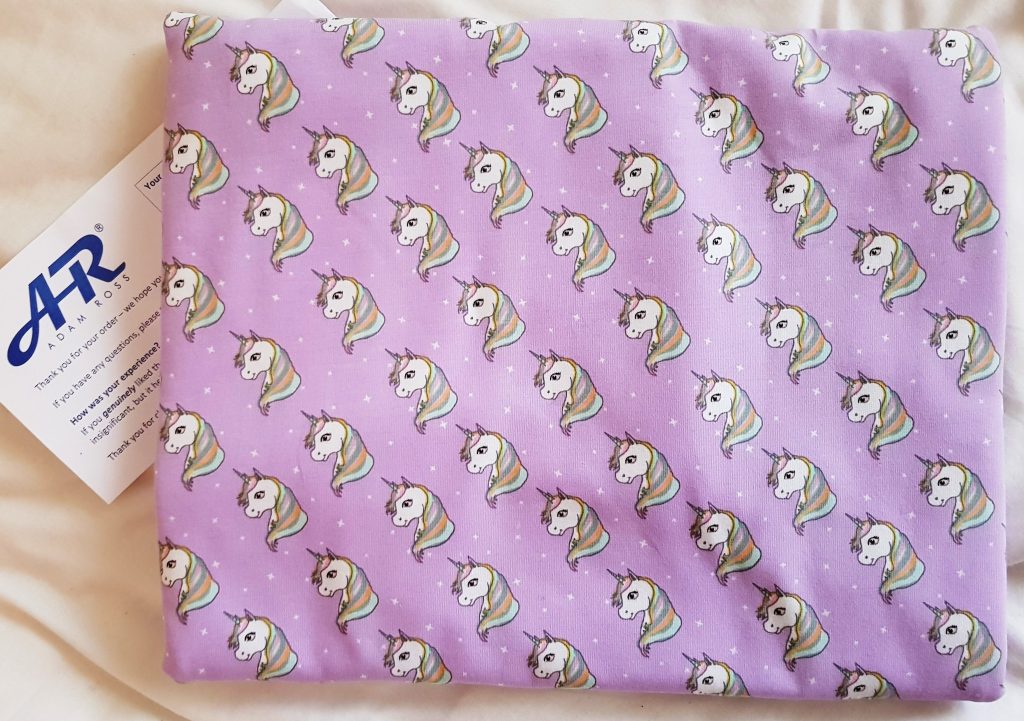
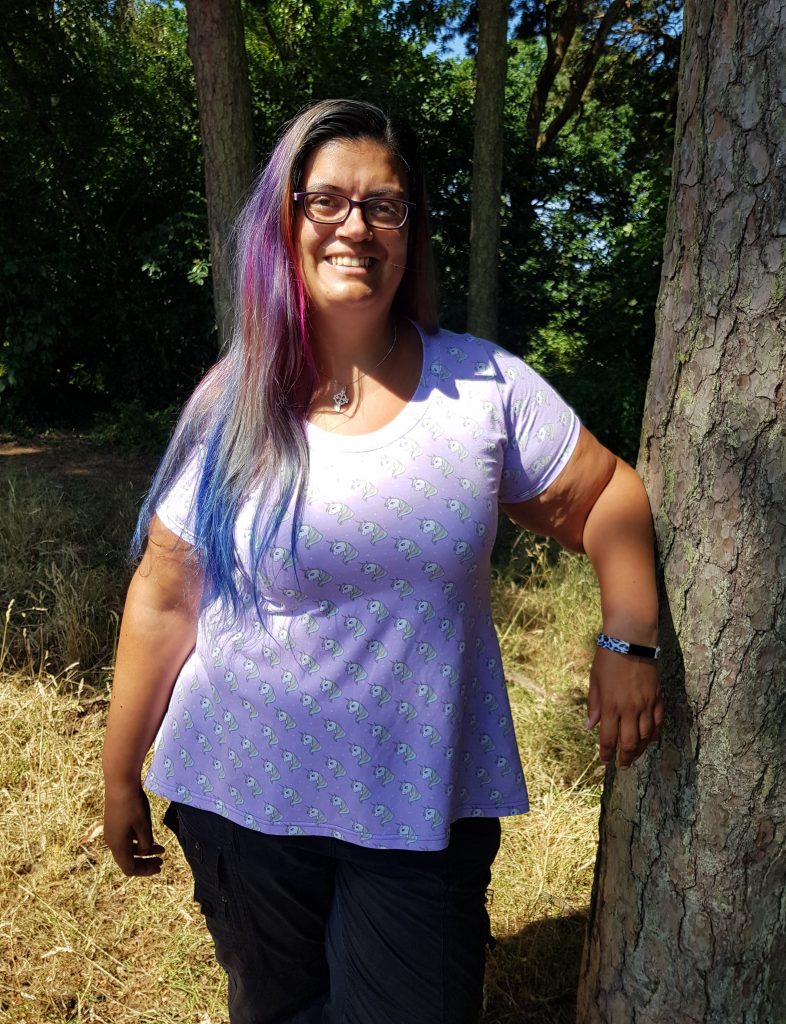
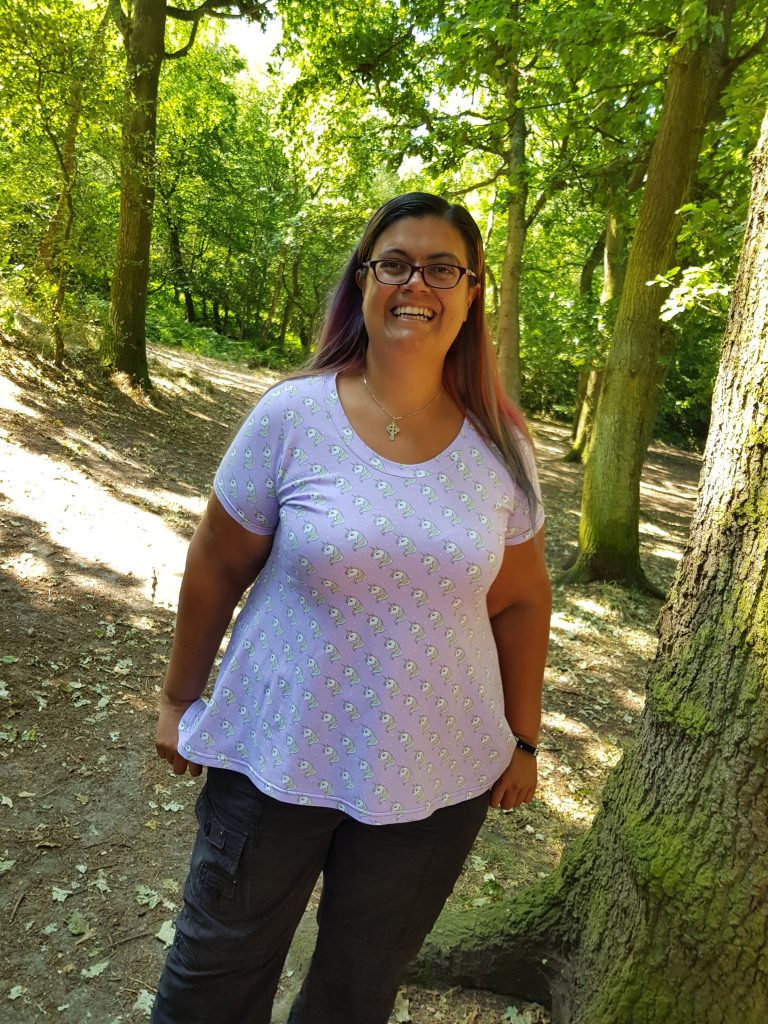
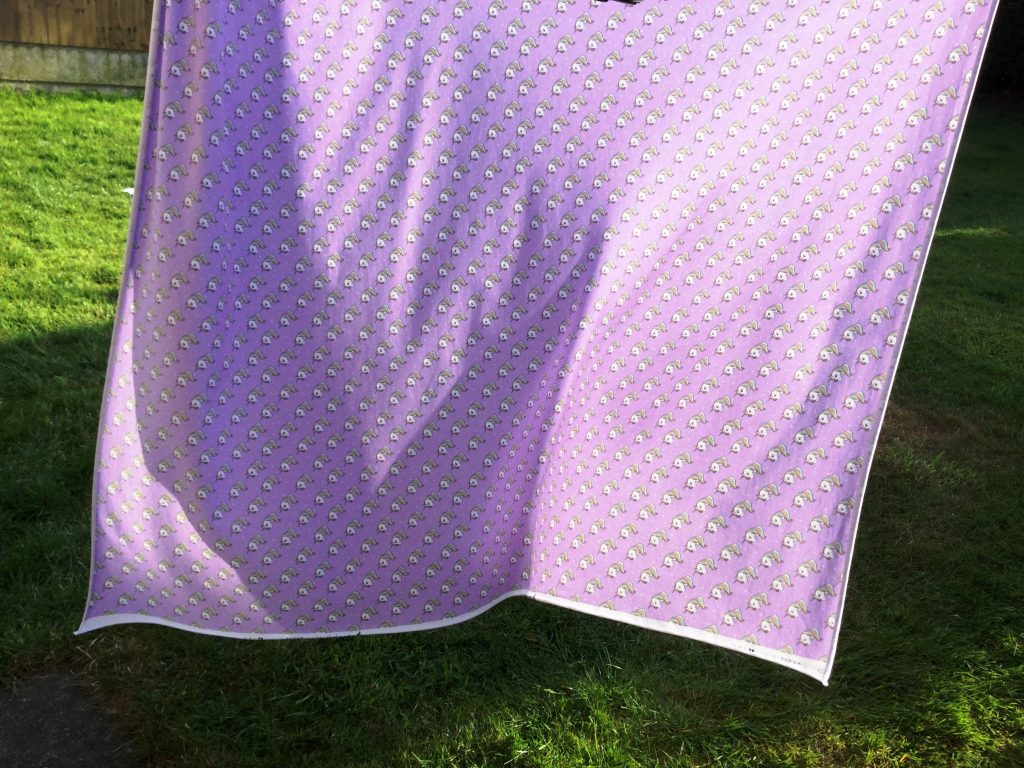
As I have to look smart for work, I therefore love wearing fun non-work suitable clothes at the weekend. I’m naturally a jeans and t-shirt girl, so have been making a lot of the Love Notions Laundry Day Tee recently (a blog post on that will follow) and as soon as I saw this unicorn jersey on the Adam Ross website knew I had to have it! As you can tell from the name of the blog, purple is my favourite colour and I love unicorns, they’re so cute and fun and yes, I am a big kid! The fabric is really soft with a good stretch and it washed really well, so I took advantage of the beautiful weather we had over the summer to dry it outside.
The pattern sews together really quickly and the fabric was very easy to sew with and pressed nicely, especially at the neckband and hem. I stitched the tee completely on my overlocker and just finished it off by hemming it on the cover stitch.
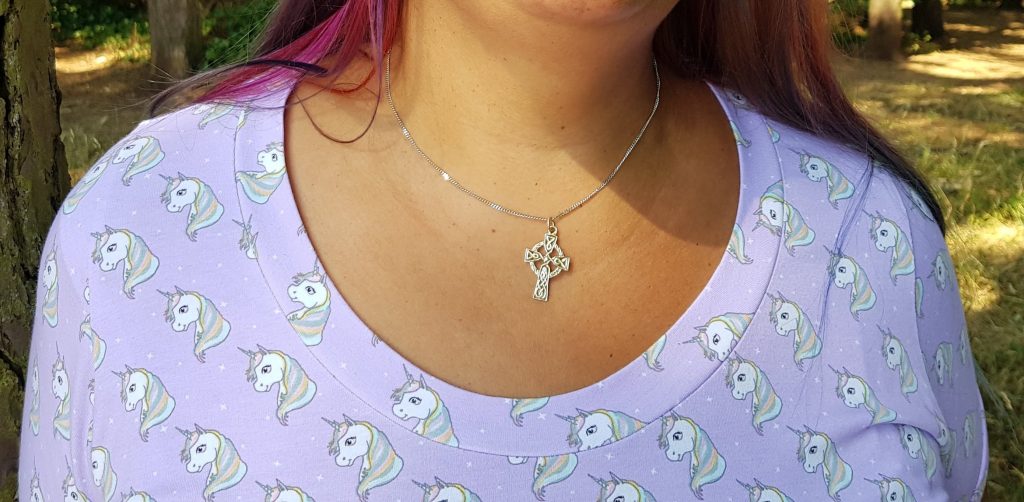
I decided not to topstitch the neckline this time as I’d like to keep it simple and have no distractions from the fabulous unicorn fabric. I’ve always top stitched it before, so we’ll see how it holds up to washing and wearing.
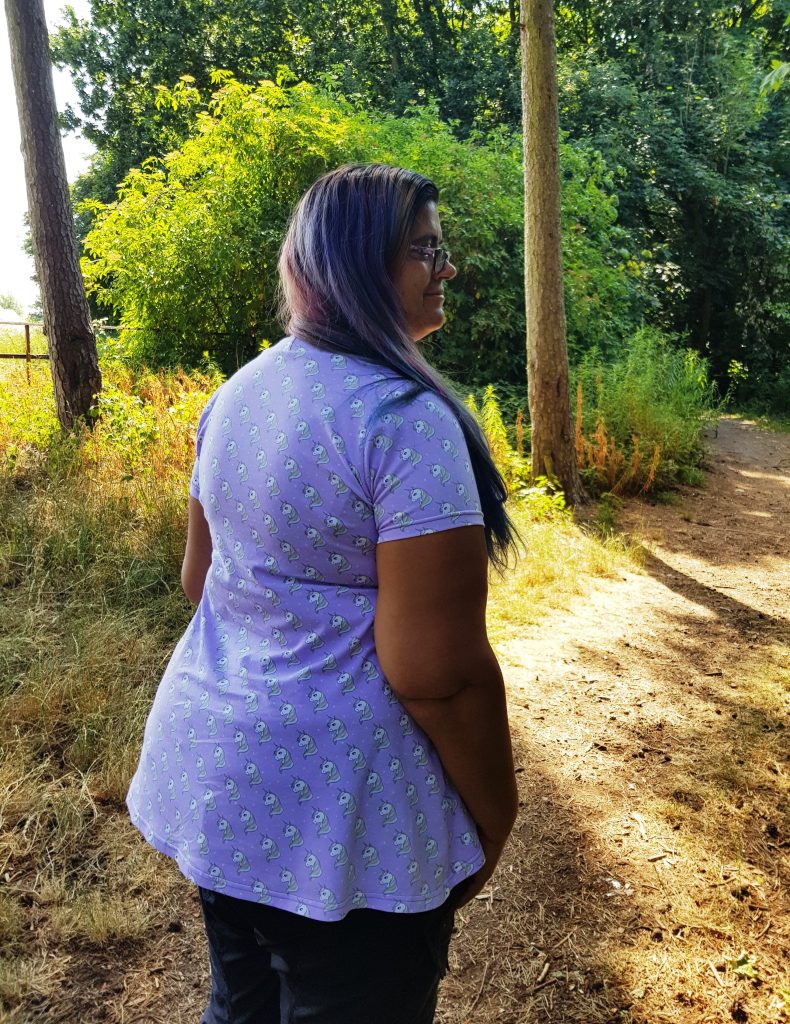
I also decided to make a slight change to the pattern by adding a small hi-lo hem, as I recently did this for the dress for my 40th birthday party and really liked it, so thought I’d see how it translates to a top. Let me know what you think in the comments below.
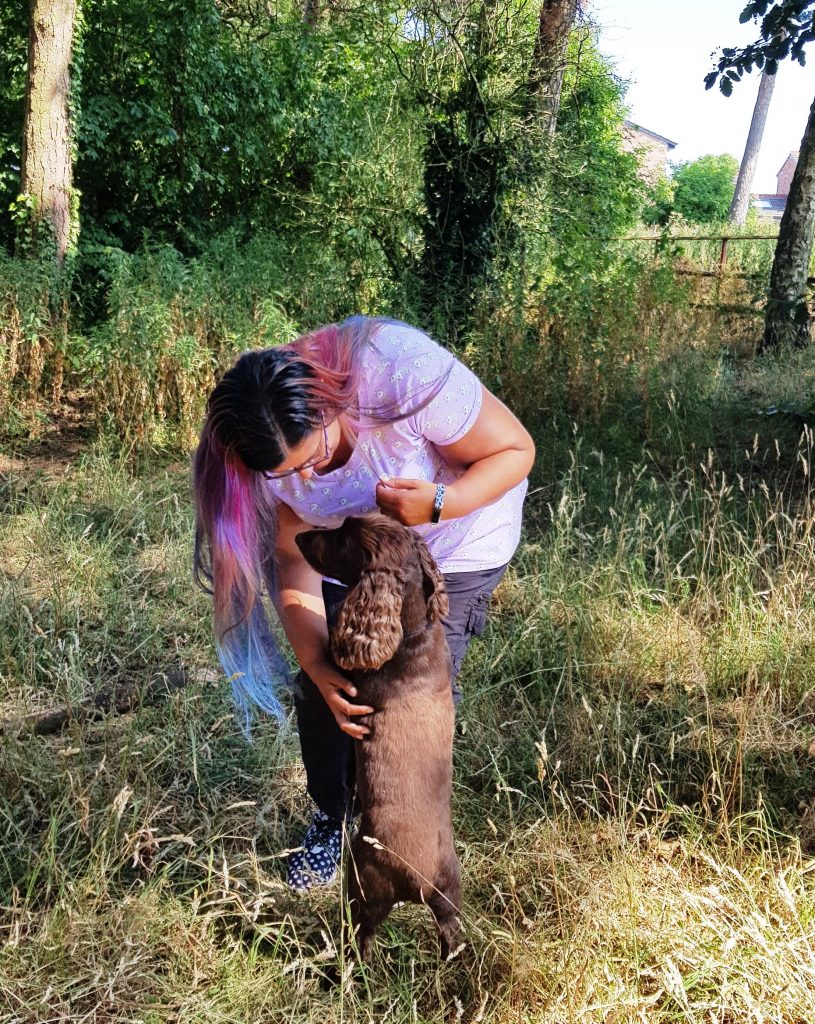
Coco wanted in on the action!
Share your thoughts
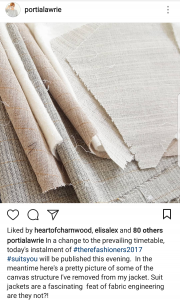
I’ve decided to join in Portia Lawrie’s Refashioners challenge – Suits You this year. The challenge is basically to refashion an old, unworn or unloved suit!
Most people entering the challenge have raided their local charity shop and bought a XXXL men’s suit to give them lots of fabric to work with. But no, old daft me decided that wasn’t enough of a challenge! I decided to use an old pale blue George at Asda ladies suit that I found in the loft, which I’m clearing out due to a rewire in the new year! I have no idea why I bought it as it’s soooo not my style, although it actually seems to fit me pretty well, which is where the extra challenge comes in as it doesn’t give me very much extra fabric to work with, doh!


I had a lot of fun playing round with the suit and trying to decide what to make with it but in the end I settled on a version of one of my TNT patterns – the BlueGingerDoll Winifred dress. I’ve altered the pattern quite a bit to fit me well, the shape suits me and I wear my existing ones quite a lot, so would be nice to have a new but also different version.
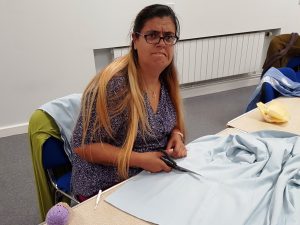
Although I have made the collarless version of the Winifred dress recently I do like the collar feature and decided to take advantage of the jacket collar and integrate this into the design. Lots of pinning and fiddling was undertaken at Liverpool Sewing Club, with me trying on again and again to ensure the button holes were not visible and the new centre front seam was straight and actually in the centre. Then to figure out the rest of the bodice fitting! As the jacket had princess seams it didn’t actually need the tuck darts that the dress usually features, which help create the bust fitting and flowing skirt. So when I figured out where to finish the bodice/jacket section and finally got the fit I liked, it was time to make the first cut!
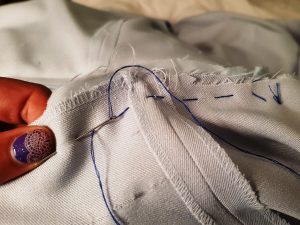
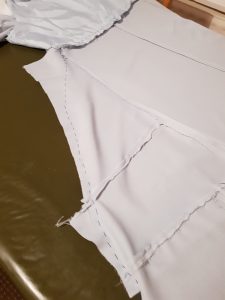
I decided to shorten the sleeves to elbow length, which i find really comfortable but I normally make short-sleeved Winifreds. As you can see from the before photos, the sleeves were a tiny bit tight, so I decided to remove the sleeve lining (I’ve left the bodice lined) to see if that helped with the fit. This is where I noticed the big difference in the seam finishes between the areas of the suit that would be visible (the trouser seams) and those not visible (sleeve seam). This is after all a budget suit and the manufactures need to save money and time where they can!
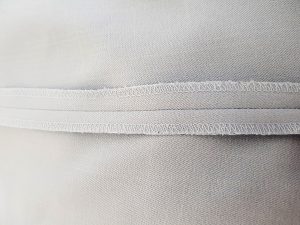
Visible seam
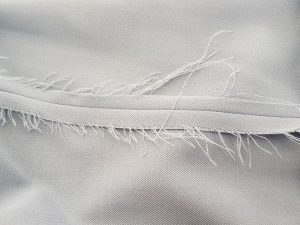
Hidden seam
At this point I decided to remove the shoulder pads as a) it’s no longer the 1980s, and b) they really don’t suit me. During this unpicking and deconstruction of the jacket stage it became obvious the difference between my Asda suit and the high end men’s tailored suit, that a lot of people, such as Portia were refashioning:

Now to move onto the skirt construction. The Winifred dress usually has an elastic casing or shirring at the back waistline but I wanted to test the fit first, so I decided to construct the skirt pieces separately first and check or fit before adding this detailing., The dress front is normally put as a full bodice and skirt all in one but my refashion needed a seam adding. I unpicked the side seam on the trousers and after a little maths and playing around with the layout decided to press out the hem and keep the inside seam in place and use this as the centre front centre back seams, as the skirt flares out and obviously so do the trousers at the hips. Although this flare isn’t enough to create the full width of the skirt, so now comes lots of patch working! I used the extra pieces from the bodice, trousers and sleeves to create extra width to get the rough shape of the Winfred dress. I then had tacked (yes me, the worst hand sewer known to mankind!) the two skirt pieces to the bodice and the rough shape of the skirt together.
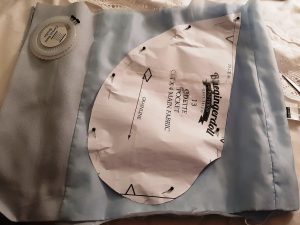
I needed to try the dress on and see if the shirring was needed or if the fit was okay without it and I was very pleased to find the shirring was not actually needed. A combination of the jacket bodice princess seams and the fact that I am extremely pear shaped meant I could lose the shirring and still have a great fit! Any good me-made dress has pockets, so time to go back to my leftovers from the suit and I used the lining from the bottom of the jacket to cut some side seam pocket, using the pattern piece from another BlueGingerDoll dress, the Odette, as a template). I’ve hacked this pattern before to add pockets but if you’re not sure how to do this then By Hand London have a great tutorial on their website, with lots of photos, which always help me as I’ve a very visual learner!
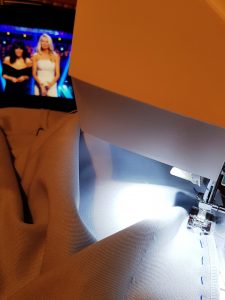
Now it’s time to put it all together properly! I used my pattern pieces as a rough guide and cut off the excess no longer needed, machine stitched all seams and remove the tacking (whilst watching Strictly of course)
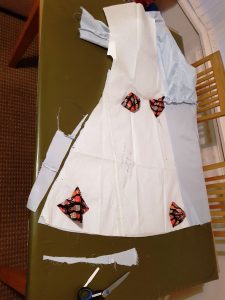
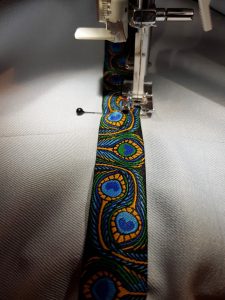
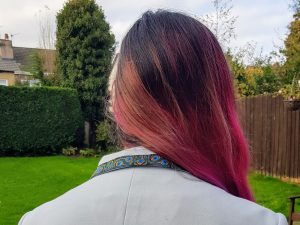
All finished, or is it?! Hmm, it’s very nice and I’m happy with the fit but it’s rather plain and therefore not really very me! My hand embroidery skills aren’t up to scratch, so I decided to have a look around for a co-ordinating trim. I really like peacocks feathers and found this one on Moksha Trim, so decided to stitch that to the waist but still wasn’t 100% happy, so had a play around at Liverpool Sewing Club with the ladies helping me work out the best placement and having a laugh in the meantime

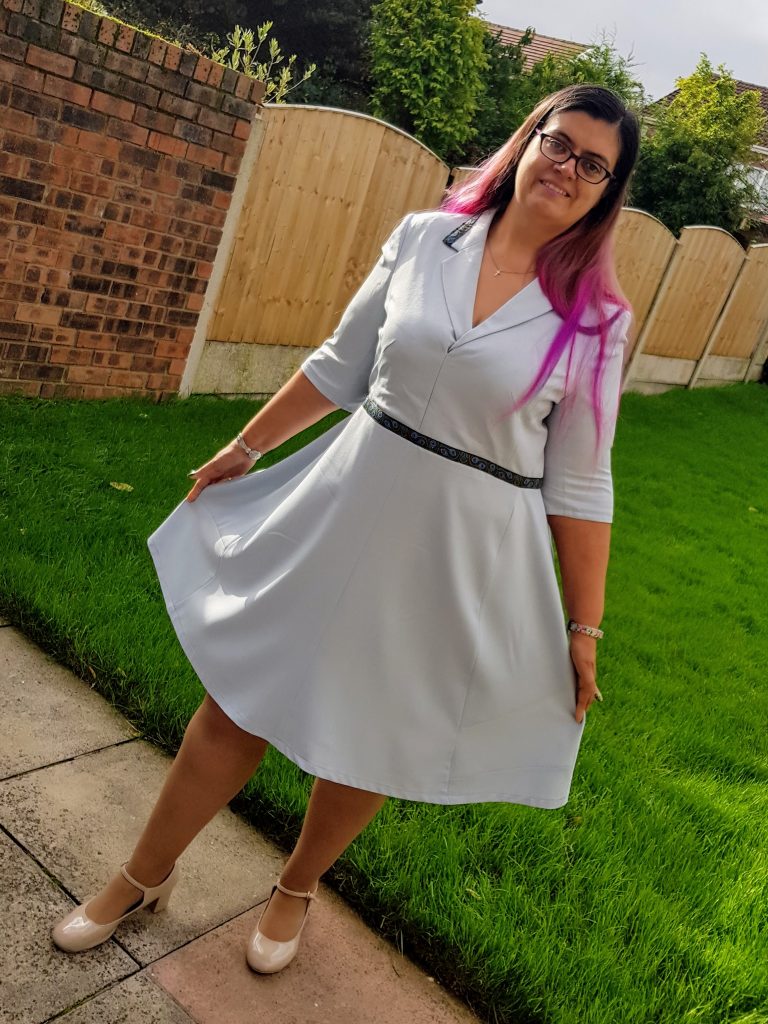
Yay, all finished! Cue lots and lots of photos:
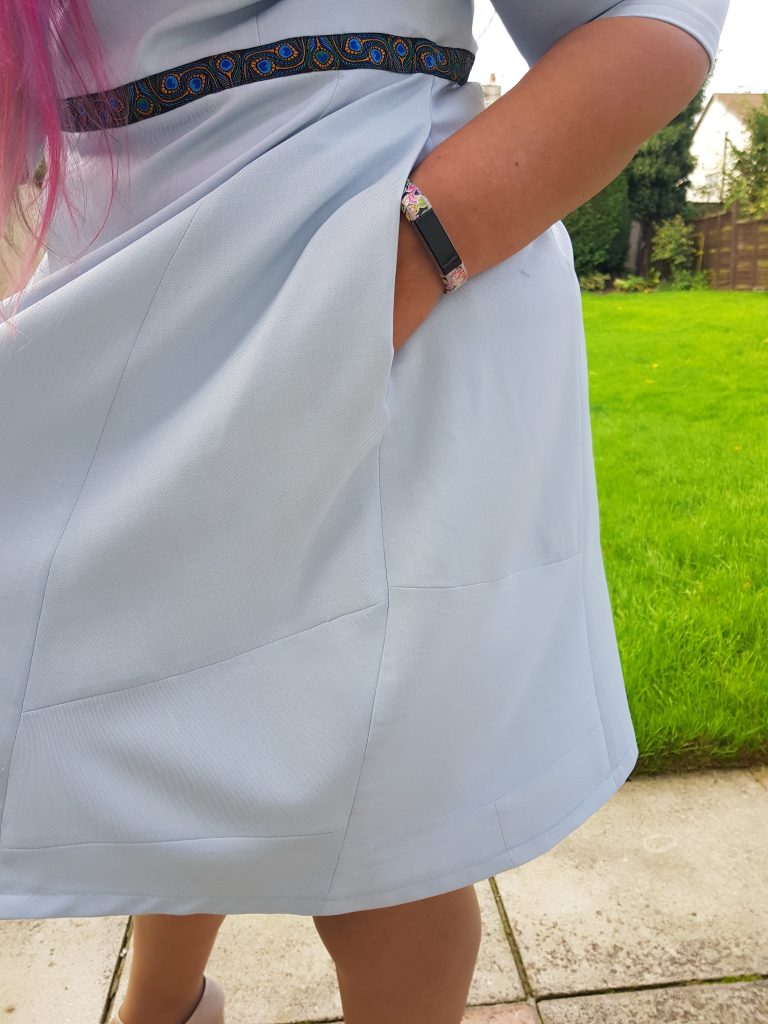
Patchwork side panels!
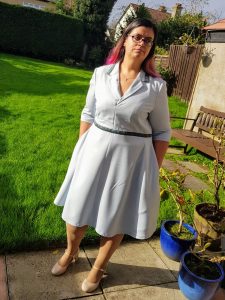


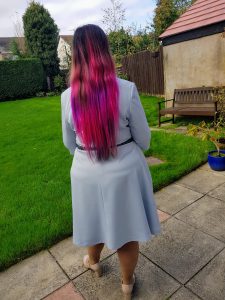
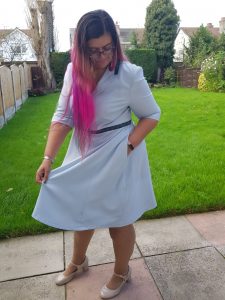
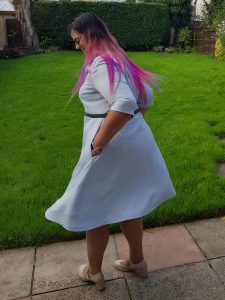
I’m really please how this has turned out and that I’ve managed to do it from not a lot of fabric and without adding any extra fabric, just 1.5 meters of trim!
6 Comments
Sorry about the long gap in blogging! This has been mainly due to a large number of issues with my house which has required a lot of work to be done and clearing out 20 years worth of stuff from the loft and in random places (yes I am a bit of a hoarder)! There’s still a lot more to do with the house but I want to blog as I’ve recently been to the most amazing sewing weekend and wanted to tell you all about it!
I was soooooooo pleased to actually get a ticket to The Sewing Weekender back in May, especially as they sold out in approximately 6 minutes!
Organised by Kate & Rachel from The Fold Line and Charlotte from English Girl at Home, the Sewing Weekender is a sewing weekend break held at Murray Edwards College in Cambridge and sponsored by Adam Ross Fabrics. Everyone brought their current projects to work on but there were also talks, workshops and a lot of nattering and tea drinking!
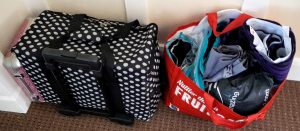
I’m not very good at decisions and couldn’t decide what projects to take with me, so in the end took four! Although 50 sewing machines and 4 overlockers were kindly provided by Janome, I decided to take my overlocker with me, as 3 of my projects were mainly constructed using it! Plus being the car I didn’t have to worry too much.
Friday
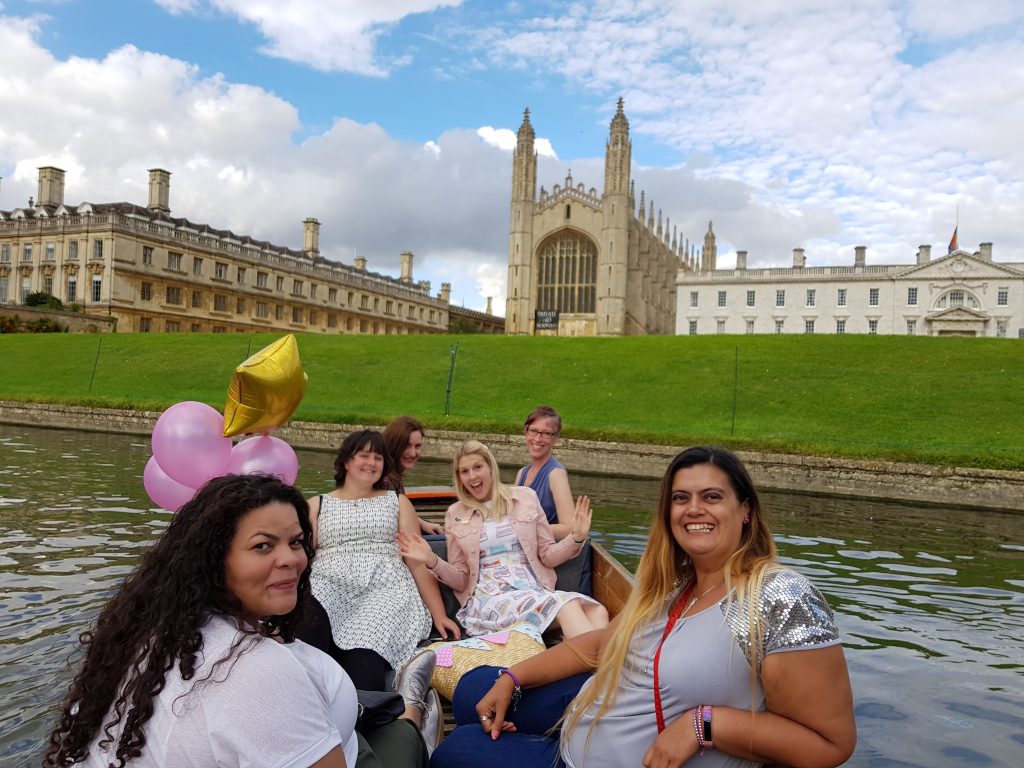
After travelling down south on Thursday to visit friends I made my way over to Cambridge Friday afternoon. As there a few of us travelling long distances and staying over the Friday evening I decided to arrange a get together. Rudy from Roodles Runique very kindly agreed to help me organise this as she lives local but was unfortunately unable to get a sewing weekender ticket!
Joy also helped and arranged a fabulous punting trip down the river relaxing and seeing Cambridge from a very different viewpoint. I loved it and would definitely recommend it to anyone visiting Cambridge
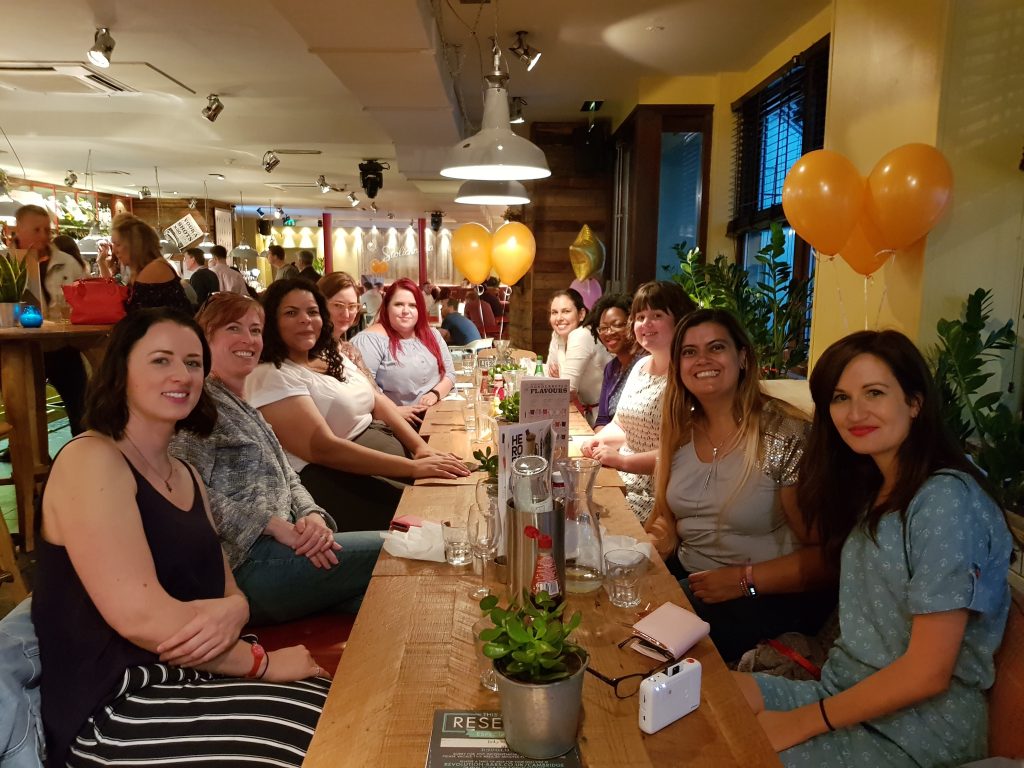
We then met up with a few more of the sewing weekenders for dinner and drinks in Revolution and I took full advantage of the 2-4-1 happy hour deal to enjoy my favourite espresso martinis!

Saturday
10am Saturday and it’s time to get started with the actual sewing weekender! The main room had been 2 long rows of tables running the length of the main room with Janome sewing machines, overlockers and ironing stations. I chose one of the first workstations as I had so much stuff and I’m not exactly known for being tidy! My lovely sewing buddies sat around me were Lois from Sewing Squares to my left, Harriet (& her lovely mum Lindsay) from Hobbling Handmades were opposite me, with Anna from Dippy Stitcher sitting next to her.
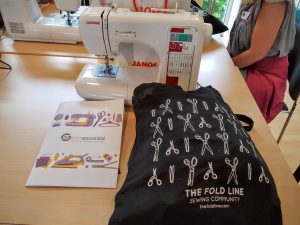

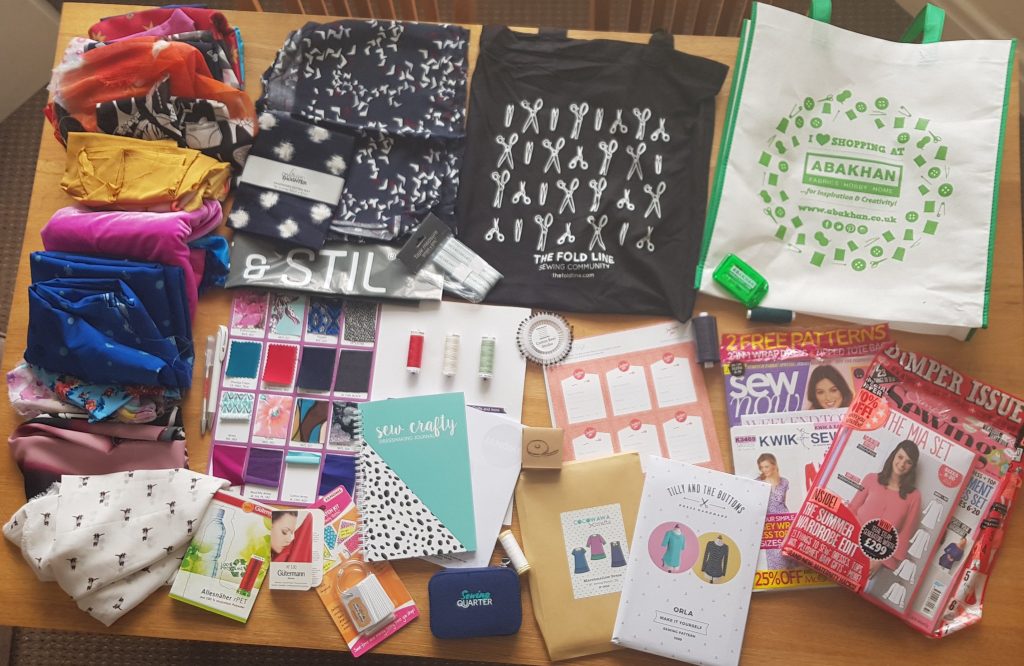
The goody bags were amazing and contained loads of different supplies from a variety of stockists:
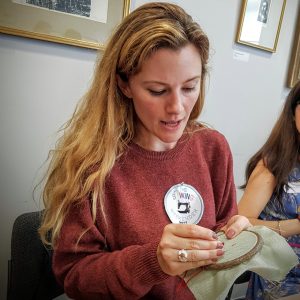
I’m not very good at hand sewing, as my mate Jan says this is because I have a severe lack of patience! J However it would be mice to embellish things instead of having to reply on iron on items, so I decided to join Elisalex from By Hand London for her hand embroidery workshop. I learn new stitches and had good fun embroidering a panel for my sewing room:
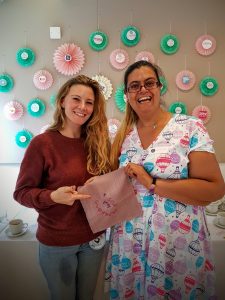
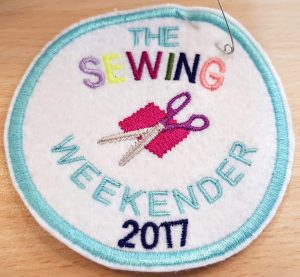
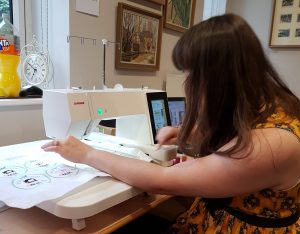
Most people walked into town for lunch but as I’m a wuss and it was pouring with rain (& eventually thunder too) I decided to stay behind and learn about machine embroidery with Ellie from Sew Positivity. We made Sewing Weekender 2017 badges and had fun choosing our colours and watching the machine embroidering very fat!

After lunch we had talks from Portia from Makery telling us about refashioning and then Fiona from Diary of a Chainstitcher telling us about the life of a Costume Supervisor. As a bit of a hoarder I found the refashioning fascinating as I hate throwing stuff away, so being able to breathe new life into garments is a must. Fiona’s tales of a costume supervisor gave an intriguing insight into a world most of us never see and I’m incredibly jealous of her being able to go high-end fabric shopping when the show allows!


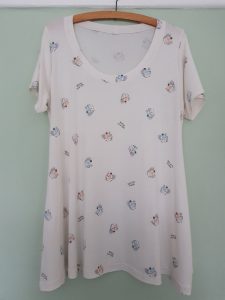
I finally got round to actually starting some sewing at 3pm! I started with something I could easily work on whilst nattering, as this is the 5th version I’ve made – the Love Notions Laundry Day Tee in fun cupcake fabric from Abakhan. I managed to get it almost all done, bar the hemming and topstitching which I did on my Janome coverstitch machine when I got home:
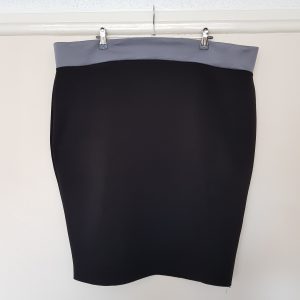
I also managed to make a start on my Patterns for Pirate Pencil Skirt!
Sunday
I actually started the day by sewing! One of the great things about these meet-ups are being able to pick other peoples brains! I was making my black pencil skirt from scuba ‘scraps’ left over from a circle skirt I made for my birthday night out and discovered I didn’t actually have enough for a waistband. I did however have some scuba in a similar weight, also from Abakhan (well the Birkenhead branch it at the top of my road!) but with a lace pattern and I wasn’t sure if it actually looked any good. However the ladies sewing around me suggested turning it inside out and using the plain grey wrong side as the right side and I think it works quite well, what do you think?
This sewing was completed around 2 more great talks from Melissa of Fehr Trade and Elena of Randomly Happy. Melissa’s talk focused on fitting our garments for movement, not just standing and sitting, which is what fitting issues usually focus on! Elena’s talk was on Mindfulness in our sewing and really interested me as I’ve recently started a mindfulness course through work, to help me with my mental health issues and mild Chronic Fatigue Syndrome. Sewing is our hobby and should be fun, not stressful and remembering to enjoy the process, not just focusing on the finished garments!


As we were finishing off I got some great fitting help from the lovely Sue with my Cake Patterns Carmine Jacket. My first toile looks amazing but due to by rather large ‘bingo wings’ is unwearable! However when I cut out the largest size in order to accommodate these then it was way too big across the back. There’s still lots more work to do on the jacket, so I’ll blog about it when finished.
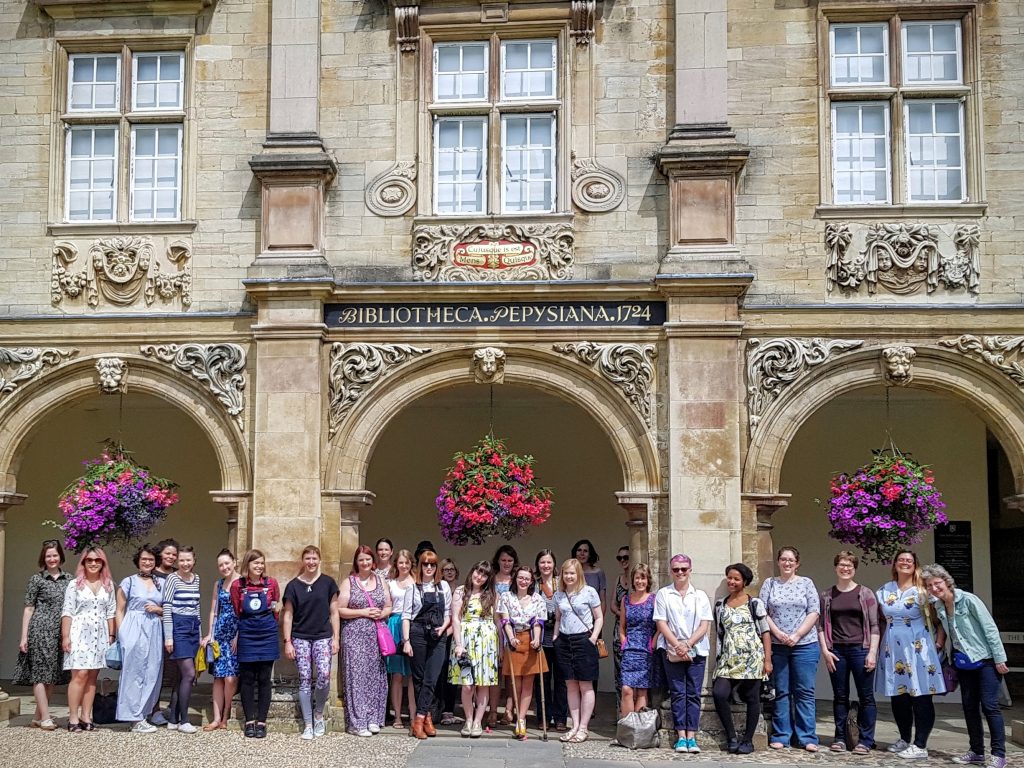
We then finished with a little photo walk into Cambridge seeing some of the colleges and nattering (of course) with the other sewing weekenders.

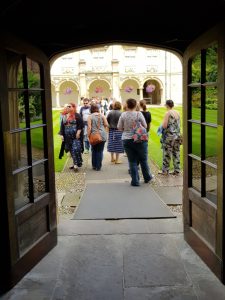


And of course a few of us stragglers went off for lunch before setting off home!

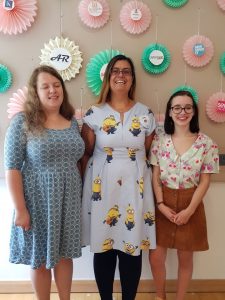
I have an amazing time at the sewing weekender, learnt lots of great stuff, had fun and meet lots of fabulous new people! I only managed to get photos with a few of them but everyone was brilliant!
Bring on 2018!
2 Comments
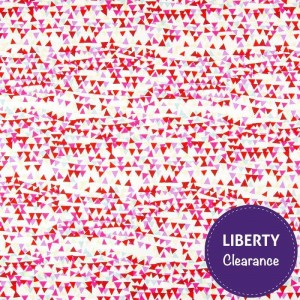
As I have previously discussed Abakhan Fabrics have recently had 22,000 meters of Liberty fabrics delivered! Initially just the Tana Lawns were available to buy but now the Cotton Twills, Kingly Cotton Cords, Jerseys, Lifestyle Craft Cottons and Mayfair Silk Chiffons are all available to purchase from Abakhan at great discounted prices.
As with all Liberty fabrics, their jersey is of great quality & is a beautifully soft fabric with a distinct stretch, jersey is your go-to for versatility and comfort. The jersey composition is 95% cotton with 5% elastane and 150cm.
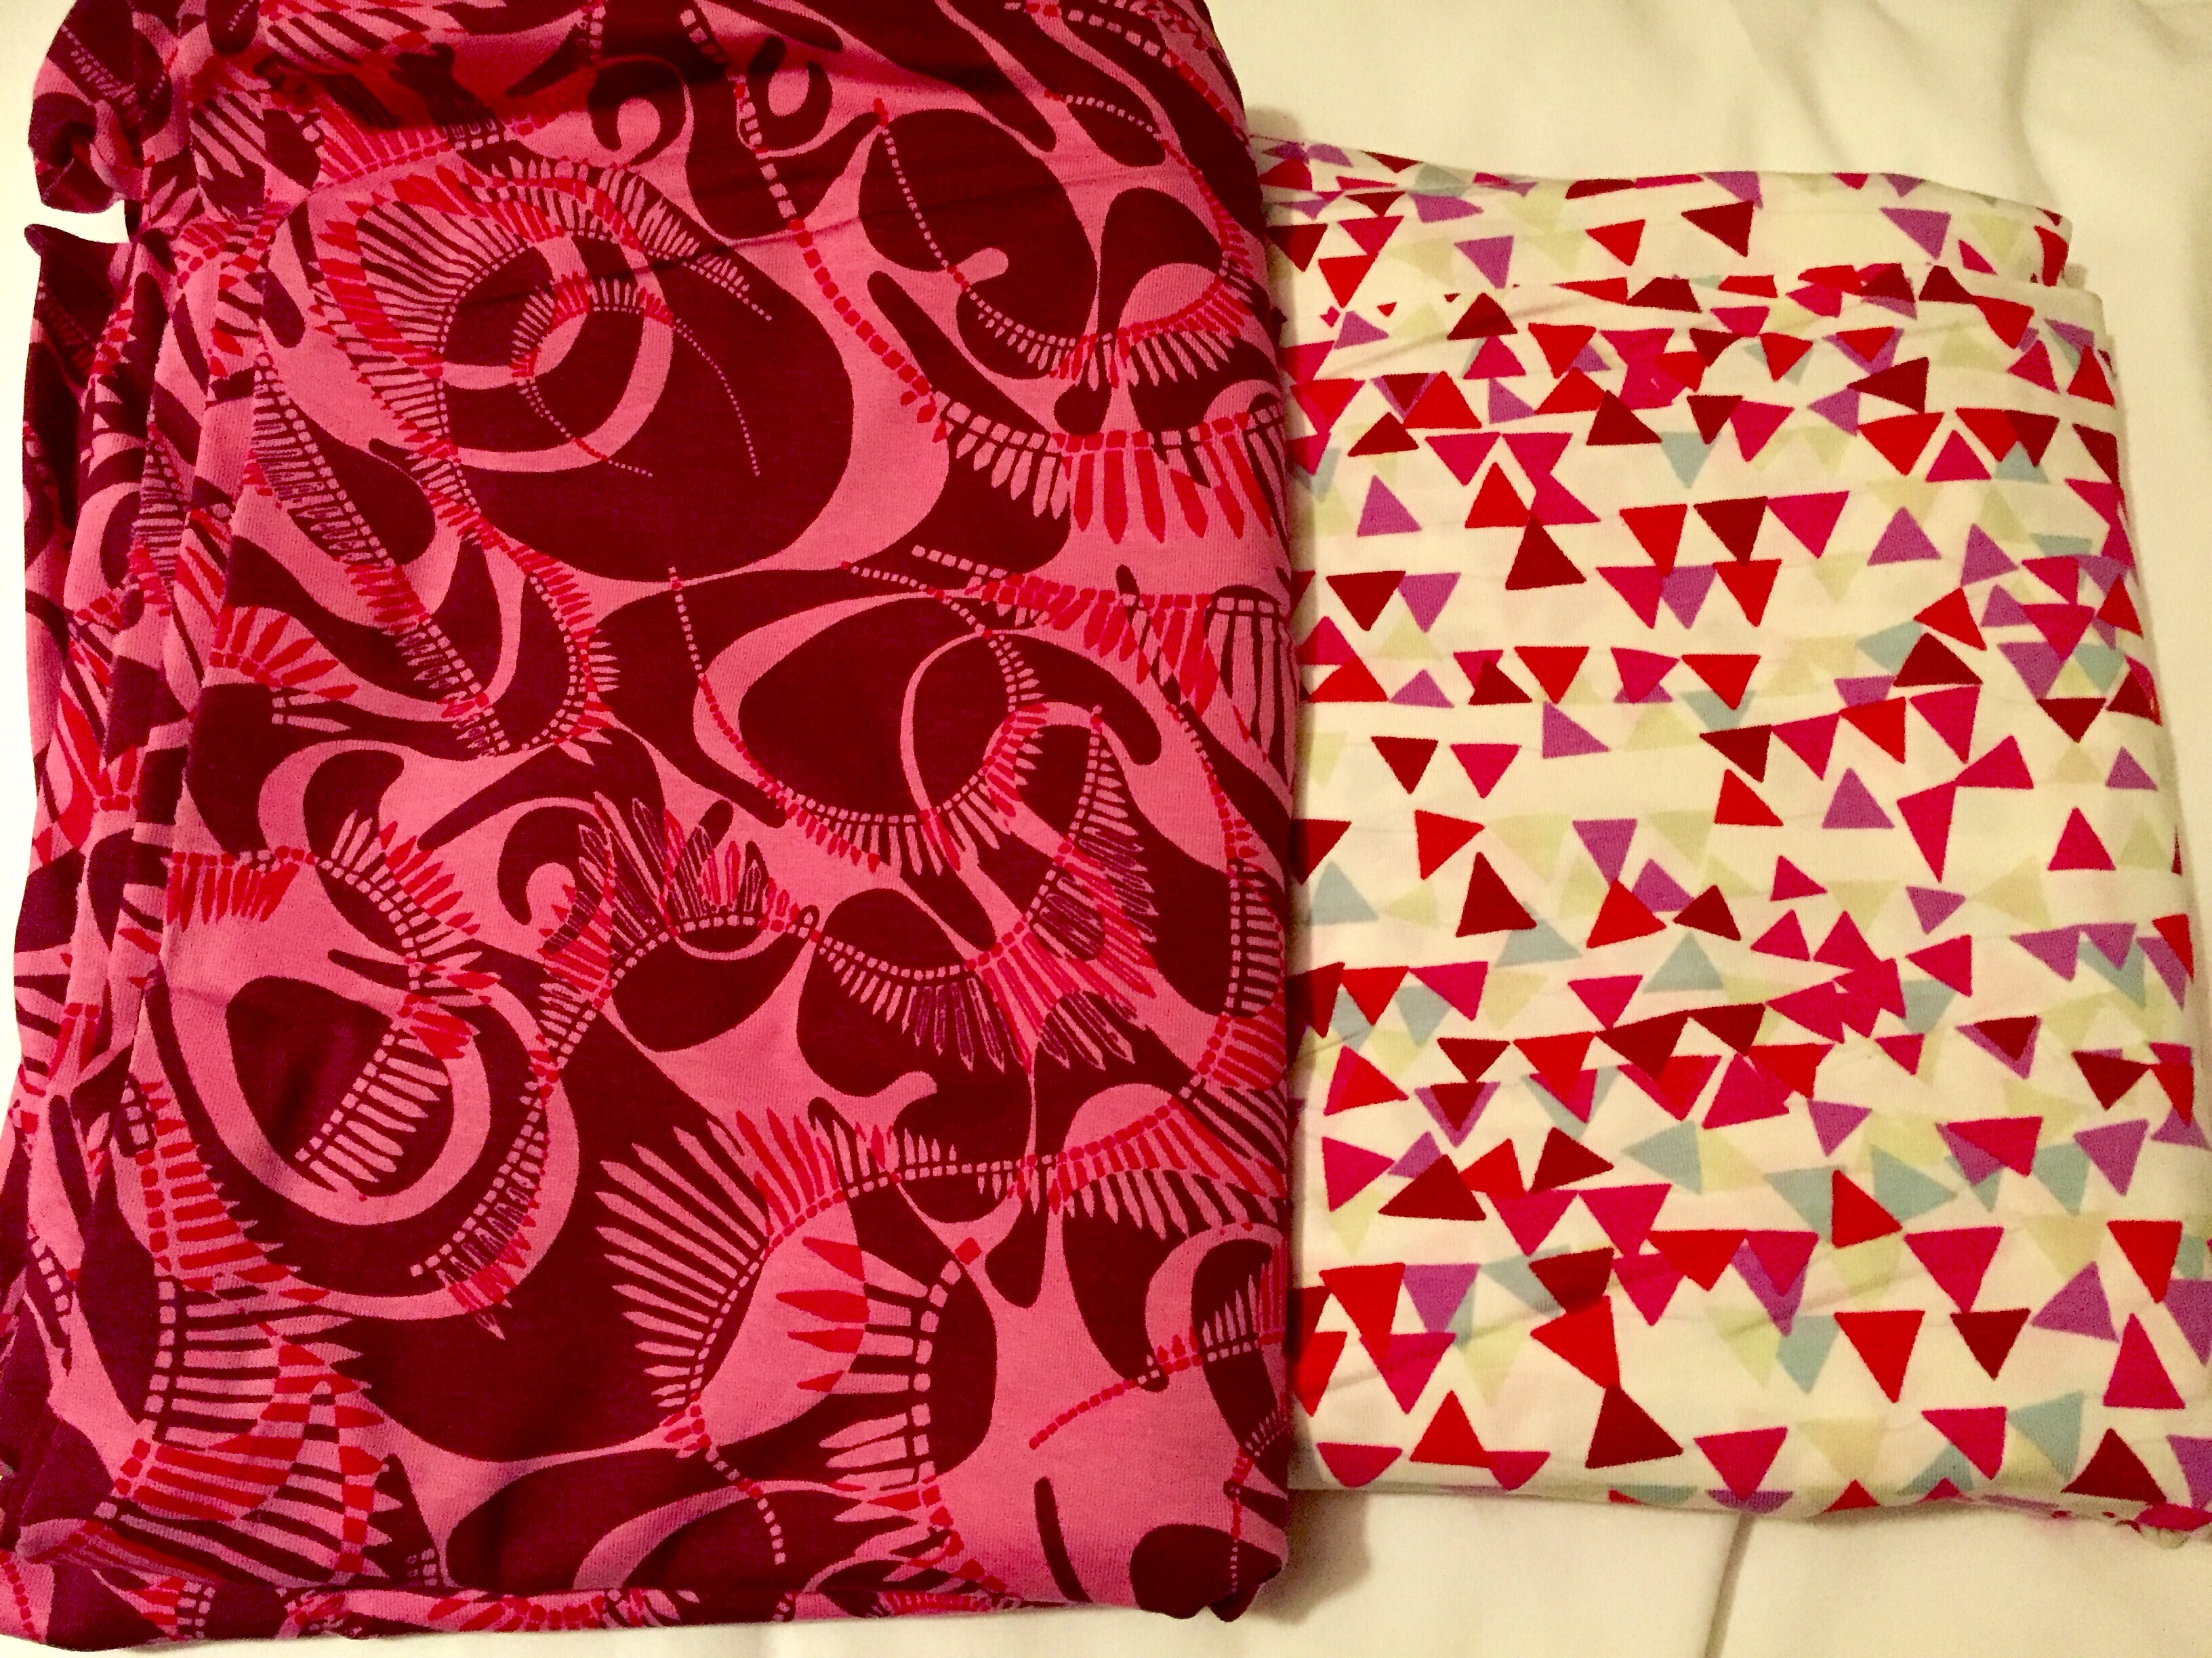
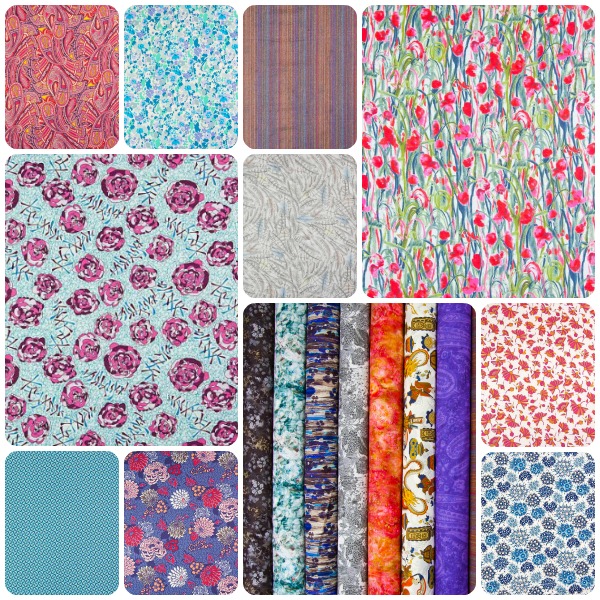
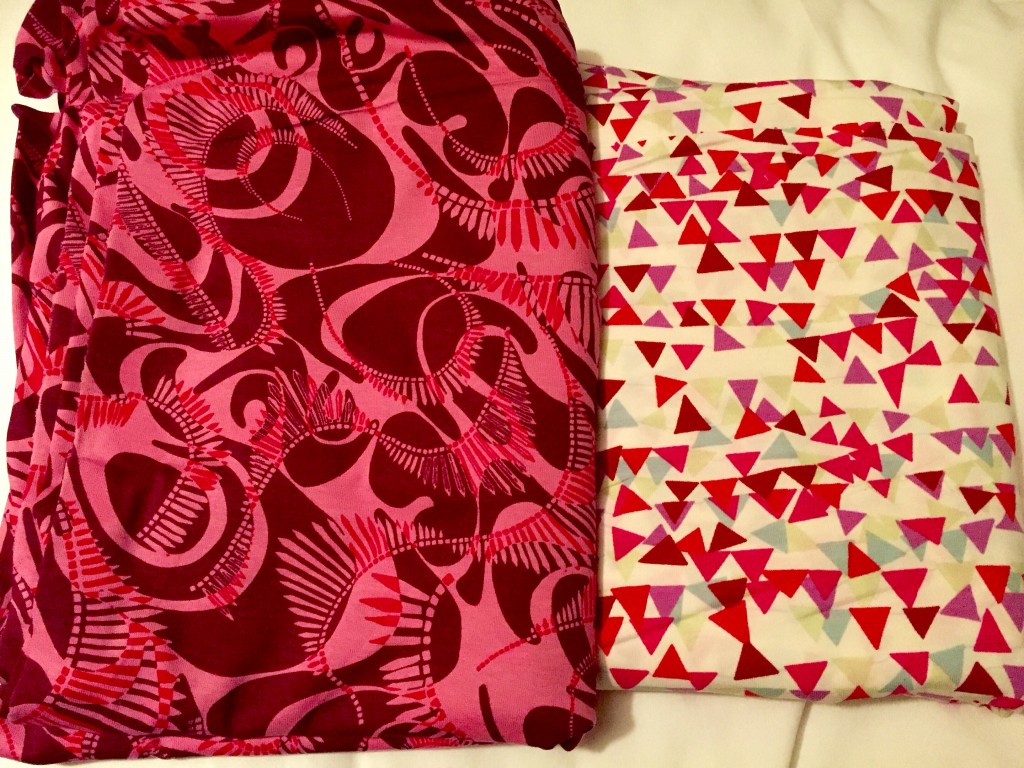
 After browsing through all the Liberty jerseys available, I chose my favourite 2 and ordered 1m of each. I love abstract prints and find the swirls and bright colours in the Liberty Tana Jersey Fabric Mitford Pink beautiful and my much my style.
I also love the slightly quirky but still pretty and colourful Liberty Tana Jersey Fabric Robin Pink and ordered 1m of that also, as I reckoned the two would work beautifully together.
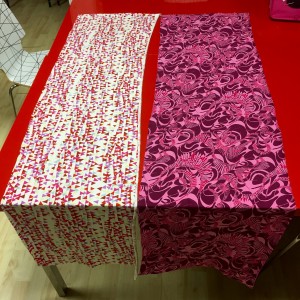
And I was very pleased when my parcel arrived and as expected they do look fabulous together:
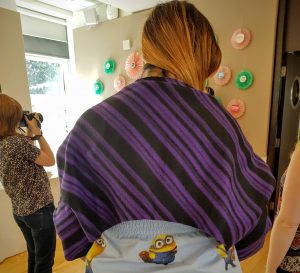
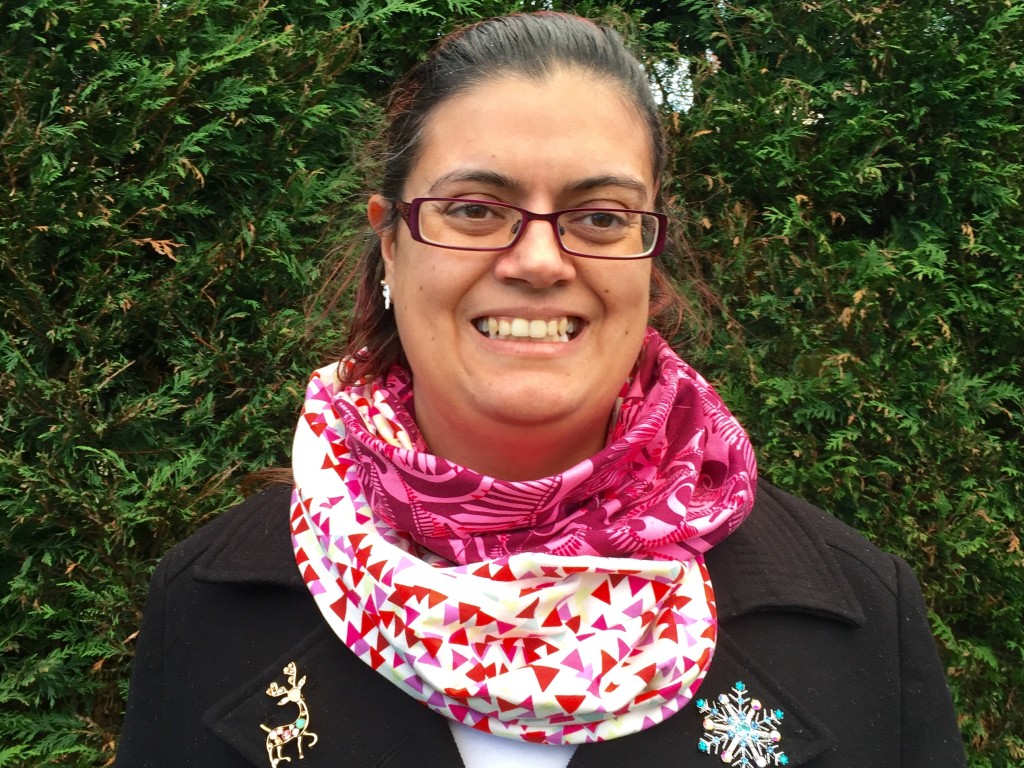
I decided with winter approaching (yes I know it’s pretty mild one so far) to make a big snuggly infinity scarf with this jersey. You can’t make too many stylish scarves at winter and a beautiful soft Liberty jersey infinity scarf will be the perfect stylish accessory perfect to snuggle against on a cold winters day! Just in case you don’t know – an infinity scarf is basically one giant loop of fabric and is sometimes also known as a circle scarf.
 Infinity scarves are quick and easy to make, as well as stylish and comfy. I have made a few before, so this took me even less time as I already have my head wrapped round the concept, which i admit took a little getting used to at first. I cut this out on Sunday evening and then stitched it together on the overlocker at Liverpool Sewing Club on the Monday evening – took me less than 2 hours in total!
I used the overlocker to sew the Liberty jersey with as it makes it much quicker and easier and I am rather fond of sewing with an overlocker. You could just a standard zigzag or overcasting stitch to sew jersey with on a standard sewing machine however.
The Liberty jersey is beautiful to sew with, so soft and easy to handle and with just the perfect amount of elastane in that it stretches well but also returns back to it shape quickly and uniformly. No skipped stitches, no tension issues or any other hassle at all with this jersey!
I’m really happy with my new scarf and love the fact that in this milder weather I can wear it open as one long loop and when it get cold wrap it round again and snuggle up in it’s softness.


I’ll write a tutorial on how to make one of these lovely Liberty jersey infinity scarves, however that will; have to wait till the new year as it’s now Christmas Eve and I still have some hand sewing and pressing to do on my Christmas day top, oops!
Merry Christmas – let me know if you get any of Abakhan’s lovely Liberty fabric from Father Christmas or any other sewing related gifts.
NB: I received this fabric free of charge to try out from Abakhan. All opinions about it however are fully my own.
1 Comment

I was recently given the opportunity to pattern test Bluegingerdoll’s new Bonnie Sweater pattern. This is their first pattern designed specially for knits so I jumped at the chance as I love knit fabrics, so comfy and easy to wear.
Designed for comfort and elegance Bonnie is a vintage inspired sweater that works in every season and for any occasion. Made with knit fabric Bonnie is a quick and easy make and can be created in a matter of hours.
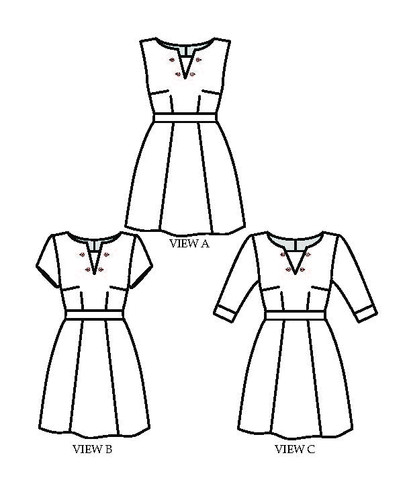
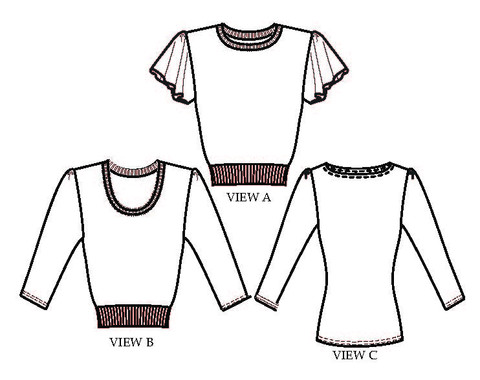
View A is an iconic 1940’s inspired cropped sweater design, featuring flutter sleeves and fitted waistband its perfect to pair with those high waisted skirts and pants.
View B also cropped at the waistline and features a scooped neckline and 3/4” sleeves.
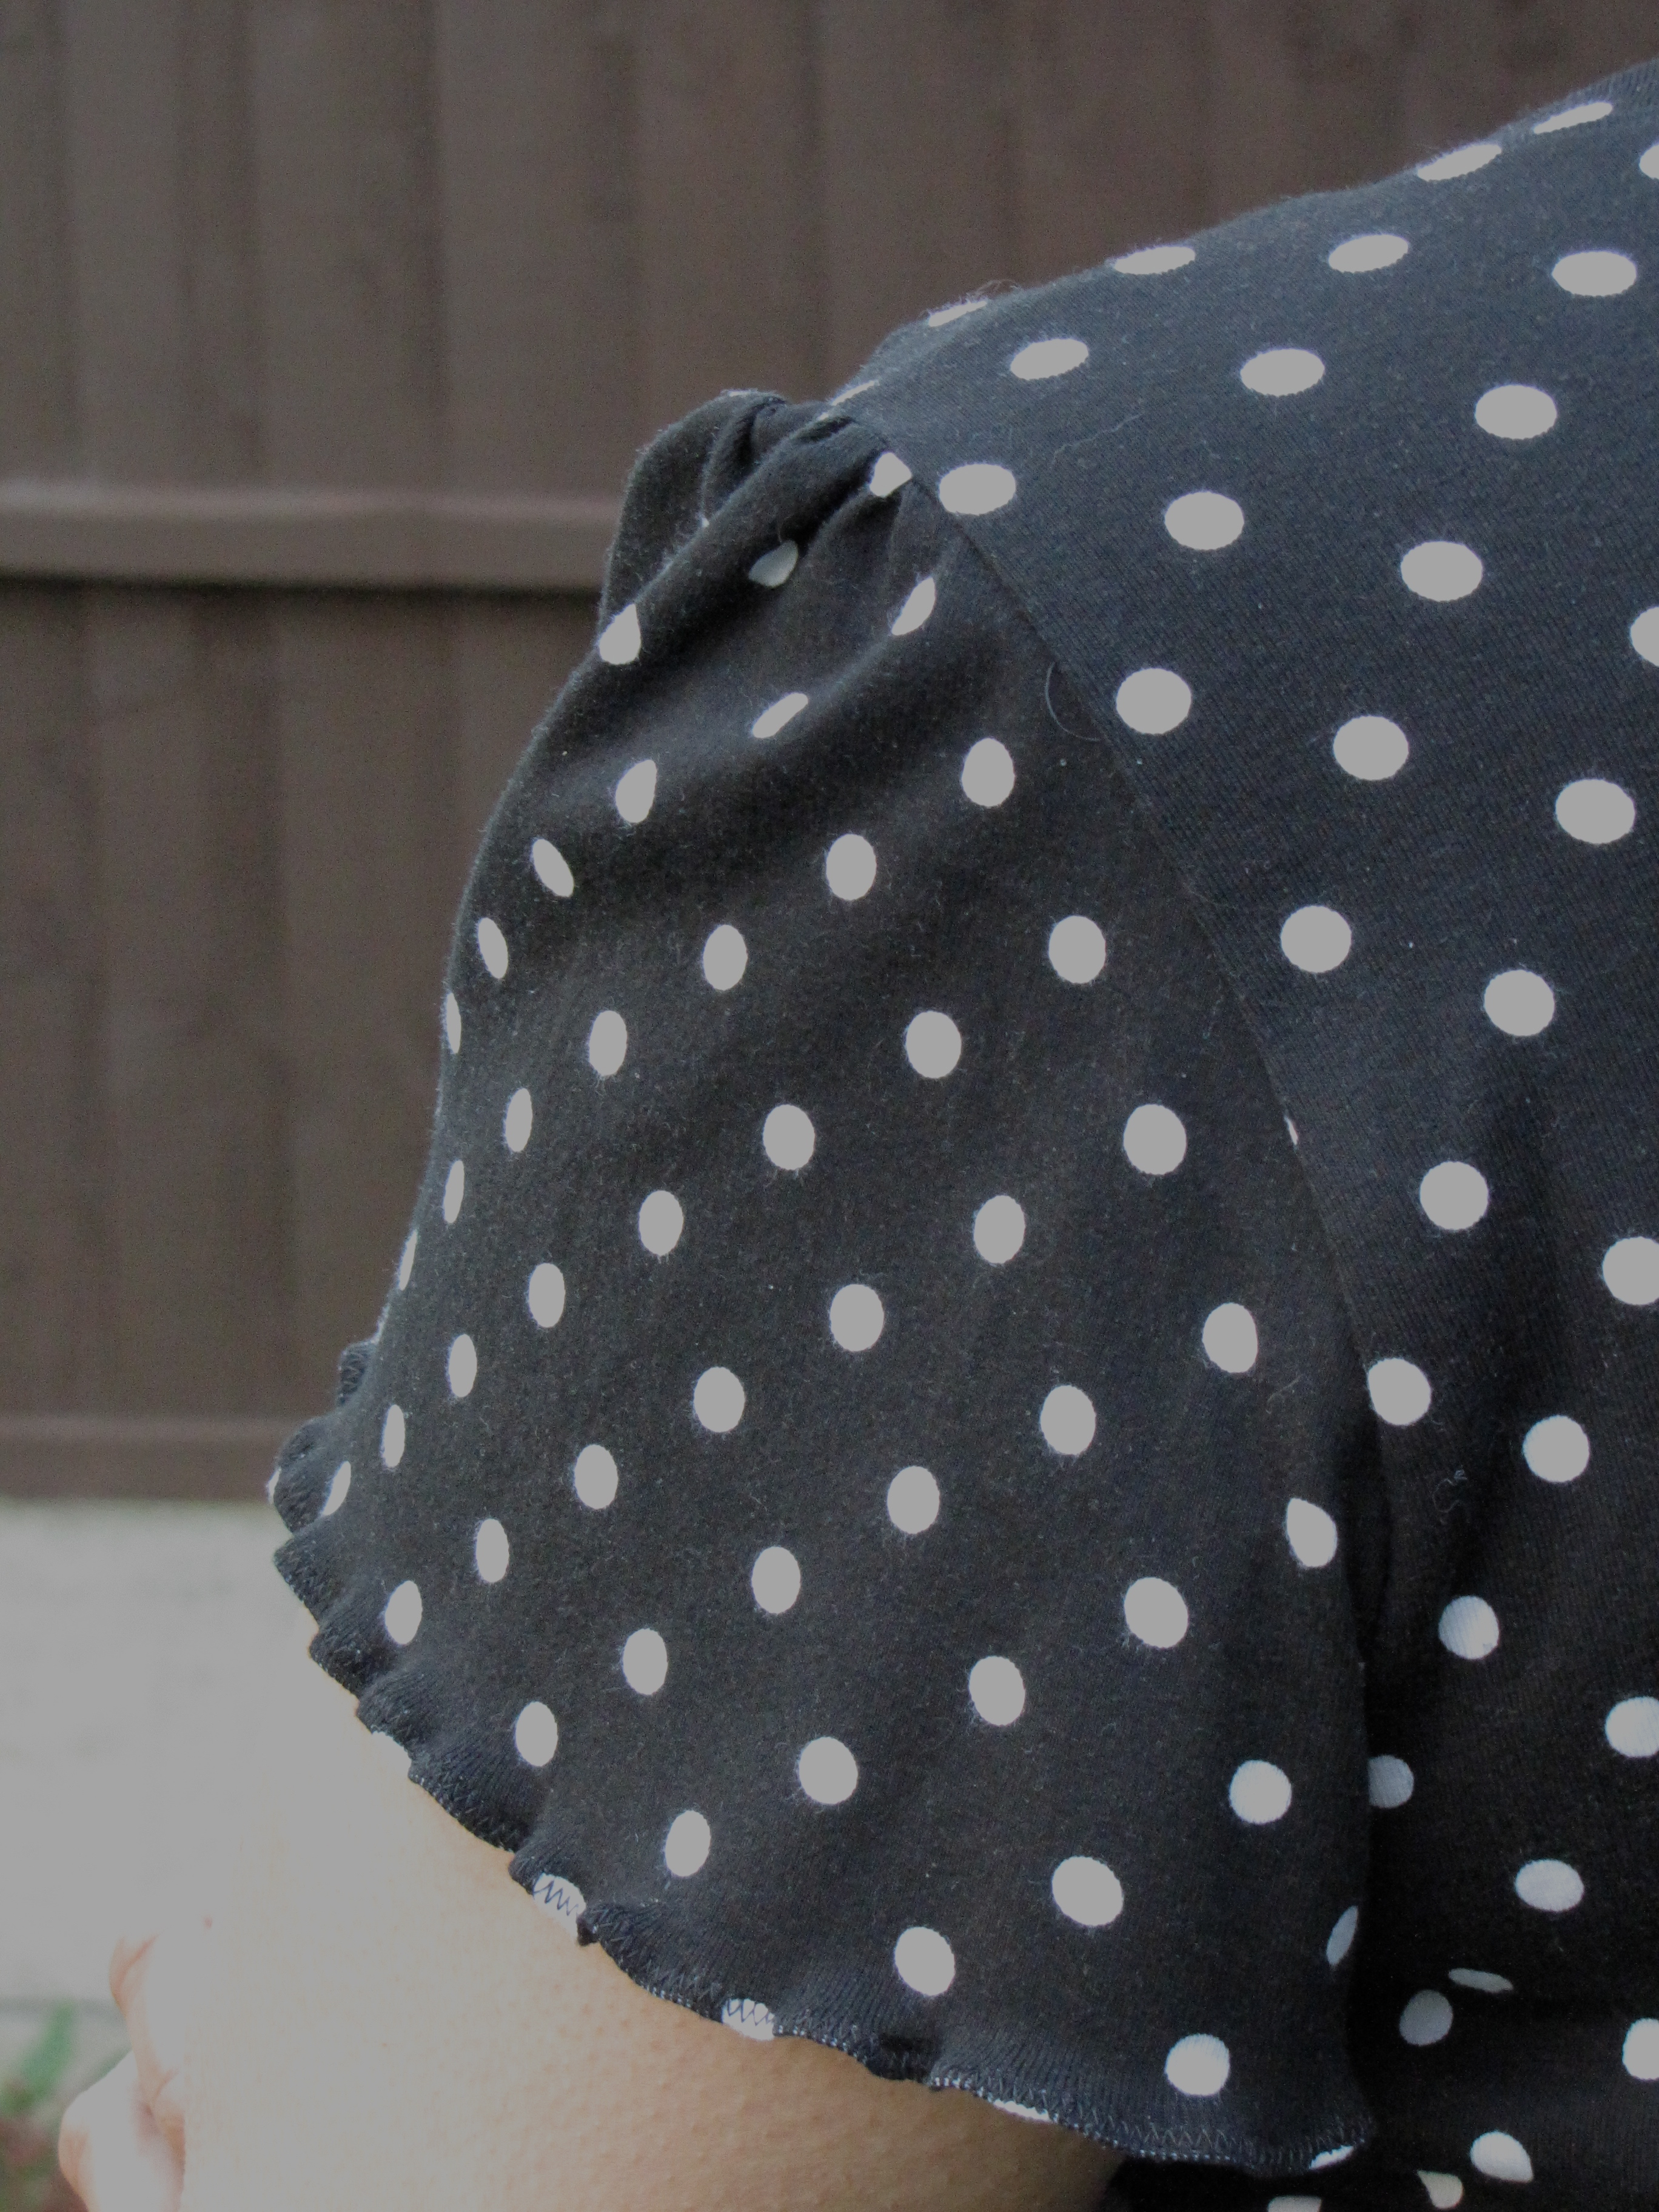
View C features a boat neckline, long sleeves and hip length bodice. All three variations feature subtle, feminine gathers at the top of each sleeve reminiscent of a bygone era.
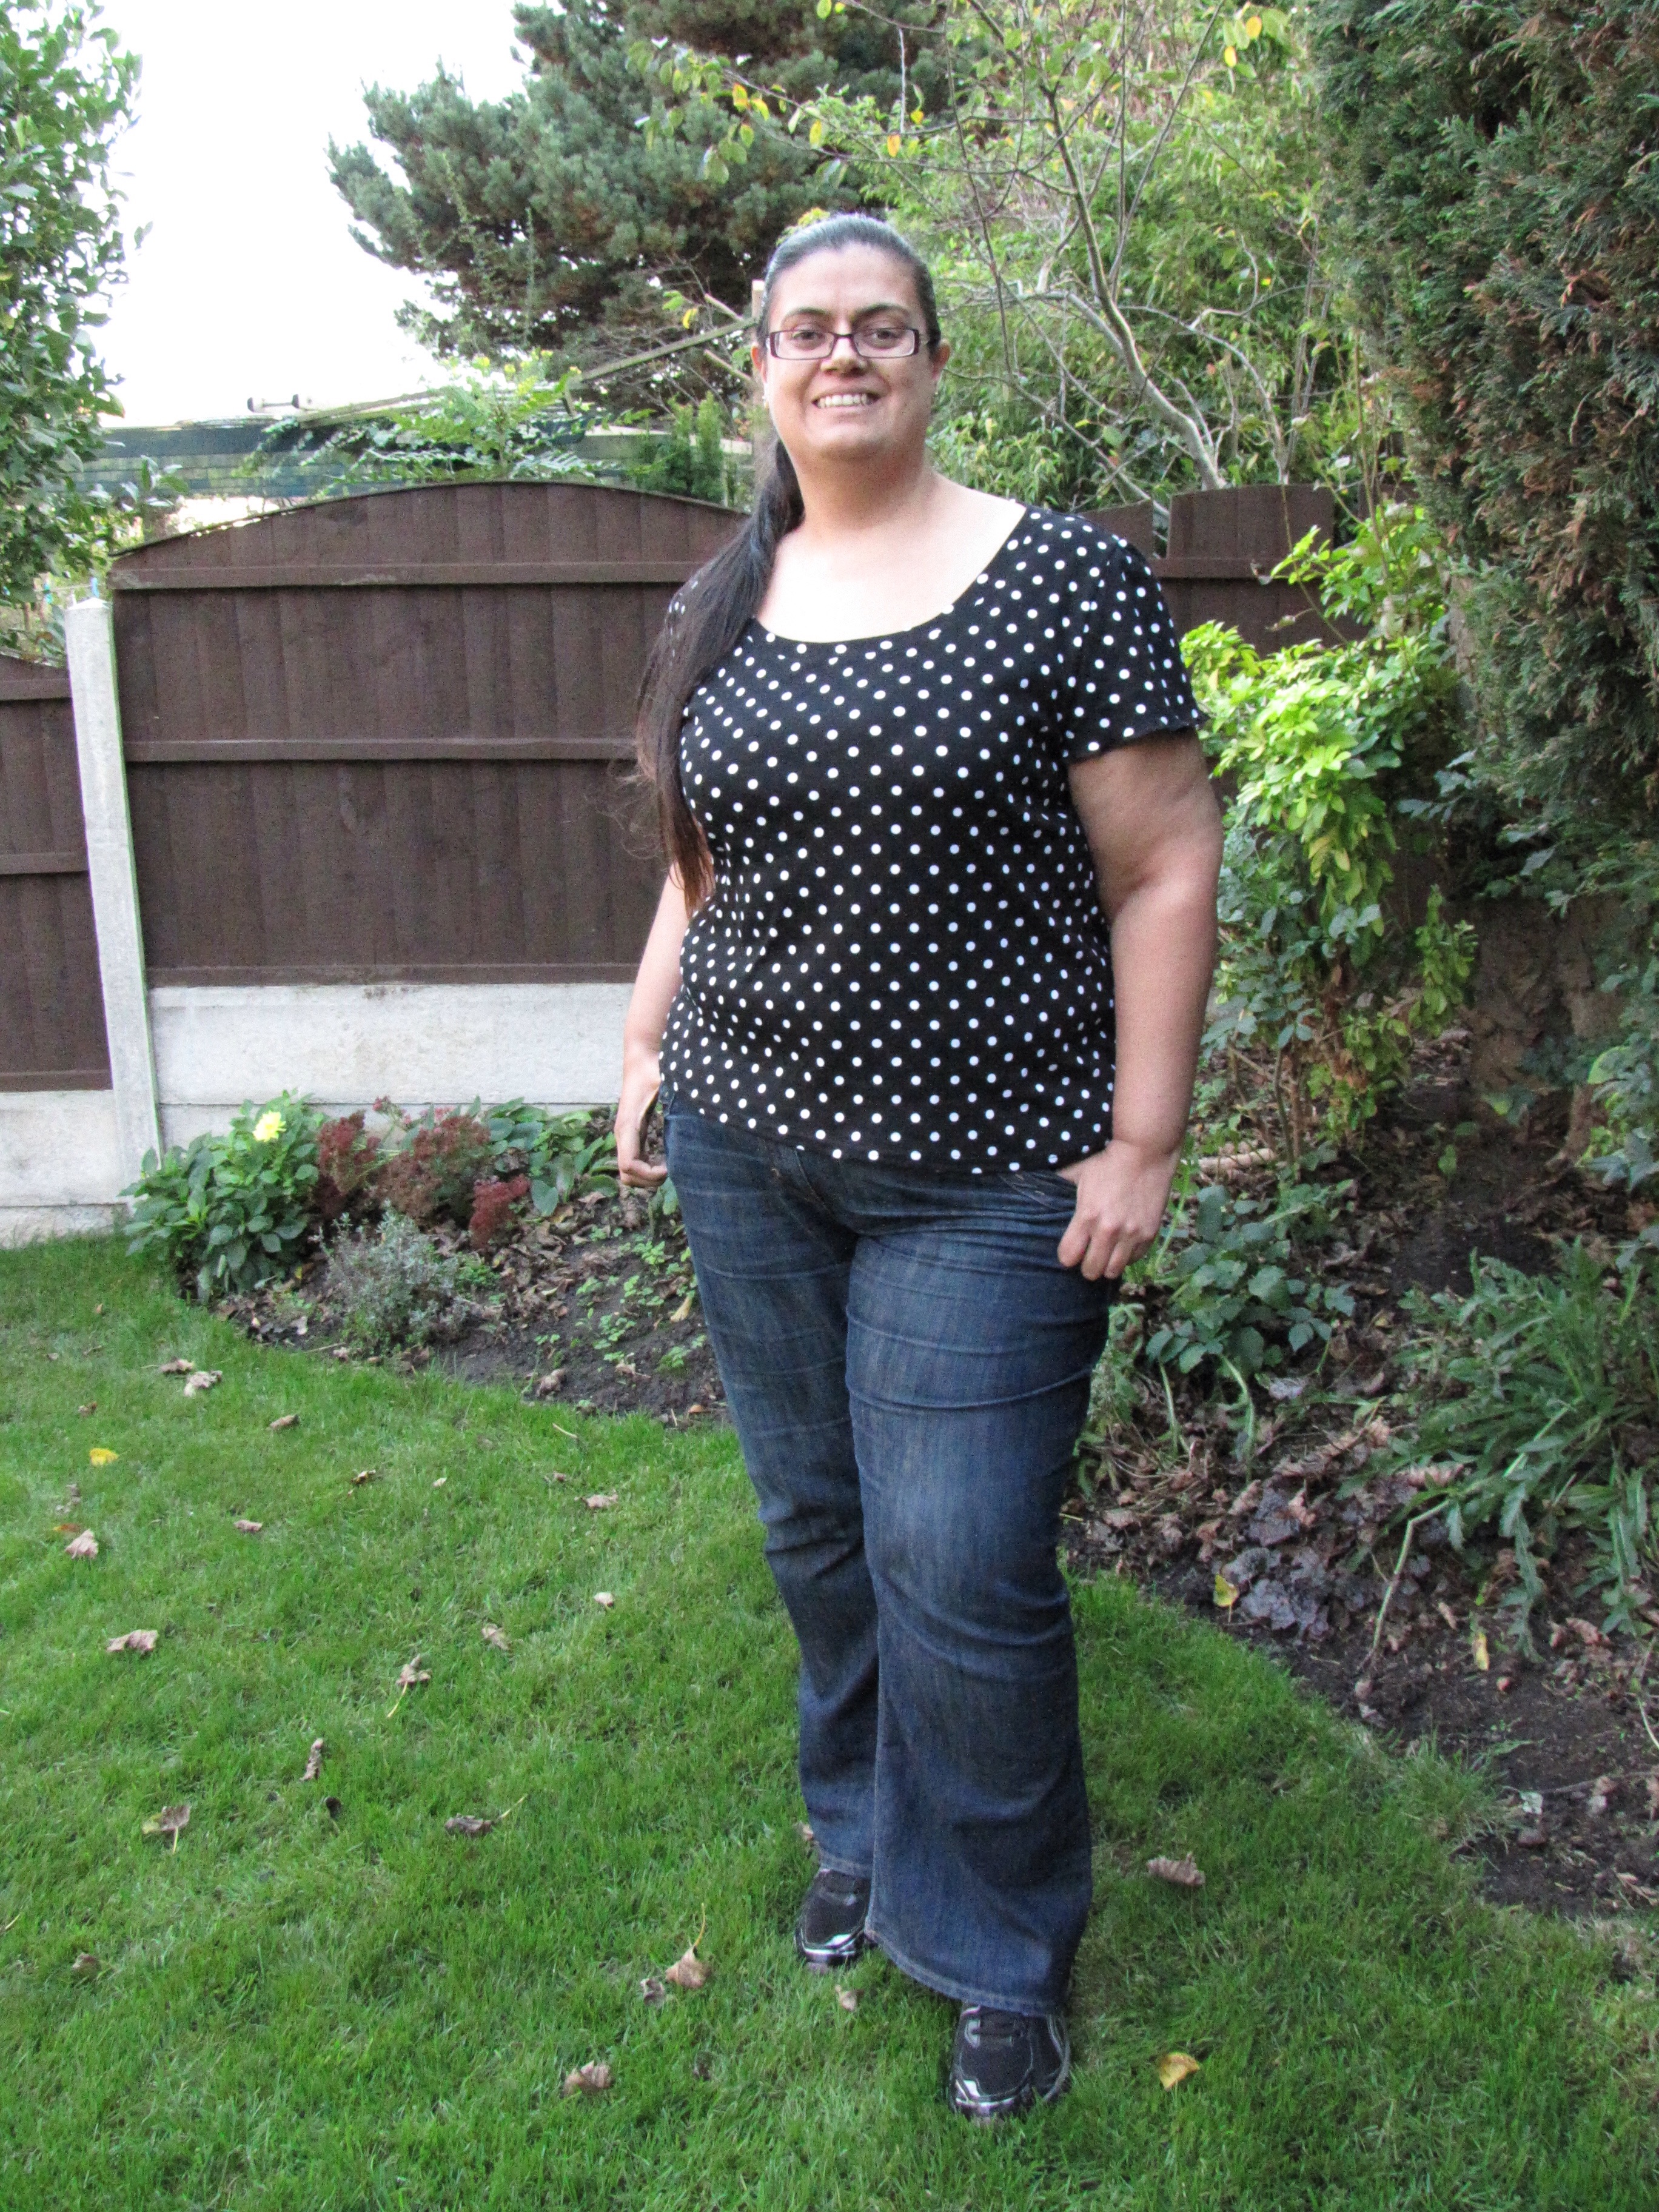
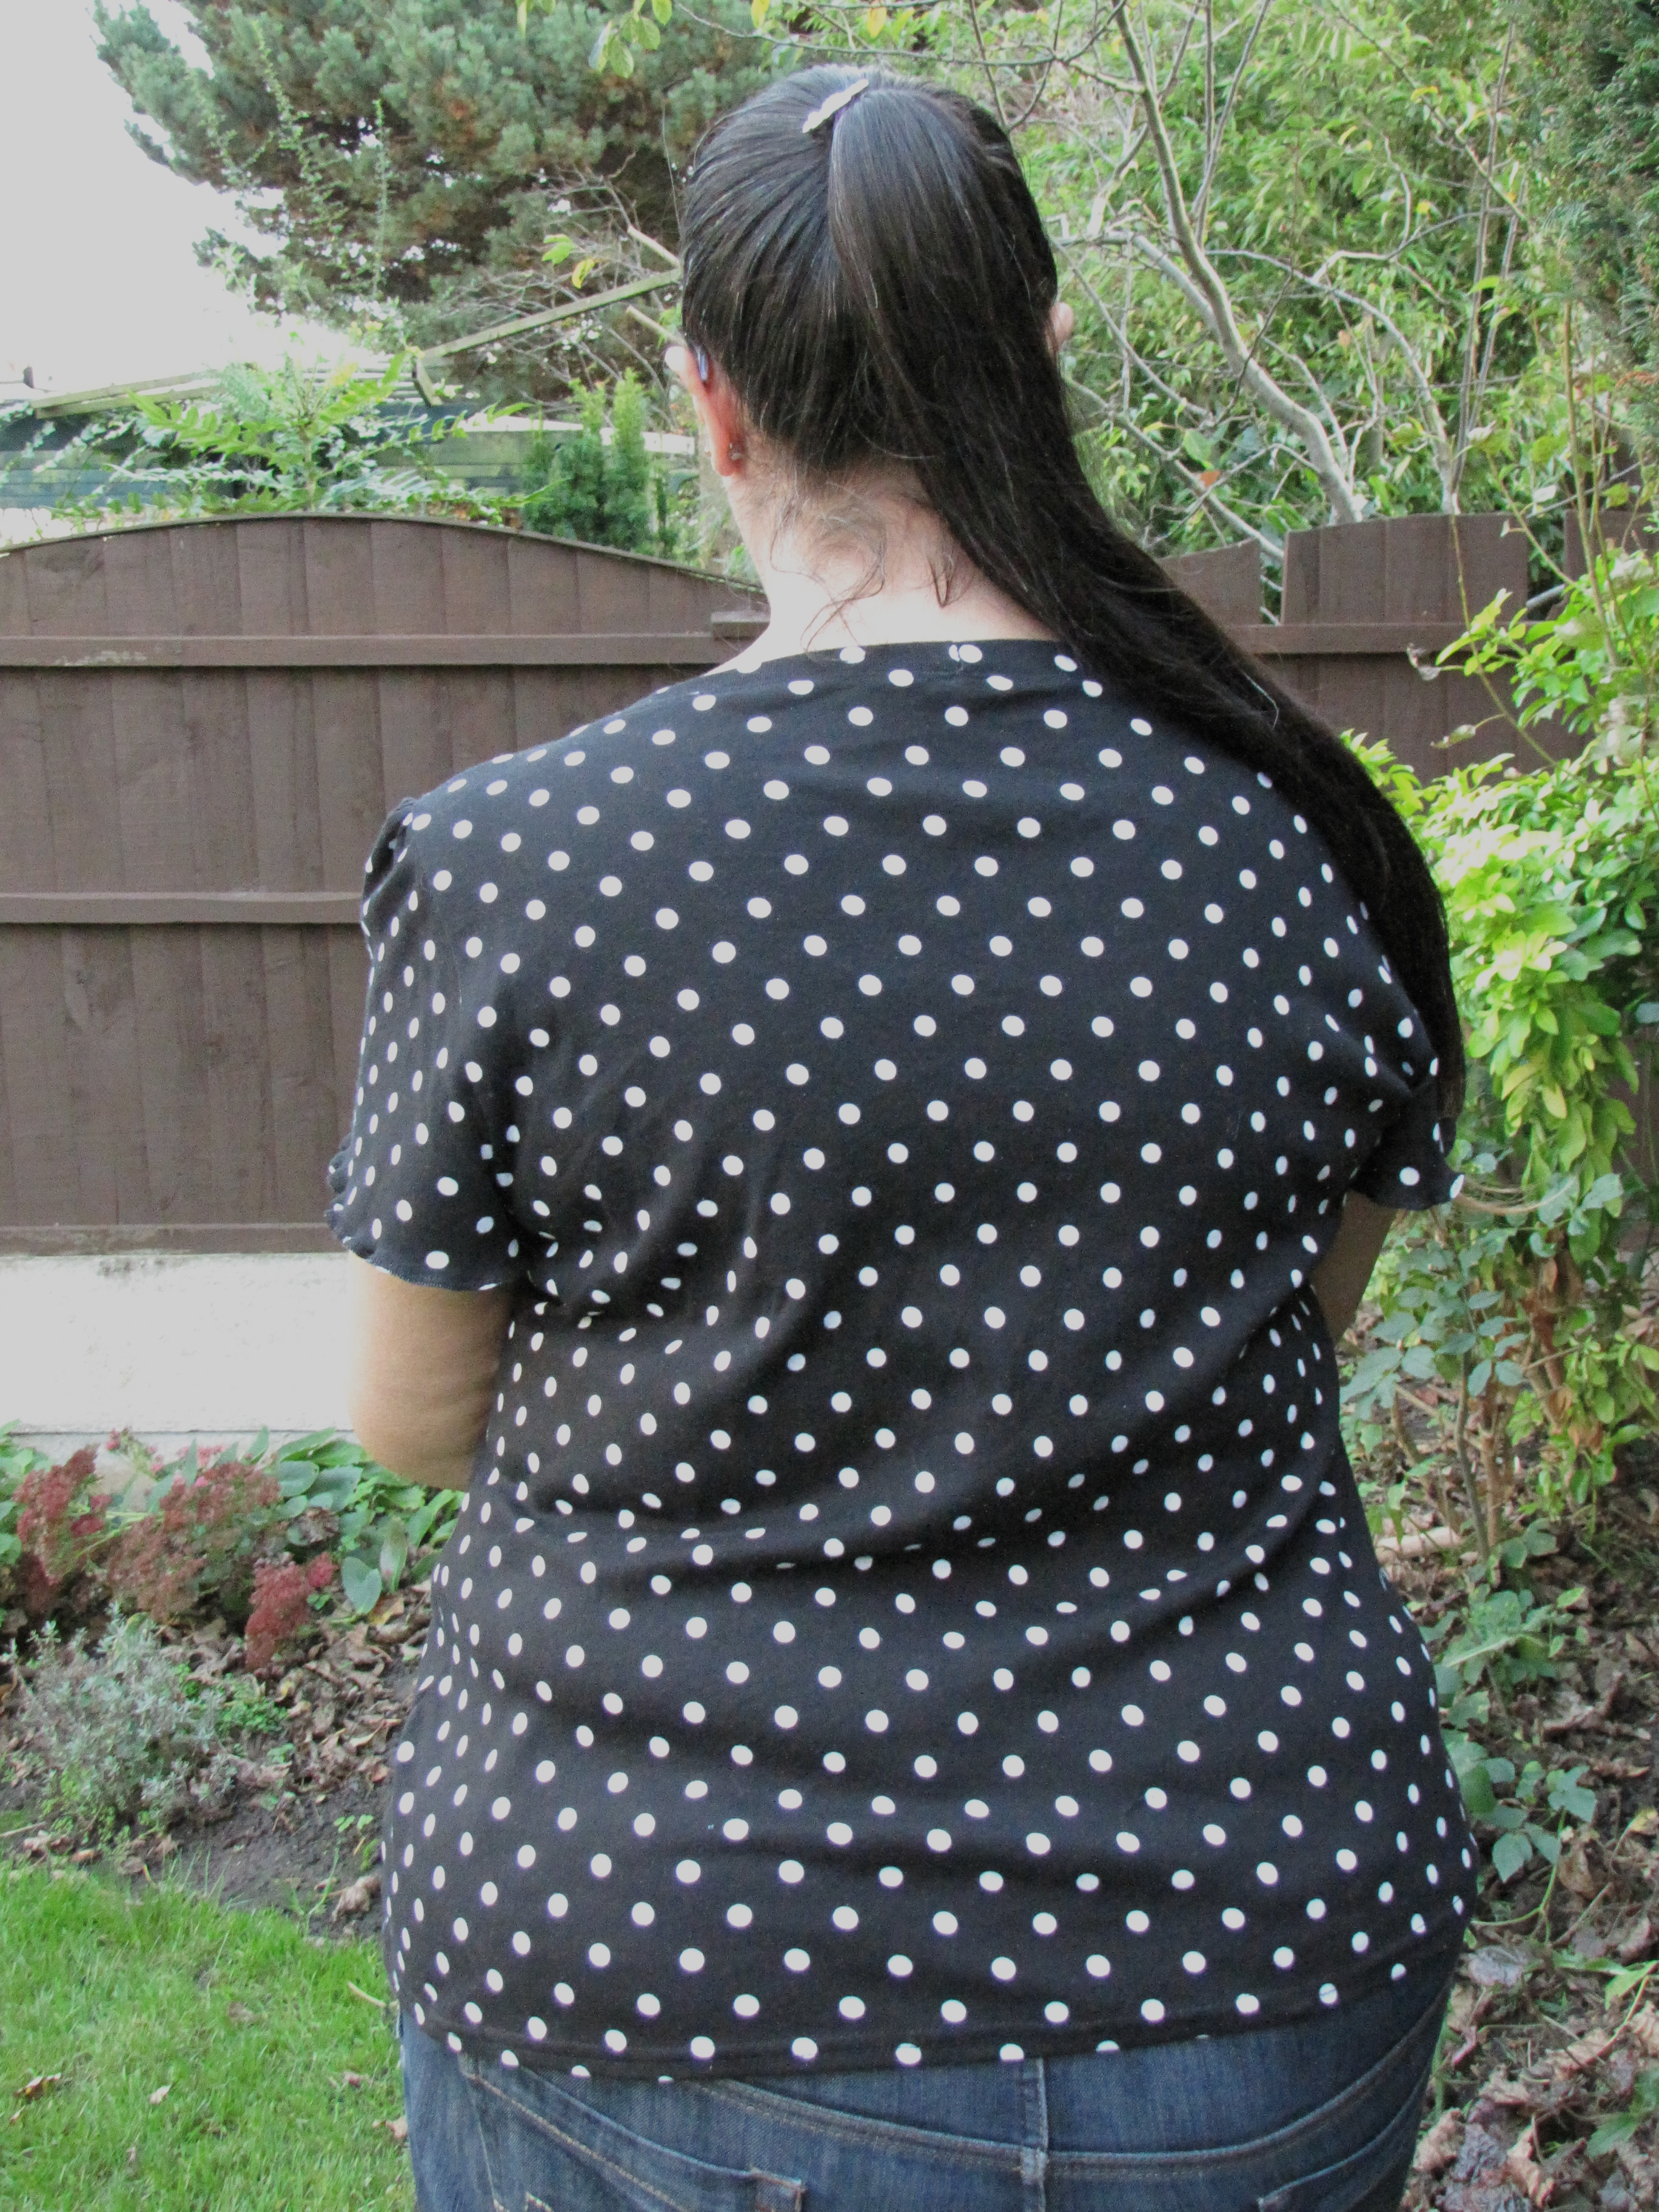
I love polka dots, so chose to use this black and white spotty jersey from my stash, which had originally been purchased from Abakhan Fabrics. After checking that I had enough of it in my stash I went ahead and checked the garment measurements against my body measurements.
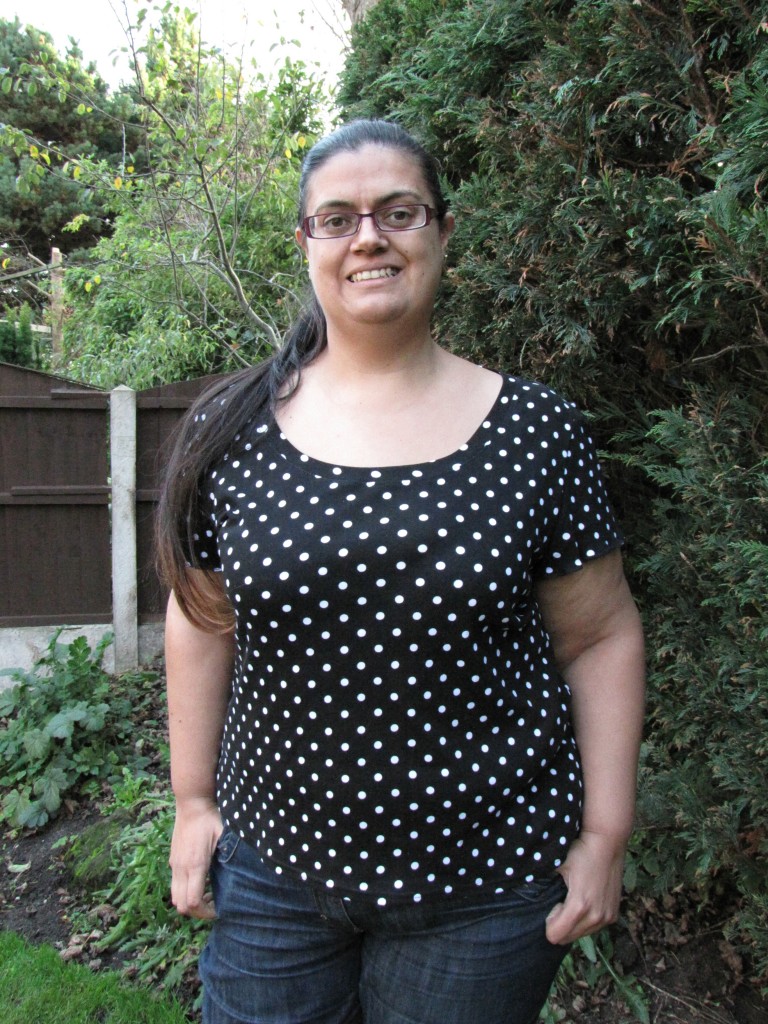
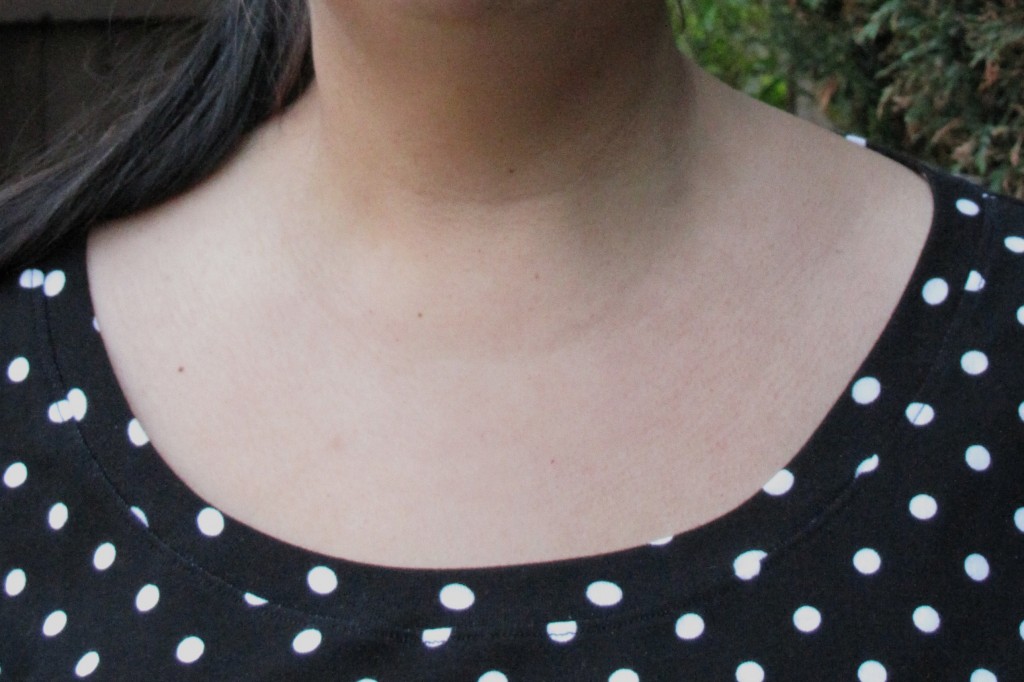
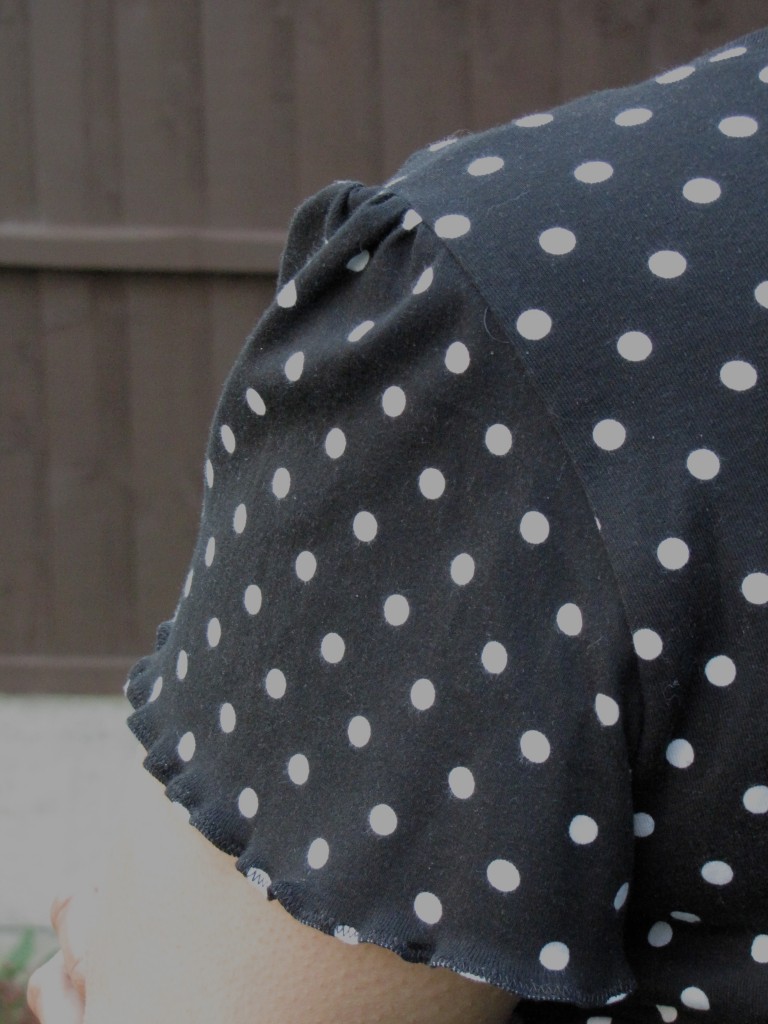
I love the fact that there’s such a variety of mix and match options for this pattern – 3 different neckline, 3 sleeve options and 2 different bodice lengths. I chose to use the lower neckline (seen on view B in the pattern line drawings and the longer length of view C, as being pear-shaped and long-bodied a hip length top suits my shape better. I then chose the shorter flutter sleeves as these tend to suit my bingo wings better and as I’m a fan of layers I wear short sleeves tops all year round.

As is a common pattern fitting alteration for myself, due to being very pear-shaped, I graded the side seams from a 20 at the bust down to a 24 at the hips. Cutting out took a very short time as with the options I chose there’s only 4 pattern pieces involved. Construction was also rather speedy using my trusty overlocker and it all went together very quickly. The instructions were easy to read and follow with detailed diagrams where needed.
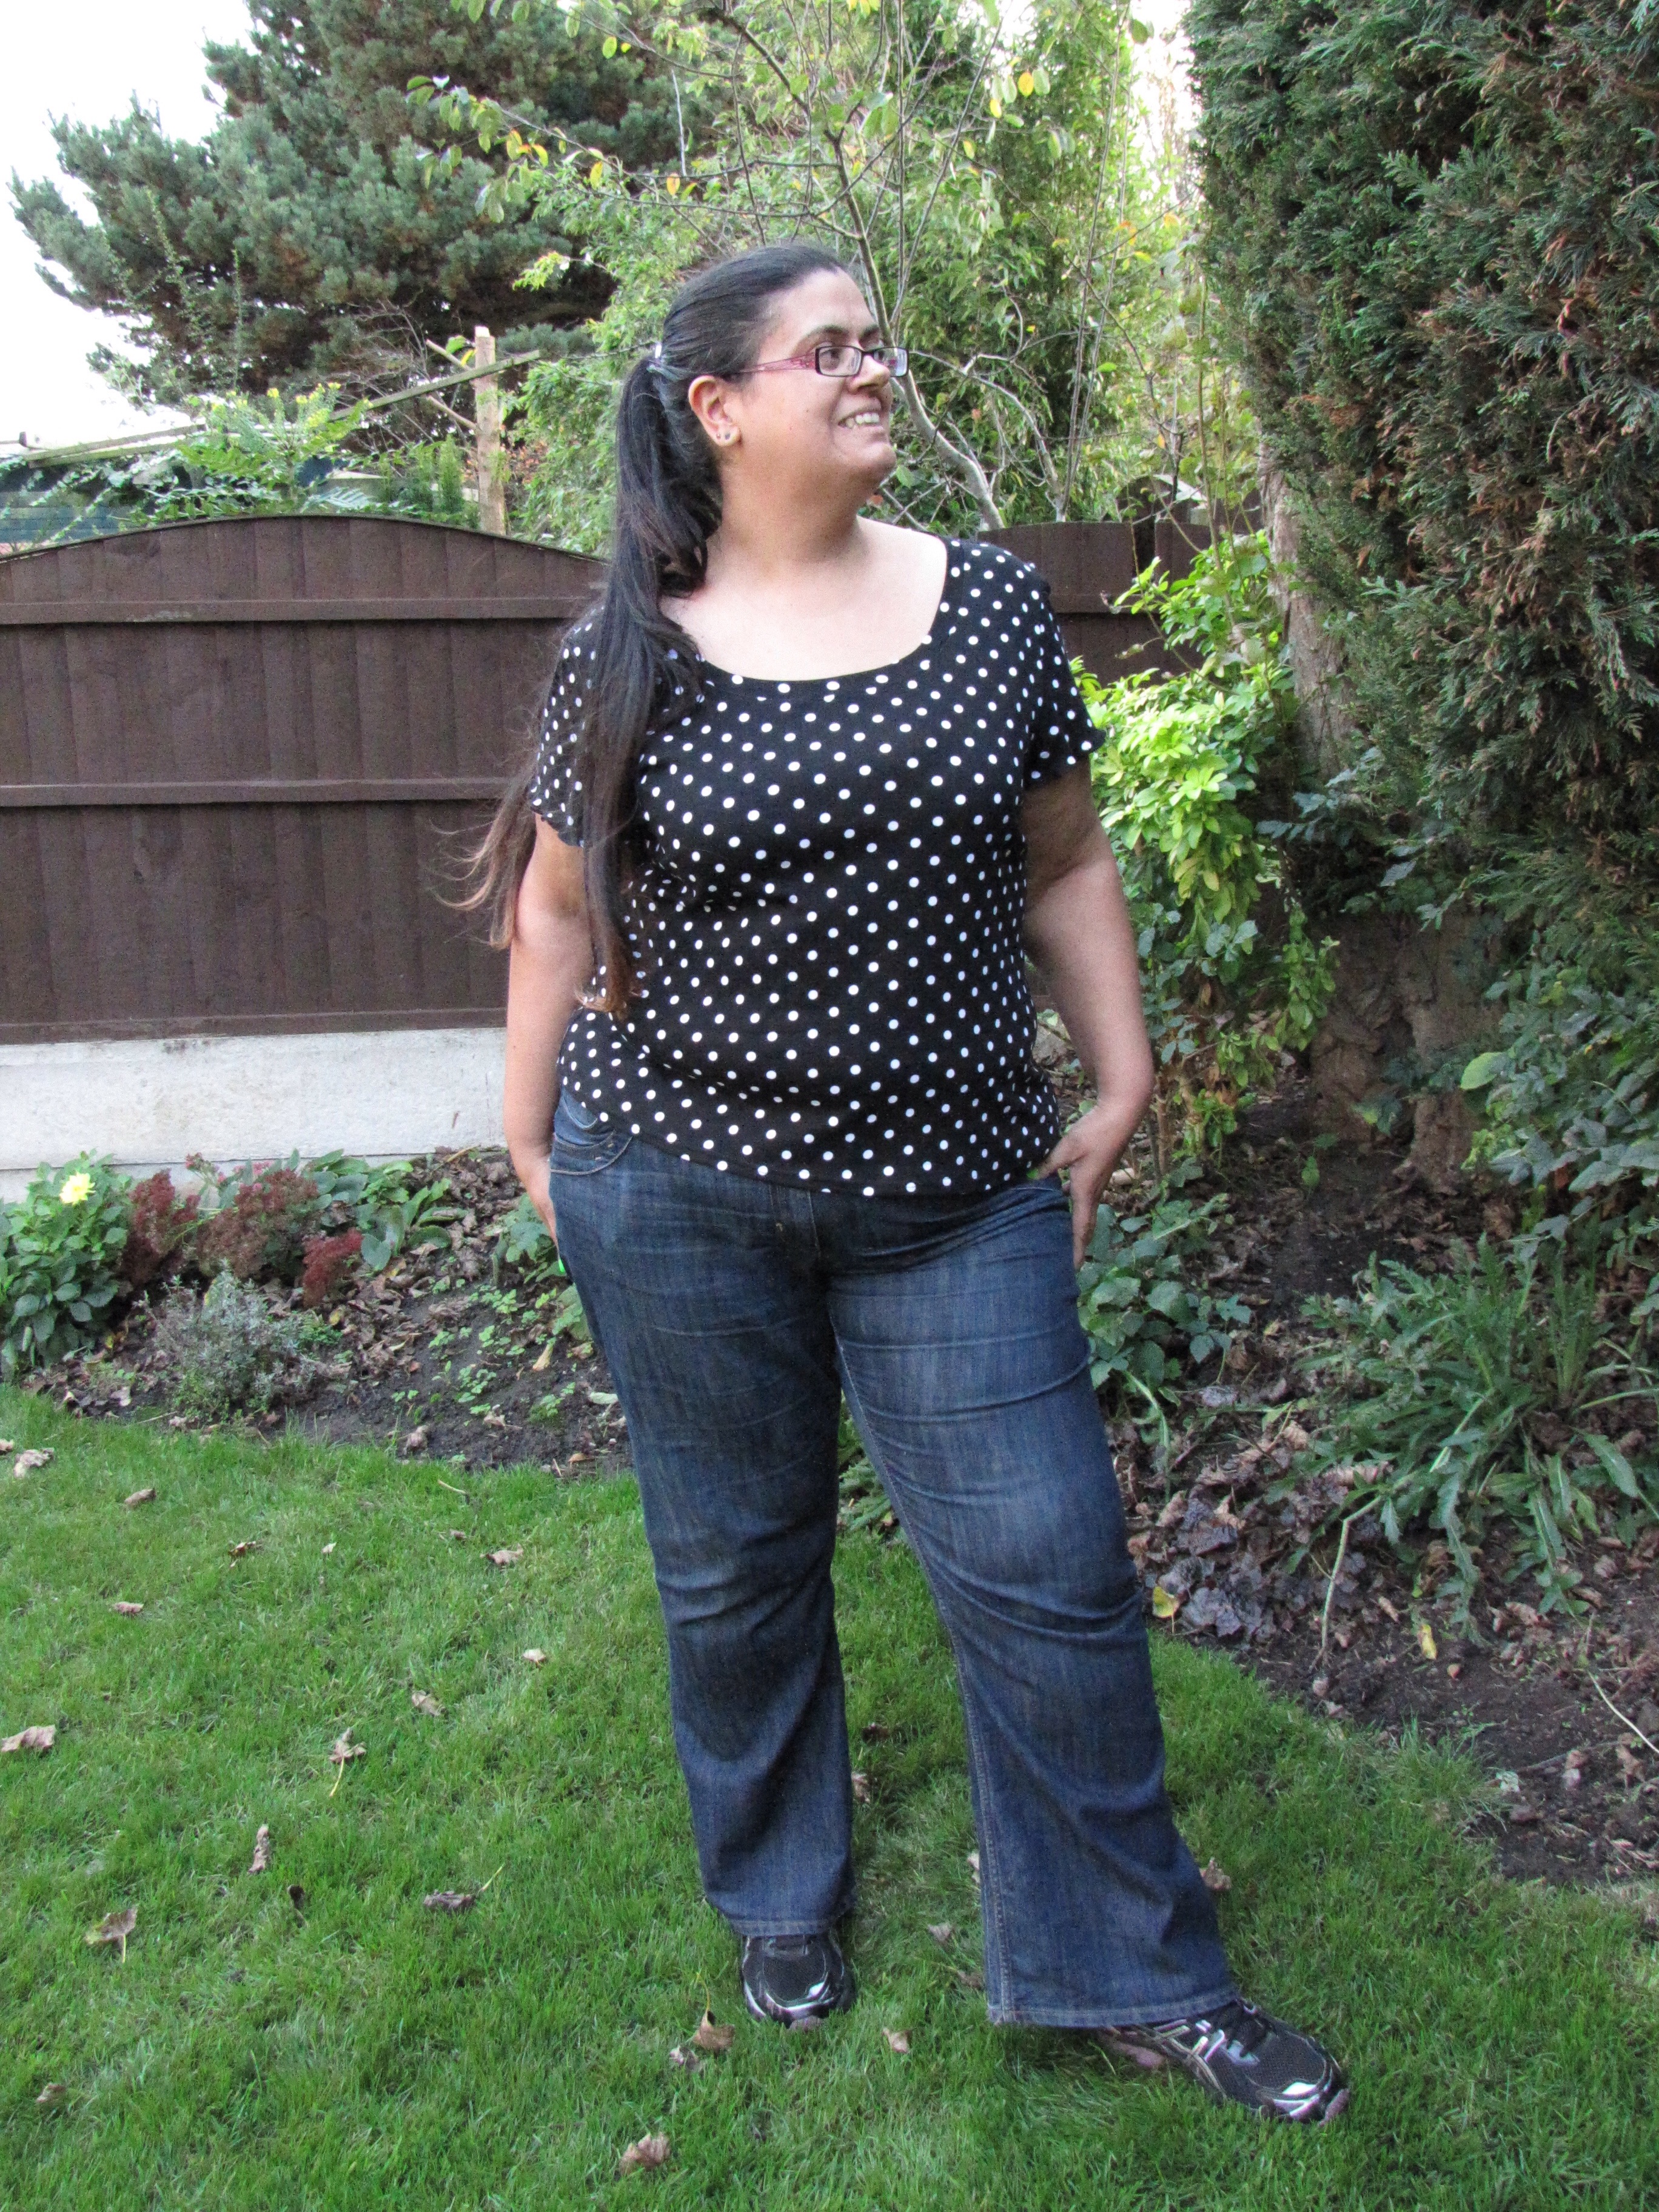
I instantly loved the shape and fit of the Bonnie sweater and found it very comfortable. The little details included in the Bonnie pattern are also very cute, the gathers on the sleeves give them a lovely effect. Since my bingo wings are a tad on the larger side I didn’t think the sleeve ‘fluttered’ as much as I’d like, so to give them a little more flutter-ability I finished them with a narrow hem and zigzag stitch as suggested in the pattern but pulled at the jersey whilst doing this to create a ‘lettuce-edge hem’ which even if I do say so myself, looks fab!
I can easily see this being one of my wardrobe staples. Plain fabrics and simple patterns such as polka dots and stripes will be great for work wear and the more funky patterns will be great for the weekends with my trusty jeans. I already have a great hot air balloon print in my stash which I reckon will suit the Bonnie sweater pattern perfectly!

The wide variety of differing Bonnie sweaters that have been created by the pattern testers shows just how versatile this pattern is: A Stitching Odyssey – Pattern Testing: Bonnie Knit Top – Bluegingerdoll Patterns; Made by Meg: Bonnie Top; Handmade by Heather B – A Pair of Bonnies; Sewn by Elizabeth – Bluegingerdoll Bonnie Knit Top and Tanya Maile.
To buy your own copy of the Bonnie sweater sewing pattern visit the Bluegingerdoll website: http://bluegingerdoll.com/products/bonnie
NB: As part of the testing process, I received this pattern free of charge. All opinions and the decision to blog about it are however are fully my own.
Share your thoughts
A few months ago I used the then newly released Bluegingerdoll Winifred dress to make a dress to wear to my friend’s wedding and made 2 ‘wearable toiles’ first. As this was a new pattern Bluegingerdoll ran a great sewalong, which I found very helpful & entered my dresses into the sewalong competition. I was lucky enough to win the competition! More information about my dresses can be found on the Bluegingerdoll blog when Abby interviewed me.
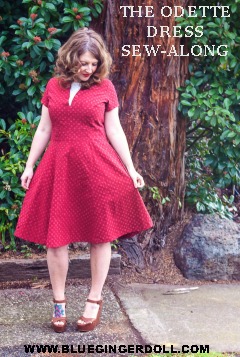
I was then lucky enough to be chosen to pattern test their latest pattern, the Odette dress.
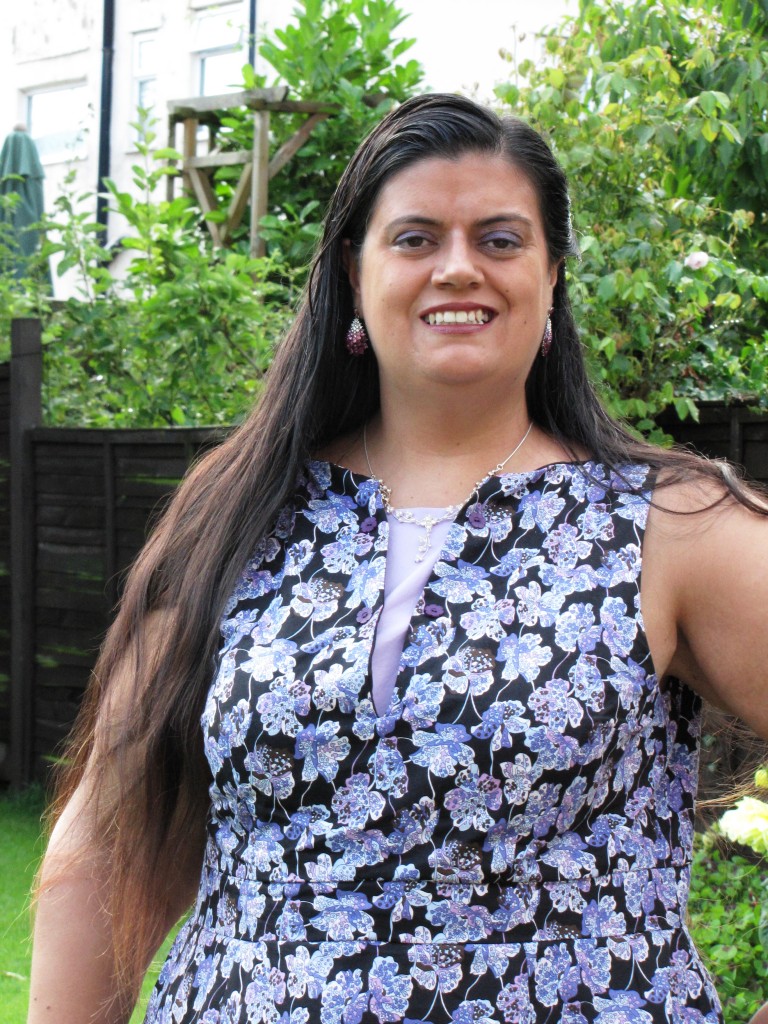
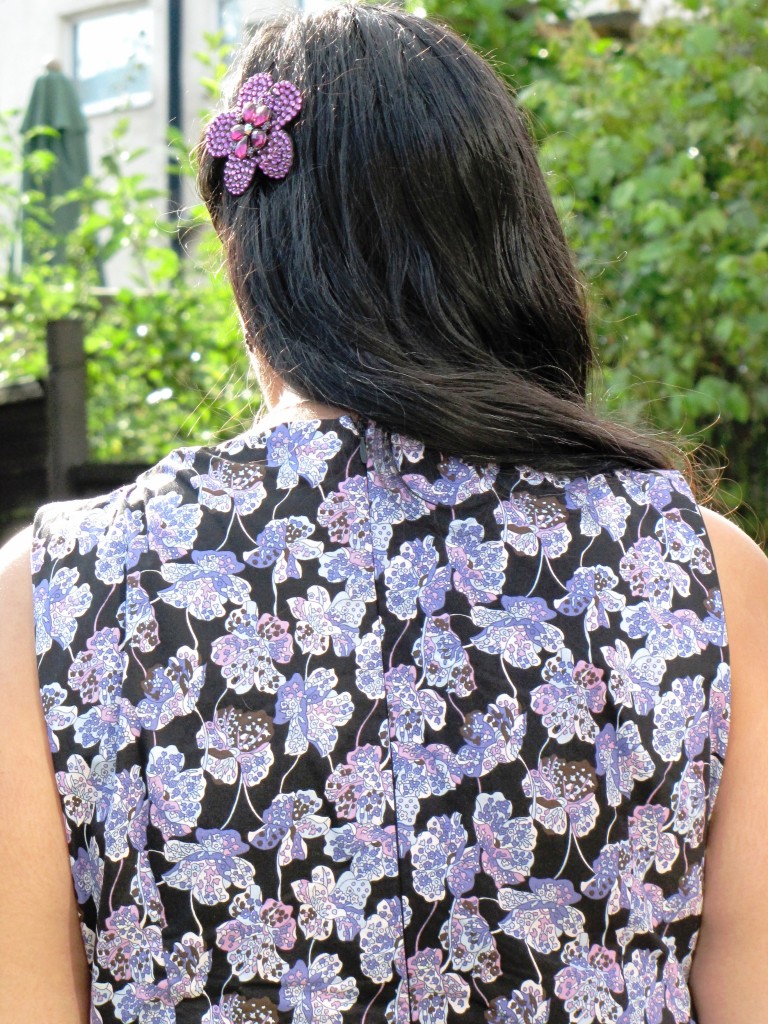
‘Odette is a one of a kind dress for your wardrobe. A fitted, fully lined bodice featuring a bateau ‘V’ neckline with a distinctive contrasting insert that frames the face.
The waistband highlights the waistline along with a seven gored skirt that skims the hips and has just the right amount of flare, as well as in-seam pockets for added practicality.
Your choice of three sleeve variations:
View A – Sleeveless, View B- Short sleeve and View C – 3/4 sleeves with complimenting cuffs’

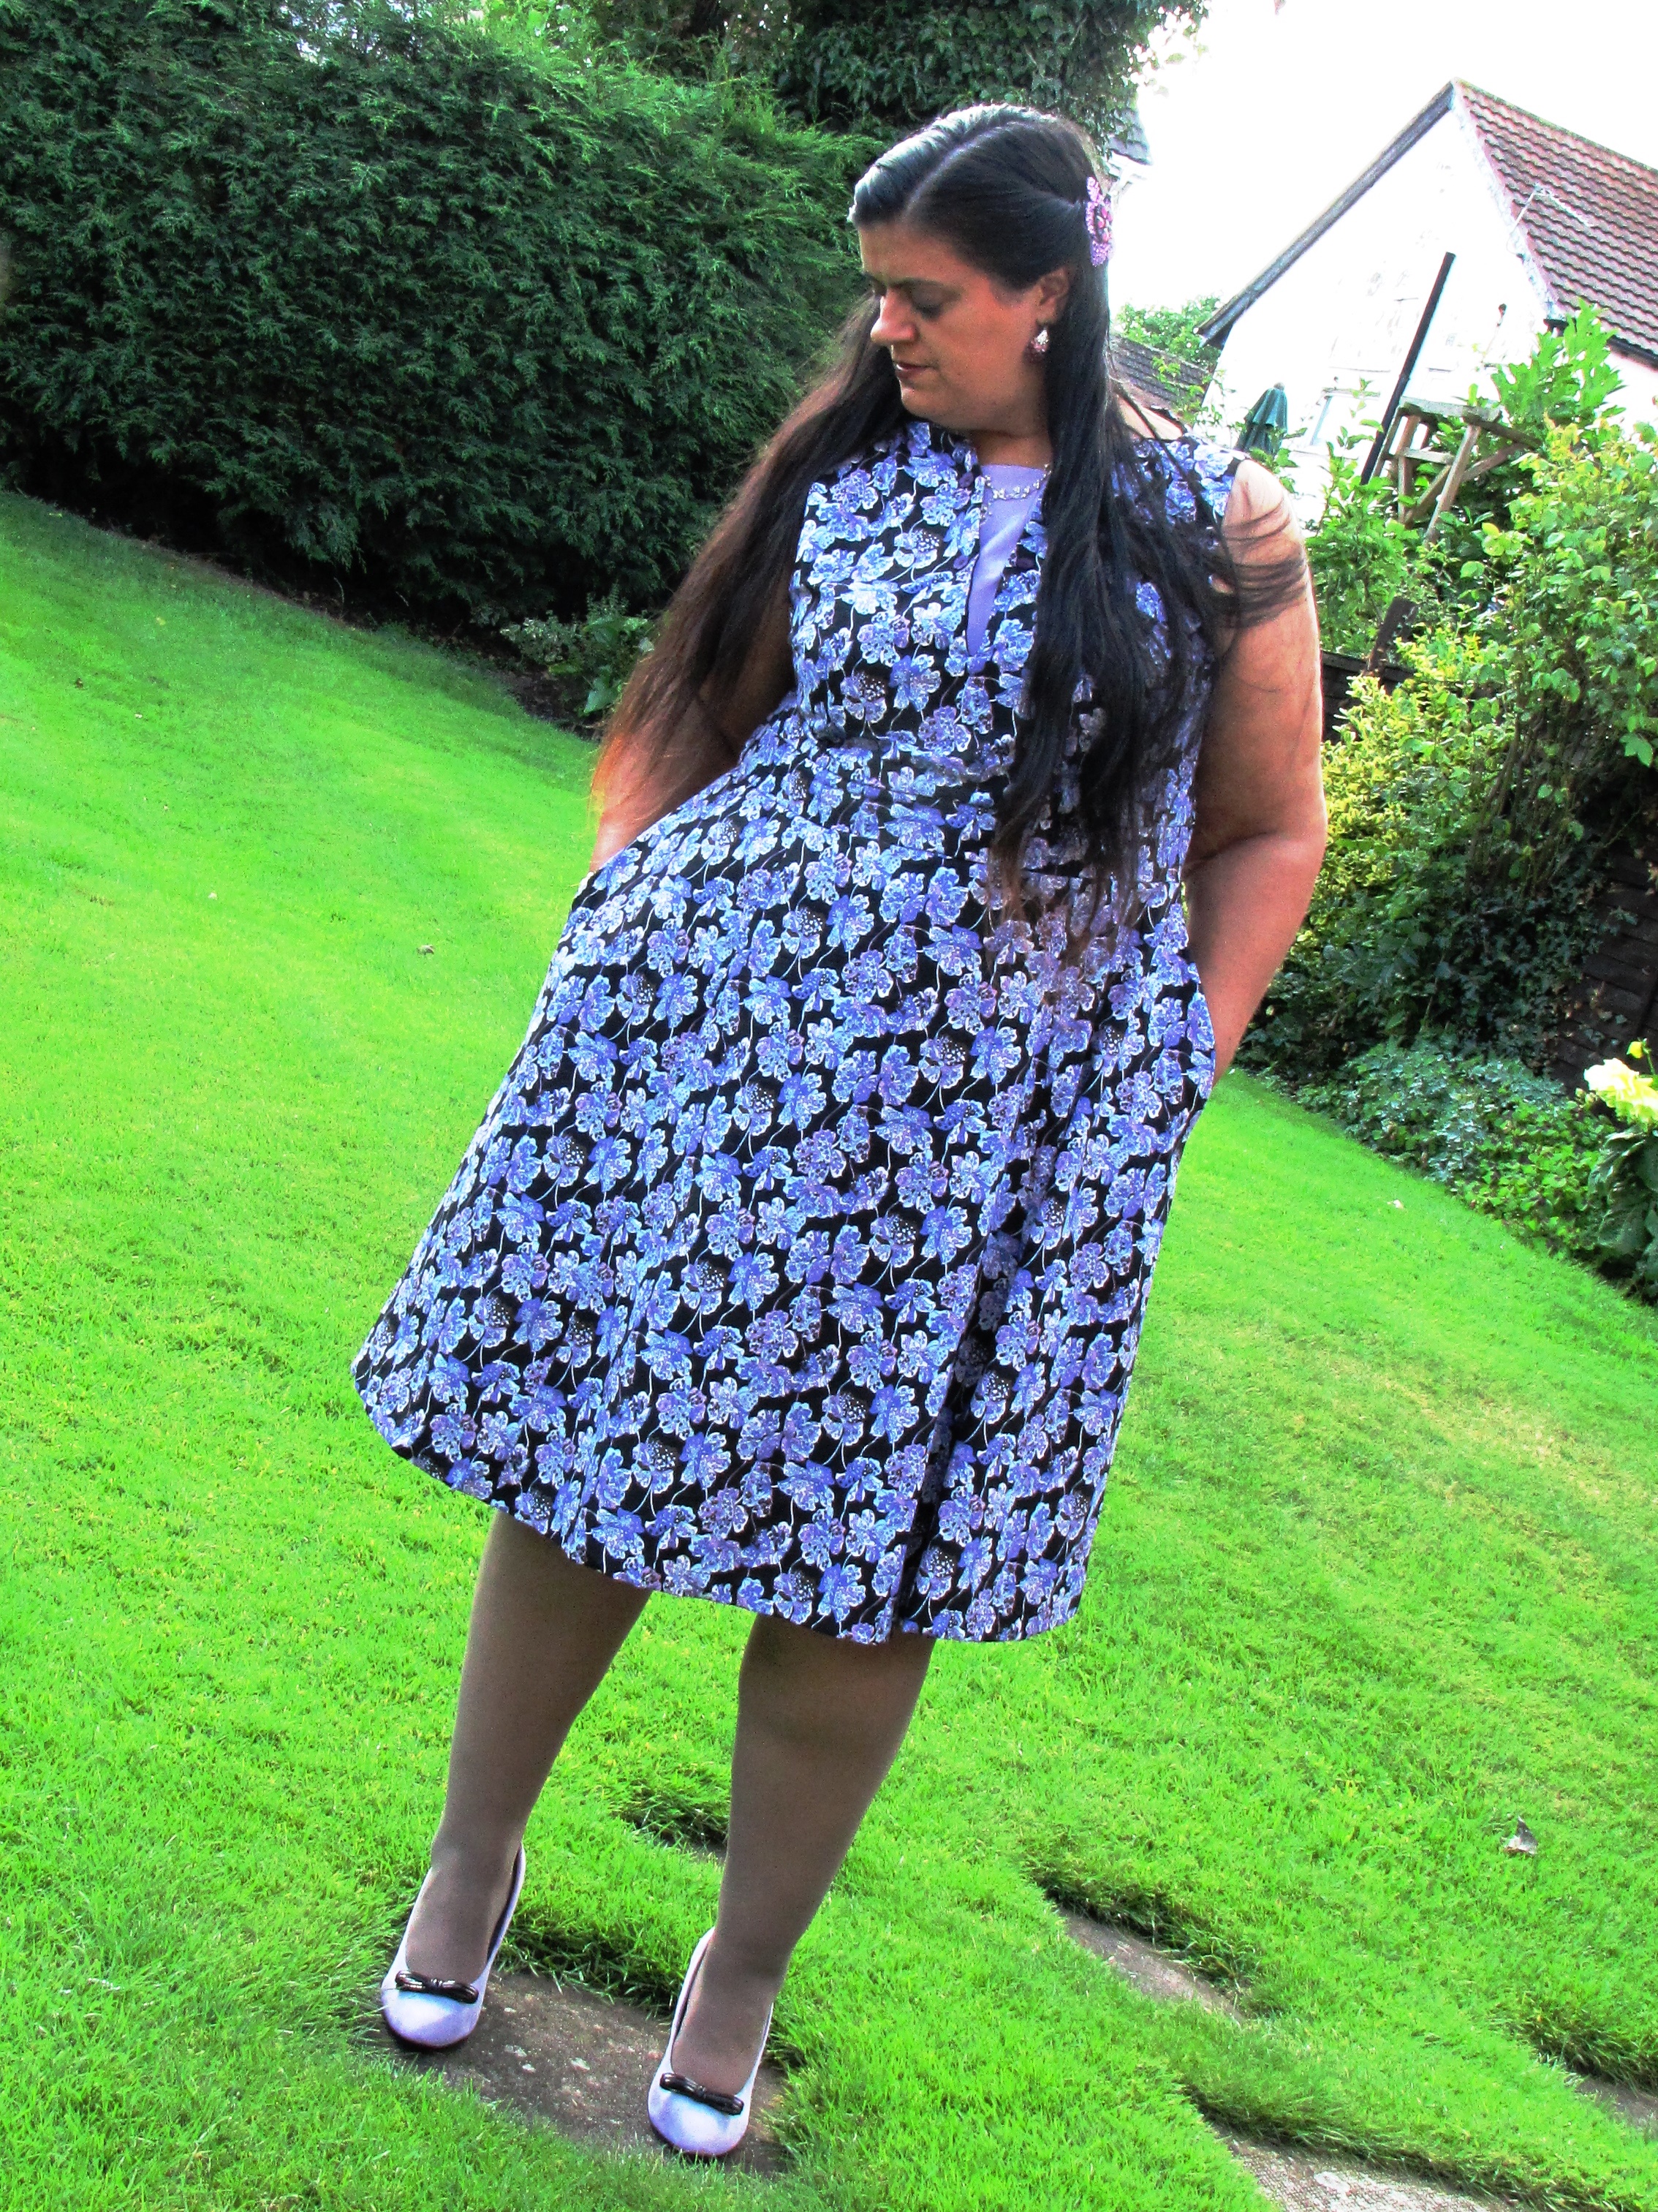
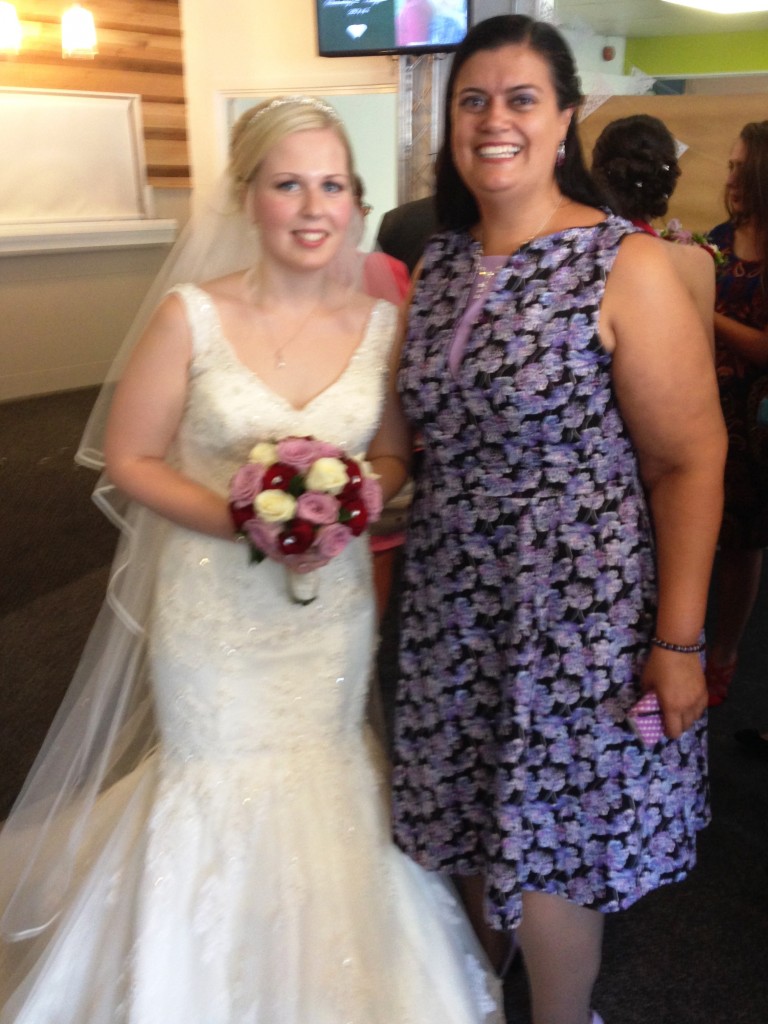
As 2014 seems to be the year of the weddings for me (6 in total!) and the timing was just rightfor the next wedding – Shannon & Peter Marsh on the 1st August I decided to make my Odette to wear on this special occasion. Those of you that know me know that I love purple (kinda obsessed) and I suppose the name of by blog The Purple Stitcher, probably gives that away! I went on the hunt for the perfect purple fabric. Generally I only do floral when they’re abstract and I was luck enough to find this beautiful almost pop art cotton in my local Abakhan Fabrics store in Birkenhead.
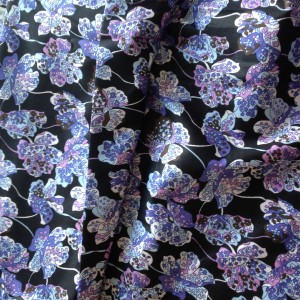
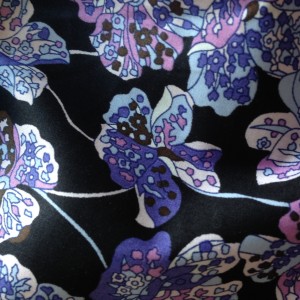
As I wanted to wear the dress at the height of the British ‘summer’ I decided to go with view A, the sleeveless version and to use a lightweight black cotton lawn for the lining and a lilac polycotton for the insert with cute flower shapped buttons, all purchased from my local Abakhan Fabrics store.

As always when using a new pattern I made a toile and is my usual style it was a charity shop duvet cover! This enabled me to get the fit just right. The fact that the bodice, waistband and skirt are all separate pieces was very useful as it enabled me to grade between these areas much easier. I’m very much pear-shaped, with my size going up by 1 from bust to waist to hips, so this is a very common pattern alteration for me. Now that Bluegingerdoll sizes come in plus-sizes this means there was no redrafting involved, which is a great time saver. I cut the bodice at size 20, the waist at a 22 and the hips at a 24 and with some help from the ladies at Liverpool Sewing Club I was able to check the fit and am very happy with the final results.
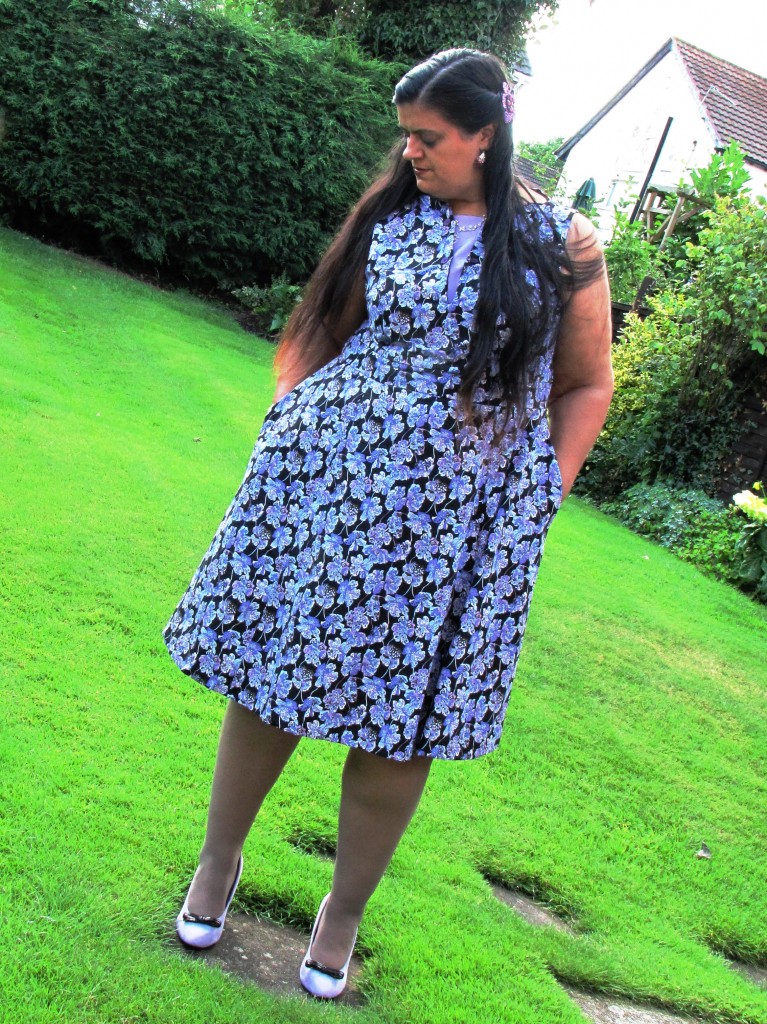
I’ve never actually sewn inseam pockets before on a dress, so was very excited to find these on the Odette and was very please at how quick and easily they went together. I also love having pockets on a dress how fun and practical is that! I also reckon they look fab and add another dimension to the dress:
It’s also been a very long time since I made a dress with an invisible zip, so used the fab tutorial on Bluegingerdoll blog to insert this and was once again pleased just how quick and easy this went in.
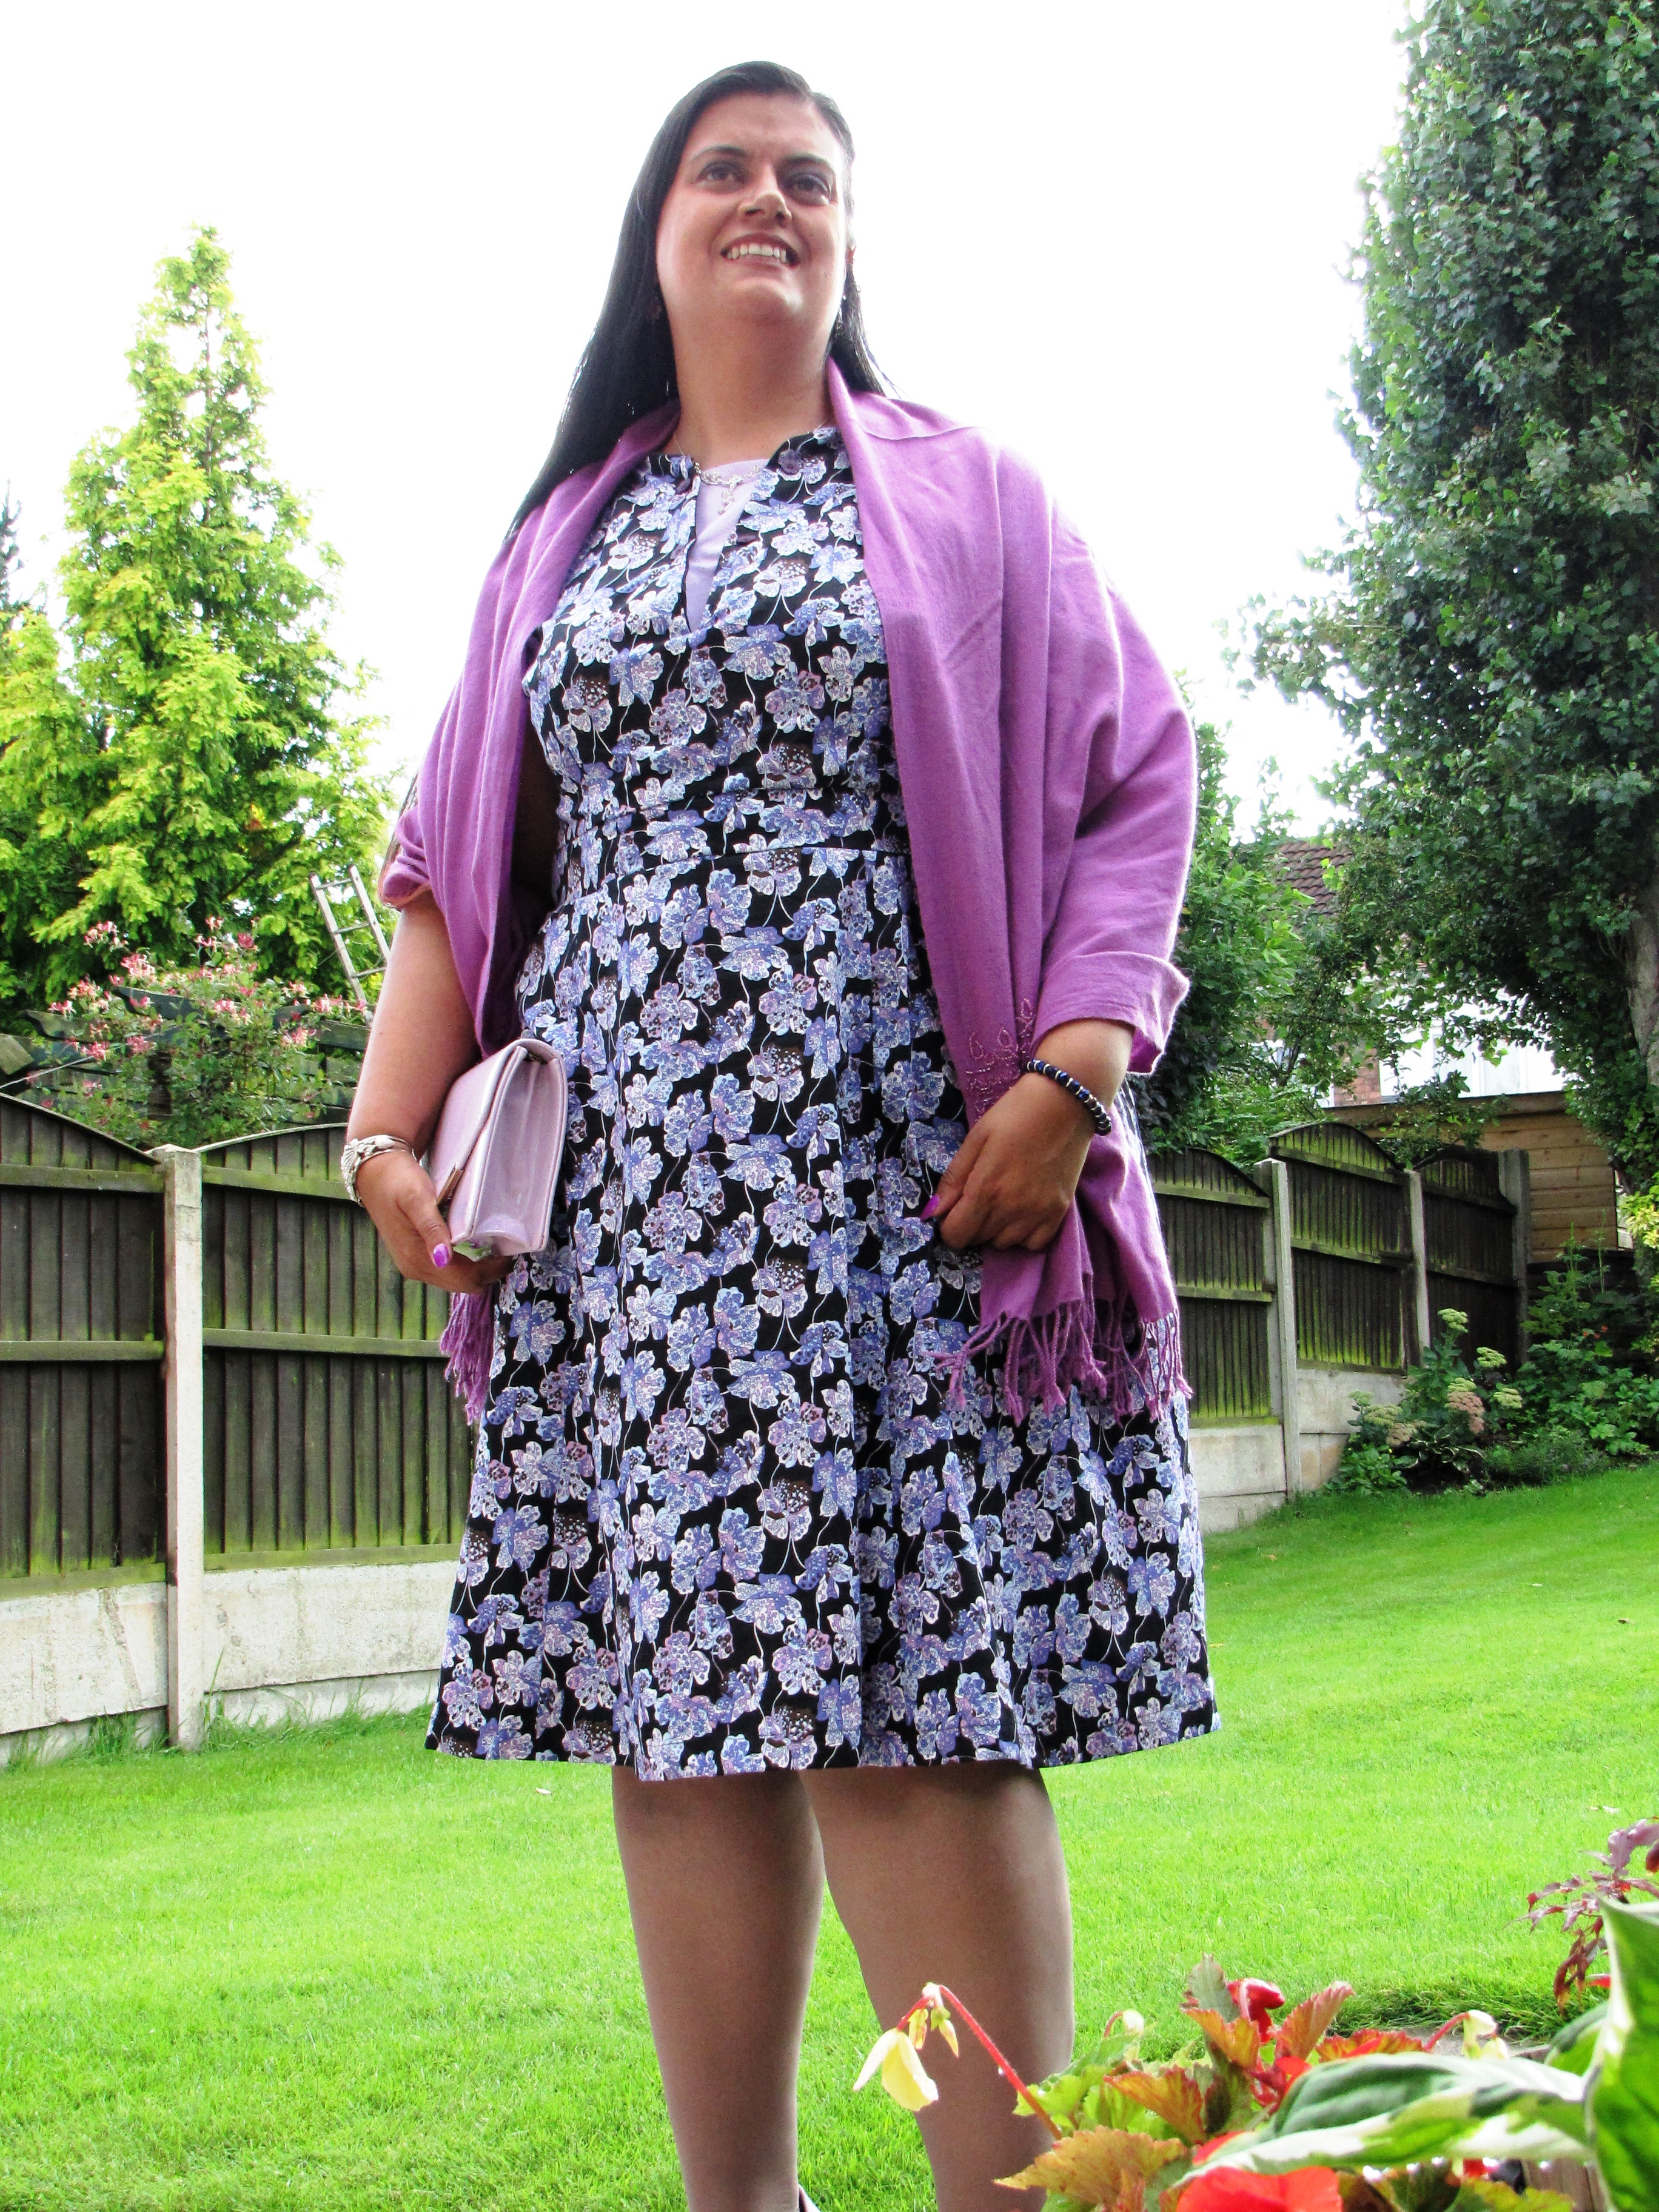
I’m very pleased with my Odette, the pattern is very flattering especially to pear-shapes like myself, and the extra little details like the interchangeable insert and in-seam pockets, add those extra special touches. I also love the fact that depending on your fabric choice it can be a more chilled day time summer dress, as seen in some of the other pattern testers blogs – Made by Meg, Handmade by Heather B, use pinstripes and make it workwear as seen by Kadiddlehopper or as with mine, add some glamorous heels, a beaded pashmina, fabulous jewellery and an evening clutch and suddenly it’s an elegant evening dress!

I loved wearing my dress to Shannon & Pete’s wedding, it was comfortable to wear all day long and managed to survive my enthusiastic dancing! Here I am with the beautiful bride at the wedding, doesn’t she look stunning!
To buy your own copy of the Odette dresssewing pattern please go here: http://bluegingerdoll.com/products/the-odette-dress
Bluegingerdoll have written a great sew-along for the Odette Dress with some great hints, tips and detailed photos for the steps involved:
NB: As part of the testing process, I received this pattern free of charge. All opinions and the decision to blog about it are however are fully my own.
2 Comments
Recently I was given the opportunity to test a new pattern, the ‘Waterfall Tank’ for the fab indie designer Sew Caroline.
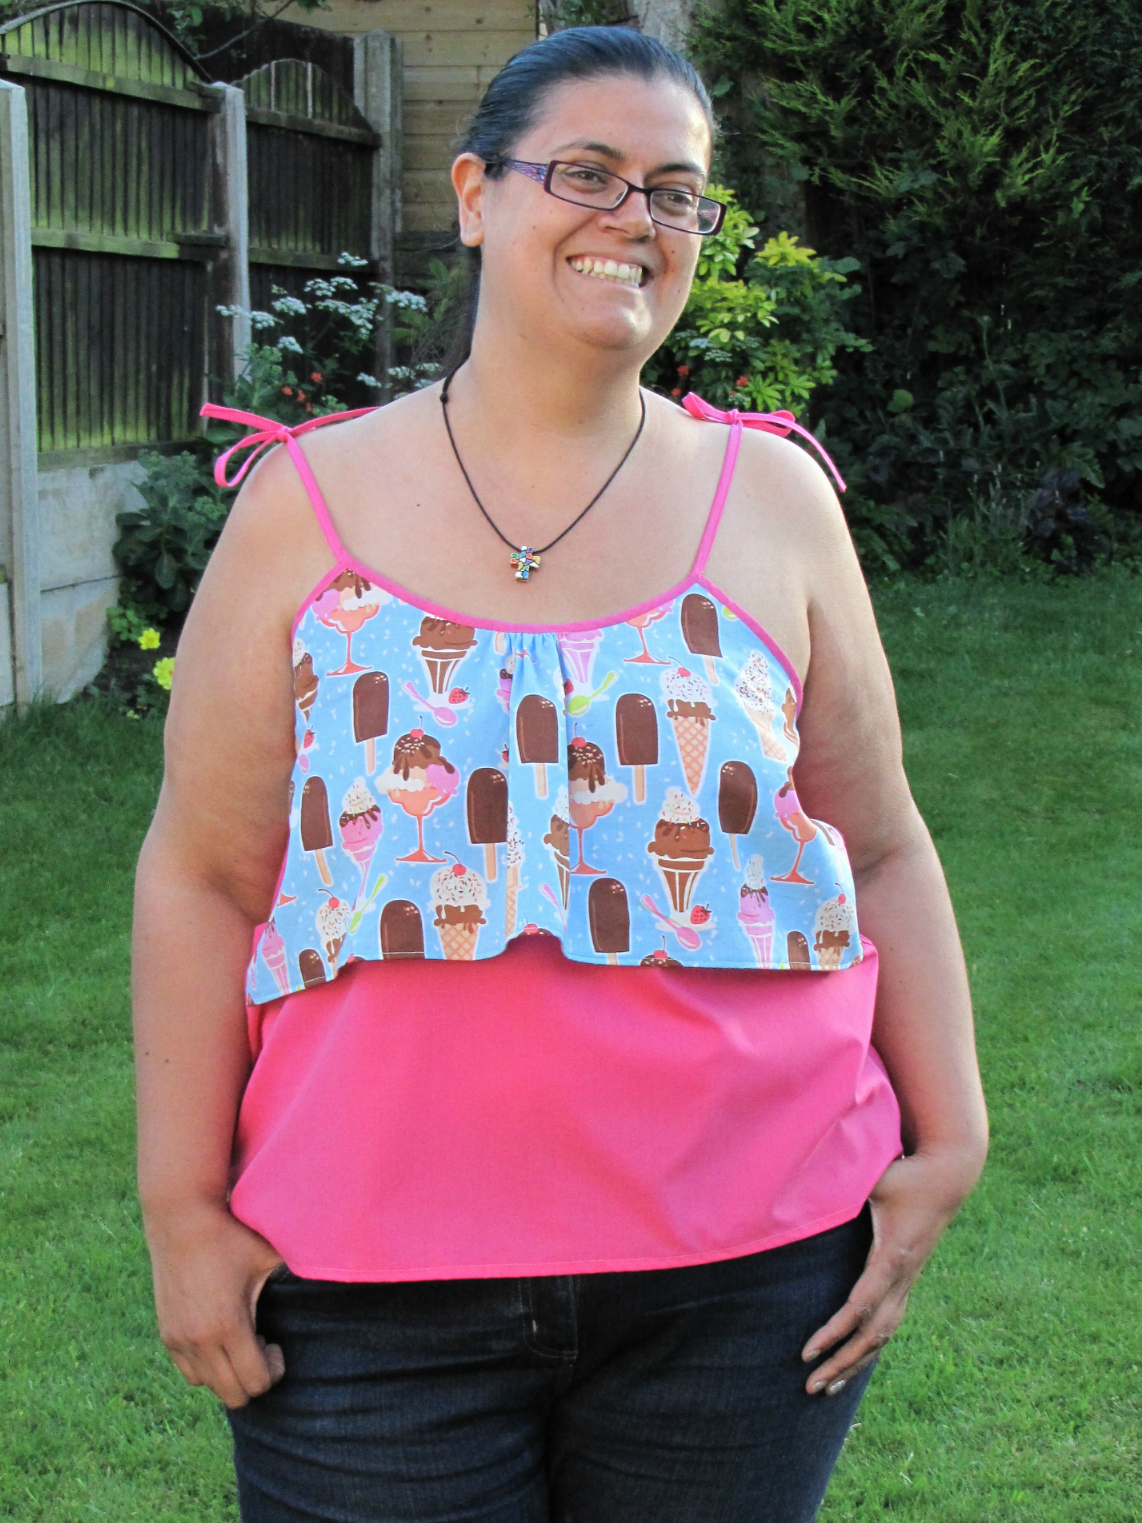
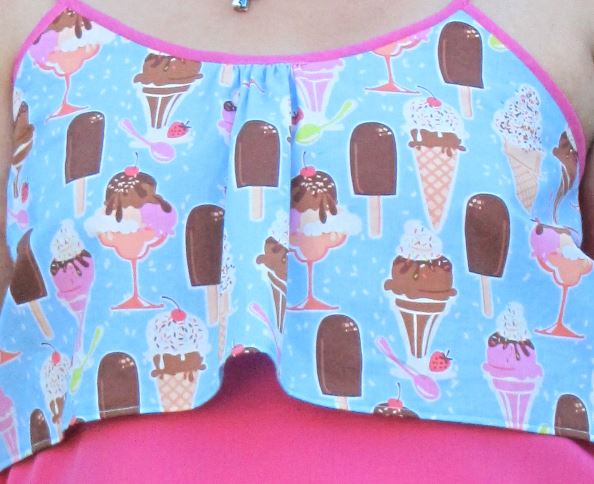
The Waterfall Tank is a really cute little tank top, aka a vest top, with a really pretty ruffled double layer top bodice, hence the name – waterfall tank. It is finished with bias binding, which is then used to create the straps, with 2 options here – either tie or fitted straps.
As soon as I saw this top previewed on Sew Caroline’s Instagram feed my mind immediately went to all those short lengths of funky and designer fabrics that I have and no idea what to use for other than a bag! I love the fact that there are so many different options for the waterfall tank you could o as I have and use a different fabric for the ruffle and main body. Or you could use 3 different fabrics, one for each section, or just use the same fabric and make your own bias biding – the instructions for doing this come with the pattern!
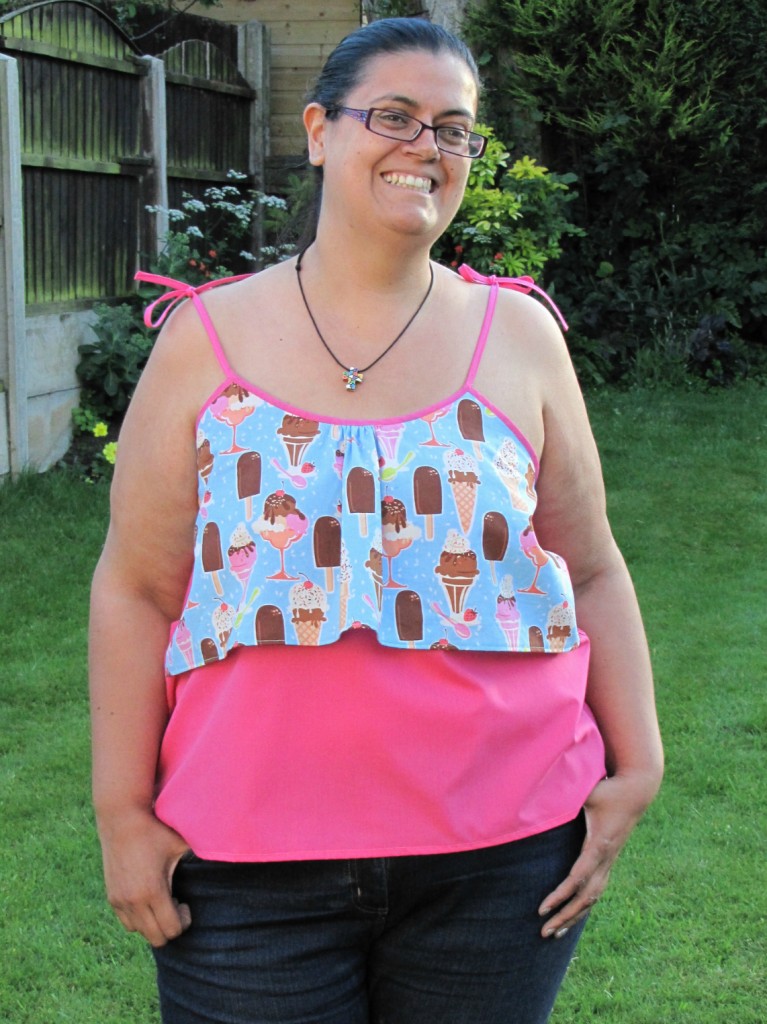
Having a rummage through my stash I found a lovely Michael Millar Ice-Cream fabric that I cough just under half a meter of last year. So off I toddled to my local Abakhan Fabrics store in Birkenhead and found a hot pink polycotton an bias binding to coordinate.
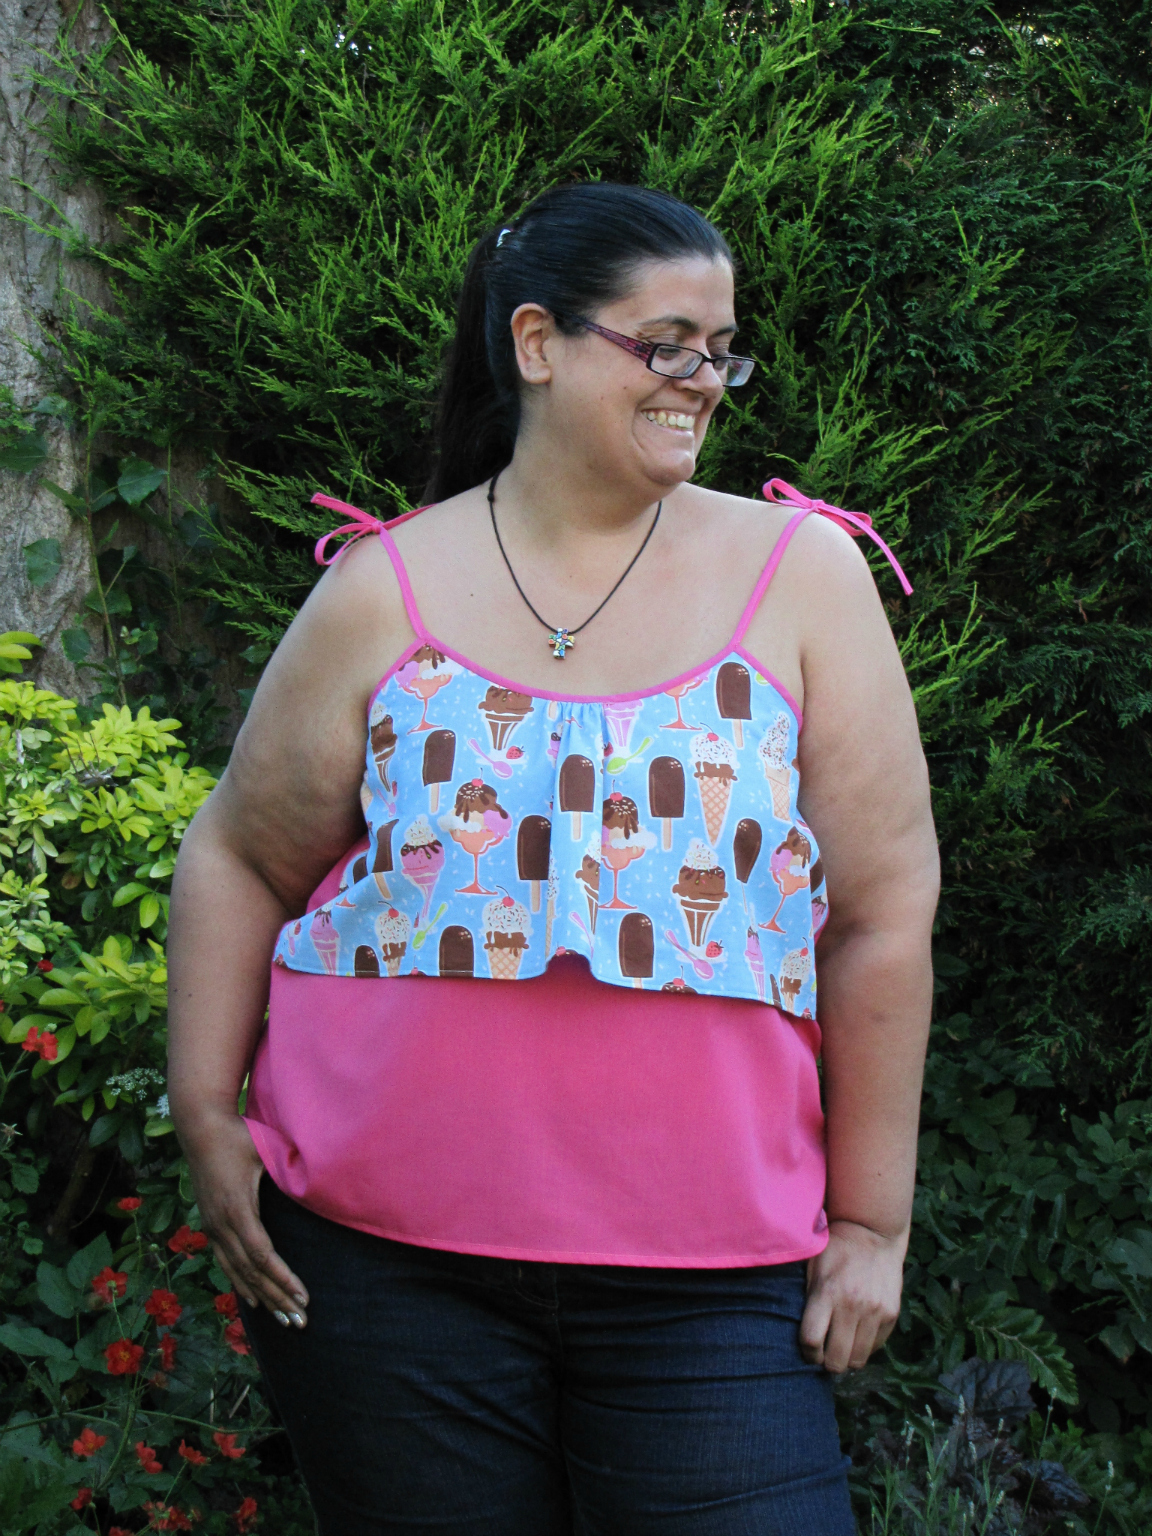
I chose the tie strap version as it looks like fun and I like the idea that I can wear it at different levels of revelling, depending on the situation! Sew Caroline’s instructions are very easy to follow, with lots of useful photos and great instructions on making your own bias binding, if you choose to. Sew Caroline also suggests using French seams and offers great, easy to follow instructions for doing this, which is very handy.
I’d recommend the pattern for advanced beginners for the fixed straps as the mitred corners & French seams could be tricky for complete beginners. Otherwise it comes together very quickly and easily. From printing the pdf to completing it took me approximately 3 hours to make. The only change I made to the pattern was to grade up a little in the hips due to being very pear-shaped. For the next version I’ll probably add a couple of inches to the length as being 5ft 9in and long bodied I prefer a longer length bodice.

The waterfall tank is comfortable to wear and flattering to a pear shape like myself, especially if you use a different fabric for the ruffle as it draws the eye to my slimmest part! As it’s a cotton, not jersey like most tank/vest tops, it skims over any problem areas, so again is more flattering. I feel that conformable in it that it’s going on my summer holiday with me this year!
If you want to see more versions of this top in a variety of different fabrics and sizes there are two round ups on Sew Caroline’s blog – Waterfall Tester Round Up Part One and Waterfall Tester Round Up Part Two
The Waterfall Tank pattern is now available from Sew Caroline’s online store, so if you fancy making your own version then why not hop over there and take a look.
Have you made your own version, or have any ideas or suggestions? If so, why not let me know in the comments below.
2 Comments