Archive for the ‘Upcycling’ Category
I’ve decided to join in Portia Lawrie’s Refashioners challenge – Suits You this year. The challenge is basically to refashion an old, unworn or unloved suit!
Most people entering the challenge have raided their local charity shop and bought a XXXL men’s suit to give them lots of fabric to work with. But no, old daft me decided that wasn’t enough of a challenge! I decided to use an old pale blue George at Asda ladies suit that I found in the loft, which I’m clearing out due to a rewire in the new year! I have no idea why I bought it as it’s soooo not my style, although it actually seems to fit me pretty well, which is where the extra challenge comes in as it doesn’t give me very much extra fabric to work with, doh!


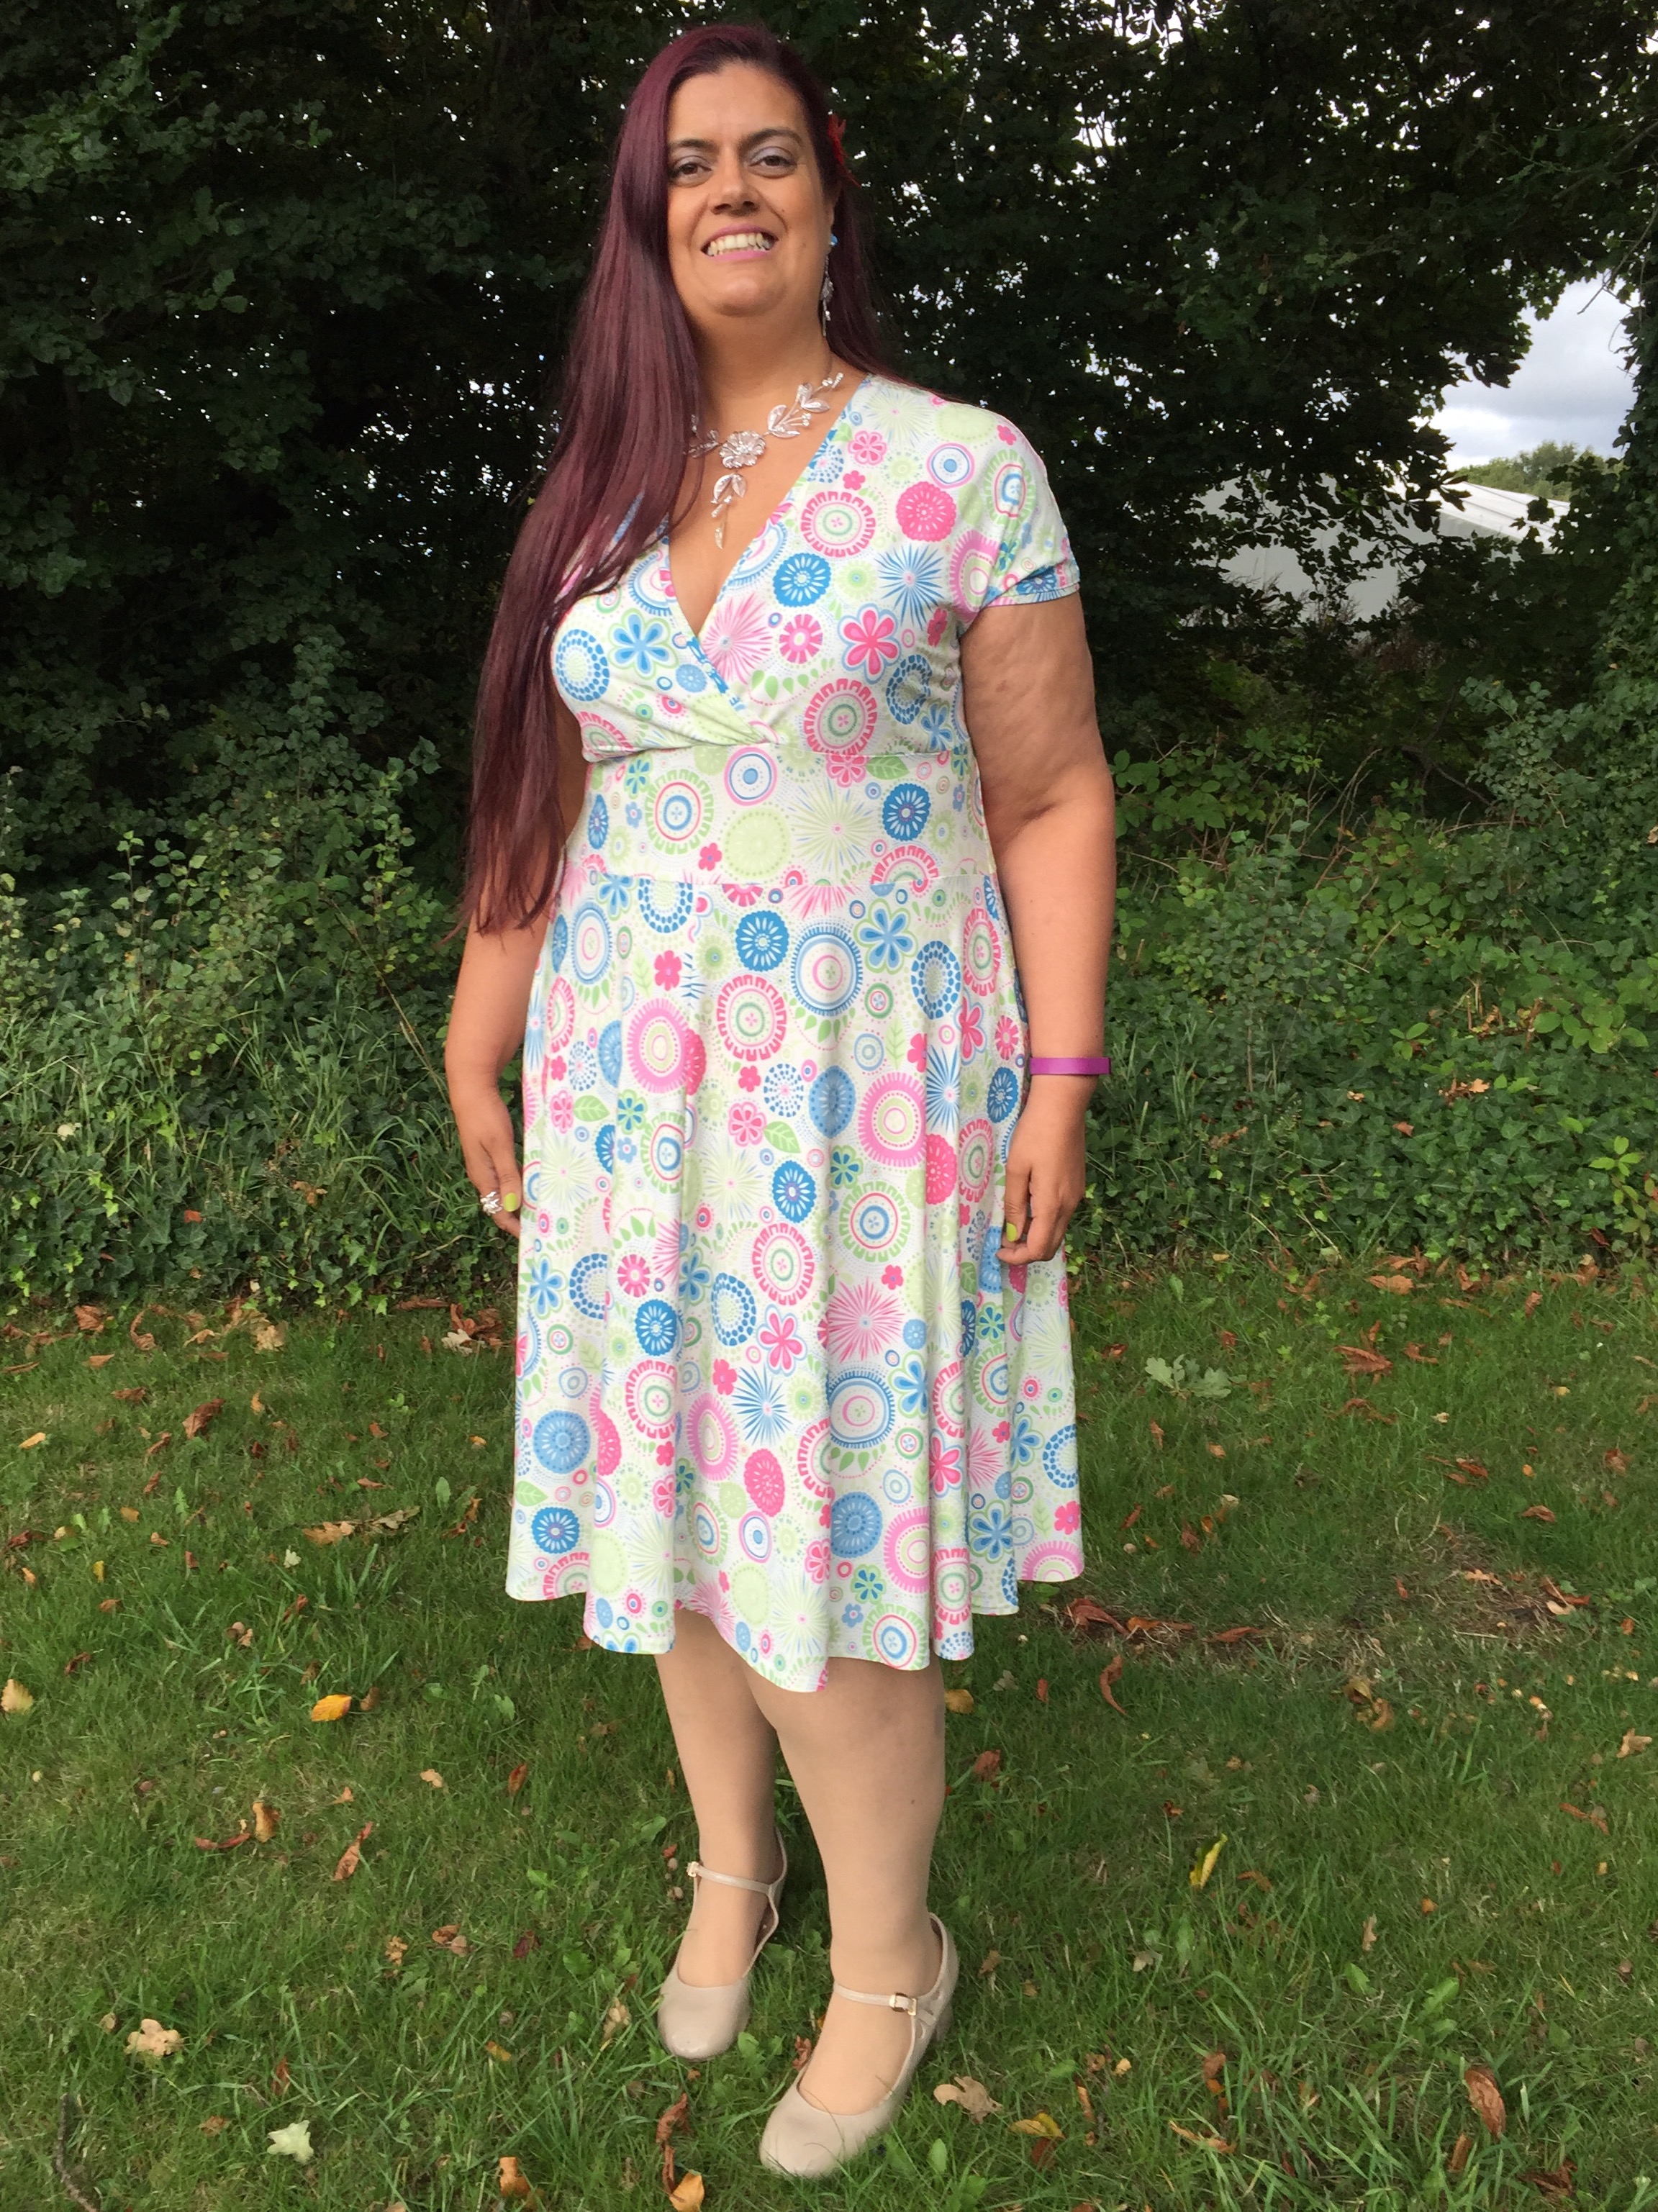
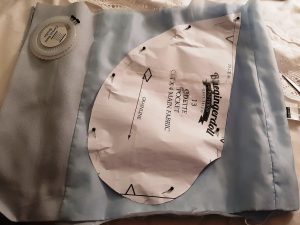
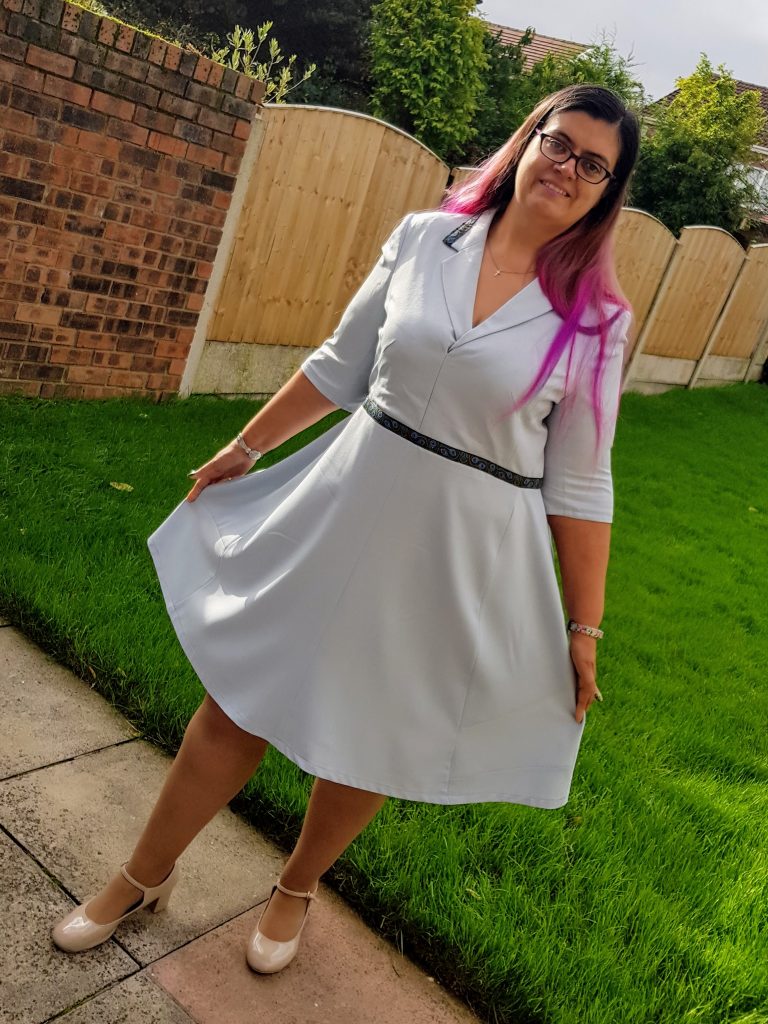
I had a lot of fun playing round with the suit and trying to decide what to make with it but in the end I settled on a version of one of my TNT patterns – the BlueGingerDoll Winifred dress. I’ve altered the pattern quite a bit to fit me well, the shape suits me and I wear my existing ones quite a lot, so would be nice to have a new but also different version.
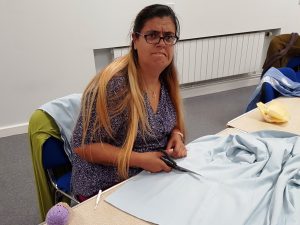
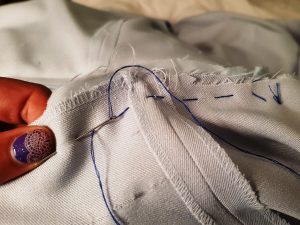
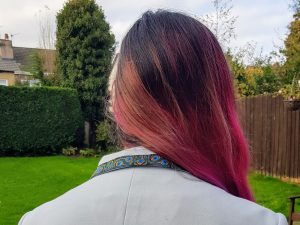
Although I have made the collarless version of the Winifred dress recently I do like the collar feature and decided to take advantage of the jacket collar and integrate this into the design. Lots of pinning and fiddling was undertaken at Liverpool Sewing Club, with me trying on again and again to ensure the button holes were not visible and the new centre front seam was straight and actually in the centre. Then to figure out the rest of the bodice fitting! As the jacket had princess seams it didn’t actually need the tuck darts that the dress usually features, which help create the bust fitting and flowing skirt. So when I figured out where to finish the bodice/jacket section and finally got the fit I liked, it was time to make the first cut!
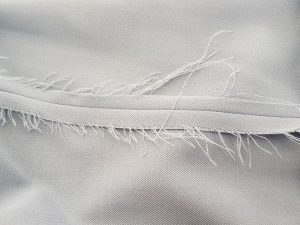
I decided to shorten the sleeves to elbow length, which i find really comfortable but I normally make short-sleeved Winifreds. As you can see from the before photos, the sleeves were a tiny bit tight, so I decided to remove the sleeve lining (I’ve left the bodice lined) to see if that helped with the fit. This is where I noticed the big difference in the seam finishes between the areas of the suit that would be visible (the trouser seams) and those not visible (sleeve seam). This is after all a budget suit and the manufactures need to save money and time where they can!
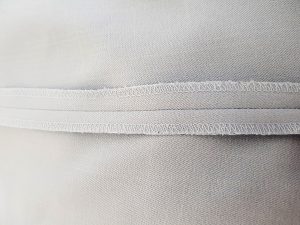
Visible seam
Hidden seam
At this point I decided to remove the shoulder pads as a) it’s no longer the 1980s, and b) they really don’t suit me. During this unpicking and deconstruction of the jacket stage it became obvious the difference between my Asda suit and the high end men’s tailored suit, that a lot of people, such as Portia were refashioning:

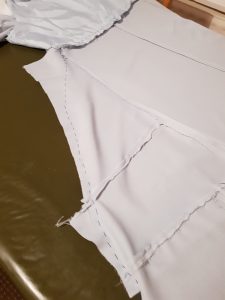
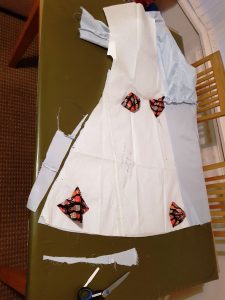
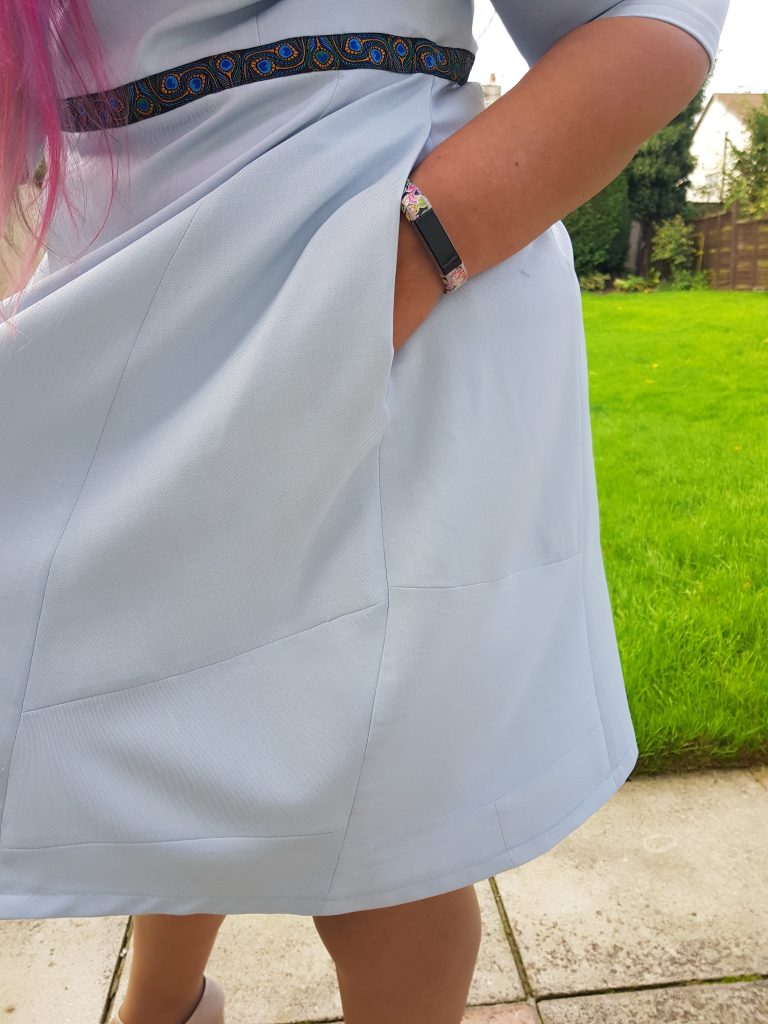
Now to move onto the skirt construction. The Winifred dress usually has an elastic casing or shirring at the back waistline but I wanted to test the fit first, so I decided to construct the skirt pieces separately first and check or fit before adding this detailing., The dress front is normally put as a full bodice and skirt all in one but my refashion needed a seam adding. I unpicked the side seam on the trousers and after a little maths and playing around with the layout decided to press out the hem and keep the inside seam in place and use this as the centre front centre back seams, as the skirt flares out and obviously so do the trousers at the hips. Although this flare isn’t enough to create the full width of the skirt, so now comes lots of patch working! I used the extra pieces from the bodice, trousers and sleeves to create extra width to get the rough shape of the Winfred dress. I then had tacked (yes me, the worst hand sewer known to mankind!) the two skirt pieces to the bodice and the rough shape of the skirt together.
I needed to try the dress on and see if the shirring was needed or if the fit was okay without it and I was very pleased to find the shirring was not actually needed. A combination of the jacket bodice princess seams and the fact that I am extremely pear shaped meant I could lose the shirring and still have a great fit! Any good me-made dress has pockets, so time to go back to my leftovers from the suit and I used the lining from the bottom of the jacket to cut some side seam pocket, using the pattern piece from another BlueGingerDoll dress, the Odette, as a template). I’ve hacked this pattern before to add pockets but if you’re not sure how to do this then By Hand London have a great tutorial on their website, with lots of photos, which always help me as I’ve a very visual learner!
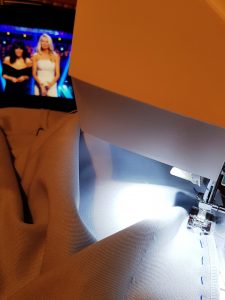
Now it’s time to put it all together properly! I used my pattern pieces as a rough guide and cut off the excess no longer needed, machine stitched all seams and remove the tacking (whilst watching Strictly of course)
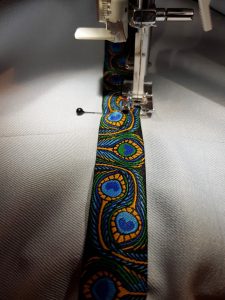
All finished, or is it?! Hmm, it’s very nice and I’m happy with the fit but it’s rather plain and therefore not really very me! My hand embroidery skills aren’t up to scratch, so I decided to have a look around for a co-ordinating trim. I really like peacocks feathers and found this one on Moksha Trim, so decided to stitch that to the waist but still wasn’t 100% happy, so had a play around at Liverpool Sewing Club with the ladies helping me work out the best placement and having a laugh in the meantime

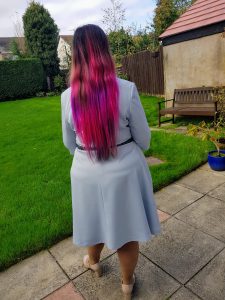
Yay, all finished! Cue lots and lots of photos:
Patchwork side panels!


I’m really please how this has turned out and that I’ve managed to do it from not a lot of fabric and without adding any extra fabric, just 1.5 meters of trim!
6 Comments

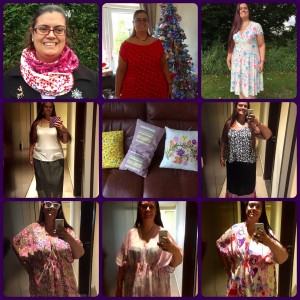
This year has been a very hectic one for me as I’ve started a new job, had a few health issues and also had building work done on my house. This has resulted in me blogging less than I intended, although I have had some time for sewing but usually a little last minute when i need something for an occasion, oops! So I thought I’d do a round up of my sewing projects from this year, with little explanations about them.
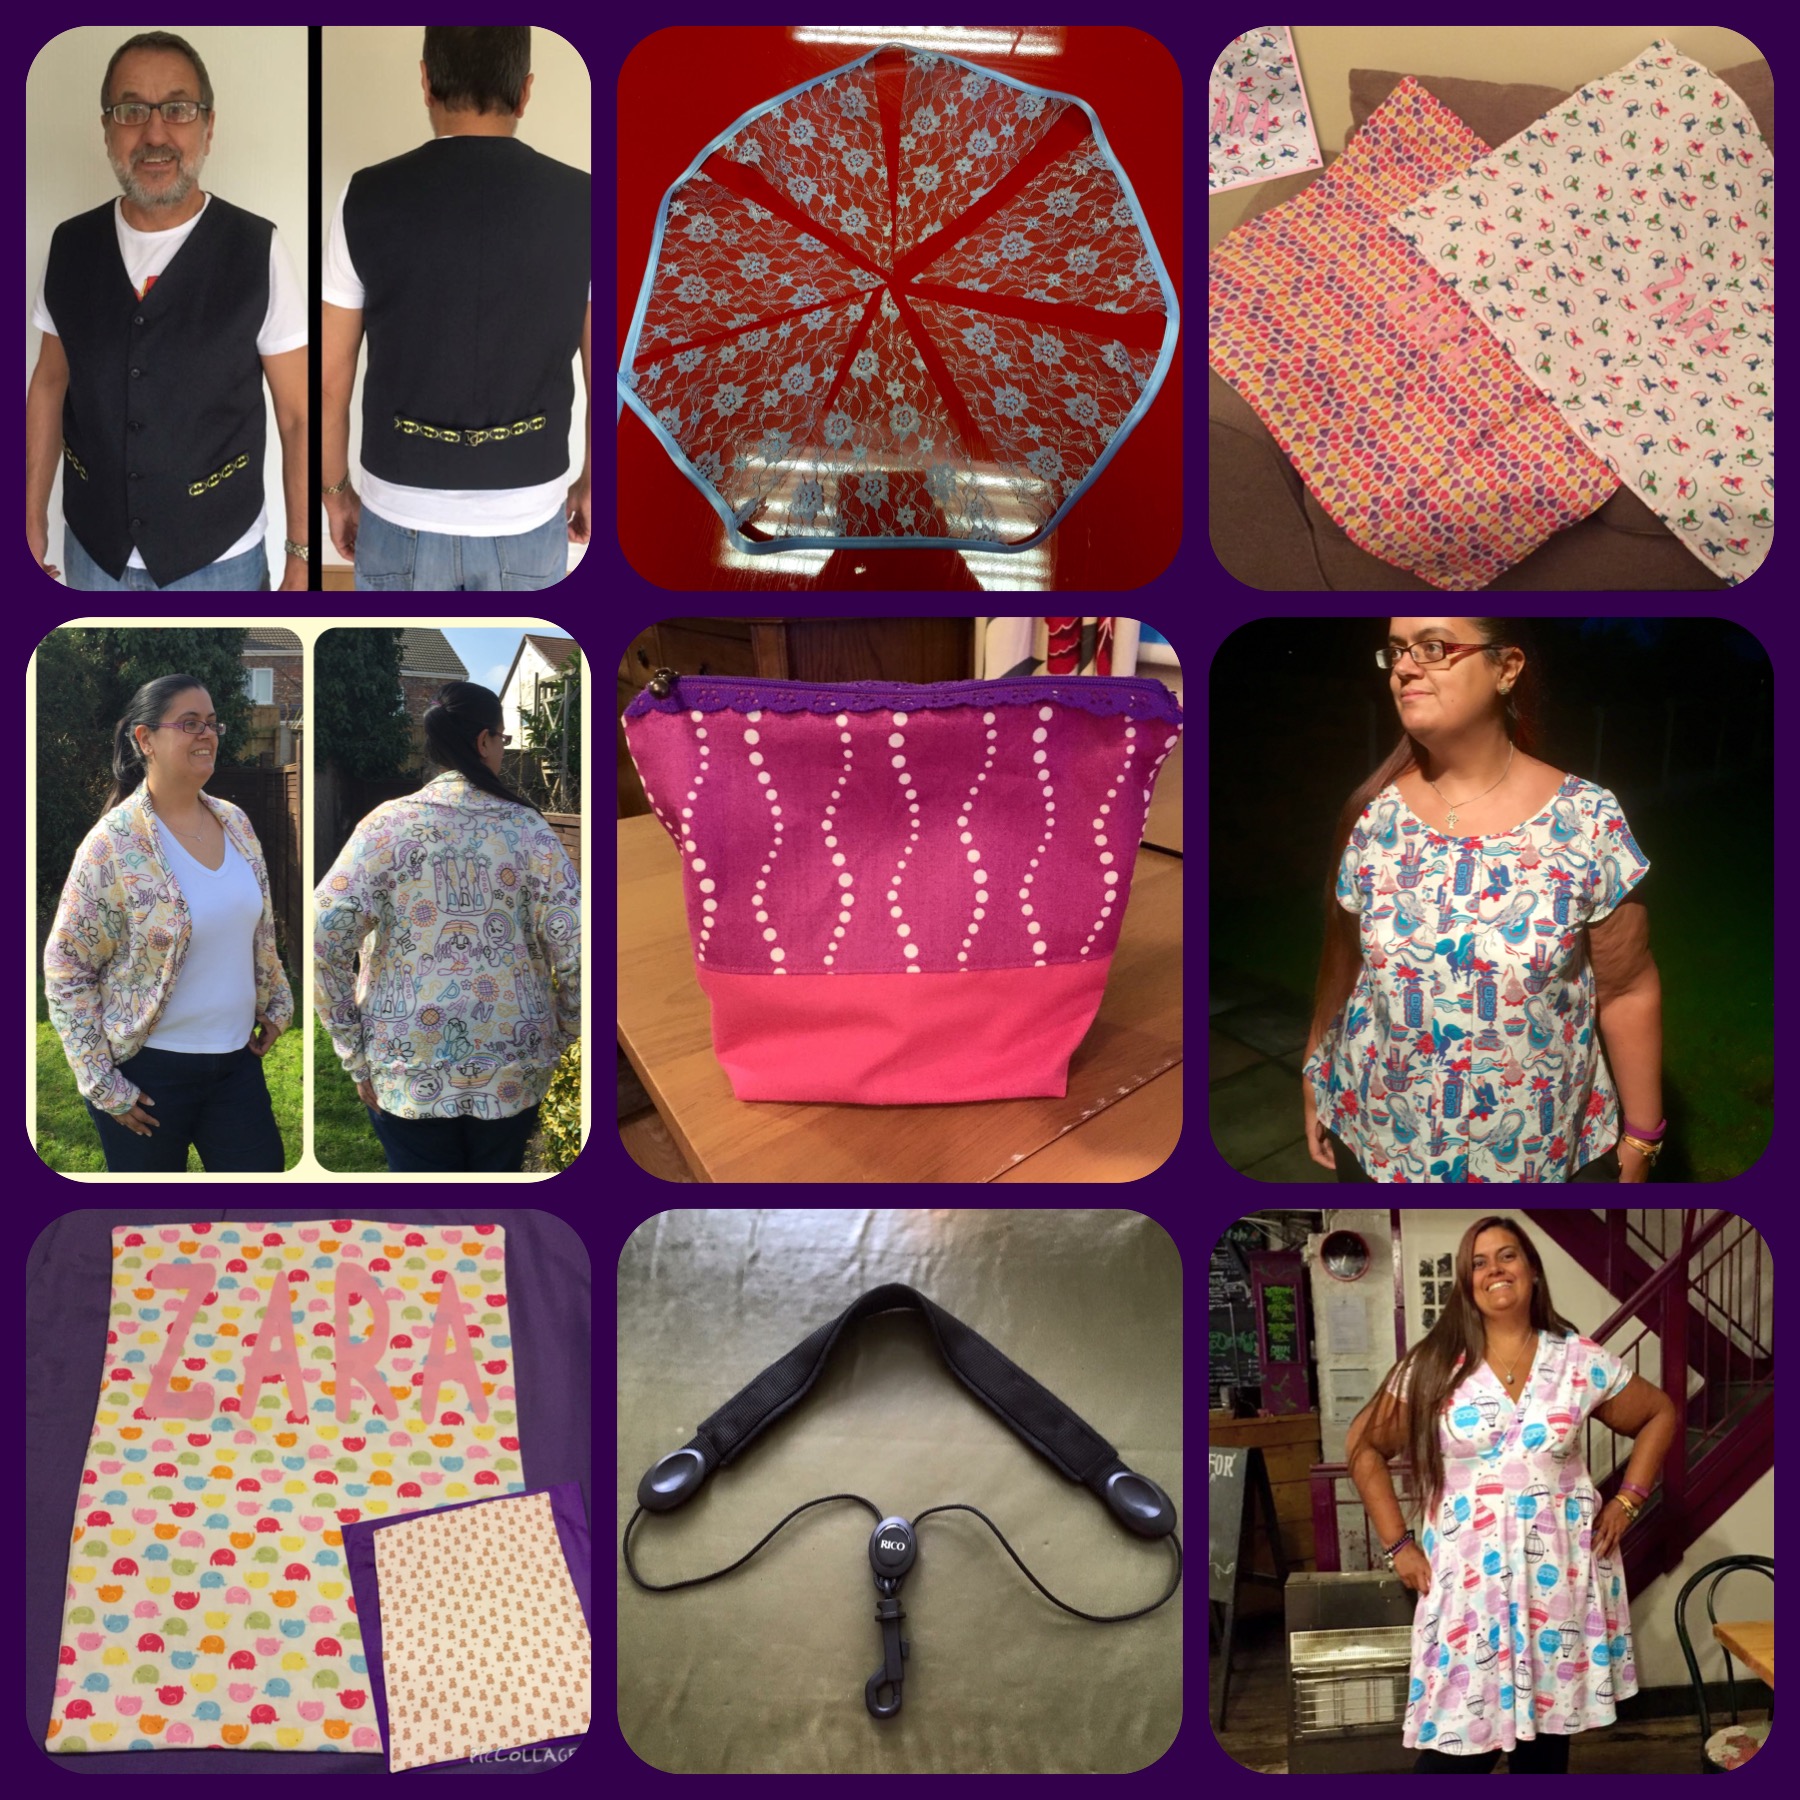
1.Dad’s Batman upcycled waistcoat:
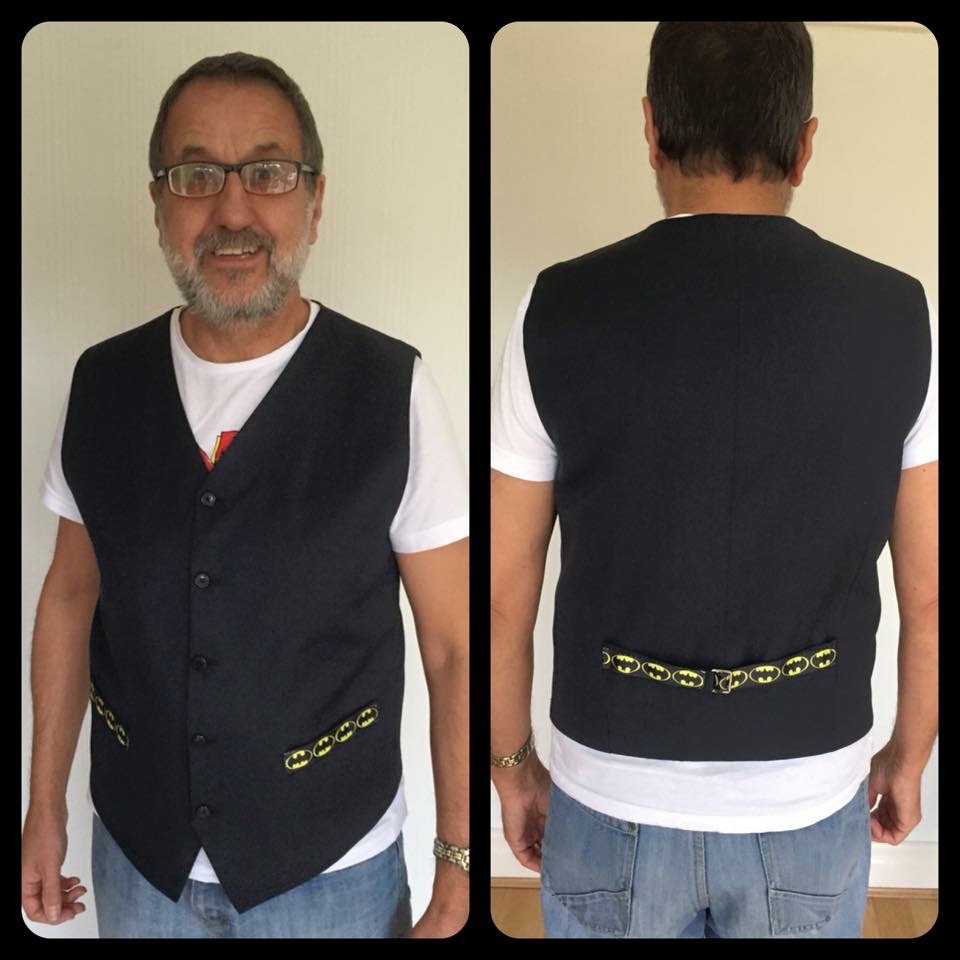
My dad wanted a fun waistcoat to wear to work (he’s a teaching assistant) but that wasn’t too over the top. I decided to upcycle this plain black charity shop waistcoat, with some Batman ribbon. My dad loved it and so do the kids at his school!
2. Zara’s tiny baby blanket
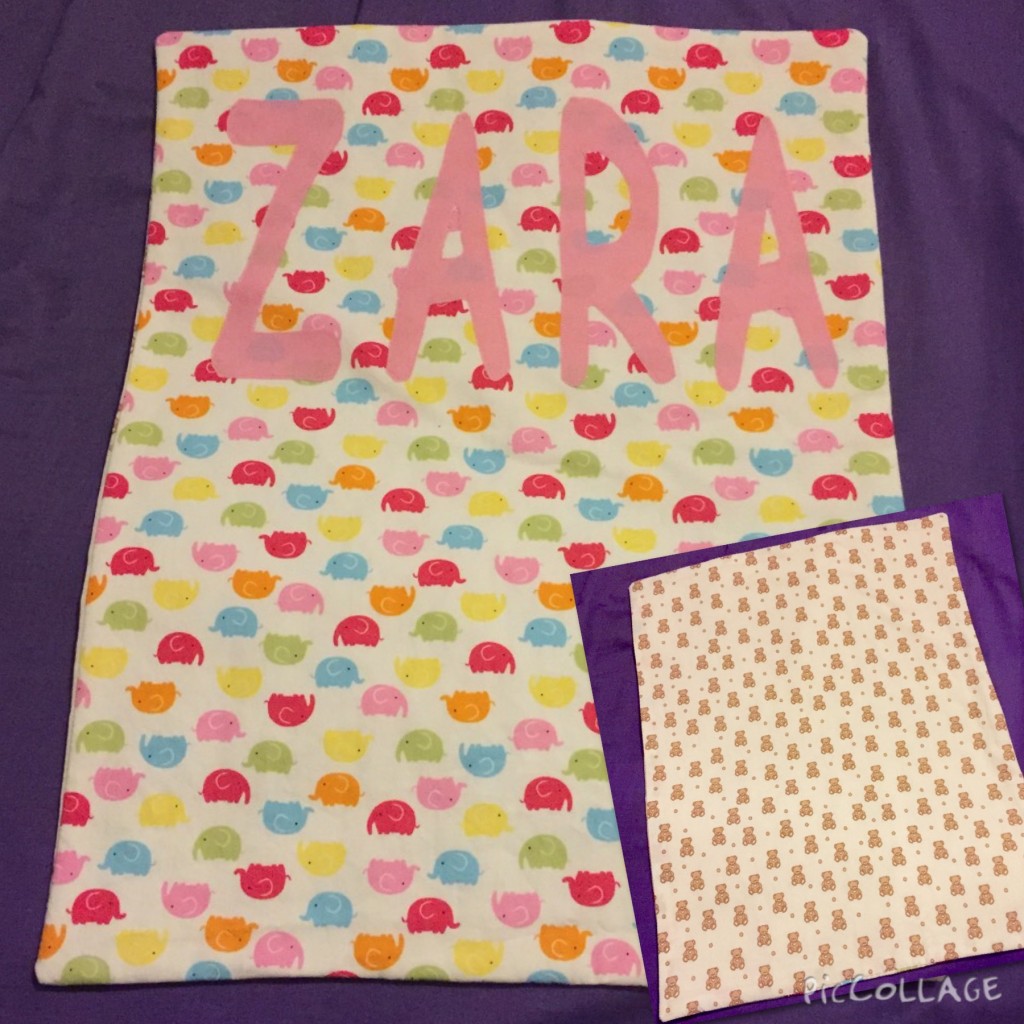
My friends Ije & Si’s little daughter Zara was born at just 27 weeks in January and therefore spent the first 3 months of her life in the Special Care Baby Unit at Arrow Park Hospital. I therefore decided to make a personalised baby blanket for her to use. Because of her delicate skin I researched premature baby blankets and only used top quality cotton fabrics and sourced some top quality pure cotton wadding from Simply Solids for the filing.
3. Zara’s incubator covers
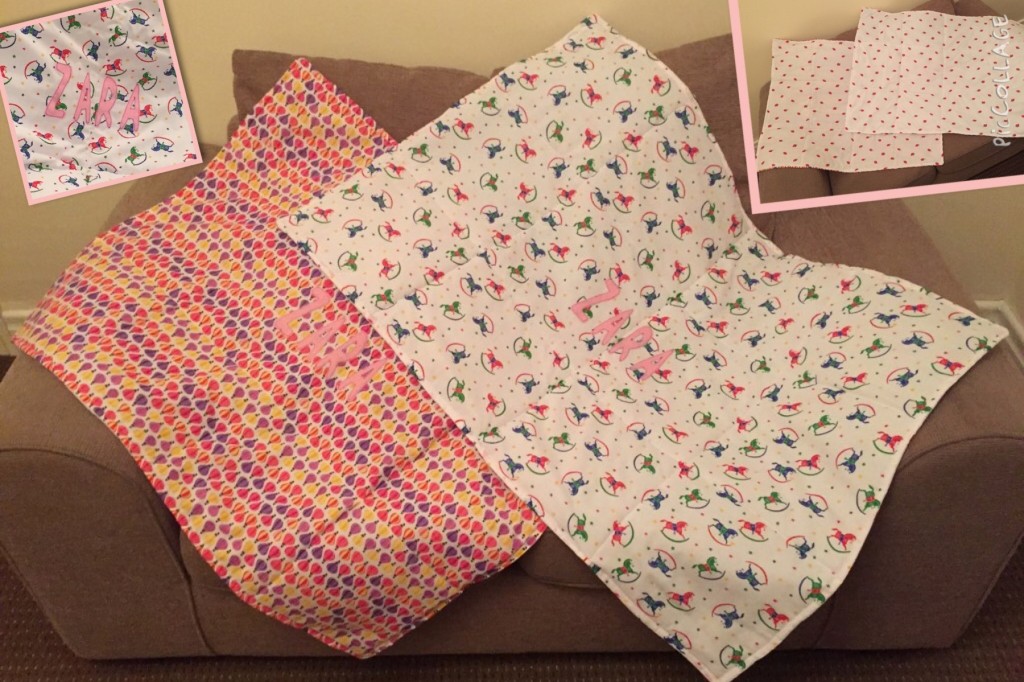
In SCBU the babies incubators were often covered in order to provide some shade and darkness for these little babies that should really still be inside their mummies tummies! There were generic boring hospital issued ones, so I decided to make personalised ones for Zara. After checking the dimensions required with the nurses in the SCBU and know that Ije loves right colours, I made these two fun covers, 1 with a balloon polycotton and the other with rocking horse polycotton, both and both were backed in a strawberry polycotton and filled with synthetic wadding, all from Abakhan Fabrics. I appliqued Zara’s name onto both to add that personal touch.
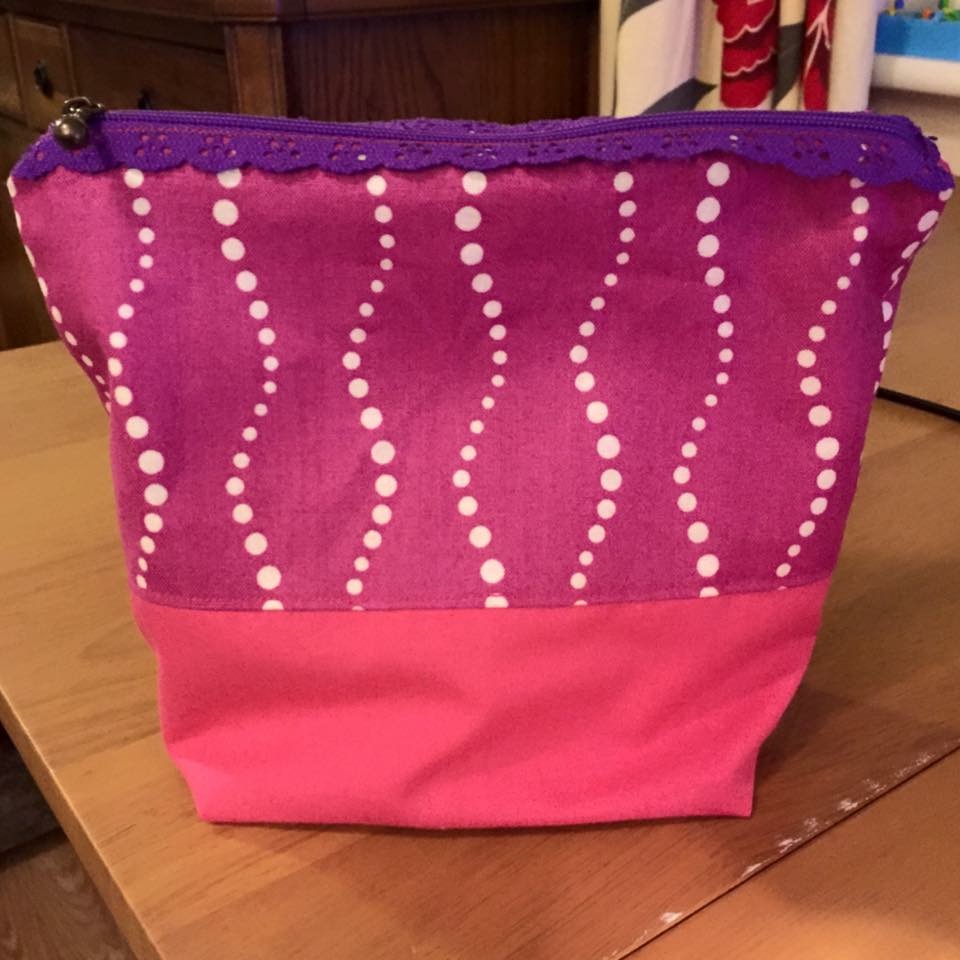
4. Zipper pouch

I took part in my first ever swap this year and this is the practice pouch I made for my swap partner. Very much me colours and love the little lacy zip closure.
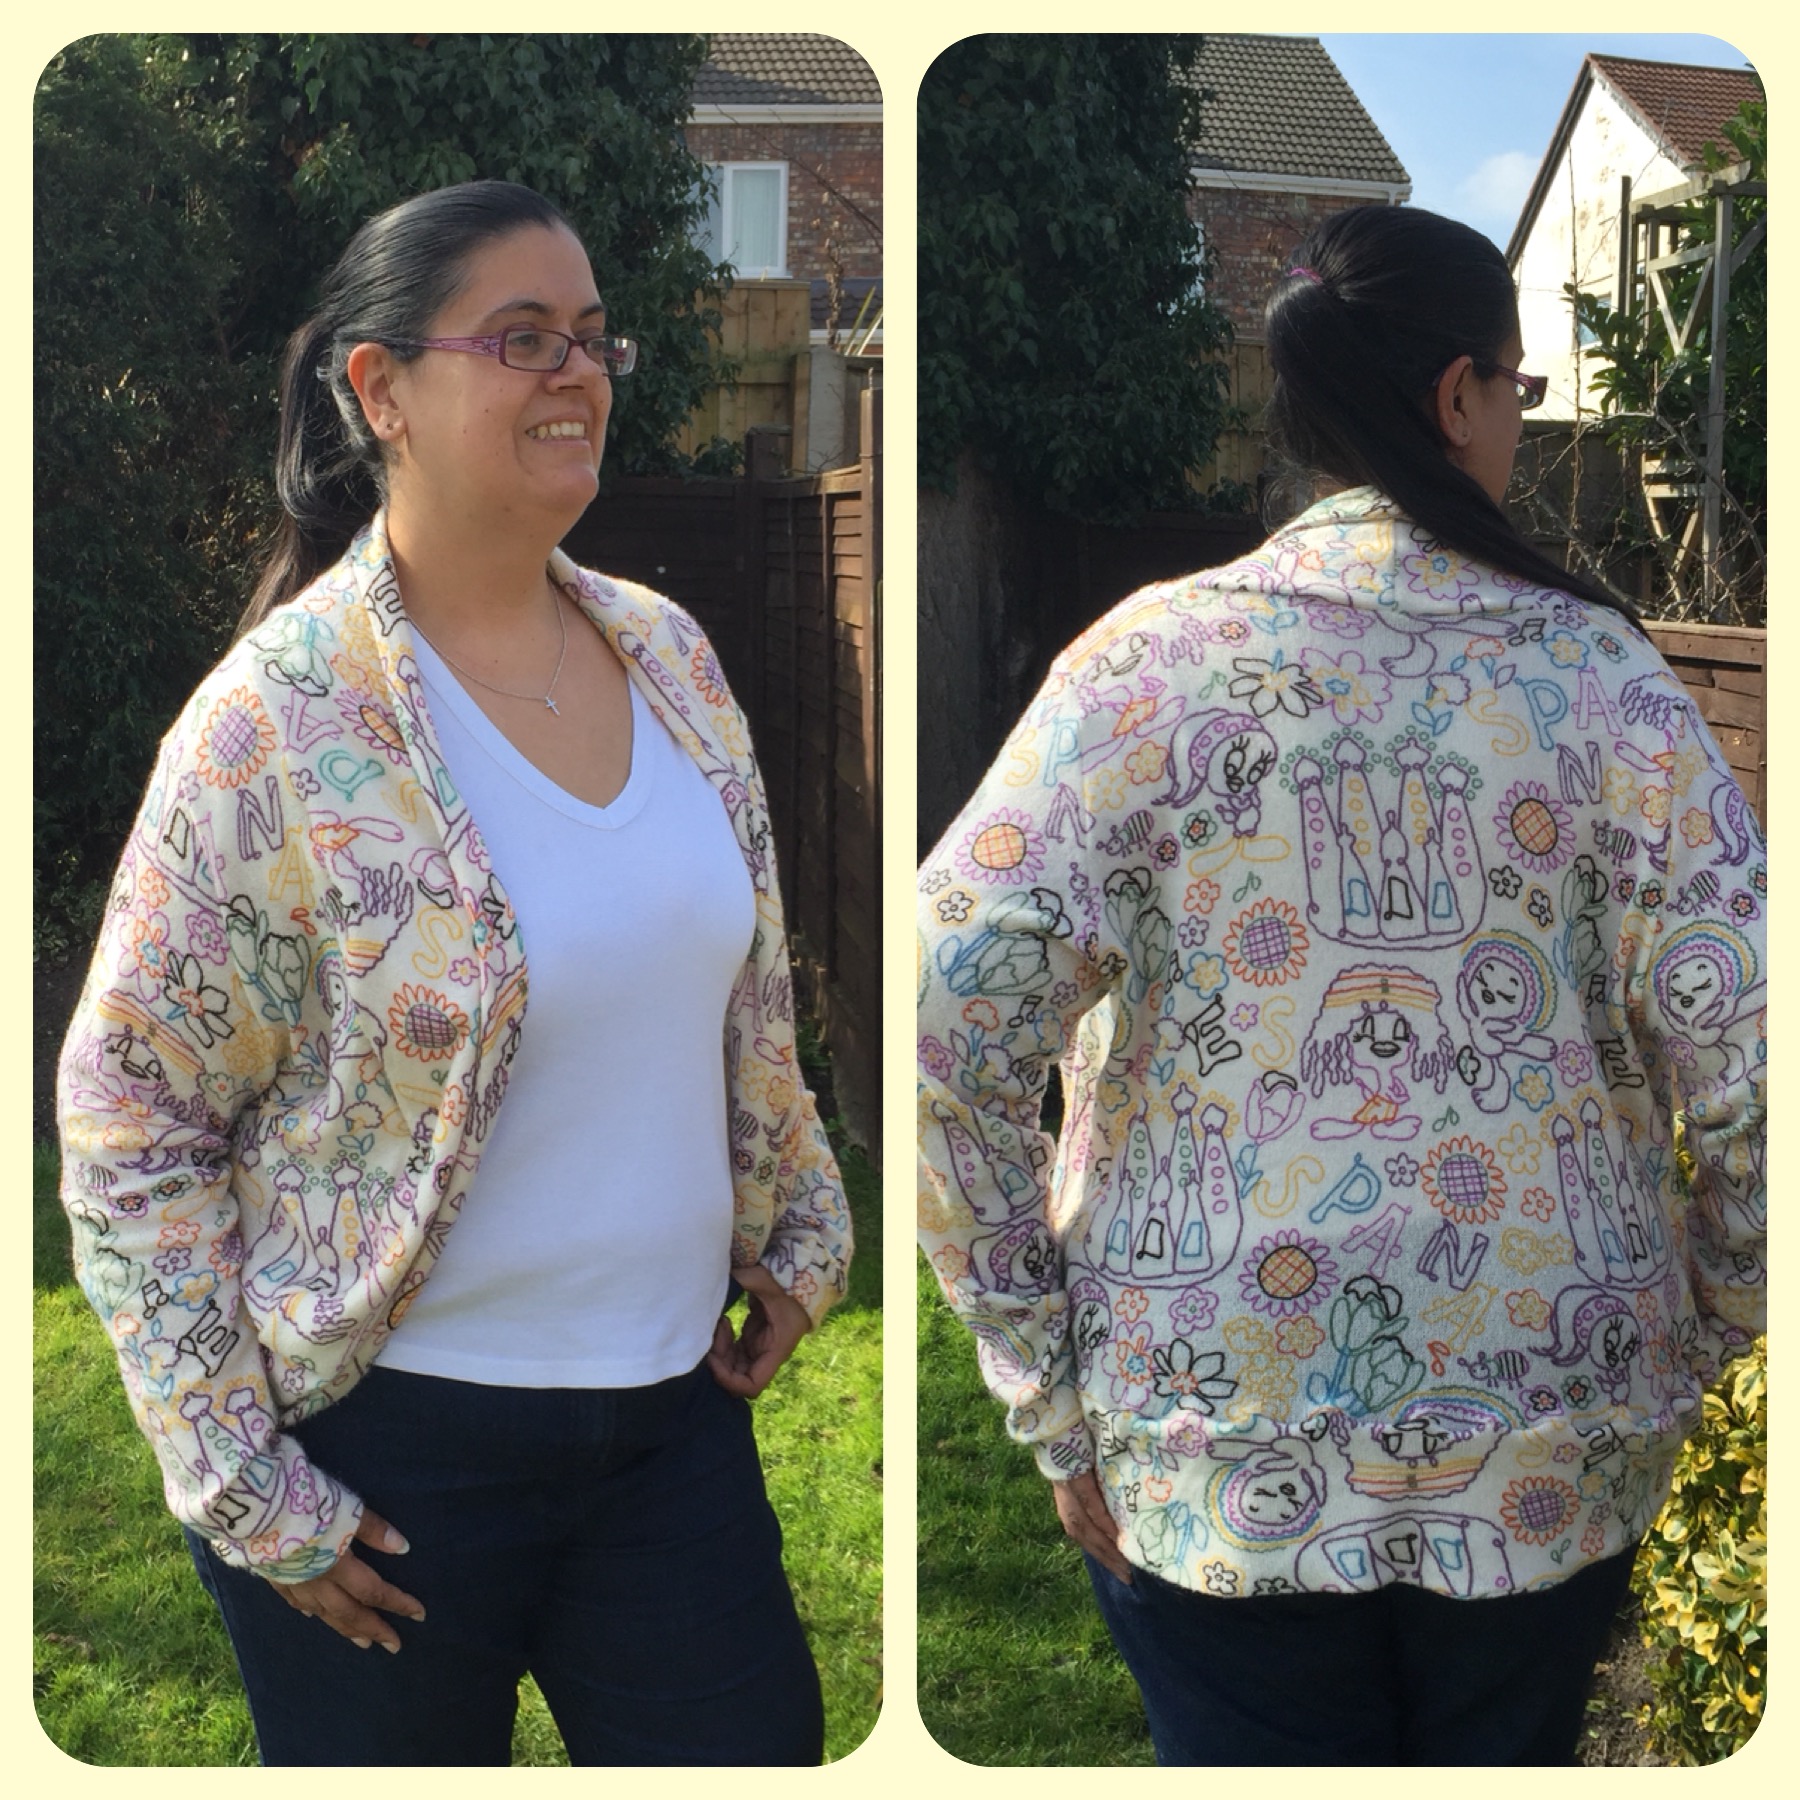
5. Julia cardigan
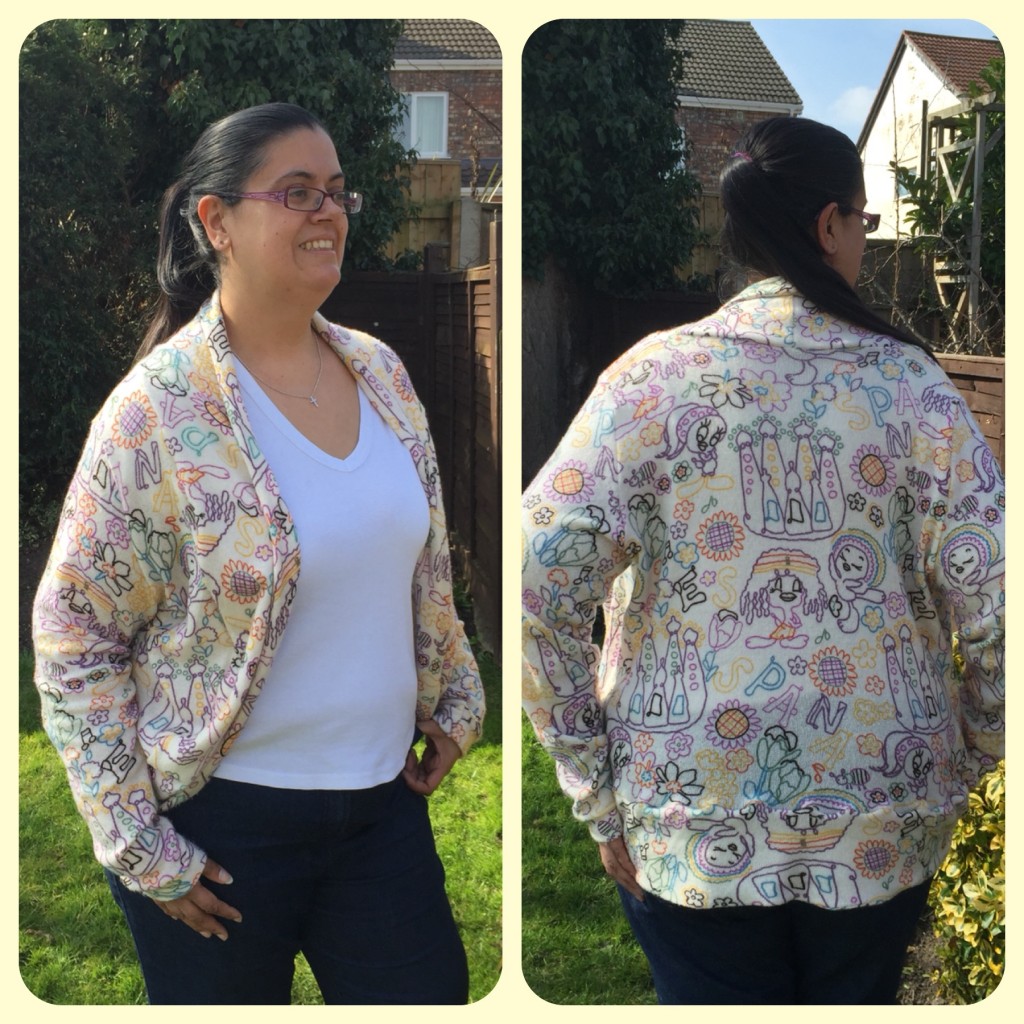
Time to get back to the dressmaking and selfish sewing, so I made myself a version of the Julia Women’s Cardigan. The pattern is from Mouse House Creations and the funky fabric, which appears to have a Spanish theme, is from Abakhan Fabrics. This is pretty easy to make, all sewn together on the overlocker and is very comfortable to wear, love the fact that the sleeves are actually love enough for little miss monkey arms here! 🙂
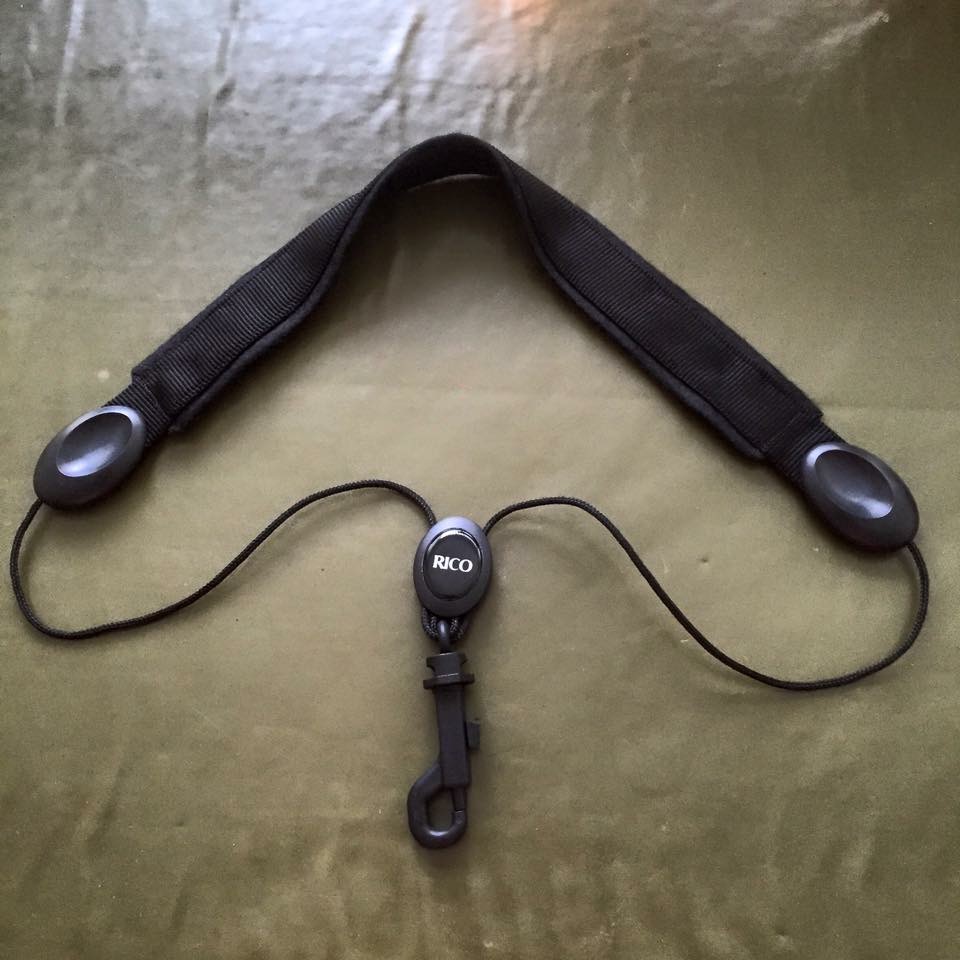
6. Dad’s saxophone padding

Not the most exciting of sewing projects but very practical! My dad is learning to play the saxophone and finds the neck strap rather uncomfortable. Therefore i used some black fleece to back the strap to make it more wearable.
7. Wedding bunting
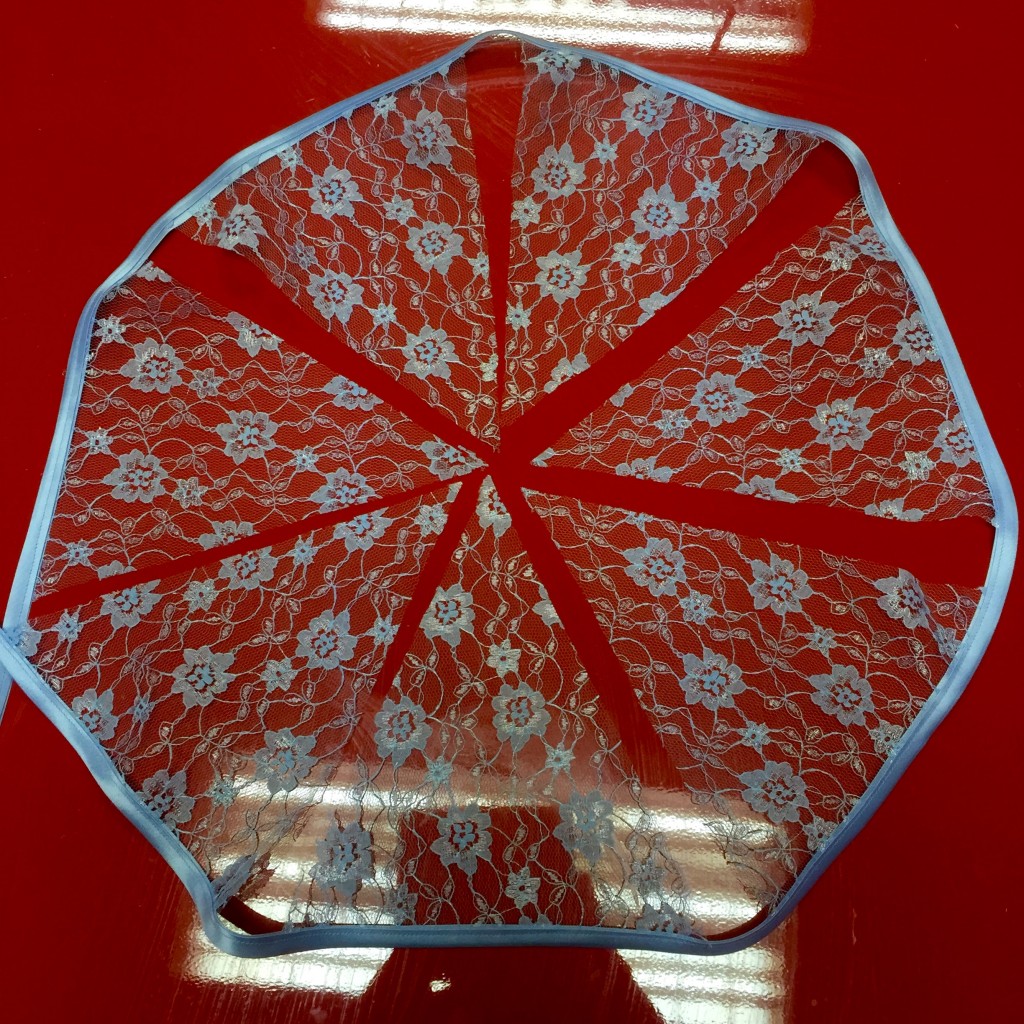
My friends Jenny & Adam got married this year and I asked if there was anything they would like me to make as a wedding gift and Jenny requested bunting to decorate the top table. I found this beautiful blue lace online and used blue satin bias binding to make 10 foot of bunting.
8. Wearable Wedding guest toile
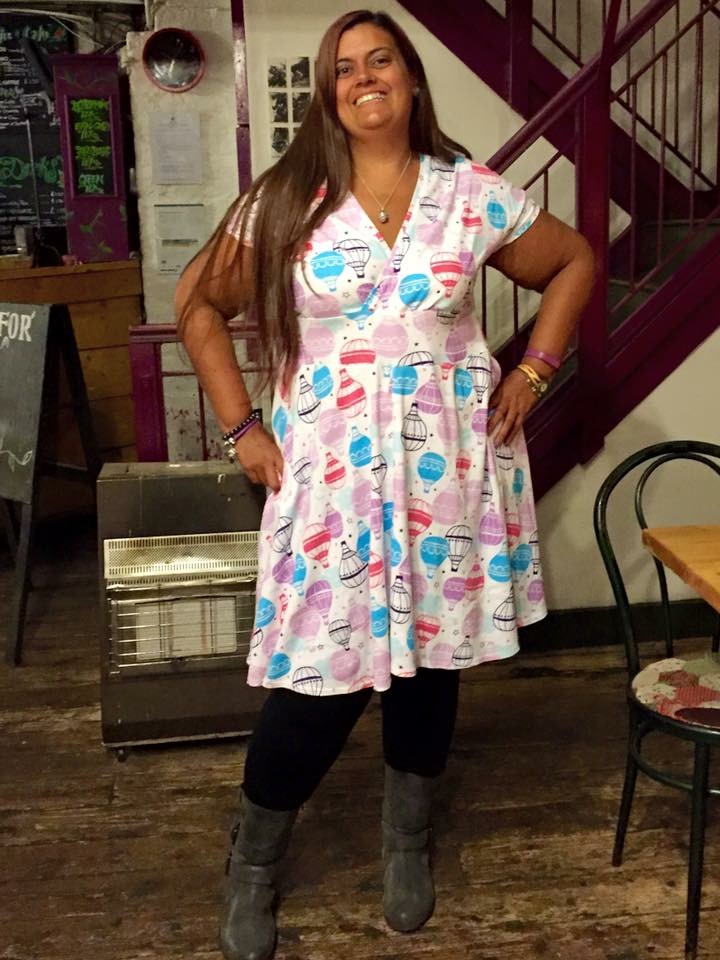
I wanted to make a new dress to wear to Jenny & Adam’s wedding, so used this funky hot air balloon from my stash (originally from Abakhan Fabrics) to make a toile, to ensure the fit was right before making the actual dress. It’s good fun and the fit isn’t too bad but I did shorten the bodice by 1″, remove the side inseam pockets and lengthen the final dress by 3″
9. Wedding guest dress
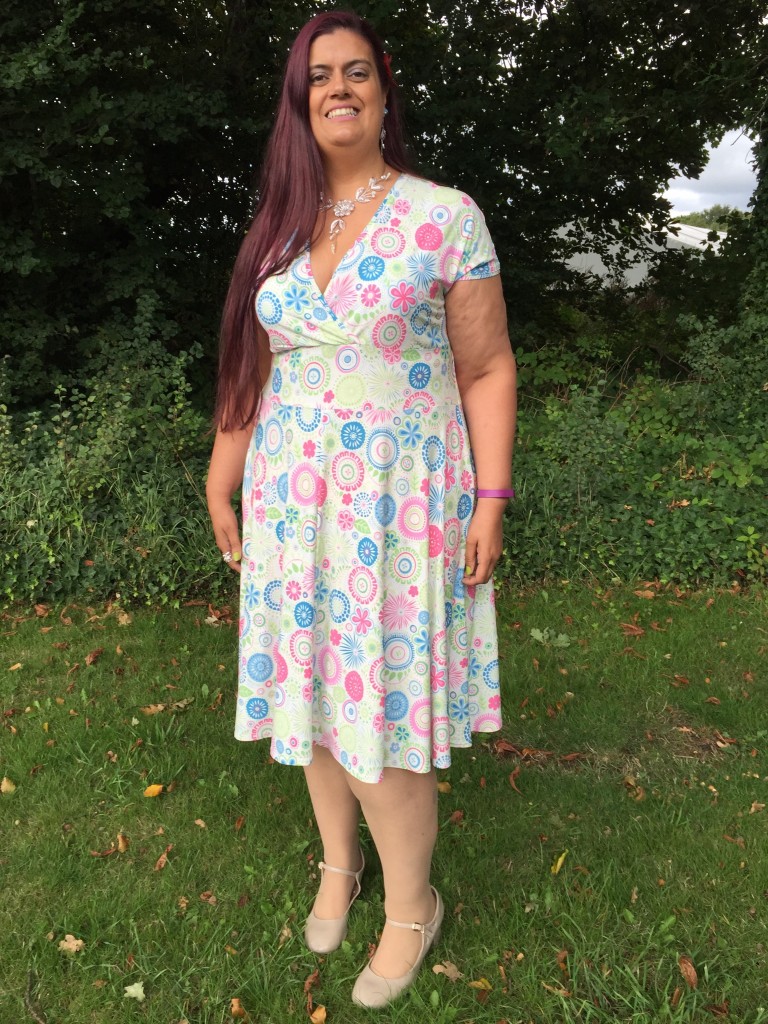
This is the final dress i made to wear to my friends Jenny & Adam’s wedding. The fabric is a Liberty jersey from Sewbox and the pattern is the Tiramisu dress from Cake Patterns. I’m really please with the fit and shape of the this dress after making the changes discussed an the toile version. It was also very comfortable to wear all day and of course the flowing skirt was great for dancing the night away in.
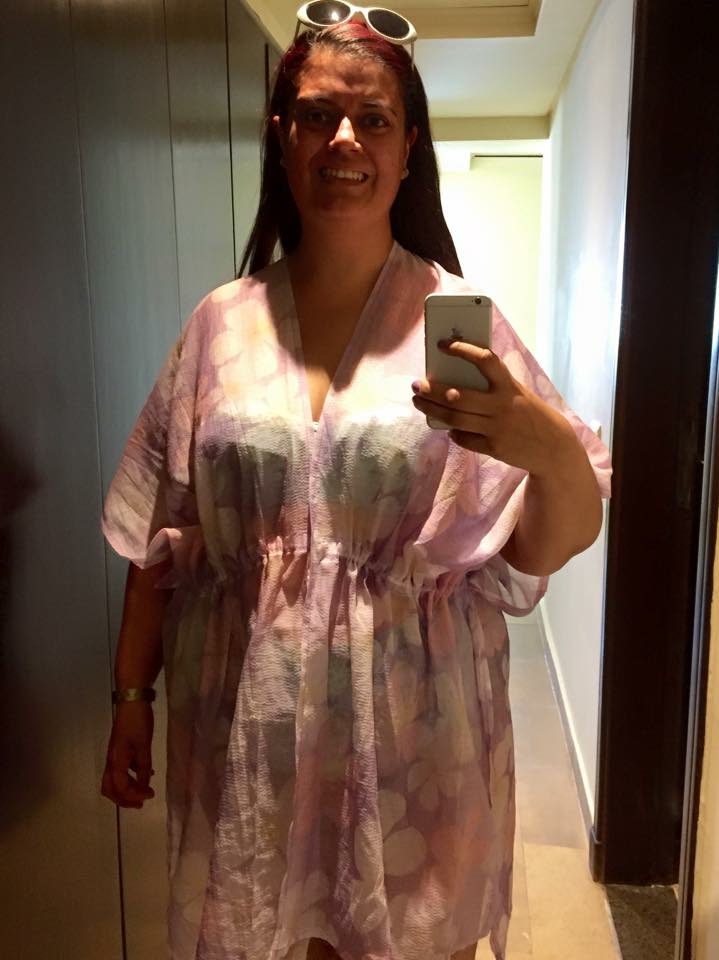
10. Handmade holiday – beach cover ups


I went on my first beach holiday in almost a decade this year, so deiced to make a number of items for my holiday. I’m rather self concious, so deicded to make these three beach coverups from light weight cottons and vopiles. The fabric was all from my stash and i used this tutorial Board & Crafty but altered it to make it much longer than the tutorial states. I had a great time in Sharm-el-Sheikh and would love to visit again.
11. Handmade holiday – simple maxiskirt
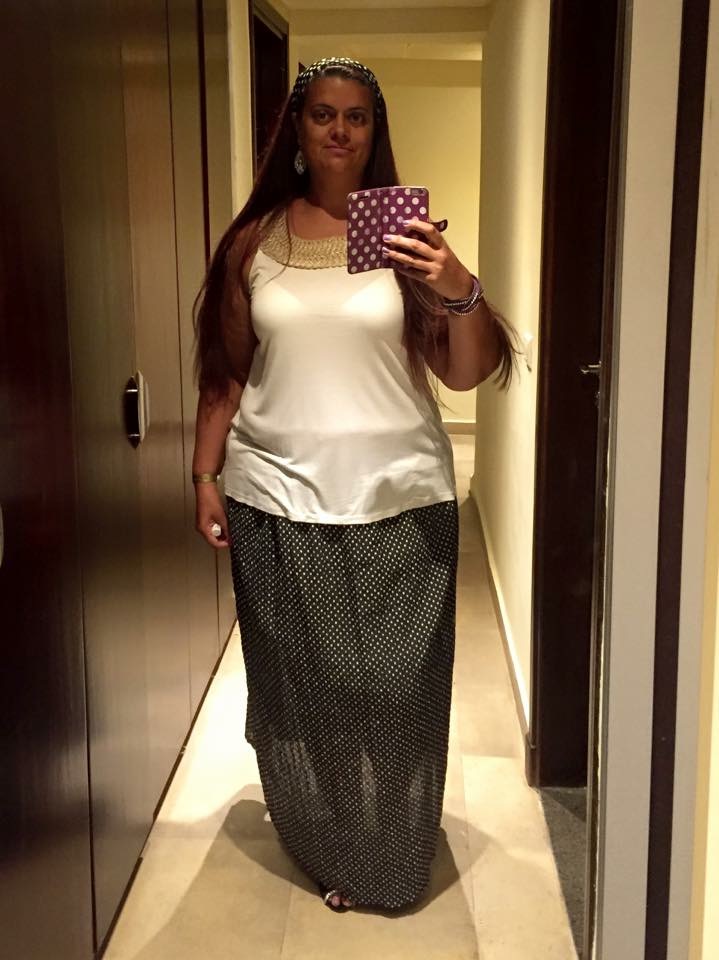
I don’t really wear maxi skirts very often but decided to try one for my holiday. I have lots of this lovely black polka dot lightweight cotton which I bought in the Abakhan Secret Sale, which I have previously blogged about. I then used this DIY Maxi Skirt Tutorial from Sew Caroline but I did hem mine as I wasn’t used a jersey fabric, like she had.
12. Handmade holiday – maxiskirt upcycle
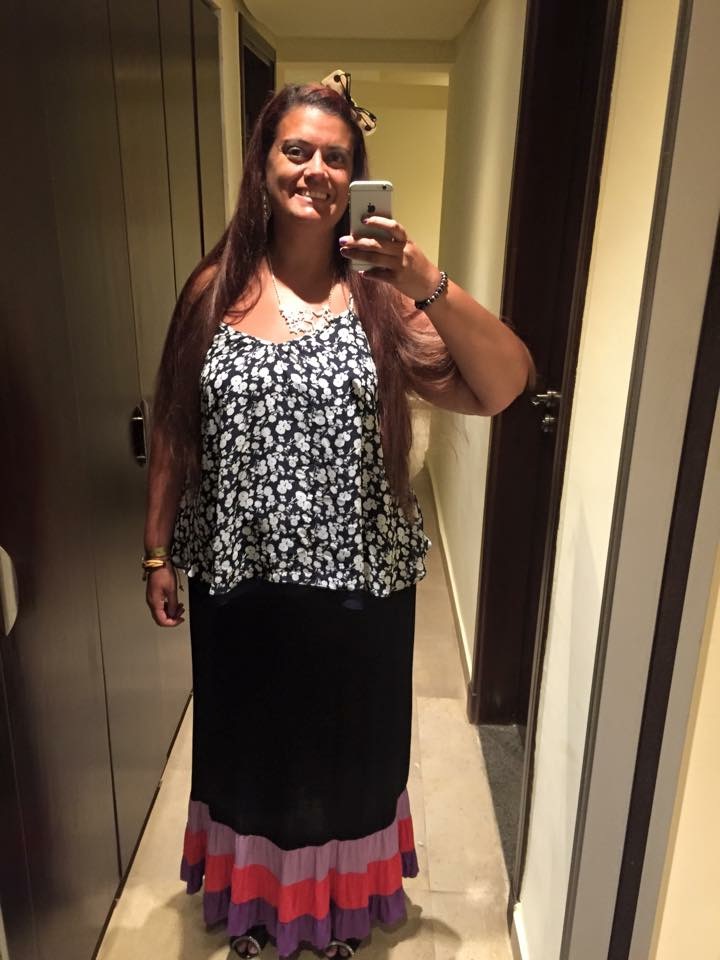
I loved this maxi-dress that I bought from Asda years ago but never wear it as being very pear shaped although it fit me well on the hips it was way too big on the bust, so it just sat at the back of my wardrobe gathering dust! I decided to convert it into a skirt instead! I pinned it at a suitable length, then added 2.5″ and then cut off the bodice. I then turned over 1.5″ at the top and sewed and inch wide channel and feed in a piece of 1″ wide elastic that I had already worked out would hold up the skirt but stretch enough to get on & off. Hey presto – one new, usable maxi skirt!
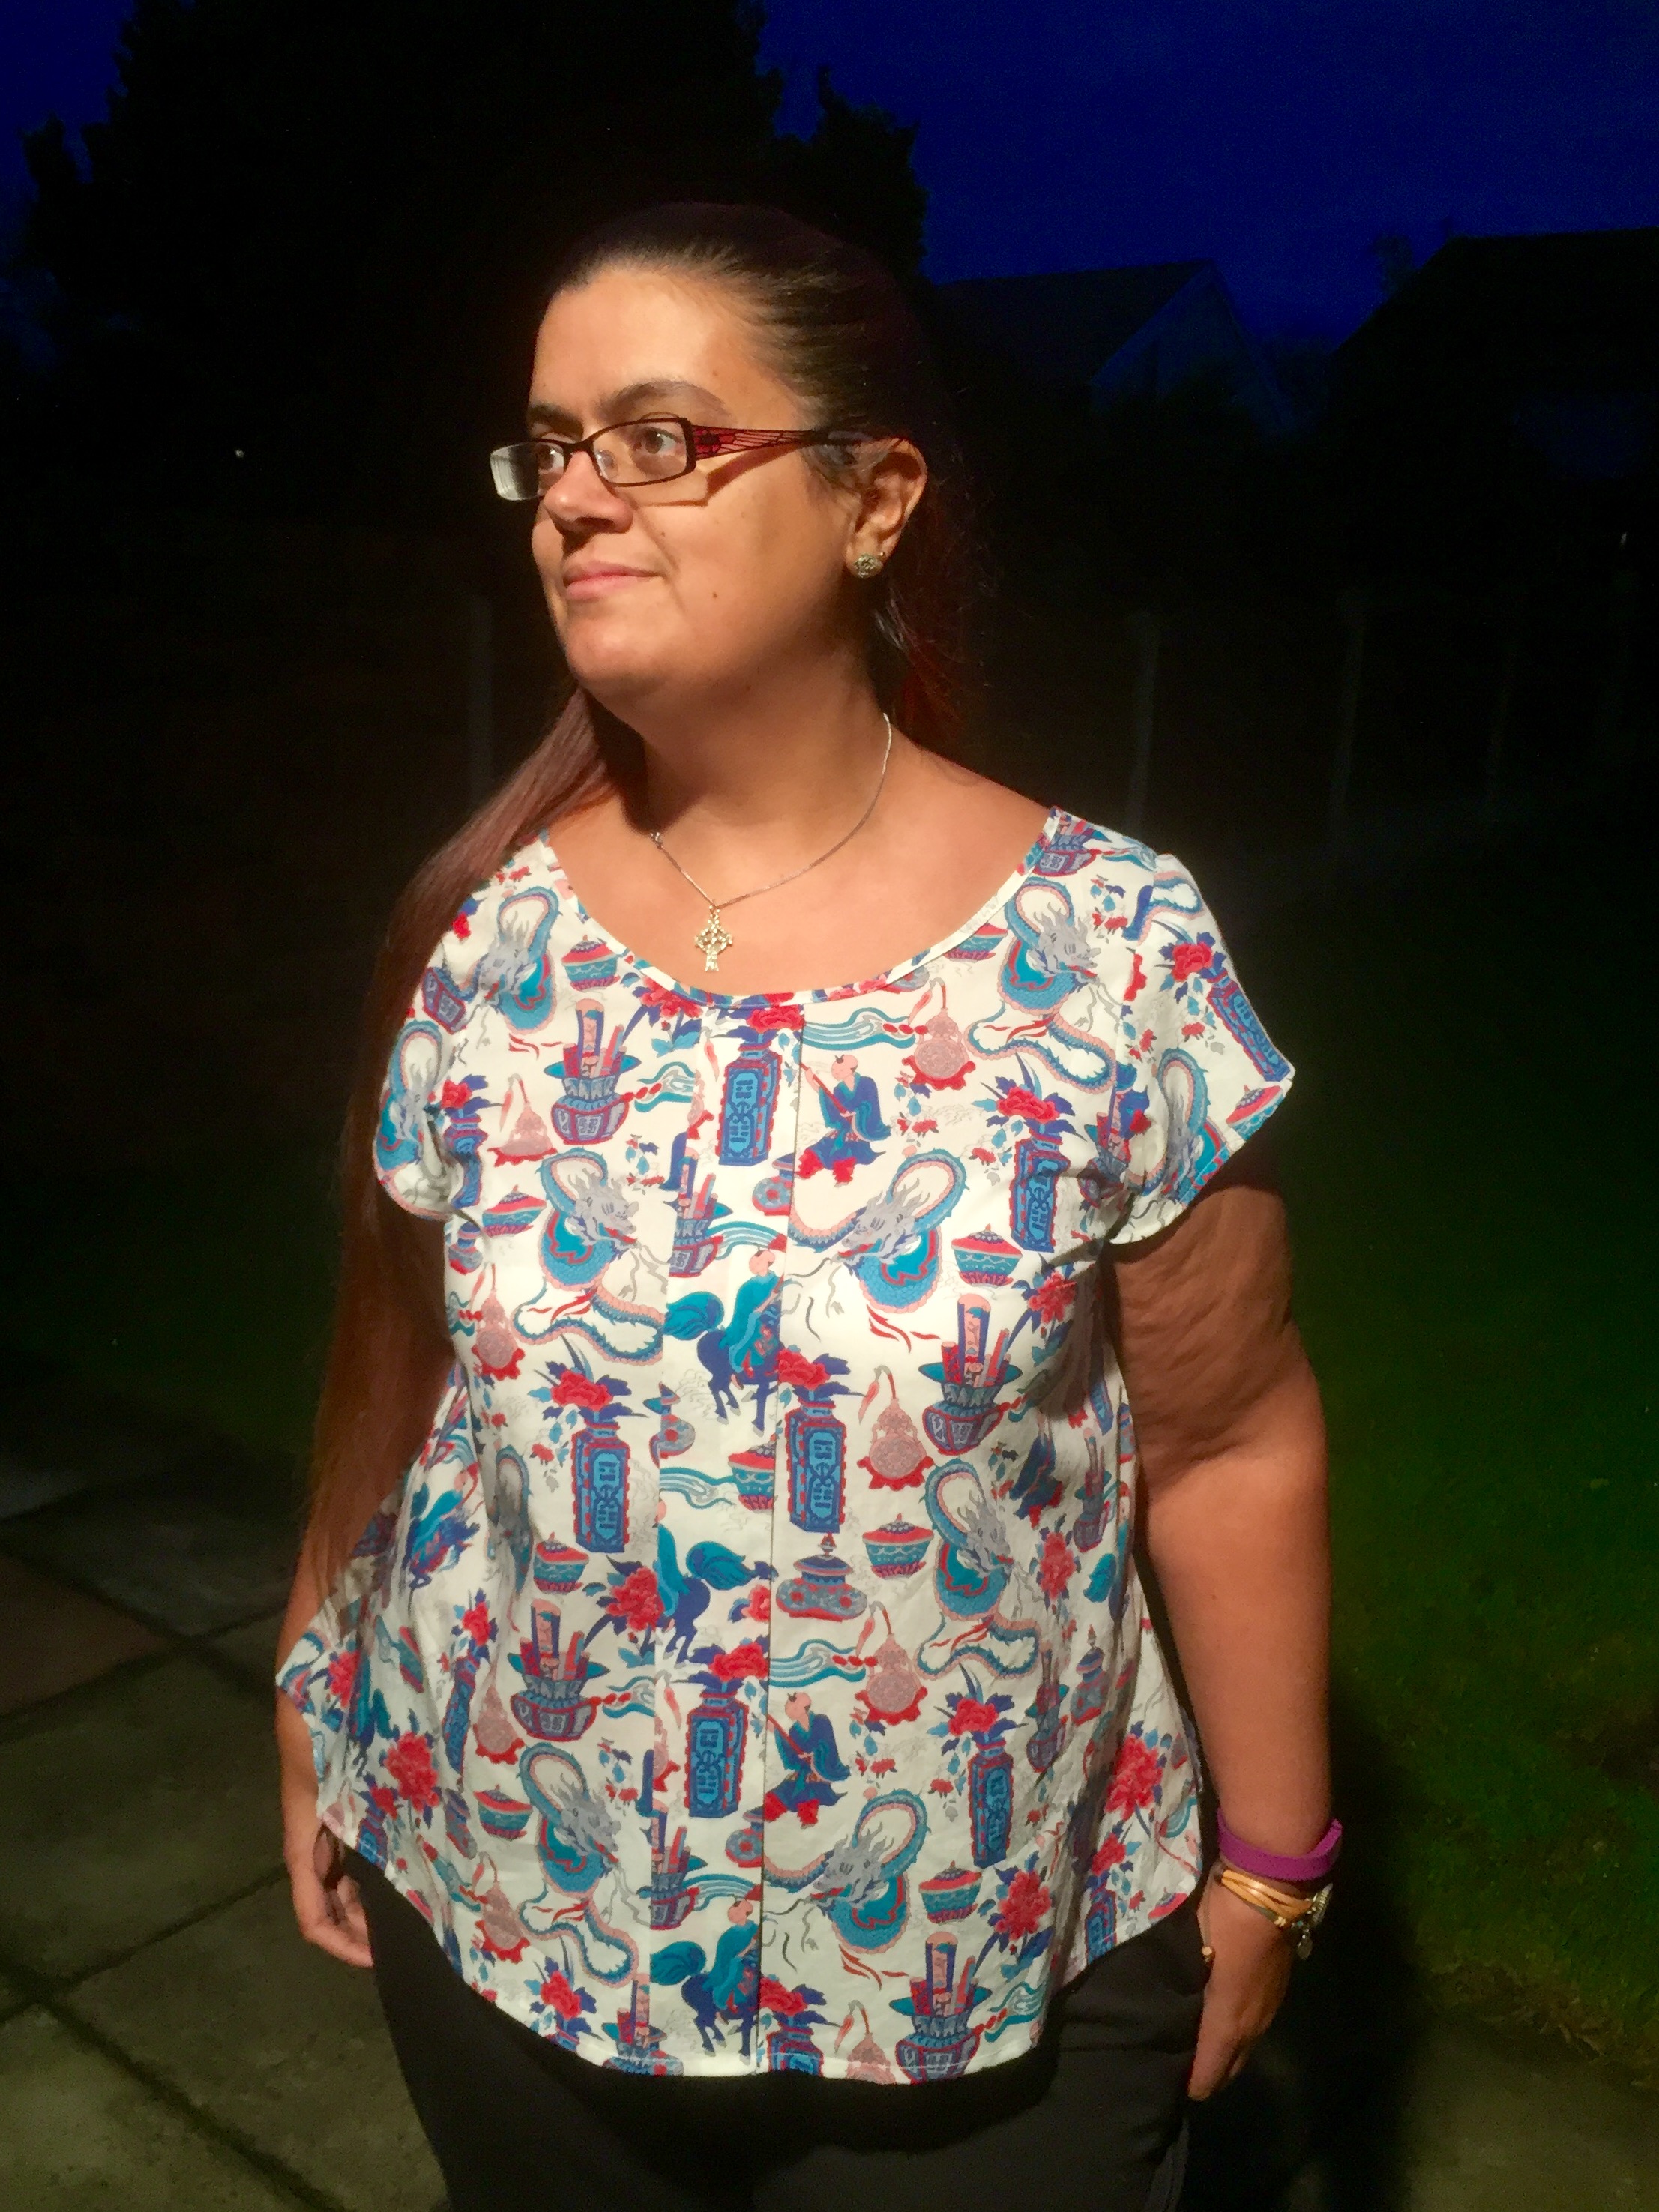
13. Liberty Sorbetto top

As I recently blogged about Abakhan Fabrics have recently had 22,000 meters of clearance Liberty fabrics delivered which they are seling at great prices. I chose to work with the Dragonista tana lawn to make a top and in order to show off the beautiful fabric wanted to pattern that had simple clean lines without too much fuss. Therefore I decided on the Colette Sorbetto pattern. However as I don’t suit loose sleeveless tops at all I chose to add the Sorbetto sleeve pattern by Sew Incidentally and then made a few alterations to the pattern to fit and suit me better. More info is available on the blog post I wrote about it here
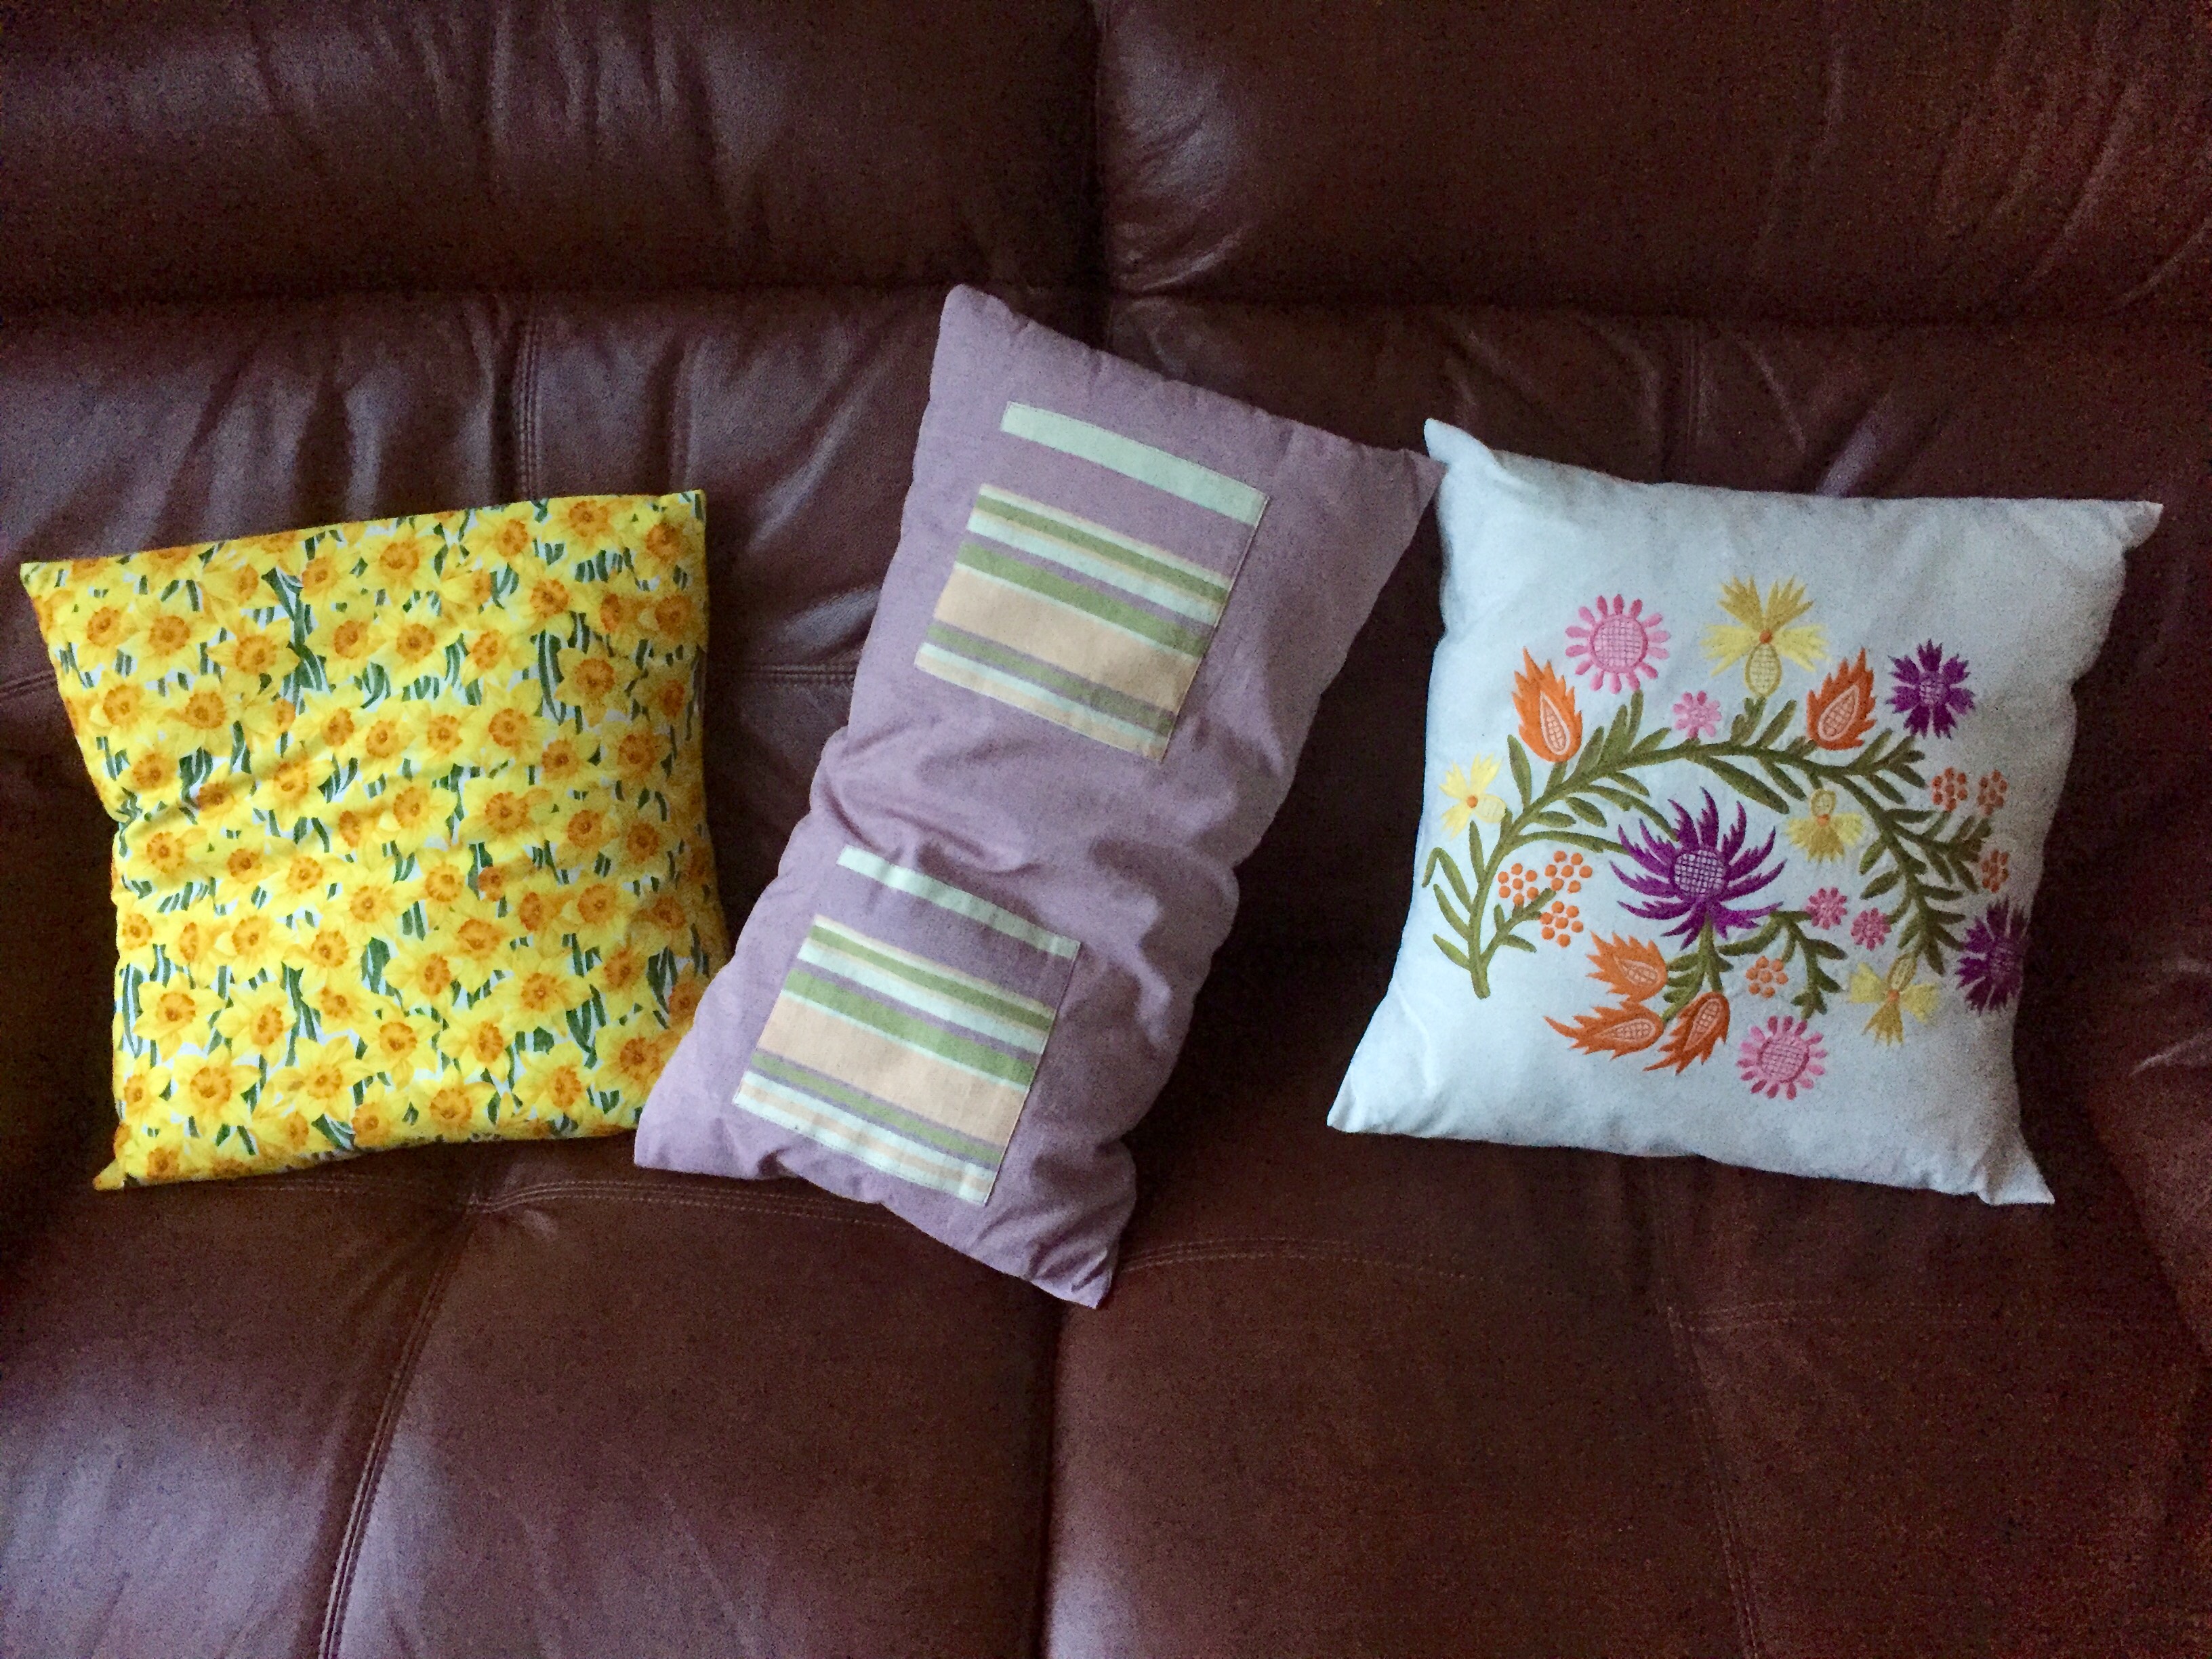
14. 3 quick cushion covers
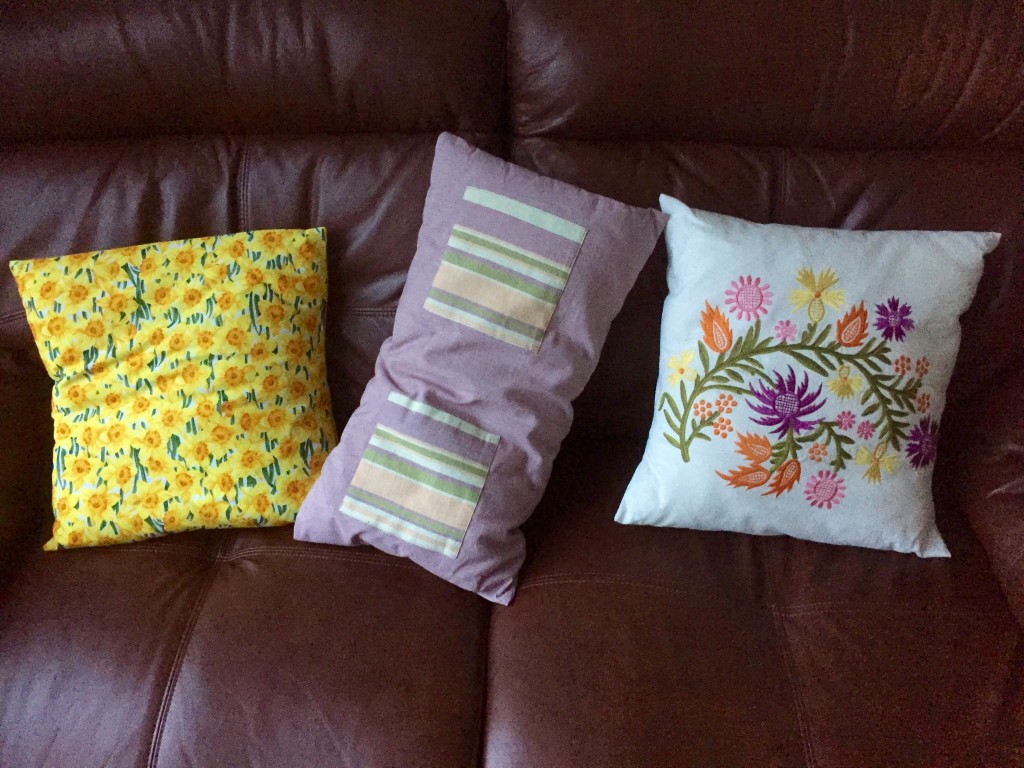
I decided to sell off some of my fabric stash recently at my church’s Christmas Market. SO I made some samples of quick & easy cushion covers to make. I used this tutorial from The Happy Housie for the 1 piece envelope cushions – the purple rectangular one & the embroidered cushion. I then used this tutorial from The Wonder Forest to make the yellow daffodil envelope cushion as it has different fabric on the back and front.
15. Liberty infinity scarf
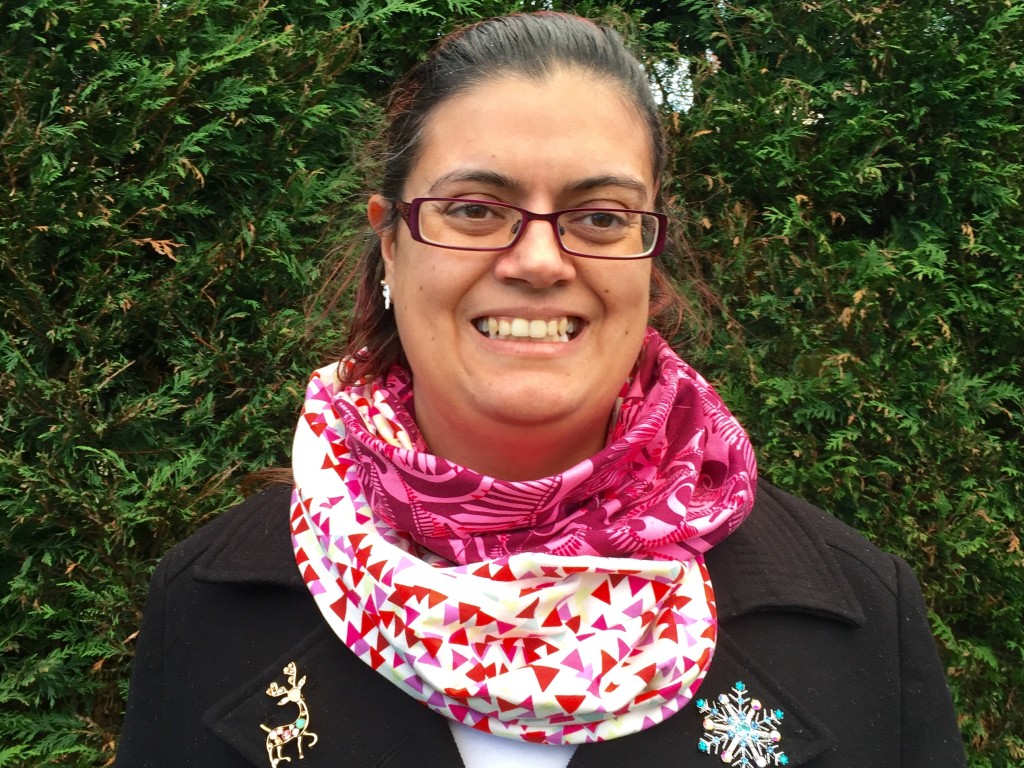
Abakhan Fabrics then received even more clearance Liberty fabric in, this time including the tana jersey. I chose to work with 2 of these coordinating jerseys to make this snuggly infinity scarf, which I’ve blogged about here previously. It’s a great fabric to work with and very warm and comfy scarf to wear.
16. Christmas day top

I saw this red jersey with little green and white polka dots on in Abakhan many years ago when i was pretty new to sewing and it just called out Christmas Day top to me, so that’s what I started making. I liked the look of this Retro Top pattern on the Burda Style website, so decided to give it ago using that. Unfortunately the pattern is only available in a size 12, so I had to try my hand at drafting it up to a much larger size, which turned out not too bad. However I didn’t mange to complete it in time for Christmas that year and completely forgot about it until i found it again a few months ago! However in the meantime I’ve lost almost 2.5 stone, so it was rather large on me! With the help of my friends at Liverpool Sewing Club I decided that rather than trying to take the side seams in I’d add waist darts at the front and back, giving it a more fitted look but also leaves enough room for Christmas dinner! 🙂
Here’s to a great, sewing filled 2016!
Happy New Year
1 Comment
The first ever Liverpool MakeFest was held on the 27th June 2015 at Liverpool Central Library and as most of you will be aware I run Liverpool Sewing Club. I therefore decided it would be good fun to get involved and to have a stall there. So what is Liverpool MakeFest?
Liverpool MakeFest is a FREE family friendly festival for all ages celebrating all things ‘makey’ in the north-west, showcasing things people have made, projects people are working on, inventions, gadgets and hands-on activities including, coding, hacking workshops and demonstrations.
It’s a place to see how science, technology, engineering, arts and crafts are shaping our world… a place to get you thinking and learning about cool stuff you could make yourself!
Sounds like fun doesn’t it? I decided that instead of just showing off what the members of Liverpool Sewing Club have made it would be great to show others that despite what they might think, sewing isn’t scary and anyone can give it a go! A few years ago I had a stall at OggCamp (the biggest free software and free culture event in the UK) with the same idea of introducing people to sewing. Dan, the OggCamp organiser told me had lots of t-shirts leftover from the previous year’s OggCamp so donated them to me. After some research I discovered the great upcycling idea of converting old t-shirts into bags which is quick, easy and suitable for complete beginners. This worked very well at OggCamp, so I decided to do the same again at MakeFest.

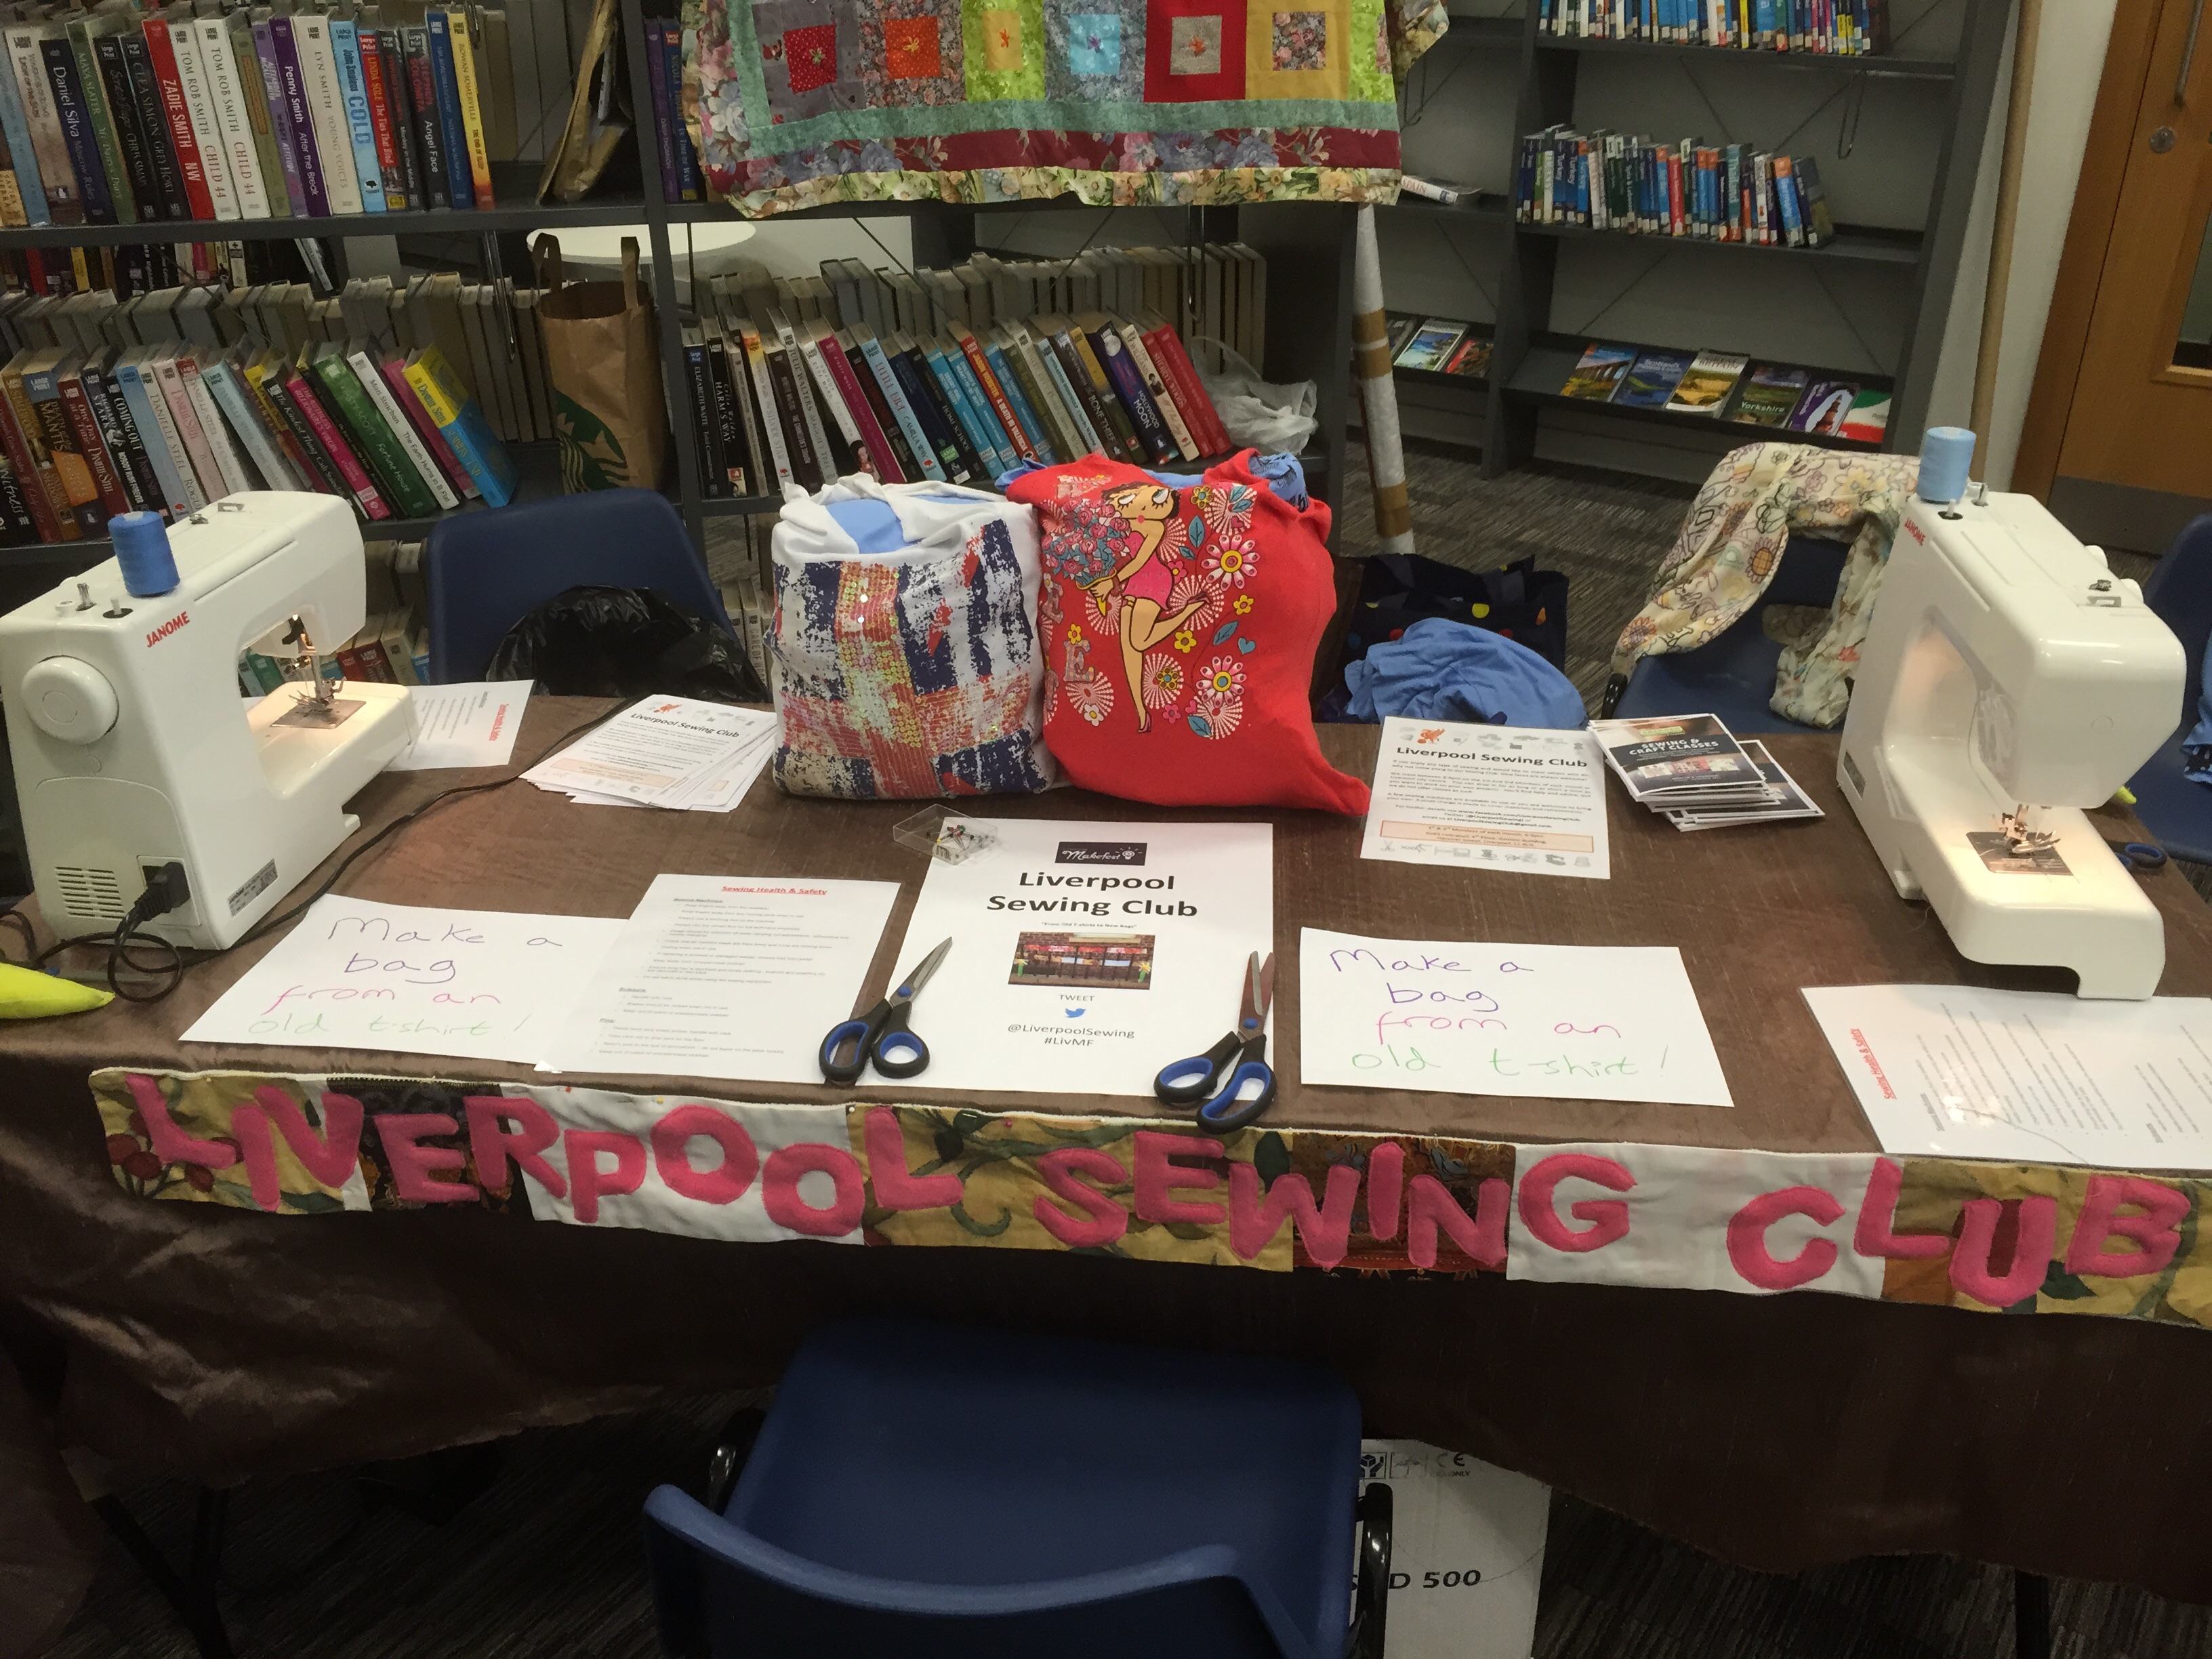
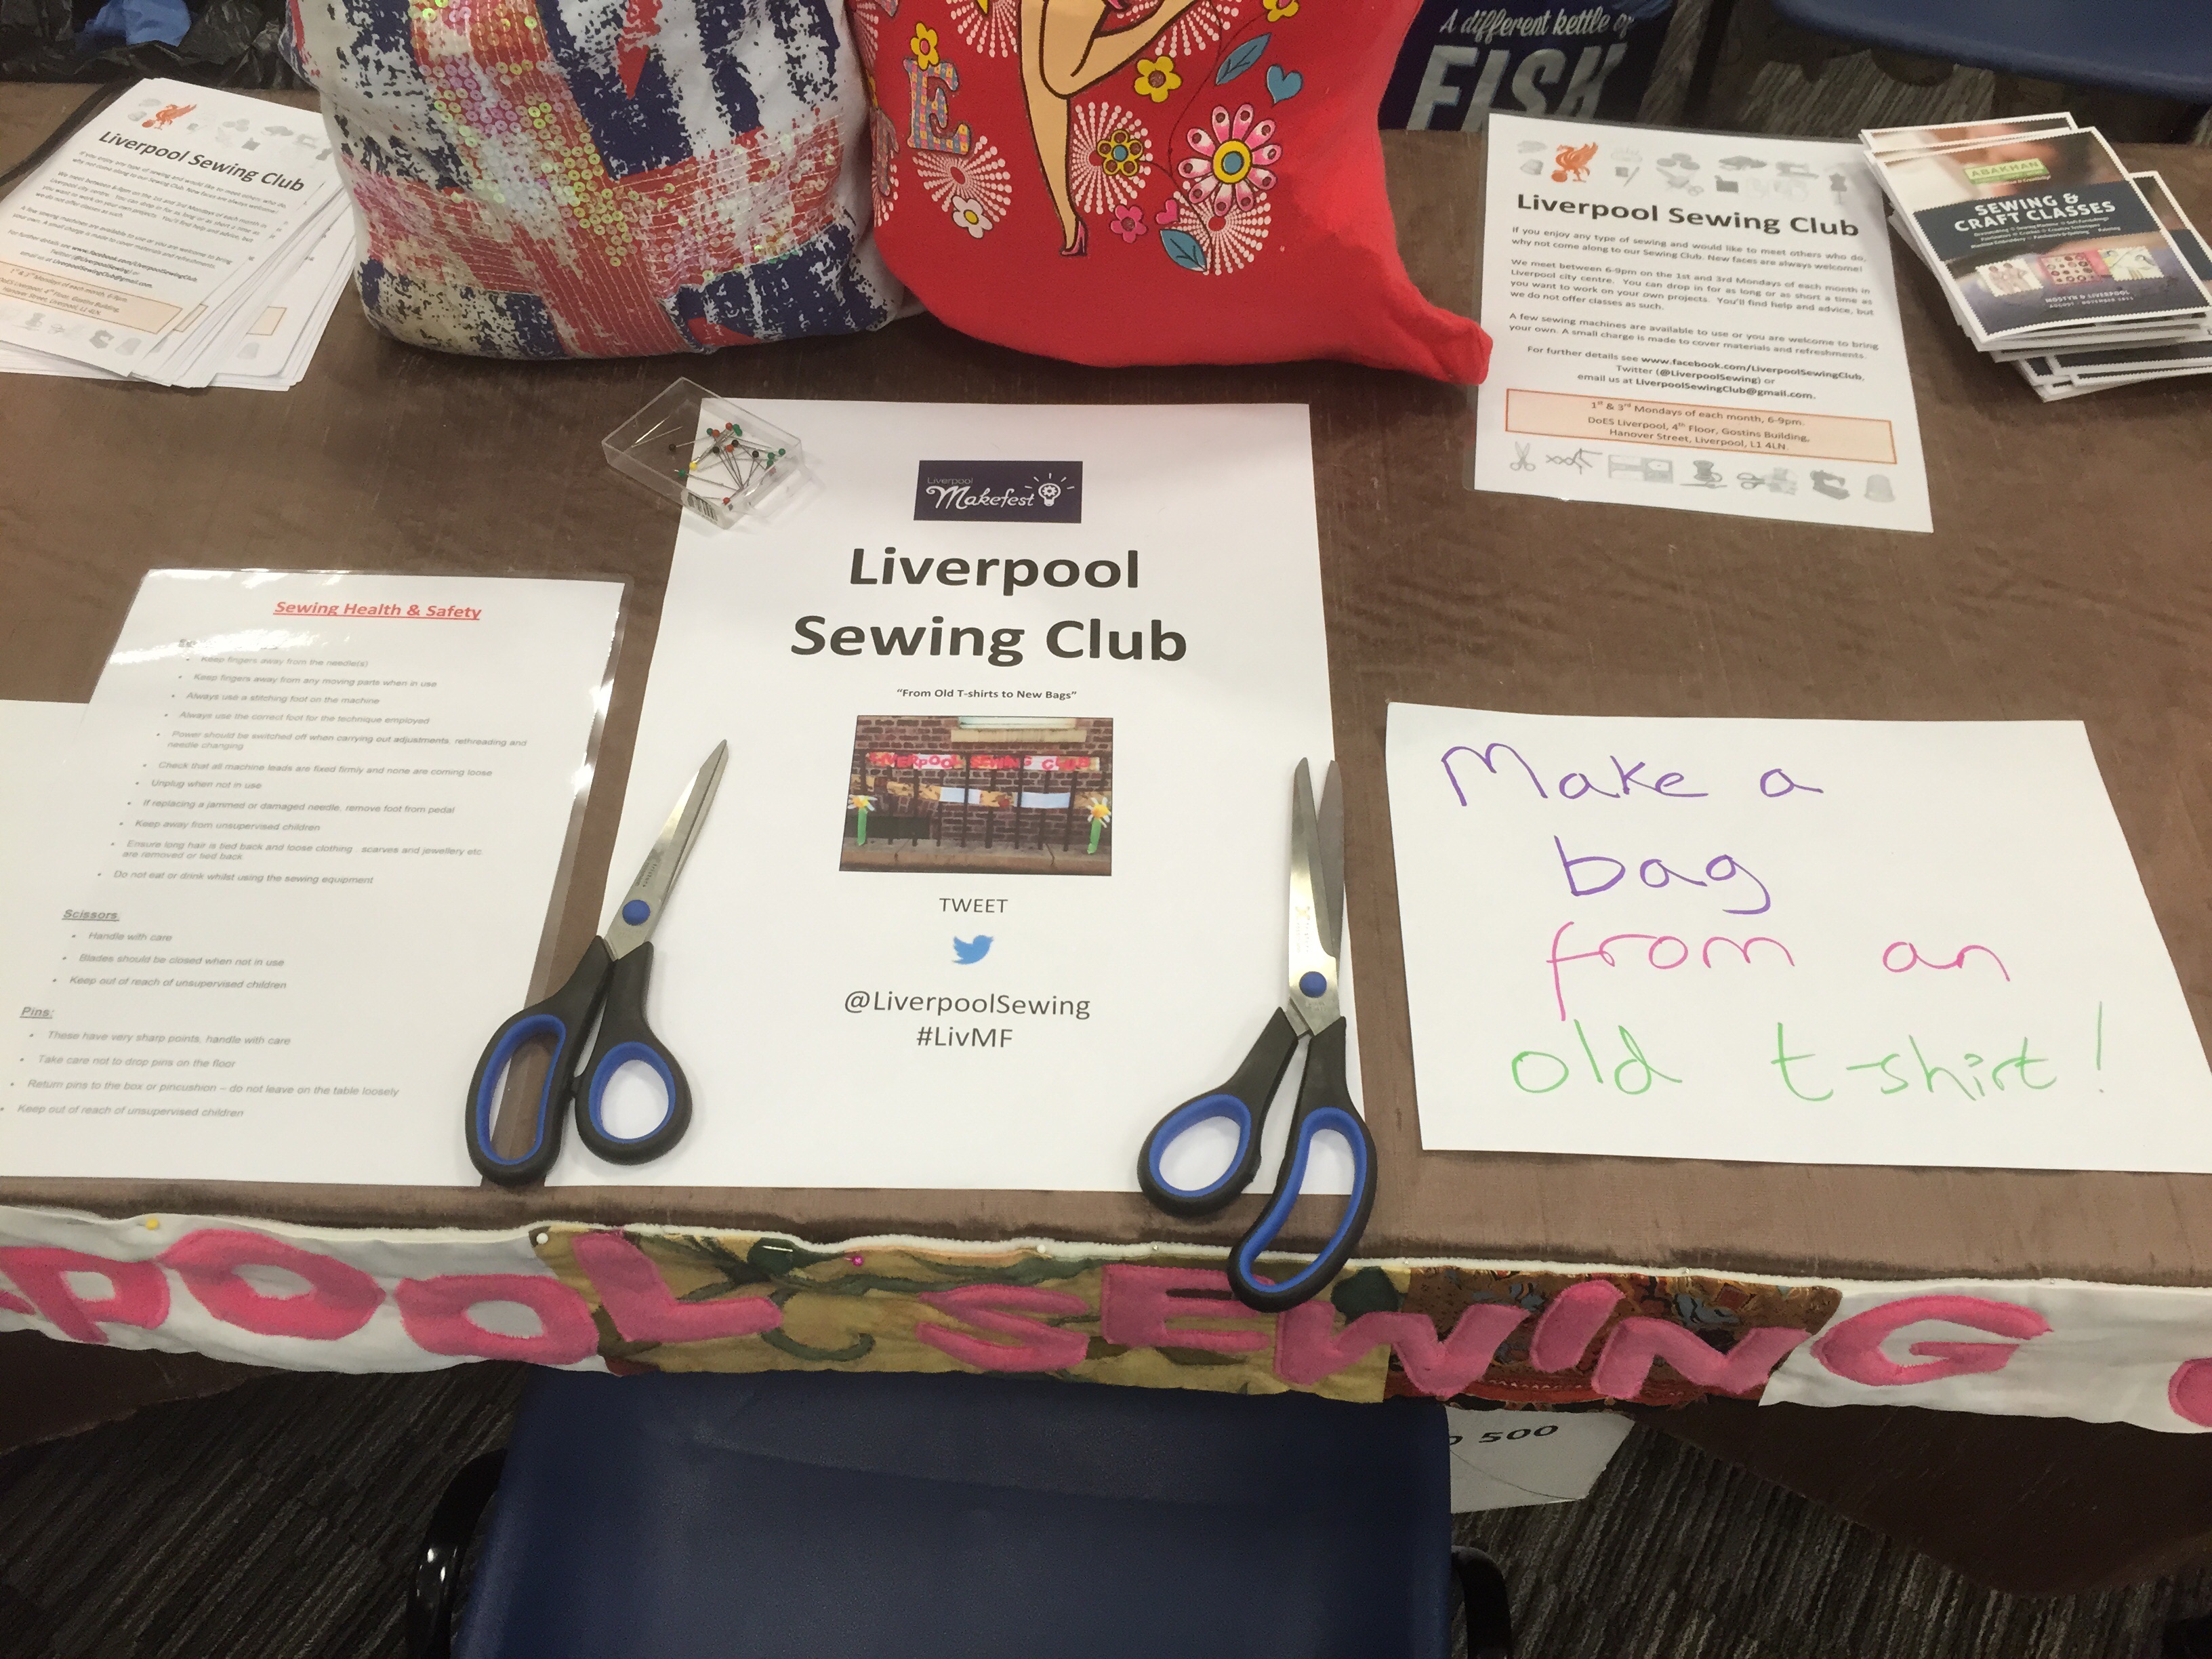
Our stall at Liverpool MakeFest
Having a small table to work with, we setup 2 sewing stations and 1 cutting station, all provided with health and safety information. We also provided leaflets for Liverpool Sewing Club and as we don’t provide sewing classes we also provided copies of the new brochure for the local fabric store Abakhan, who provide a wide range of sewing classes, including those suitable for beginners.

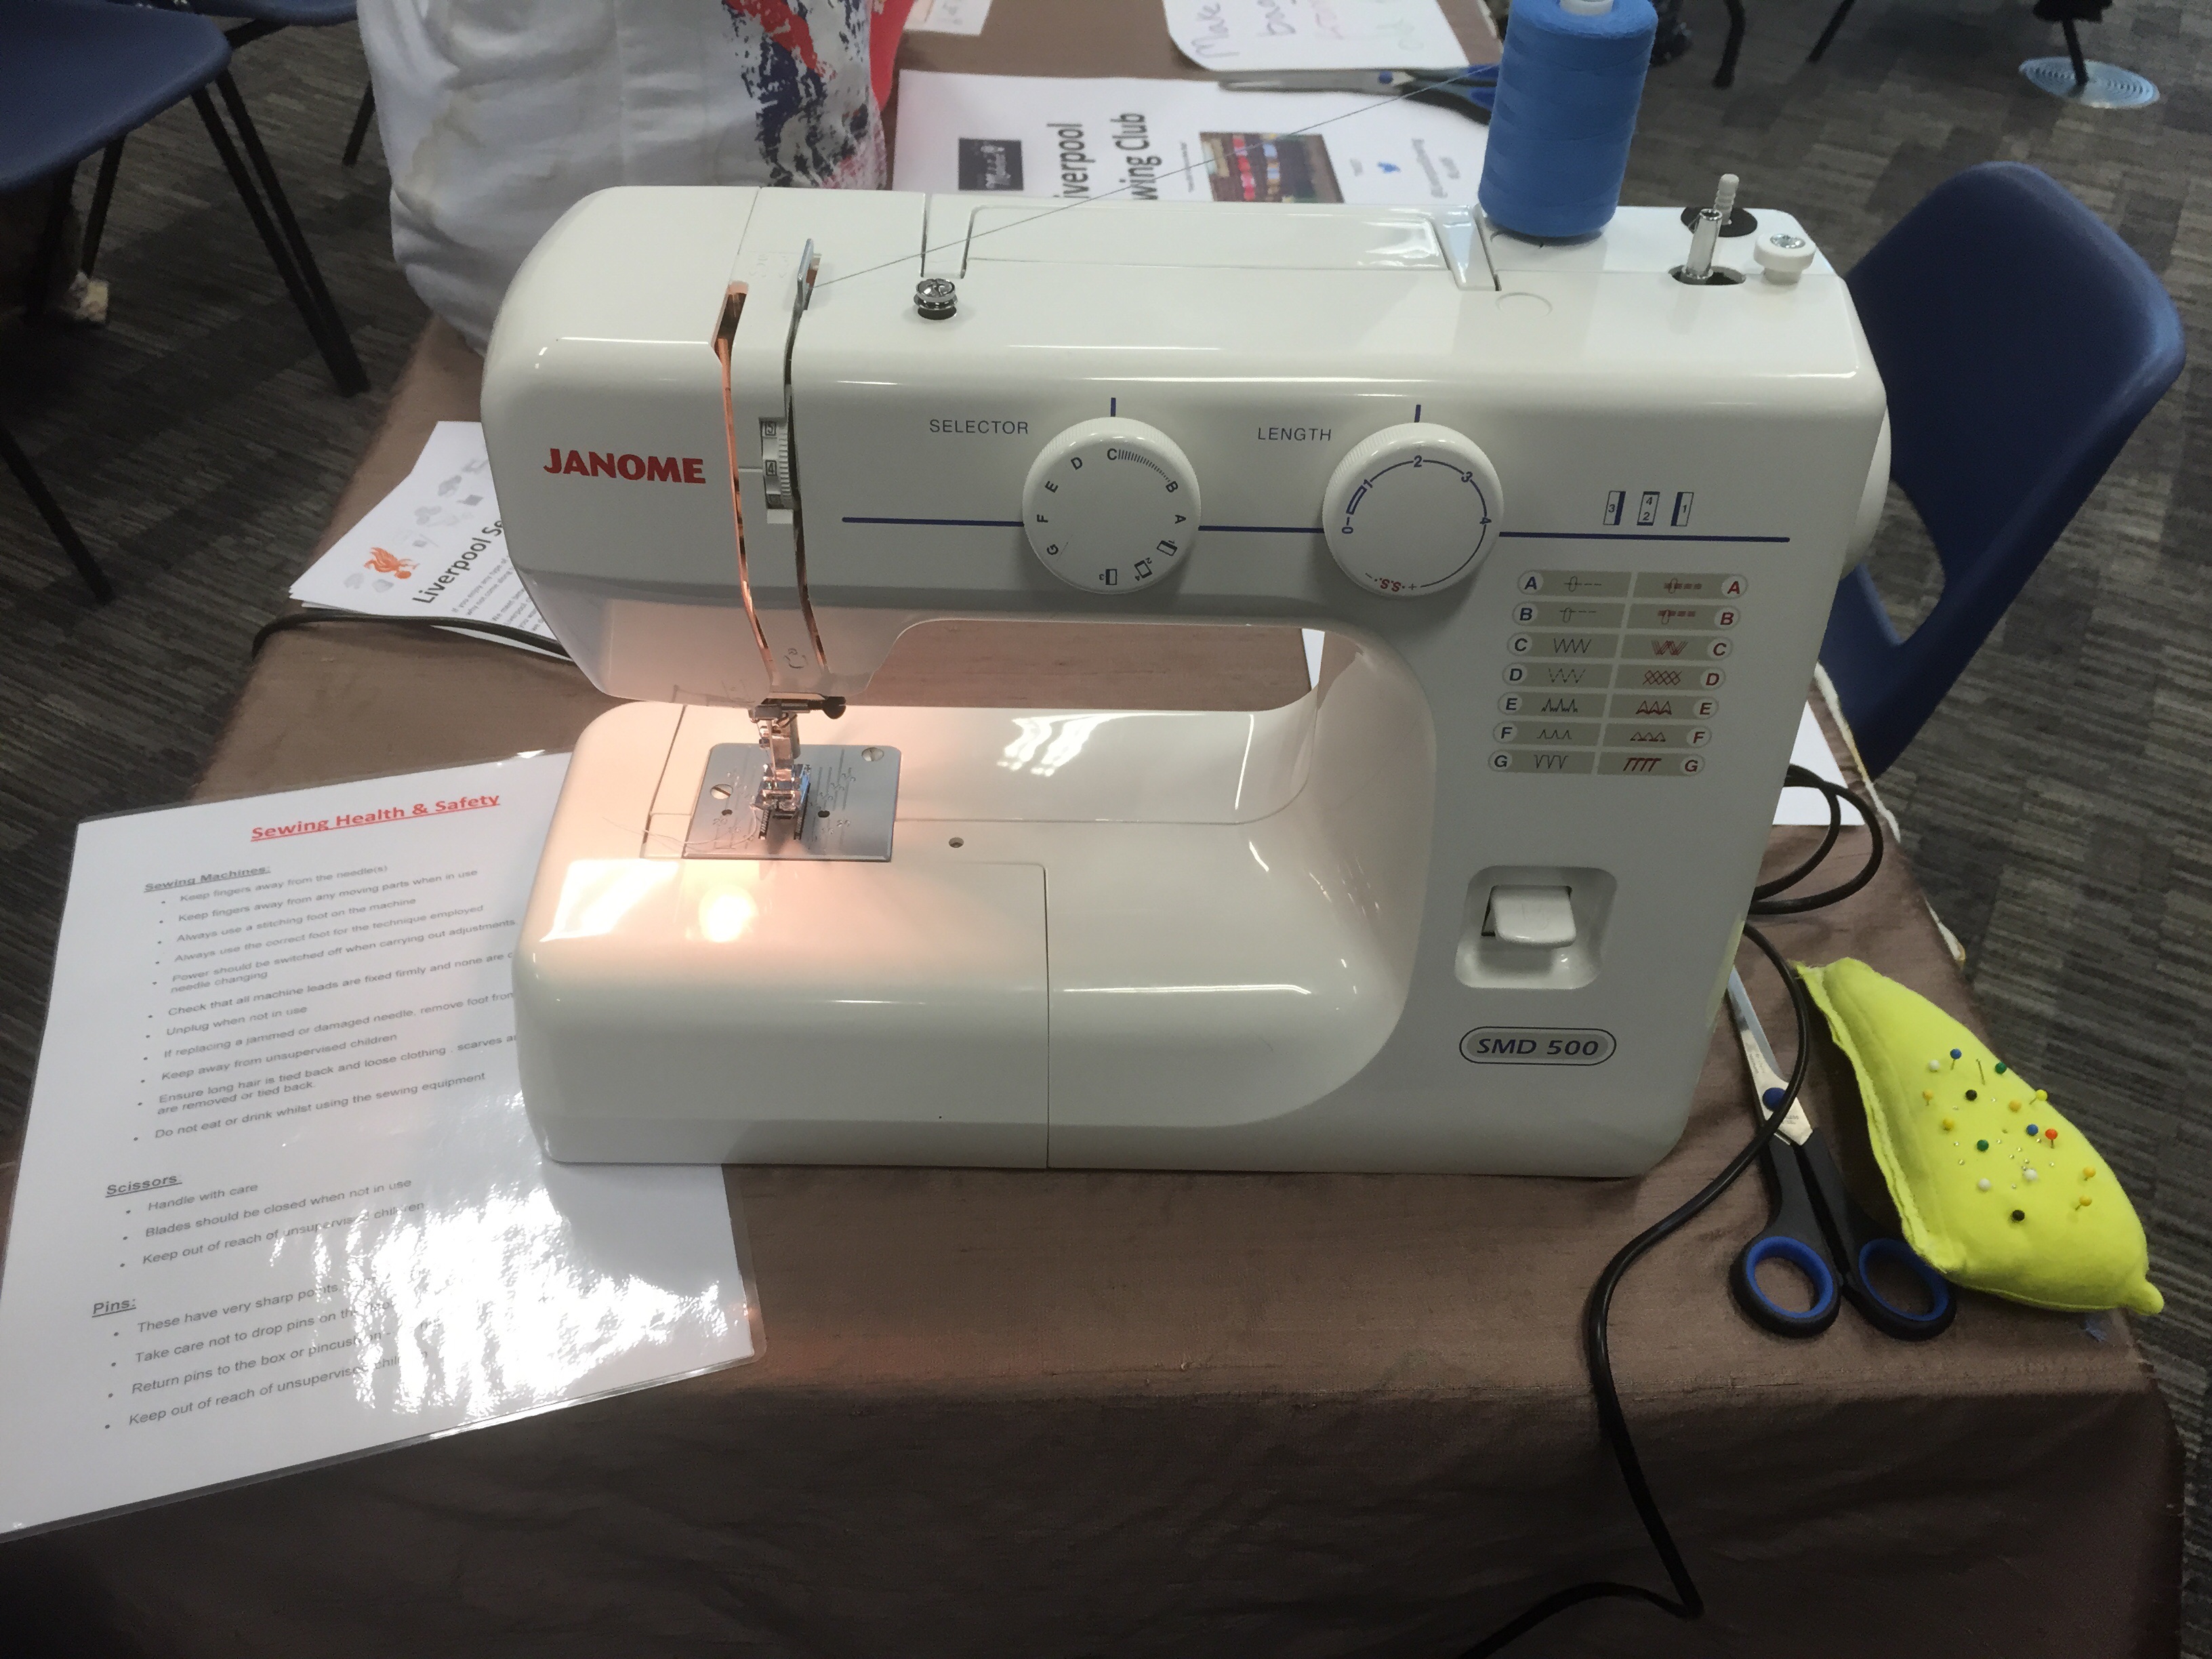
A sewing station

The cutting station
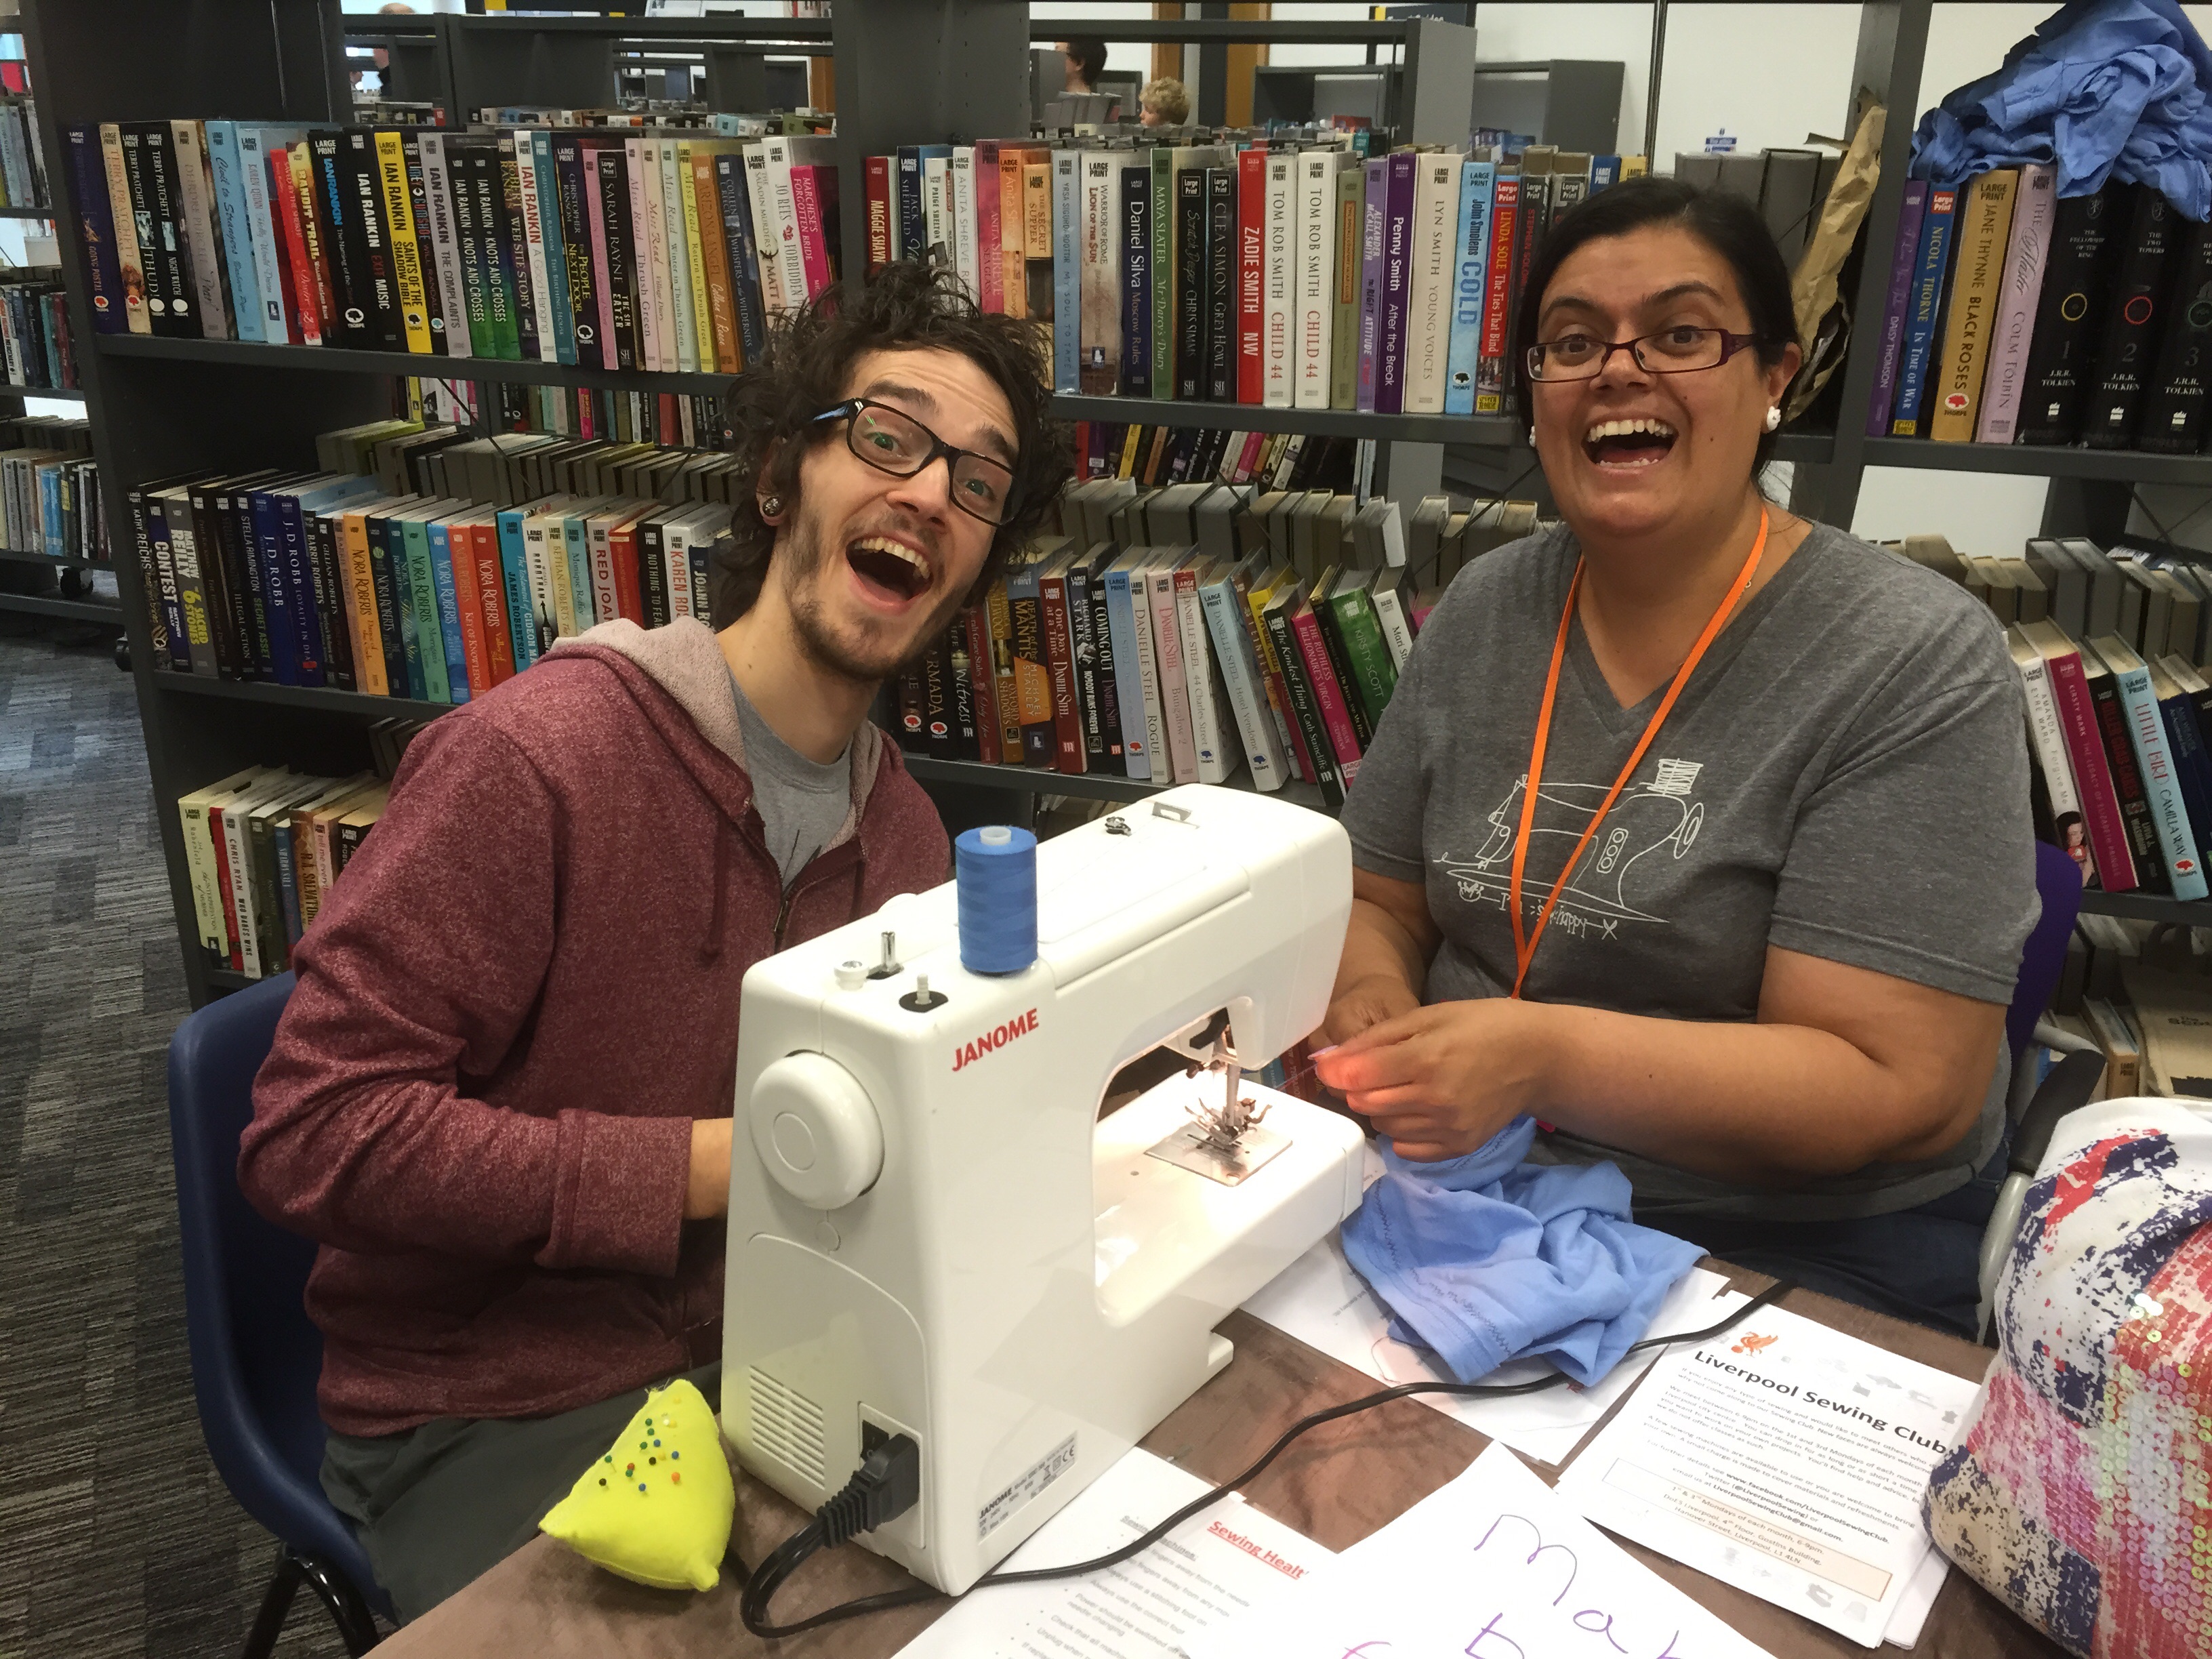
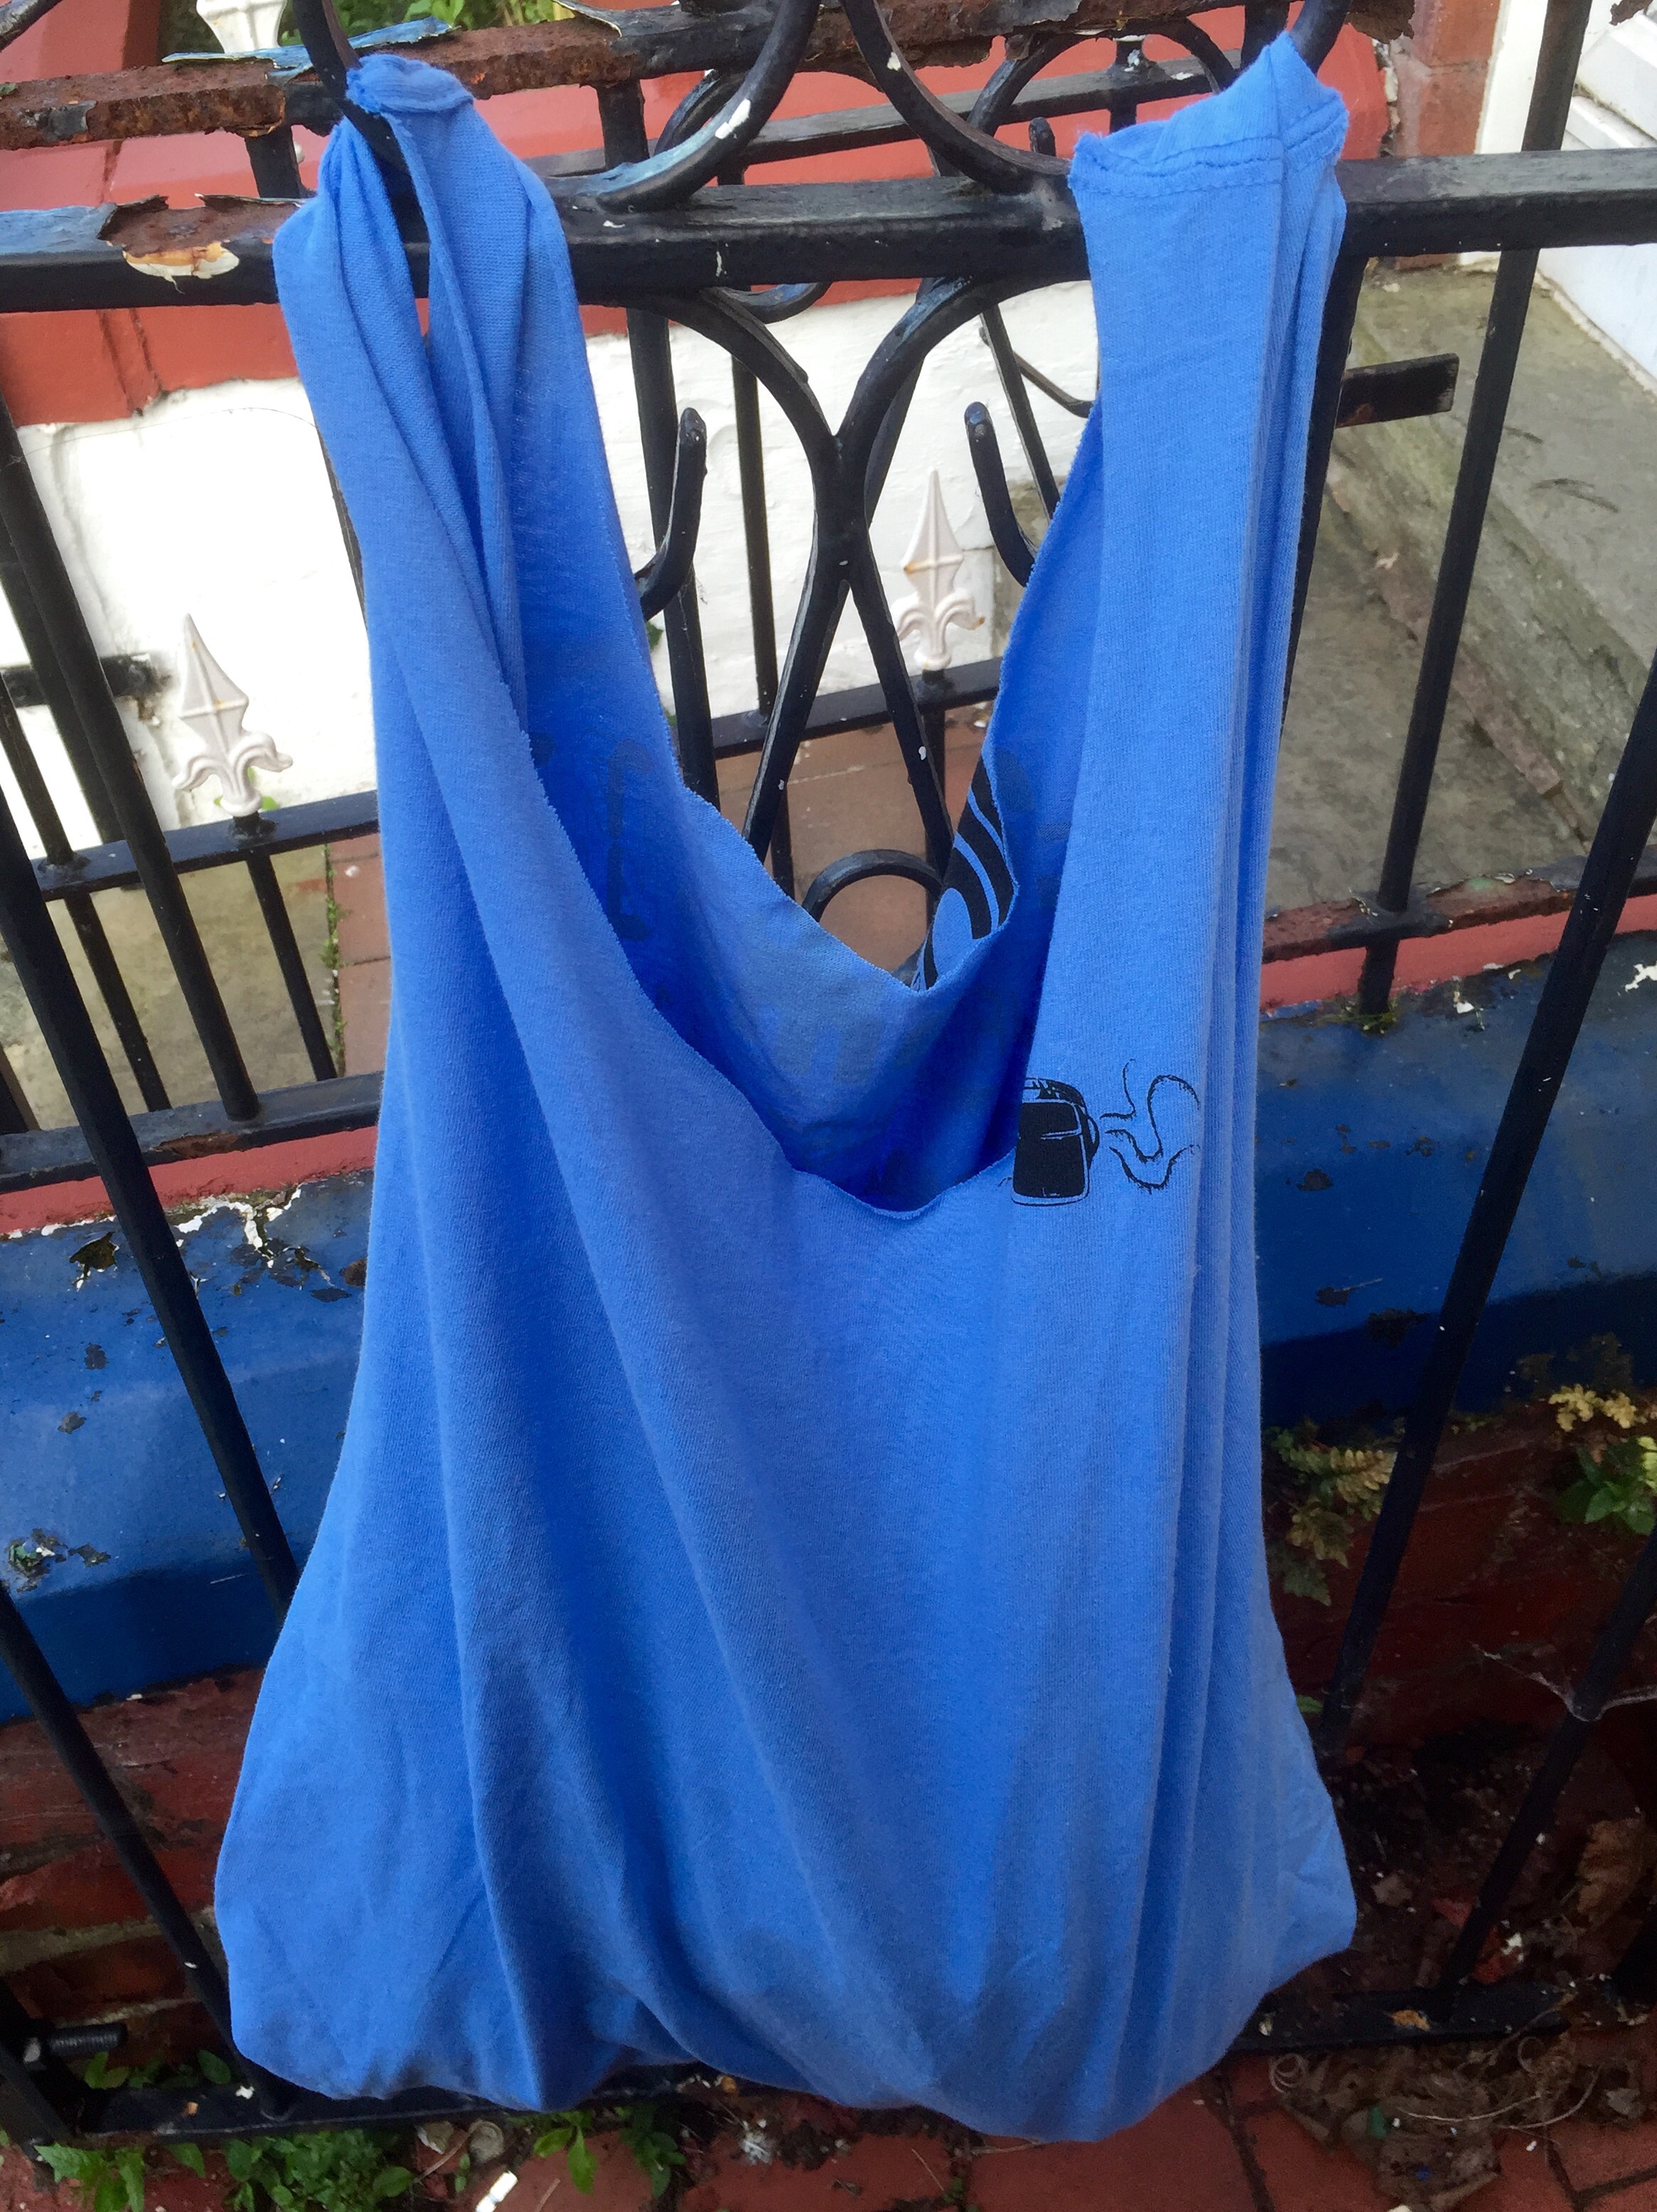
Myself and a number of other lovely ladies from Liverpool Sewing Club then spent the day helping people to turn the leftover stash of old t-shirts from OggCamp into new stylish bags, great for a variety of different uses as well as being both environmentally friendly and practical – being t-shirts they roll quite small and can easily be squashed into the bottom of a handbag, ready for all those last minute purchases!
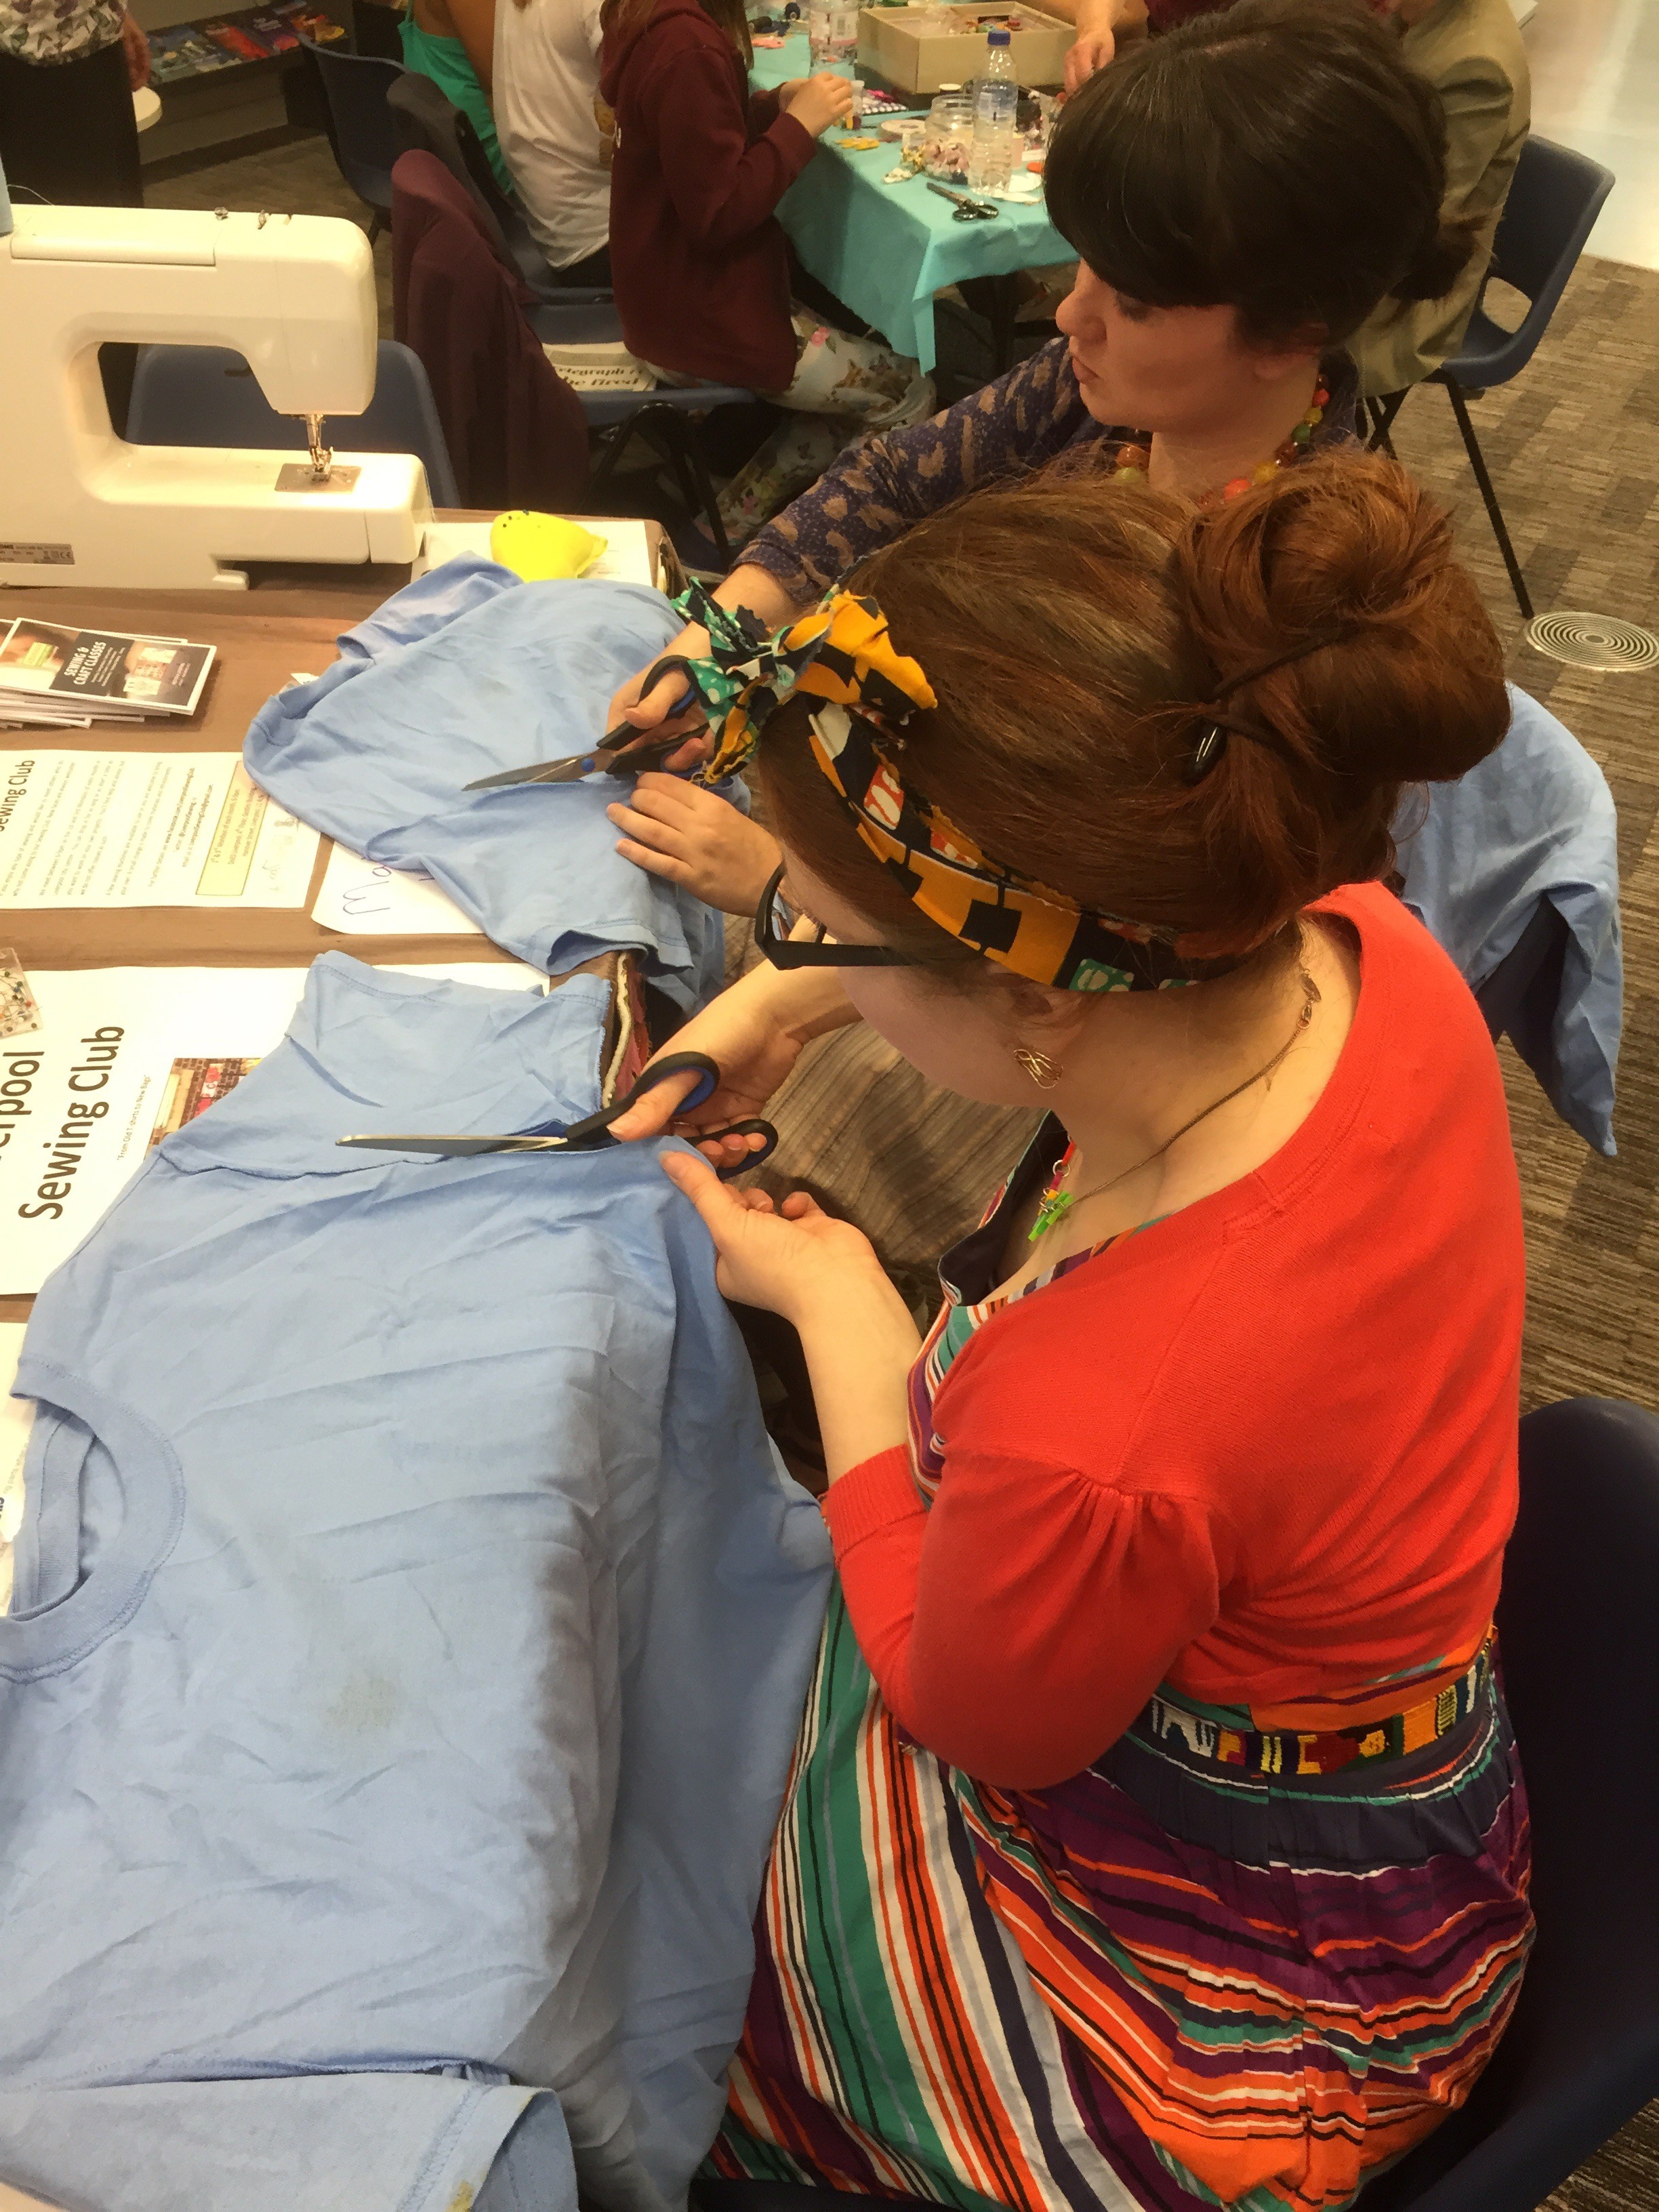
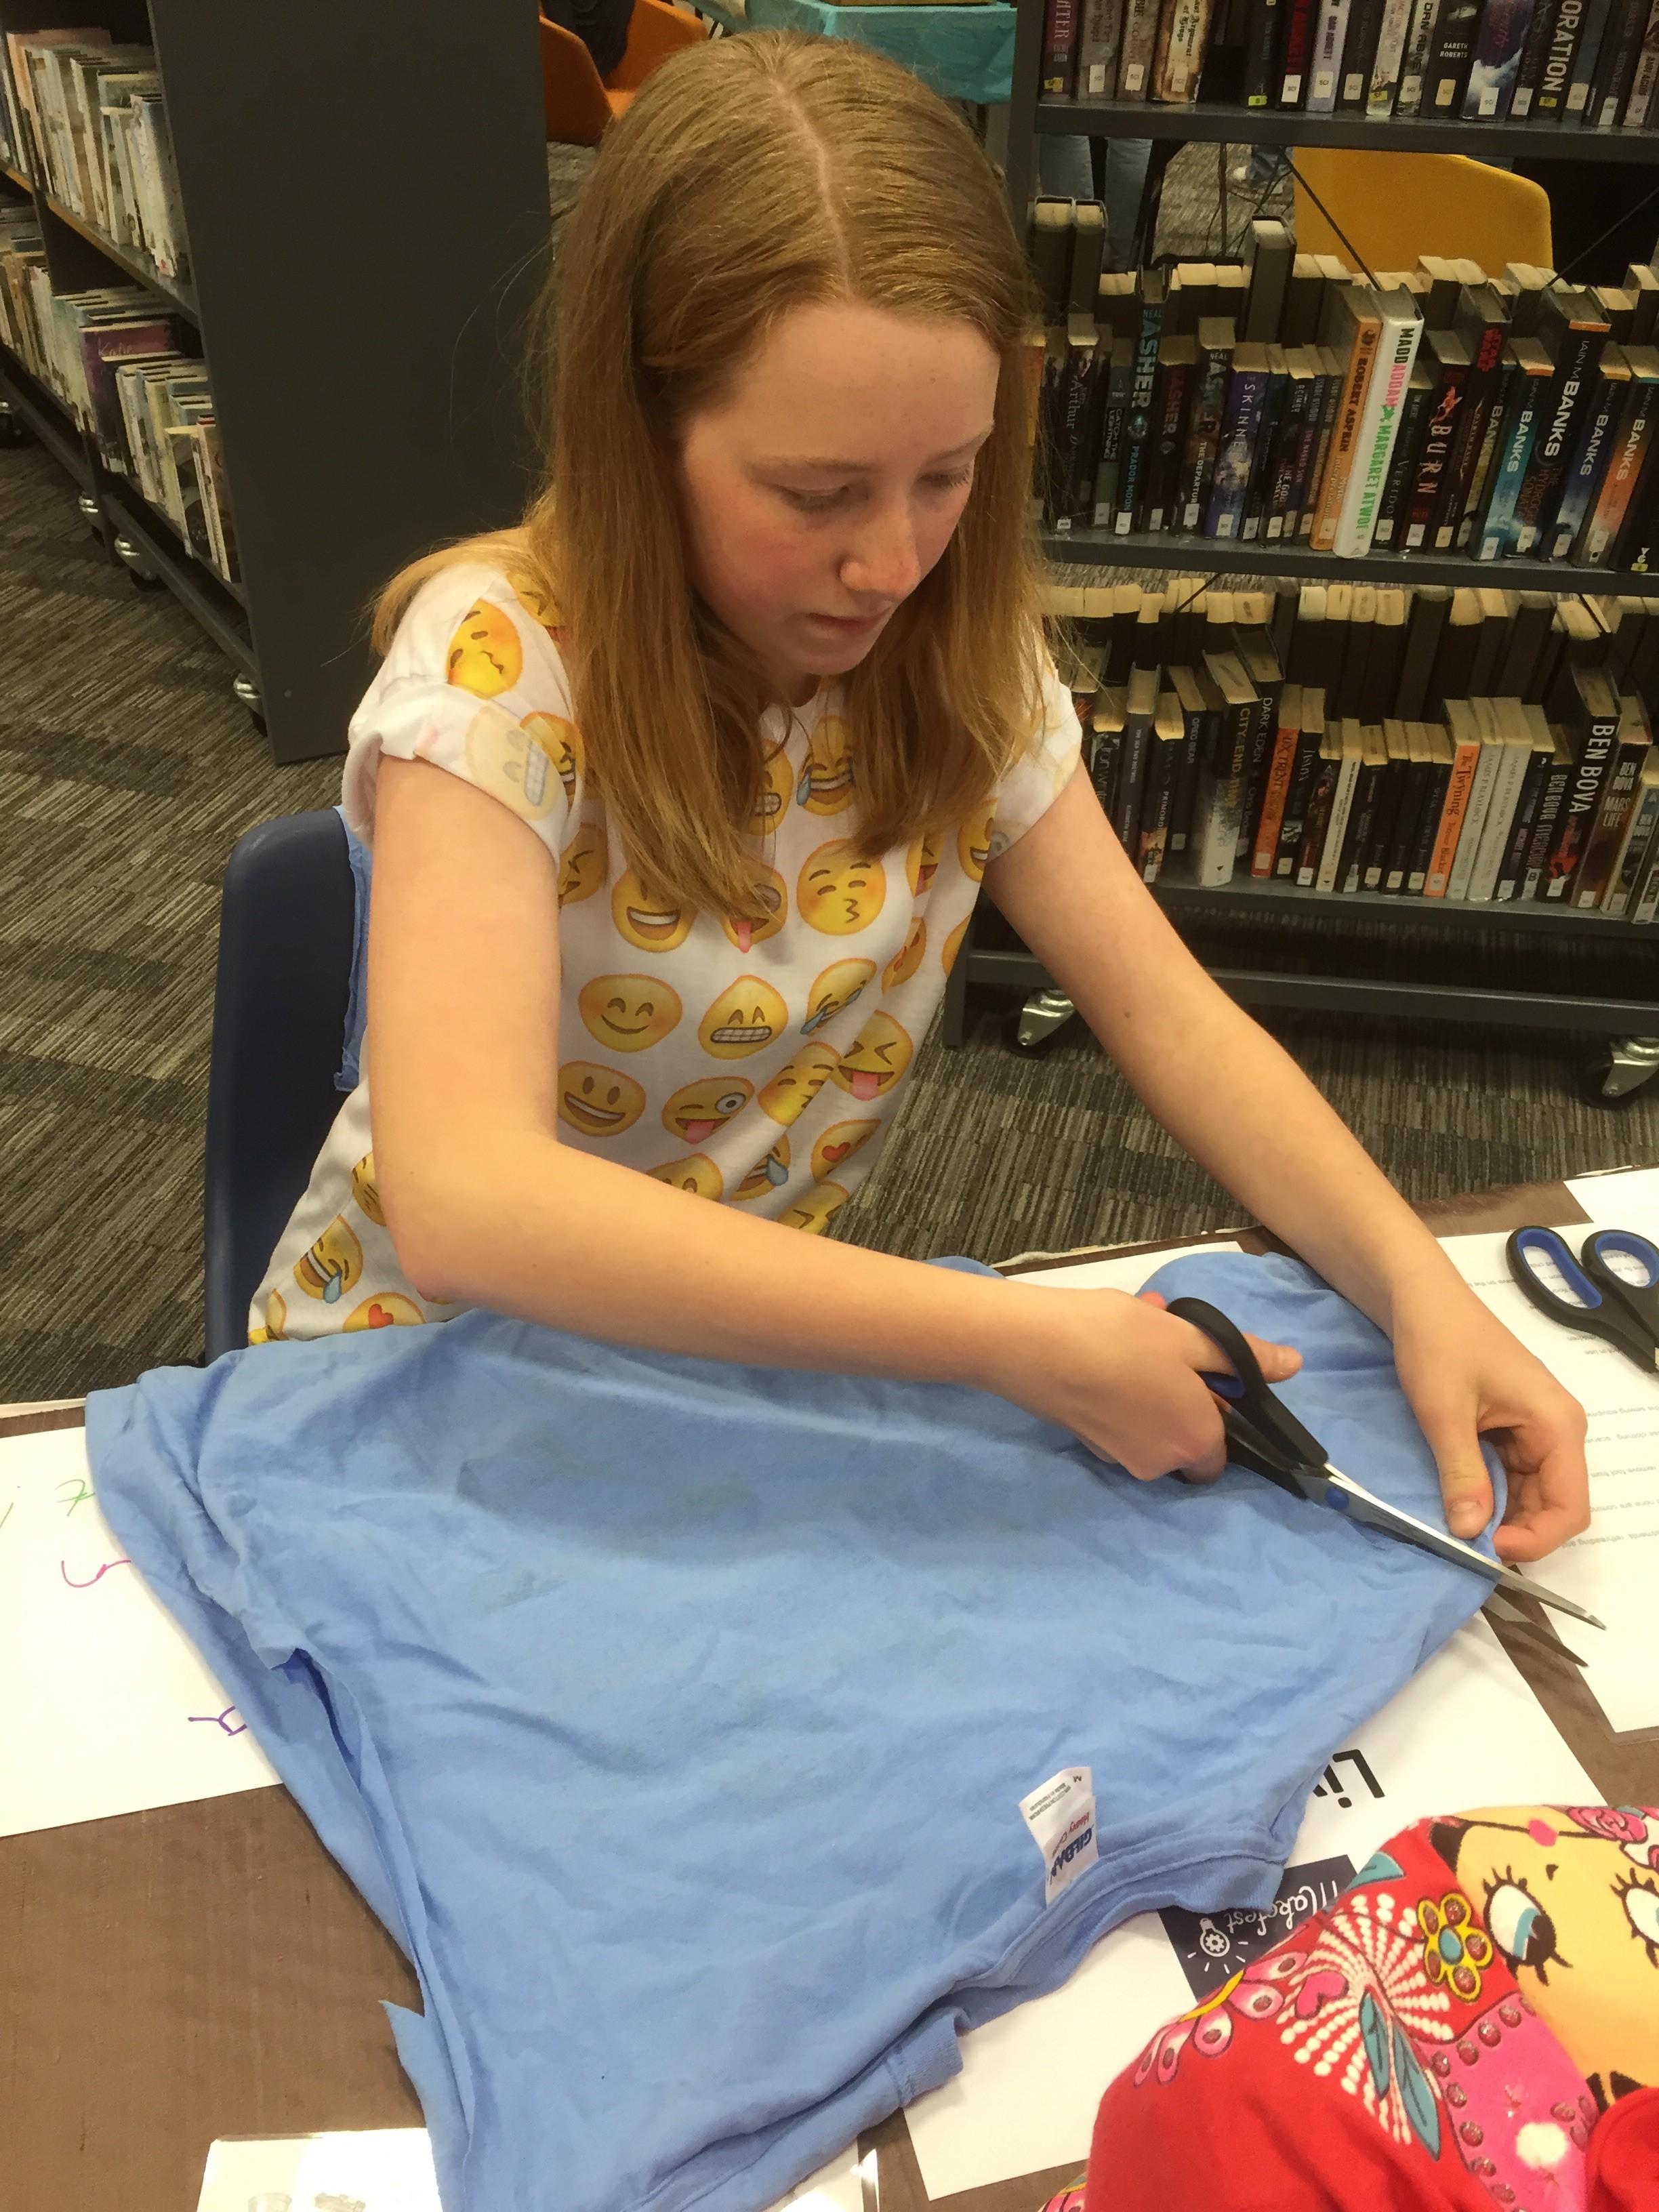
I will blog at a later date with a more in depth tutorial on the process. However the basics are: Firstly, turn the t-shirt inside out, then cut off the sleeves and cut the neckline deeper:

Better get cutting!

Got to cut those sleeves off
Pin the front and back of the t-shirt together so you are ready to sew the bottom of your bag together:
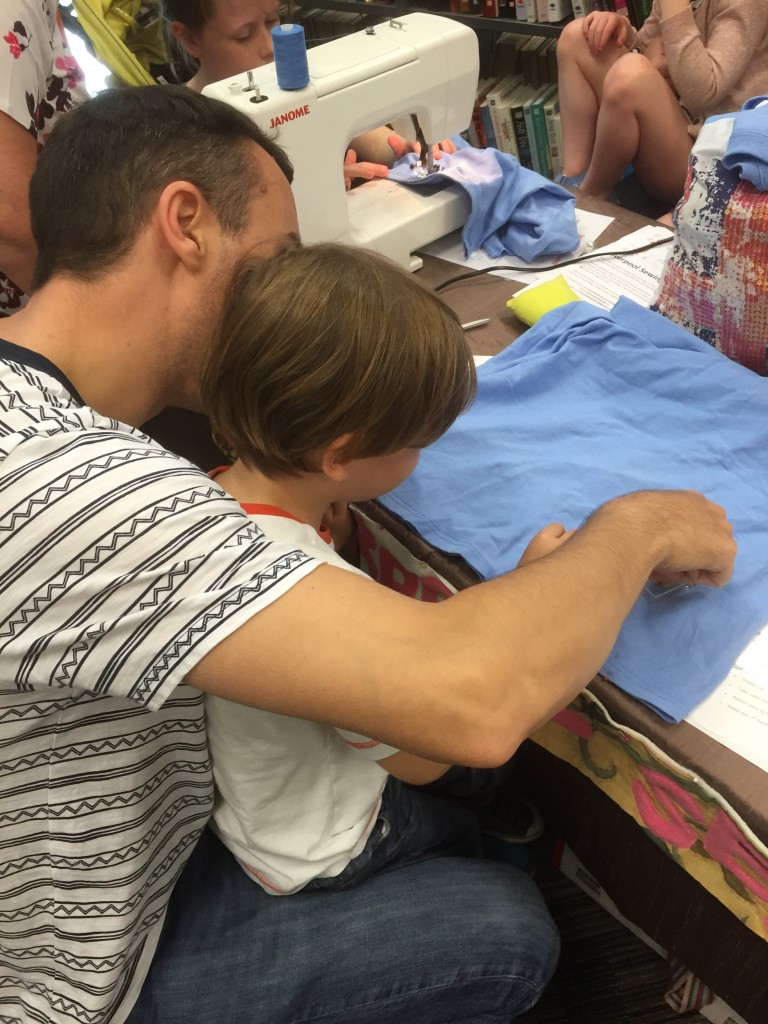
A dad & his lad pinning the bottom of the bag together
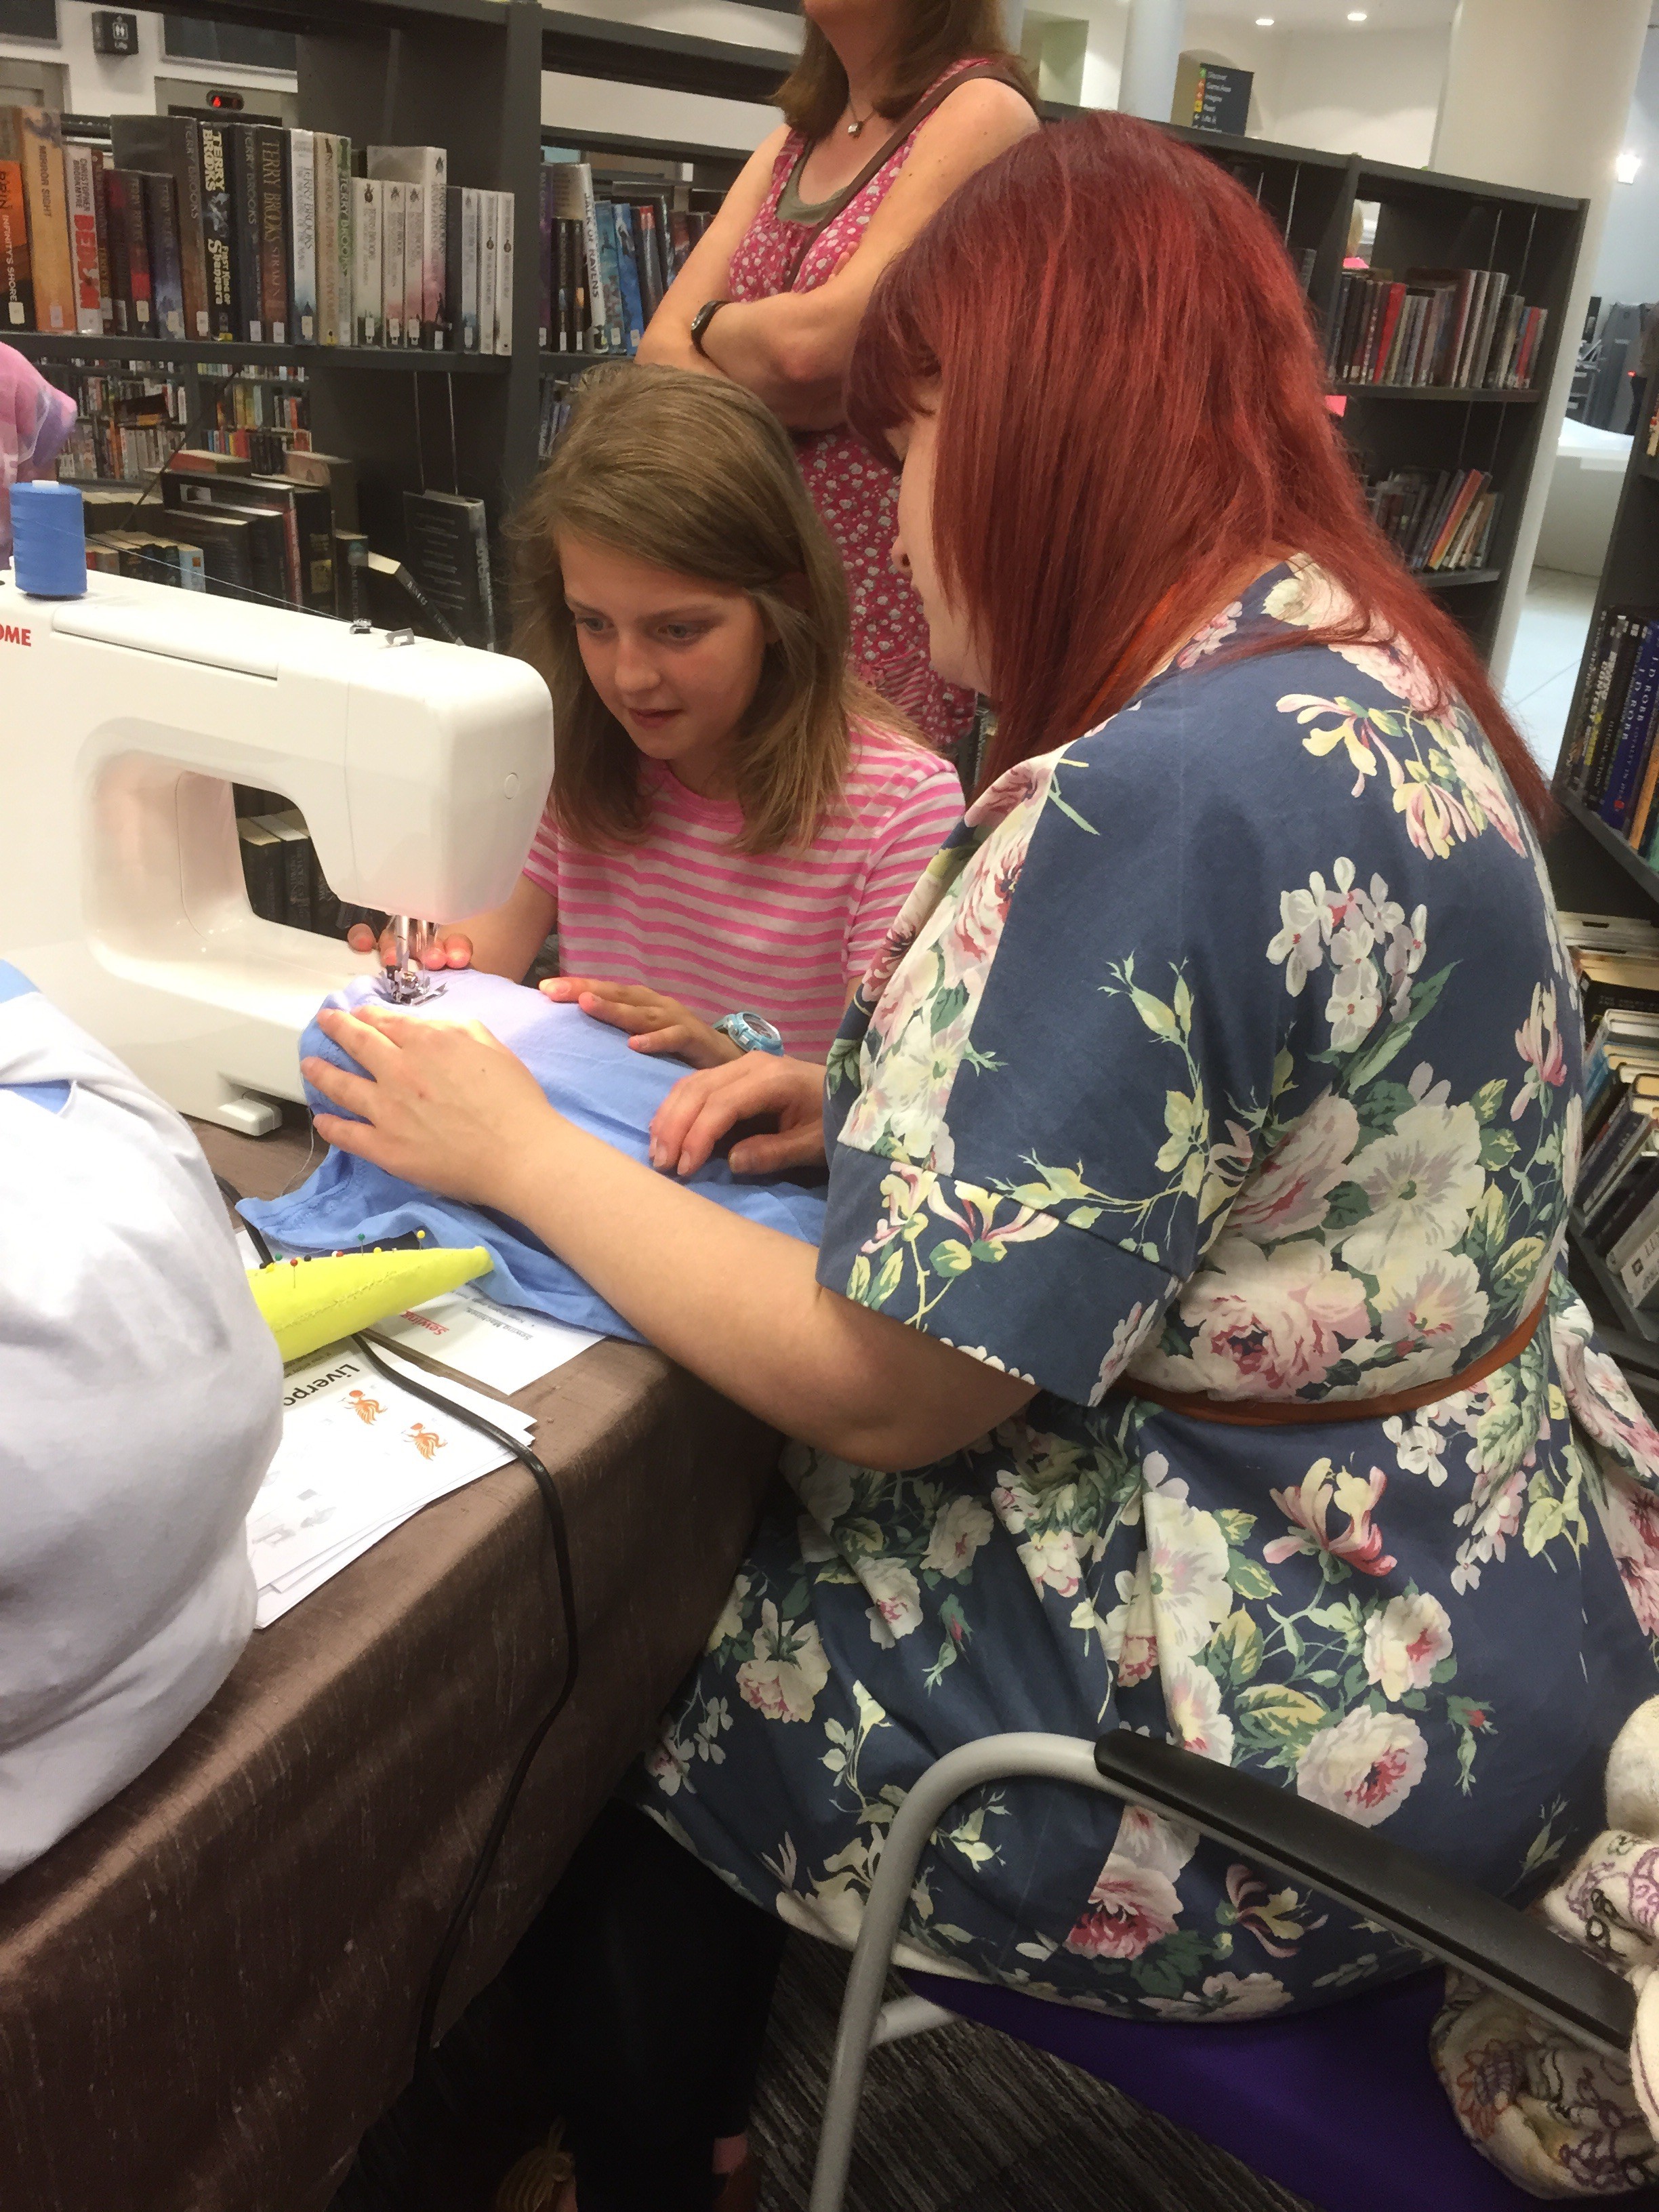
Now the cutting and pinning is done, we’re all ready to use the sewing machine:
Time to sew the base of the bag
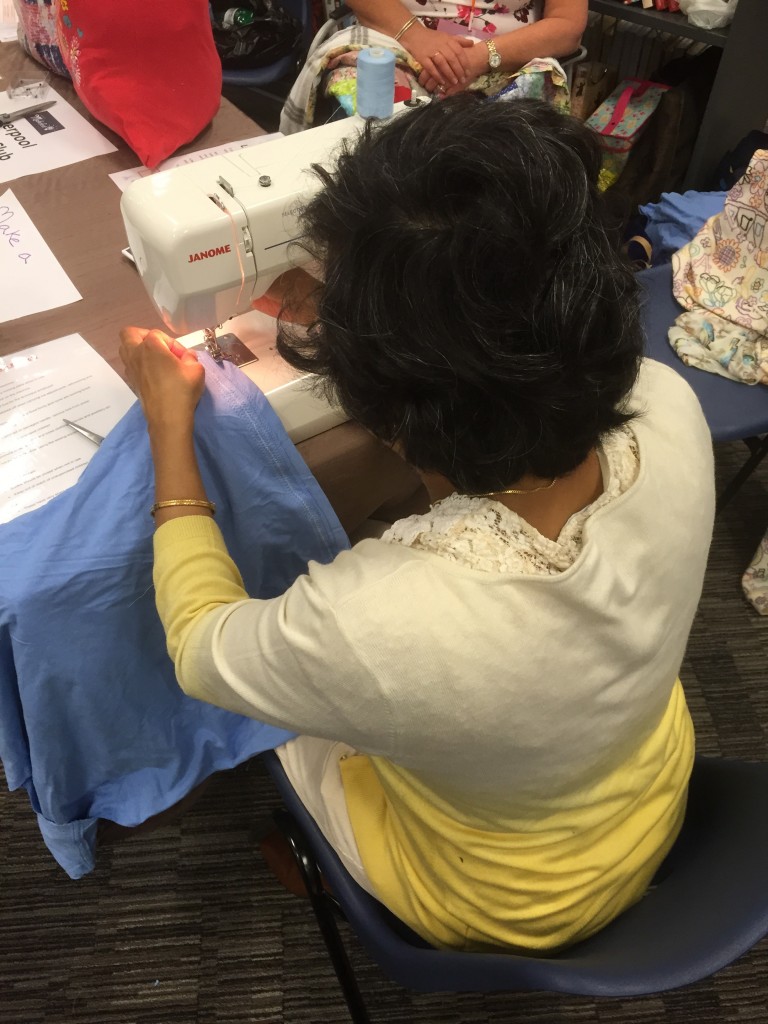
Me helping a young lady to sew her bag

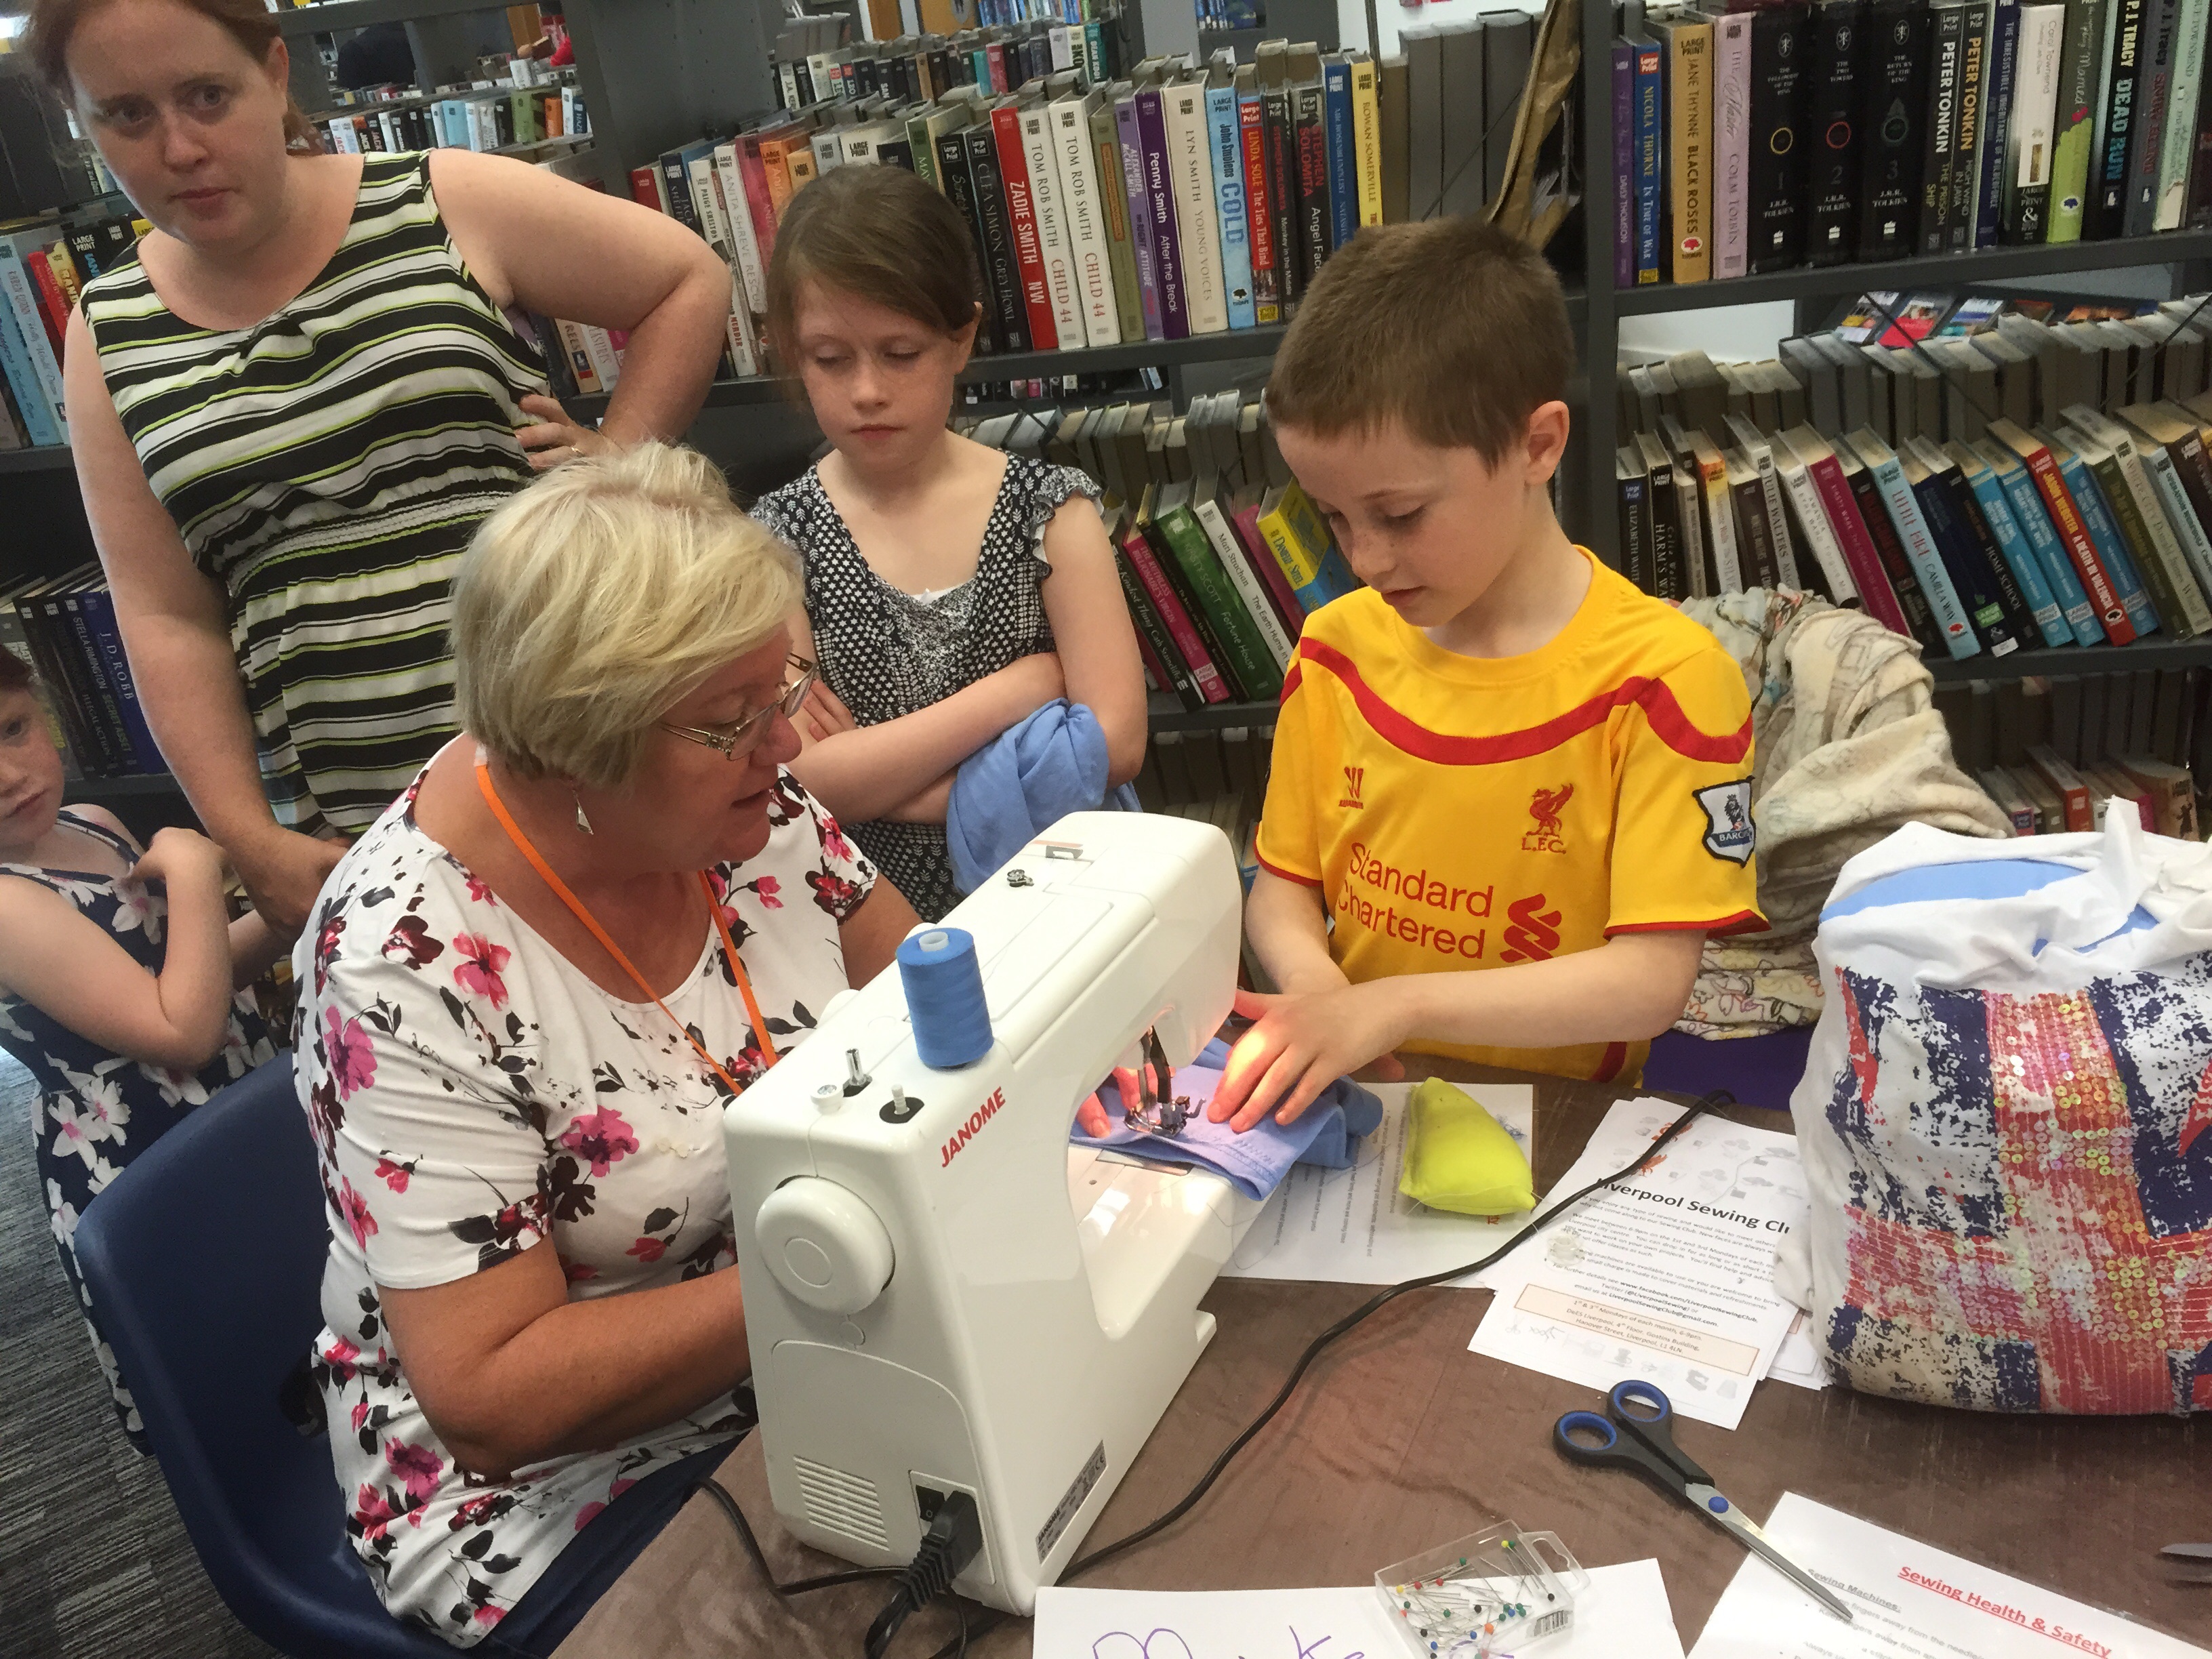
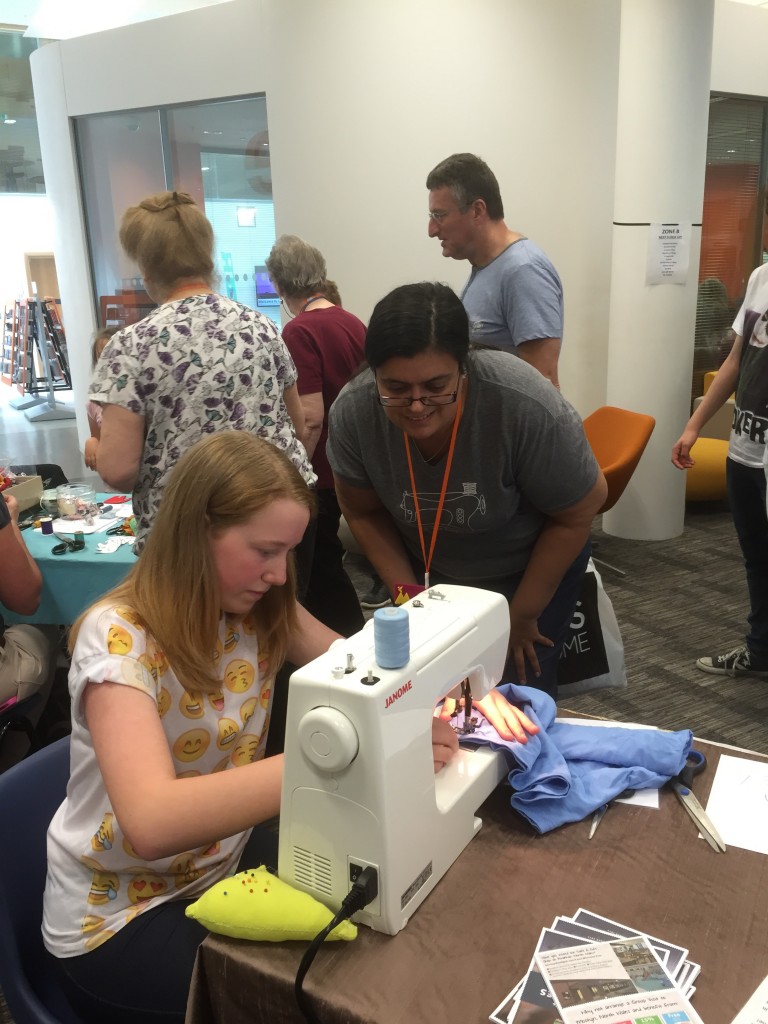
Rosie helping a young lady use the sewing machine

Jan showing a young family how the sewing machine works
As you can see from the photos all ages can do this, from young kids (with a bit of help) through to adults and both male and female – sewing isn’t just a female activity! Although, smiling and having fun is of course a necessity!

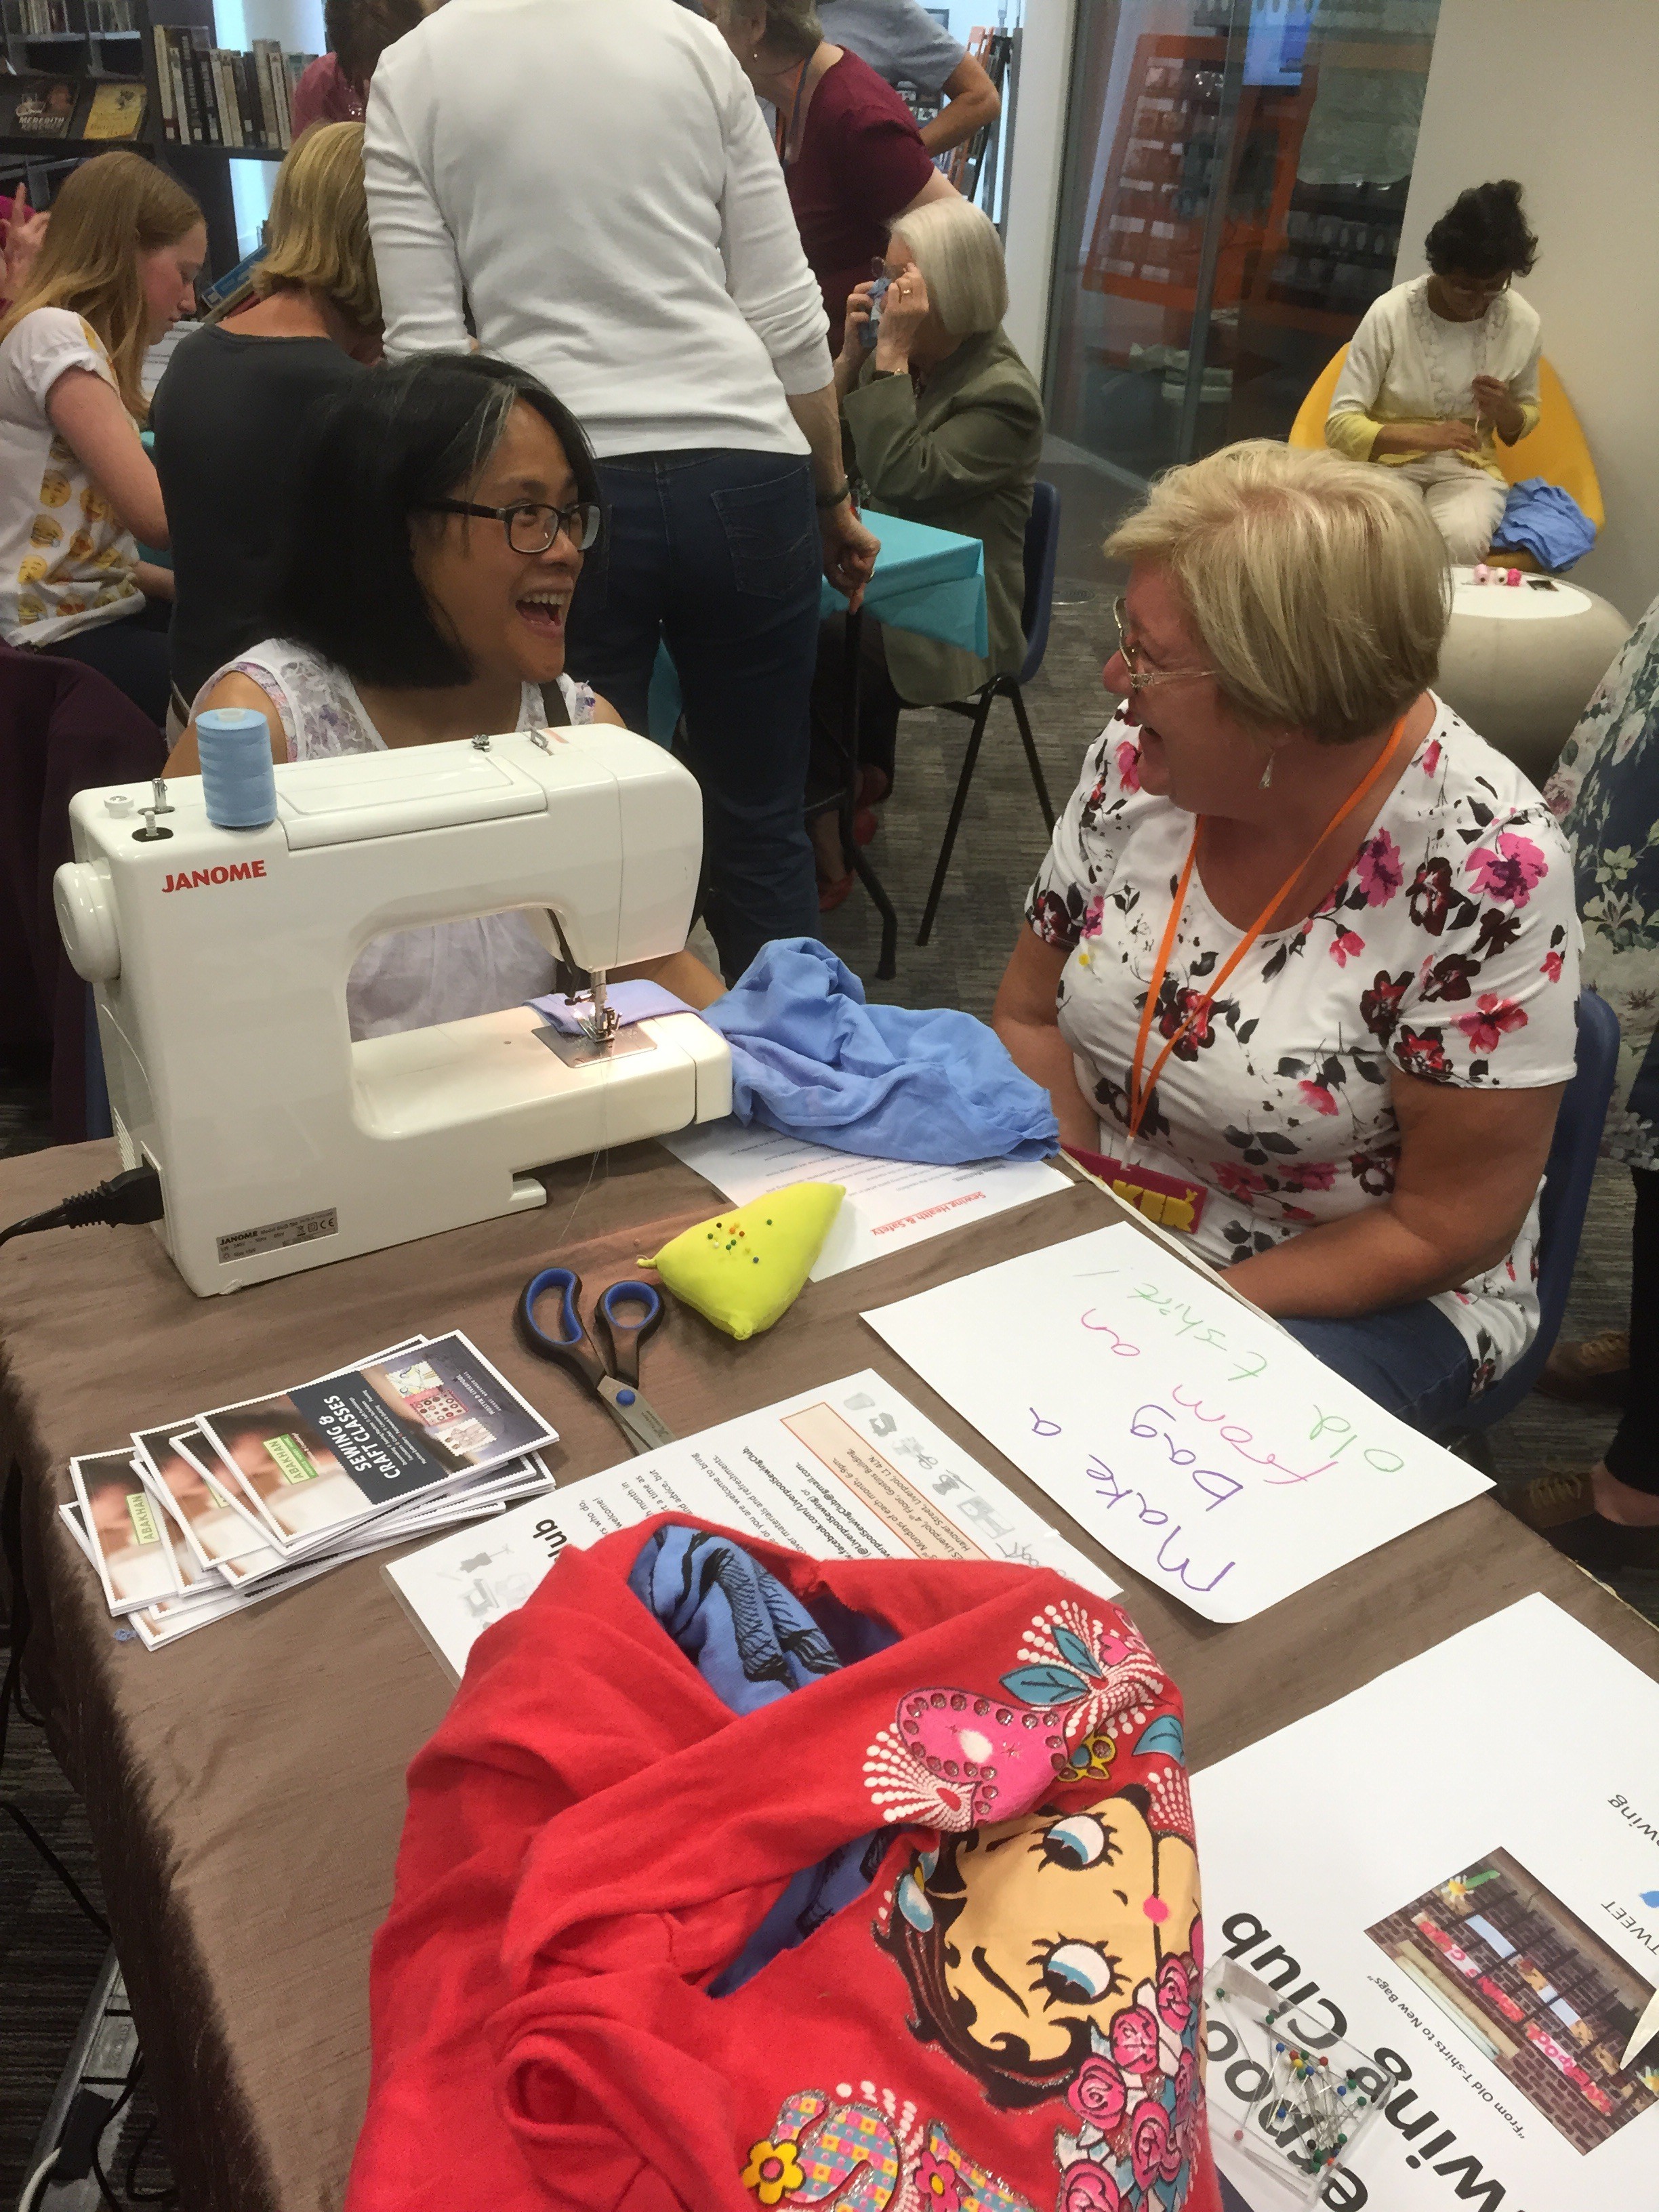
Jan having fun chatting to a lady about sewing
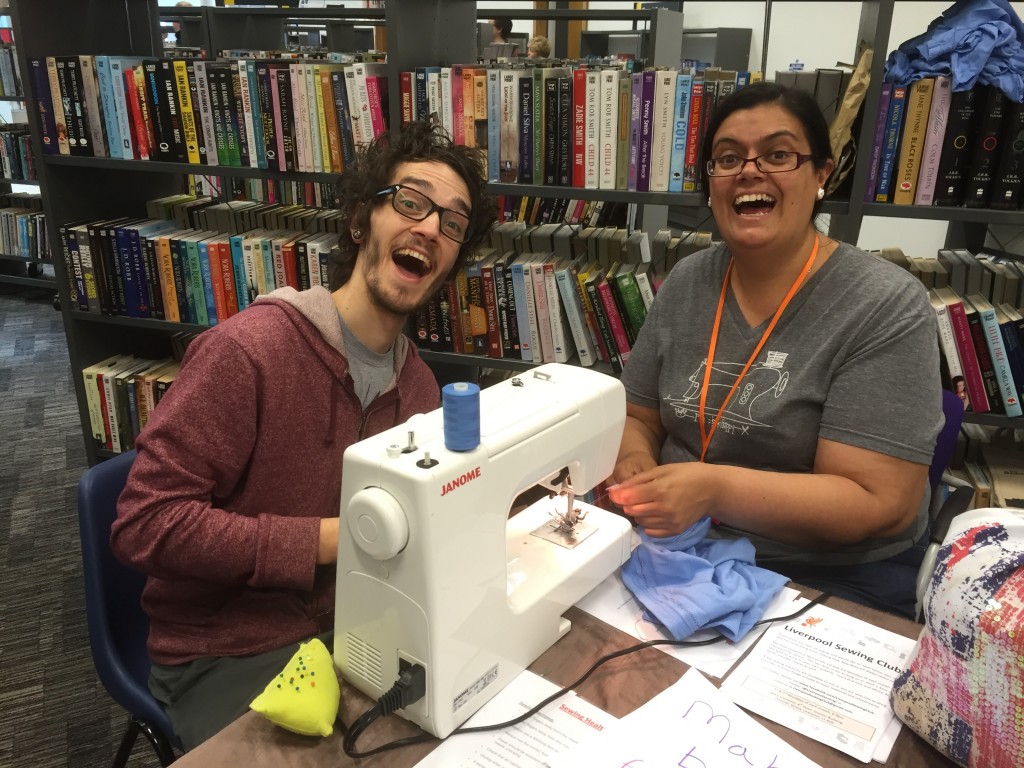
Hehe see I told you we were having fun!
And we have a finished bag – Quick, easy and fun to make!

A completed t-shirt bag!
One lady decided not to turn her t-shirt inside out when sewing, so that the plain side was visible and then embellish it, using trims and an embroidered elephant she made with the stall that was situated next to us – The Merseyside Embroiderers’ Guild, isn’t it beautiful!
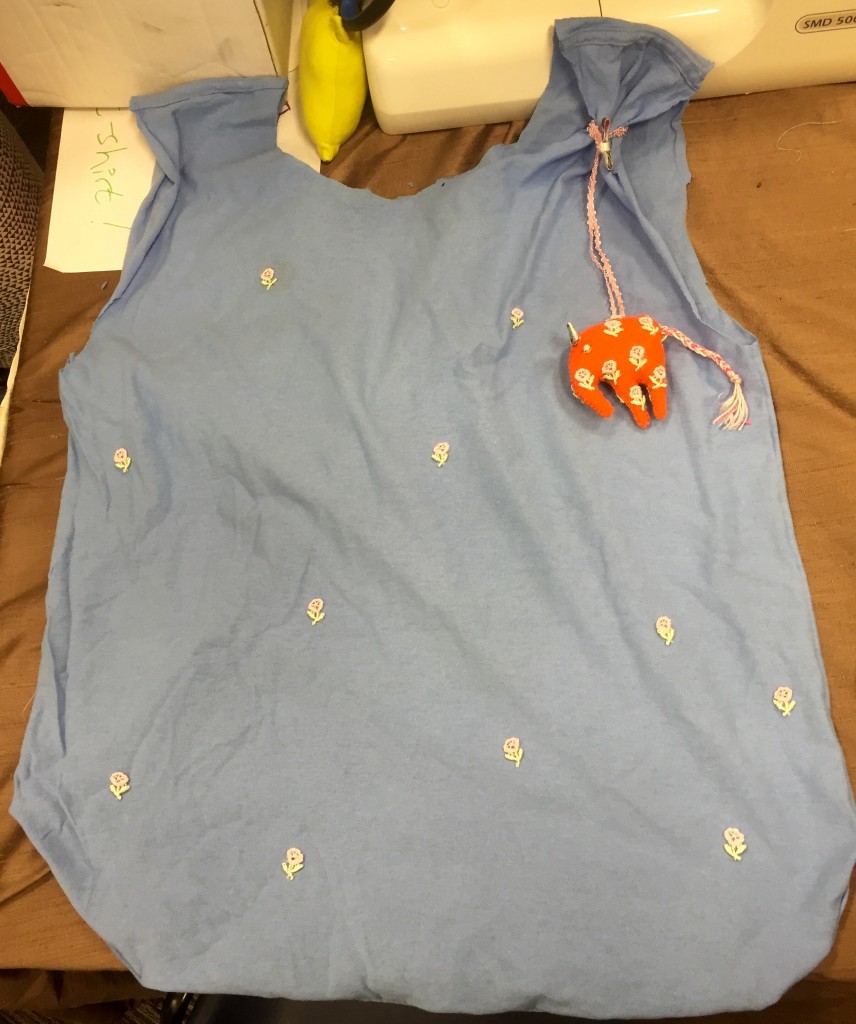
Beautiful embellished t-shirt bag
Overall a great fun day was had by both Liverpool Sewing Club members and by the general public. My only regret was that I was having that much fun on our stall that I never had a chance to actually go visit all the other stalls at Liverpool MakeFest, doh!
Have you made any t-shirt bags? Why not comment below & tell me?
Share your thoughts