On Sunday (23rd November) I organised a day trip for some of the ladies from Liverpool Sewing Club to the Knitting & Stitching Show over in Harrogate. It was a very full on & long day and now I’m feeling sufficiently recovered to be able to write about it! This is the third time we’ve attended and a tip to the show, fooling by dinner at Betty’s Team Rooms is now starting to become a sewing club tradition.

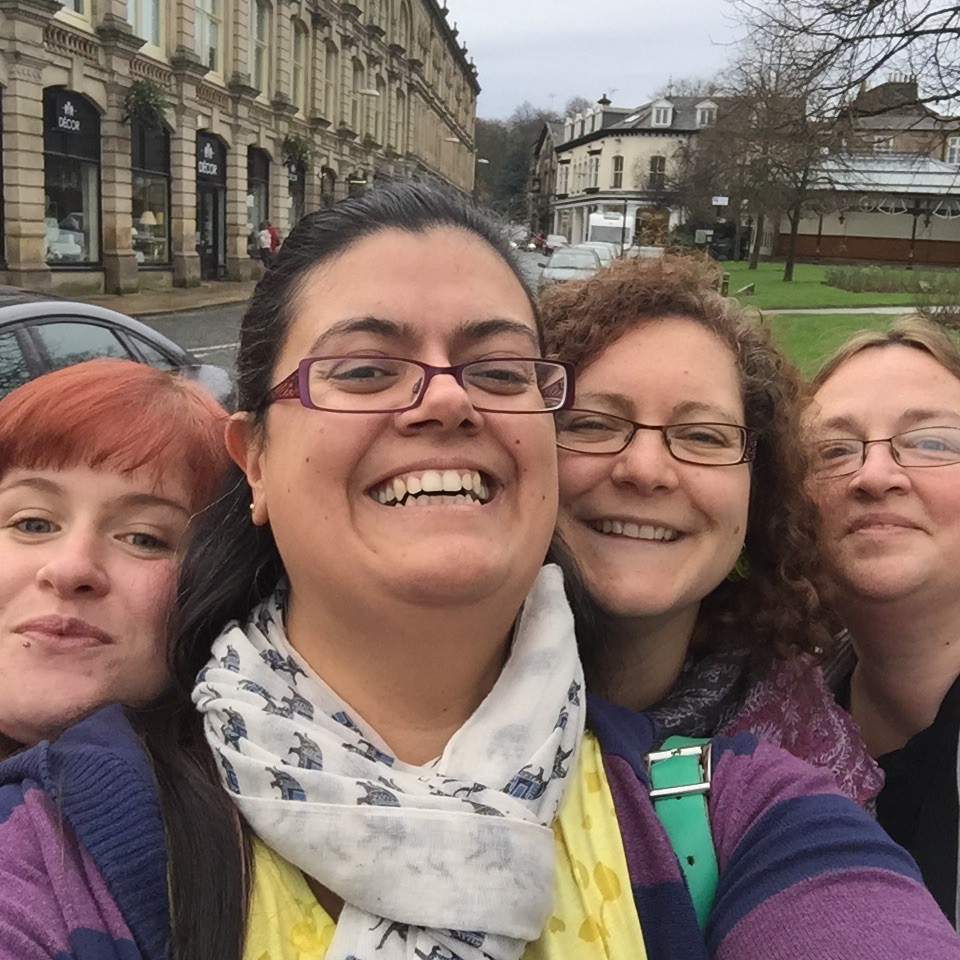
Rosie, me, Nele, Pollie
The drive over to Harrogate took a few hours and after a little drama finding somewhere to park we got started on a visit to the Harrogate Knitting & Stitching Show. The show can be a tad overwhelming as there is so much to see with the exhibitions and stalls split across a number of different halls on the ground floor and then downstairs to the workshops, university fashion students display areas & refreshments area.
Exhibitions
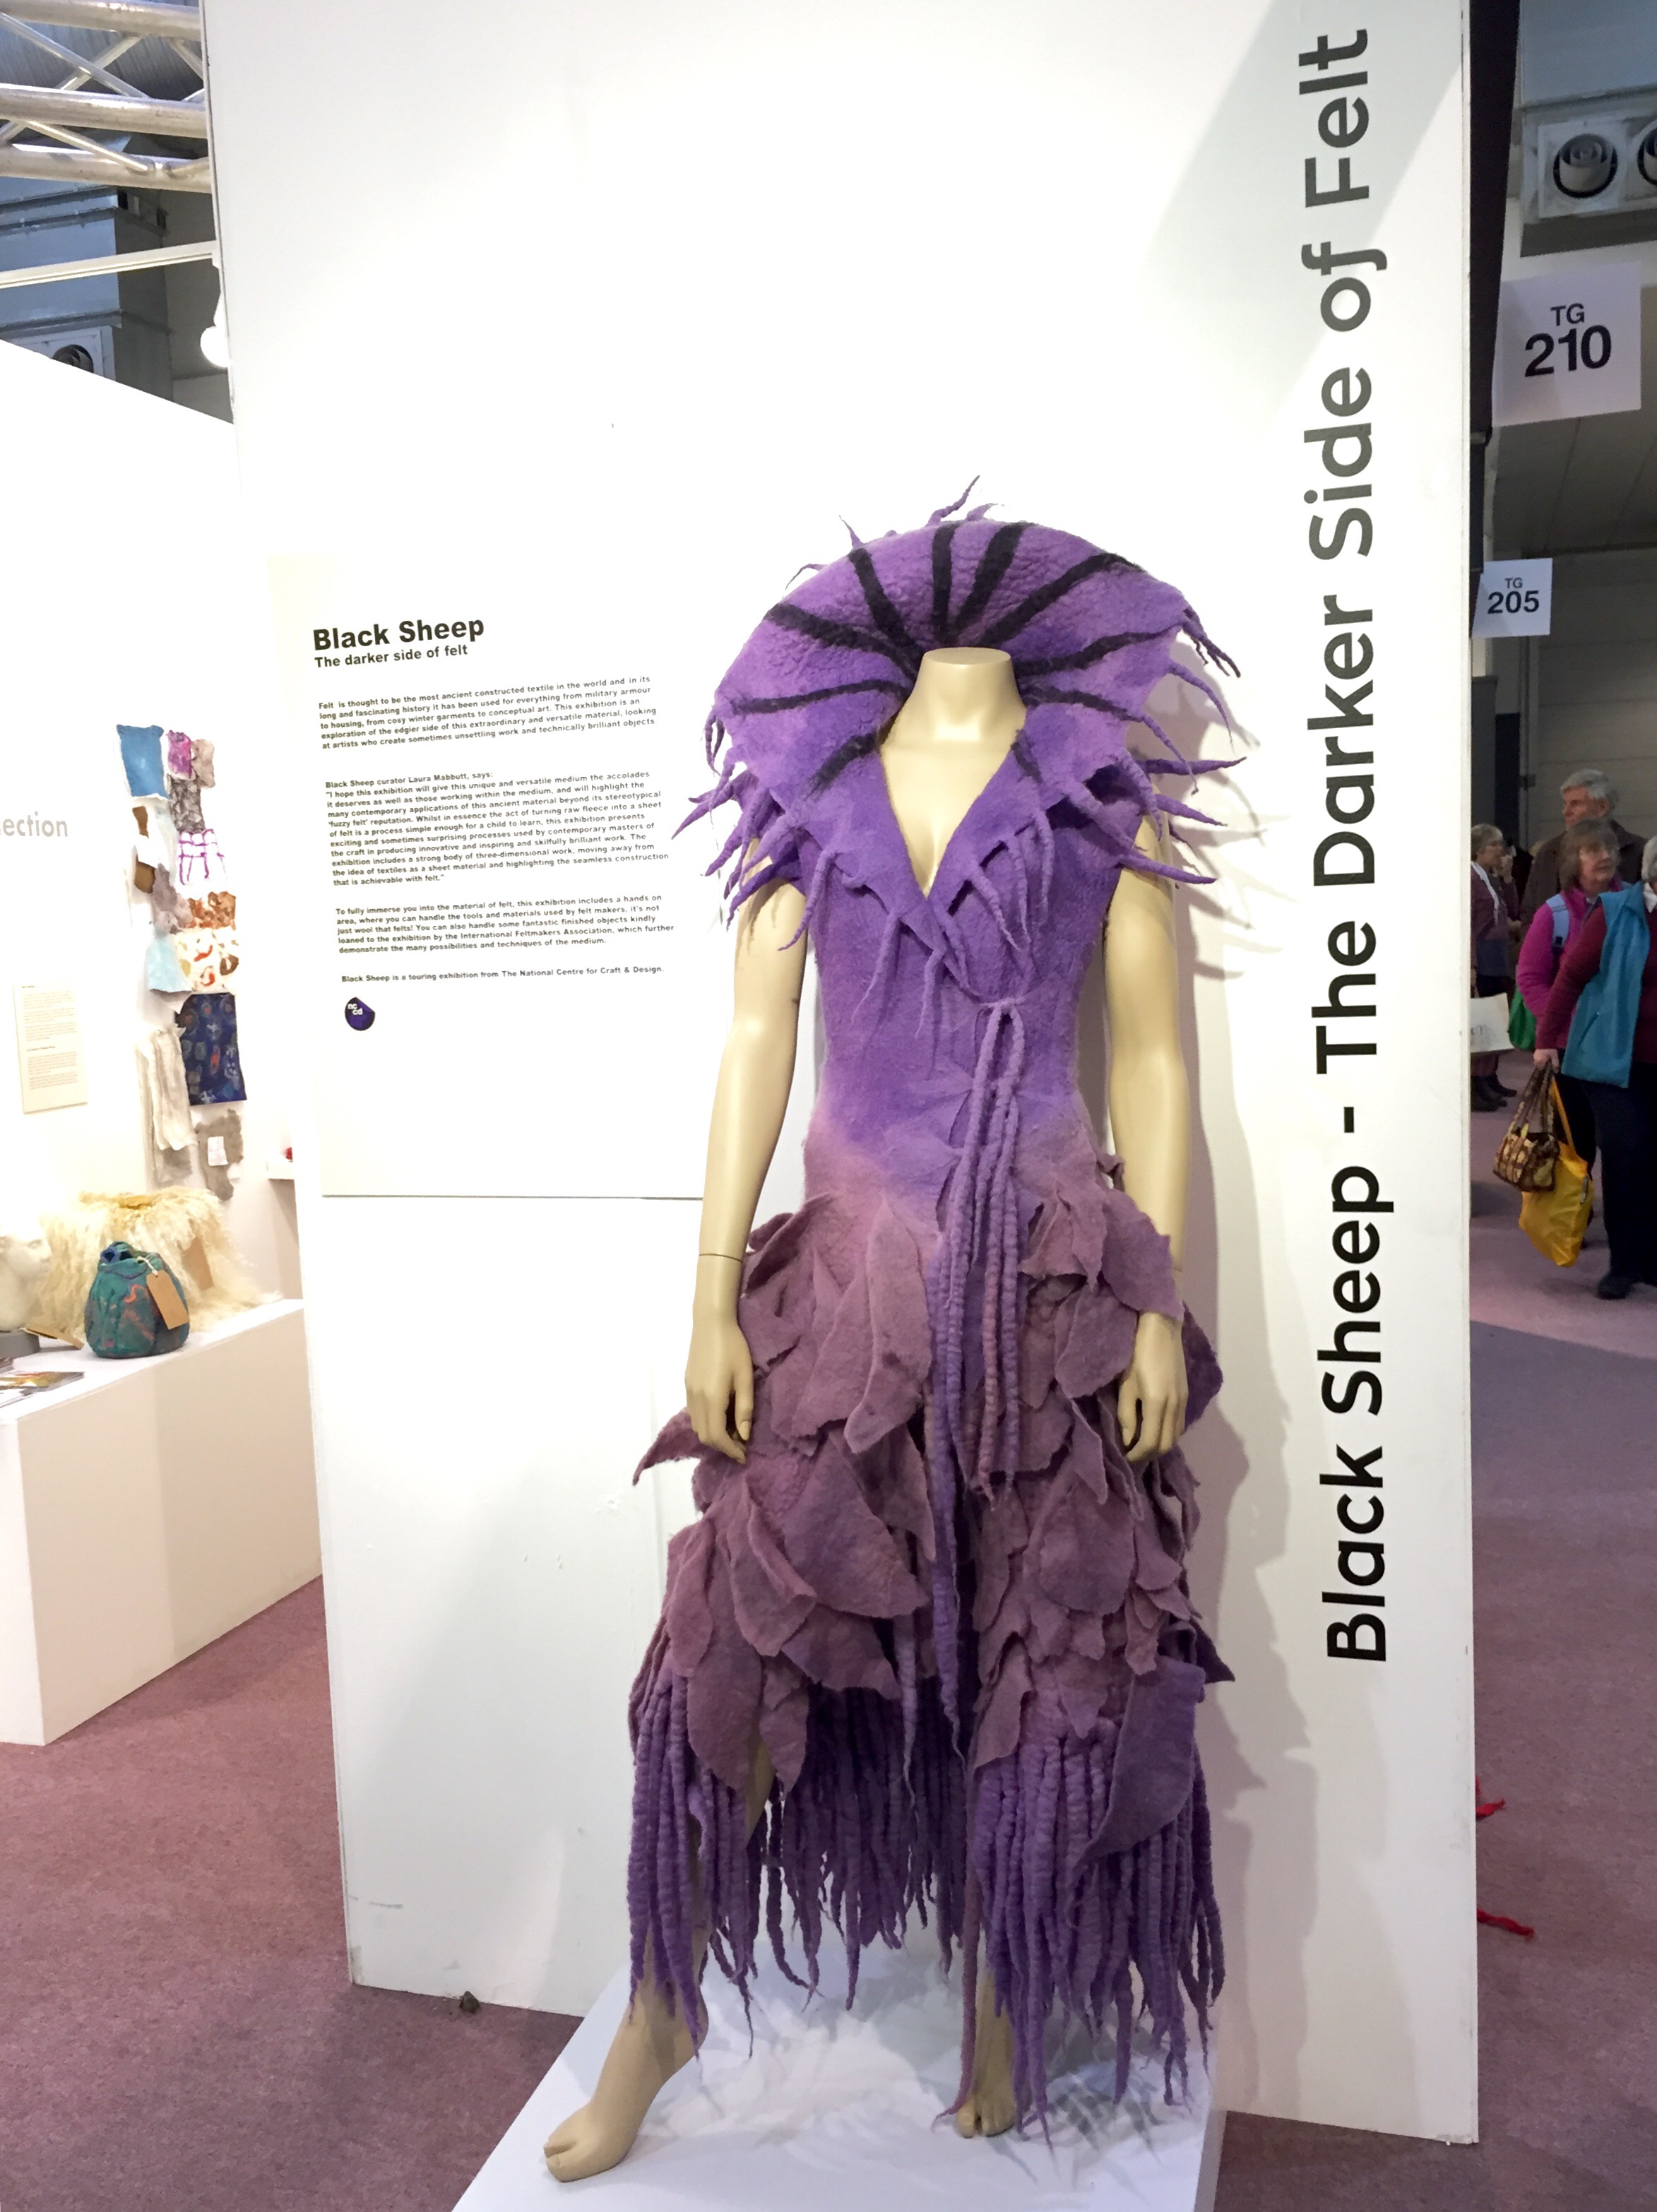
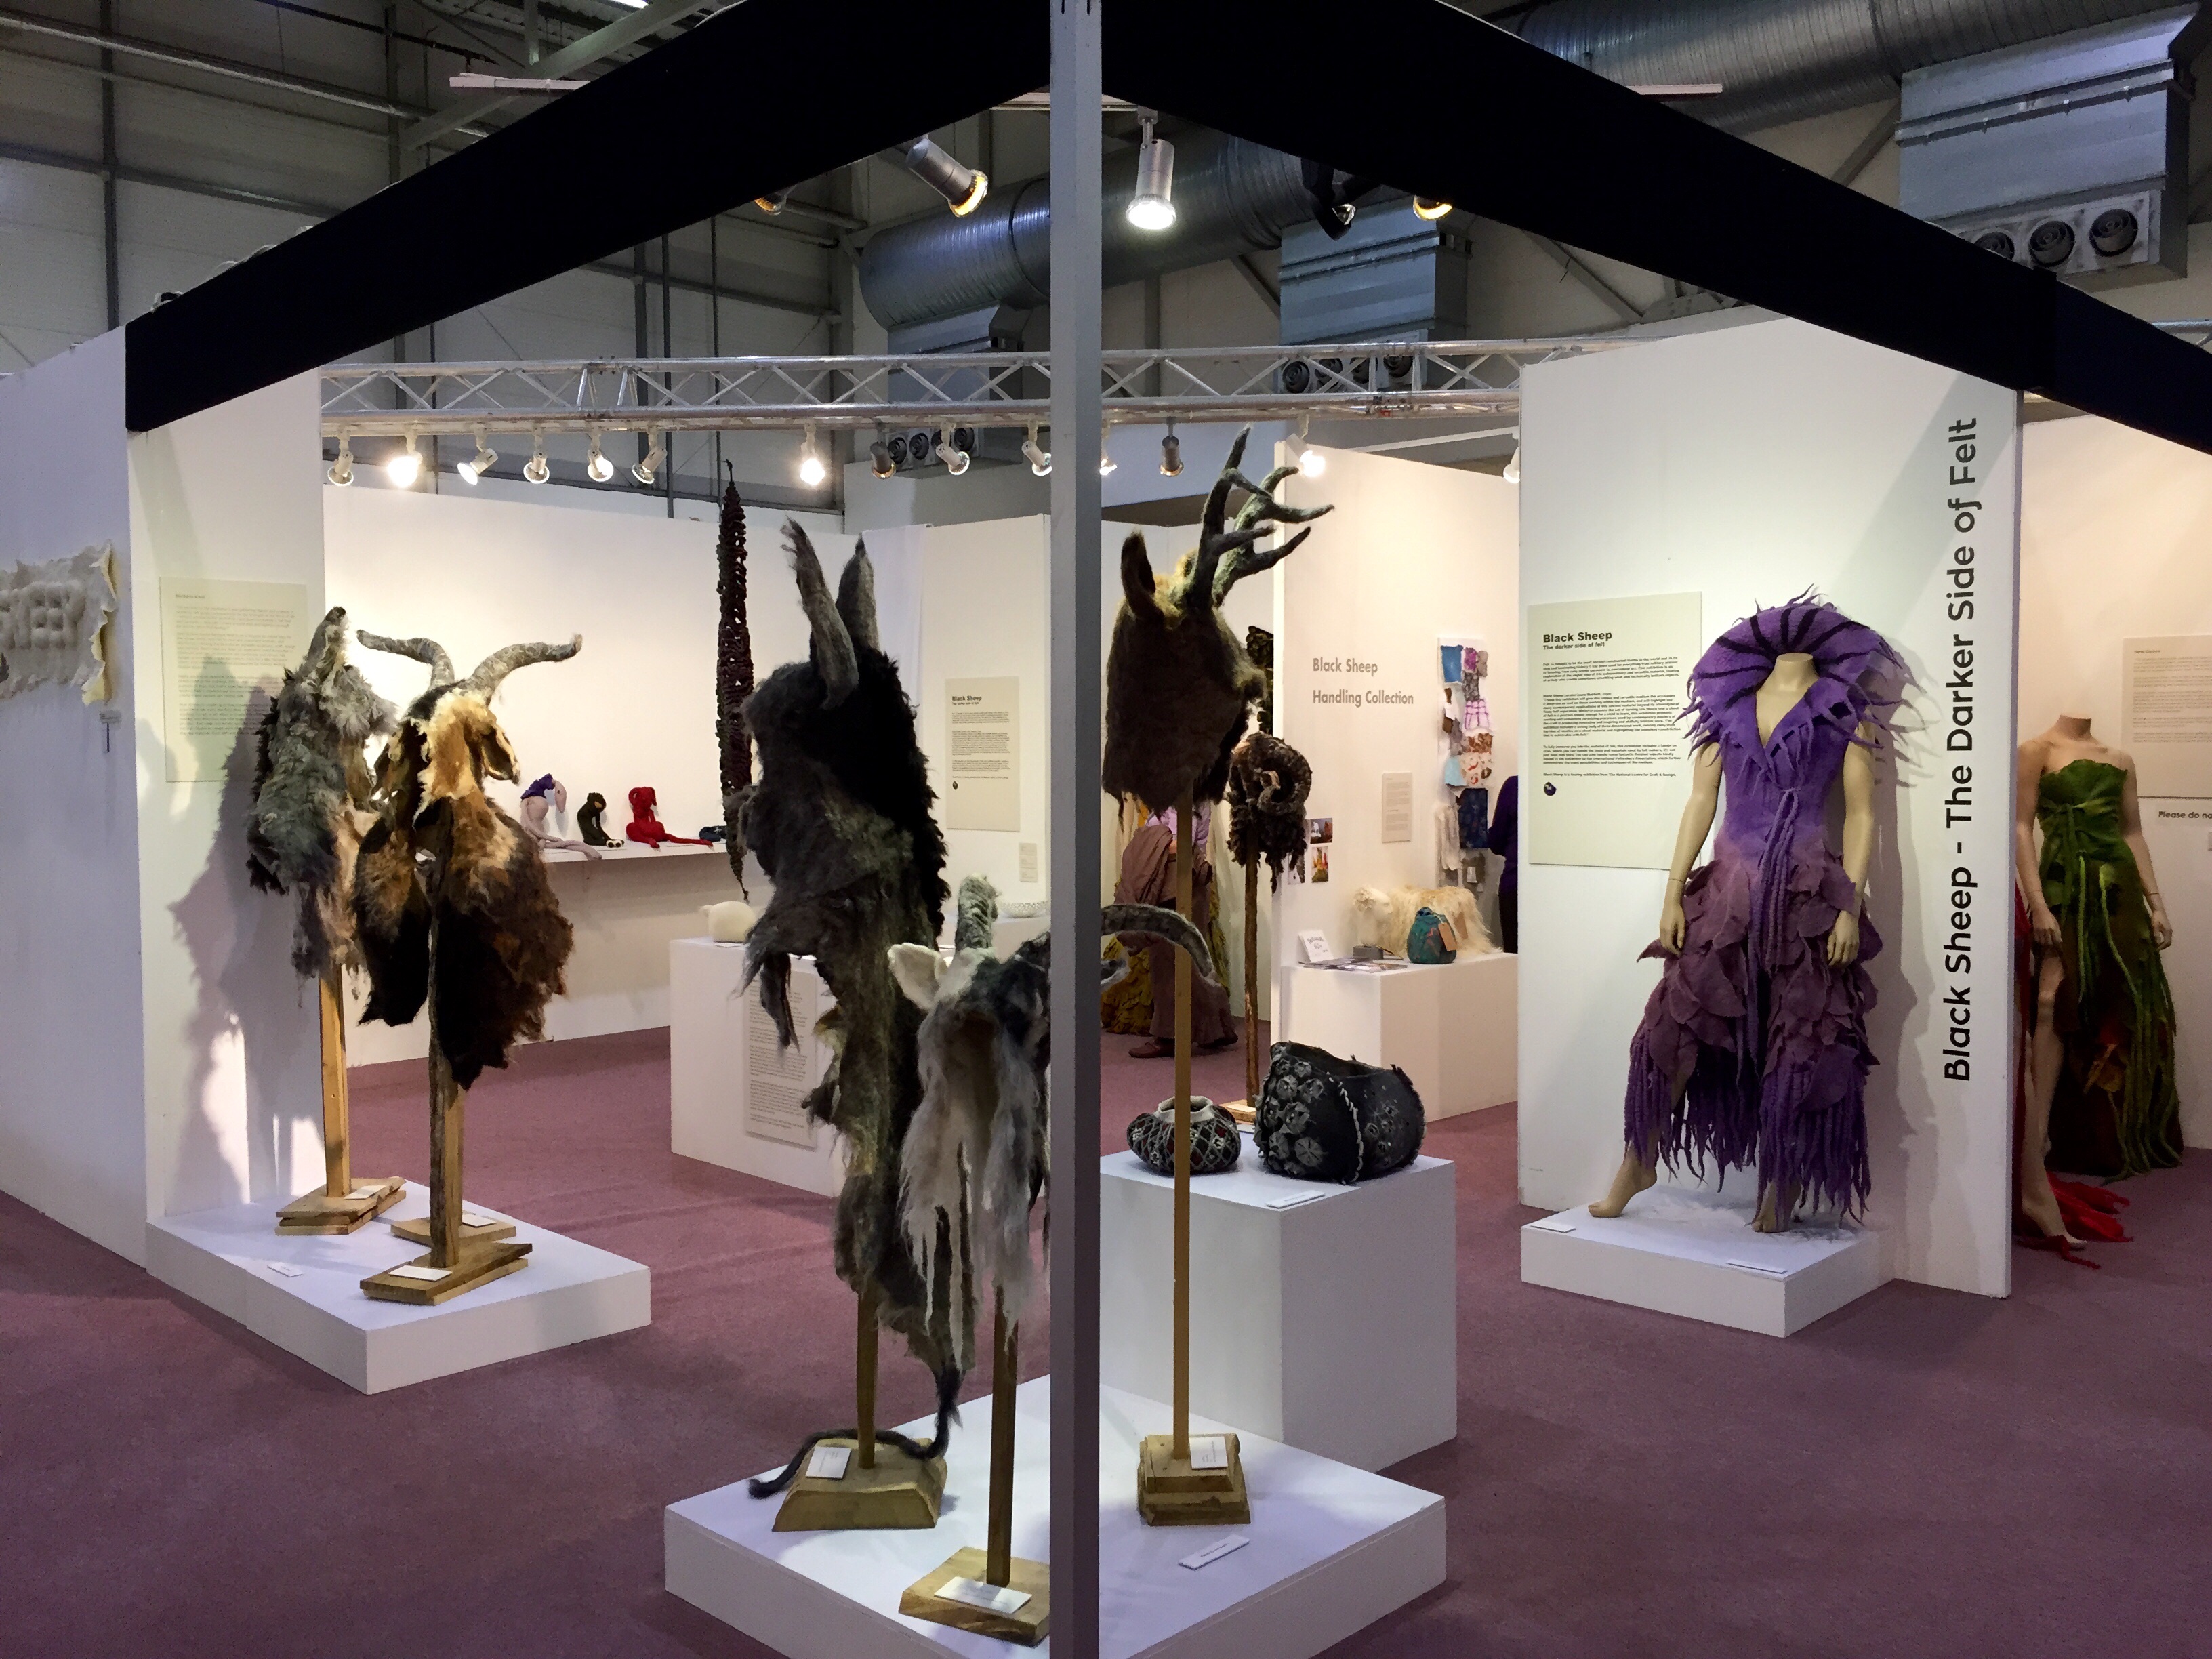
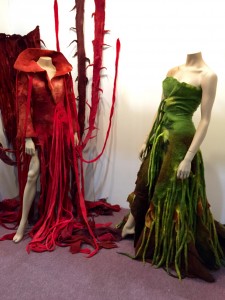
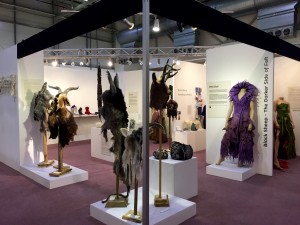
There were lots of exhibitions to see and unless you visit for a couple of days there just isn’t enough time to visit all the exhibitions and stalls. As I’m a dressmaker I felt drawn to the ‘Black Sheep – The Darker Side of Felt’ exhibition, especially as the lead item was this purple felted dress.
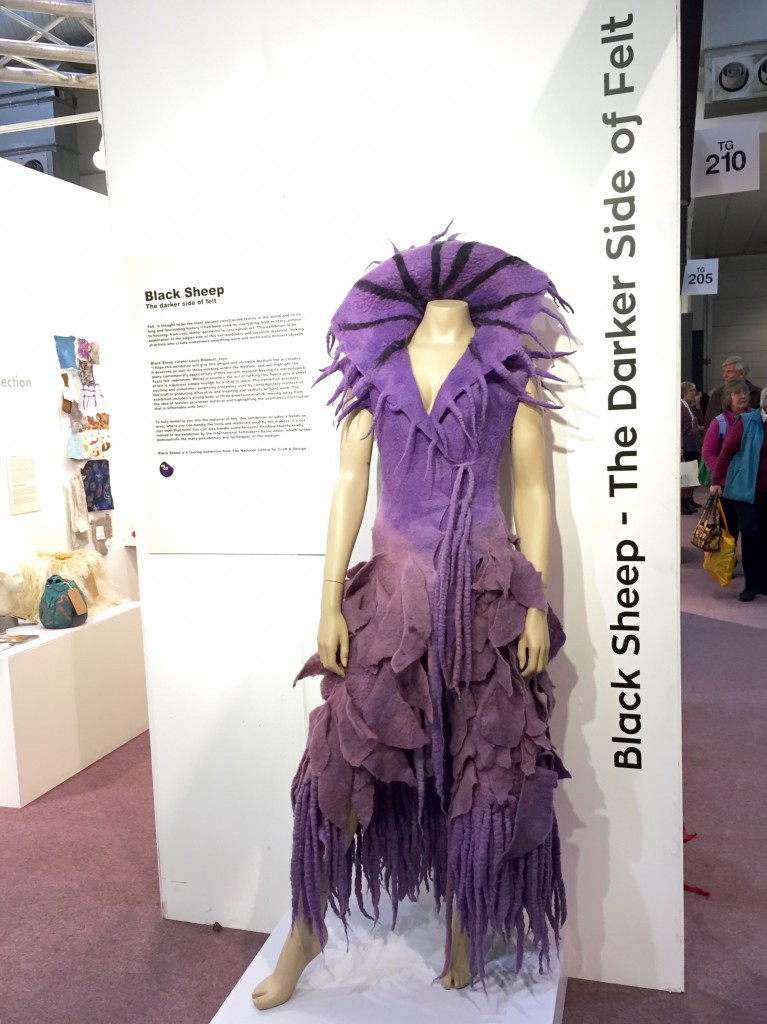
The exhibition explores the edgier side of this extraordinary and versatile material. More information about the show can be found on their blog: https://blacksheepfelt.wordpress.com/2014/03/22/about-the-show/
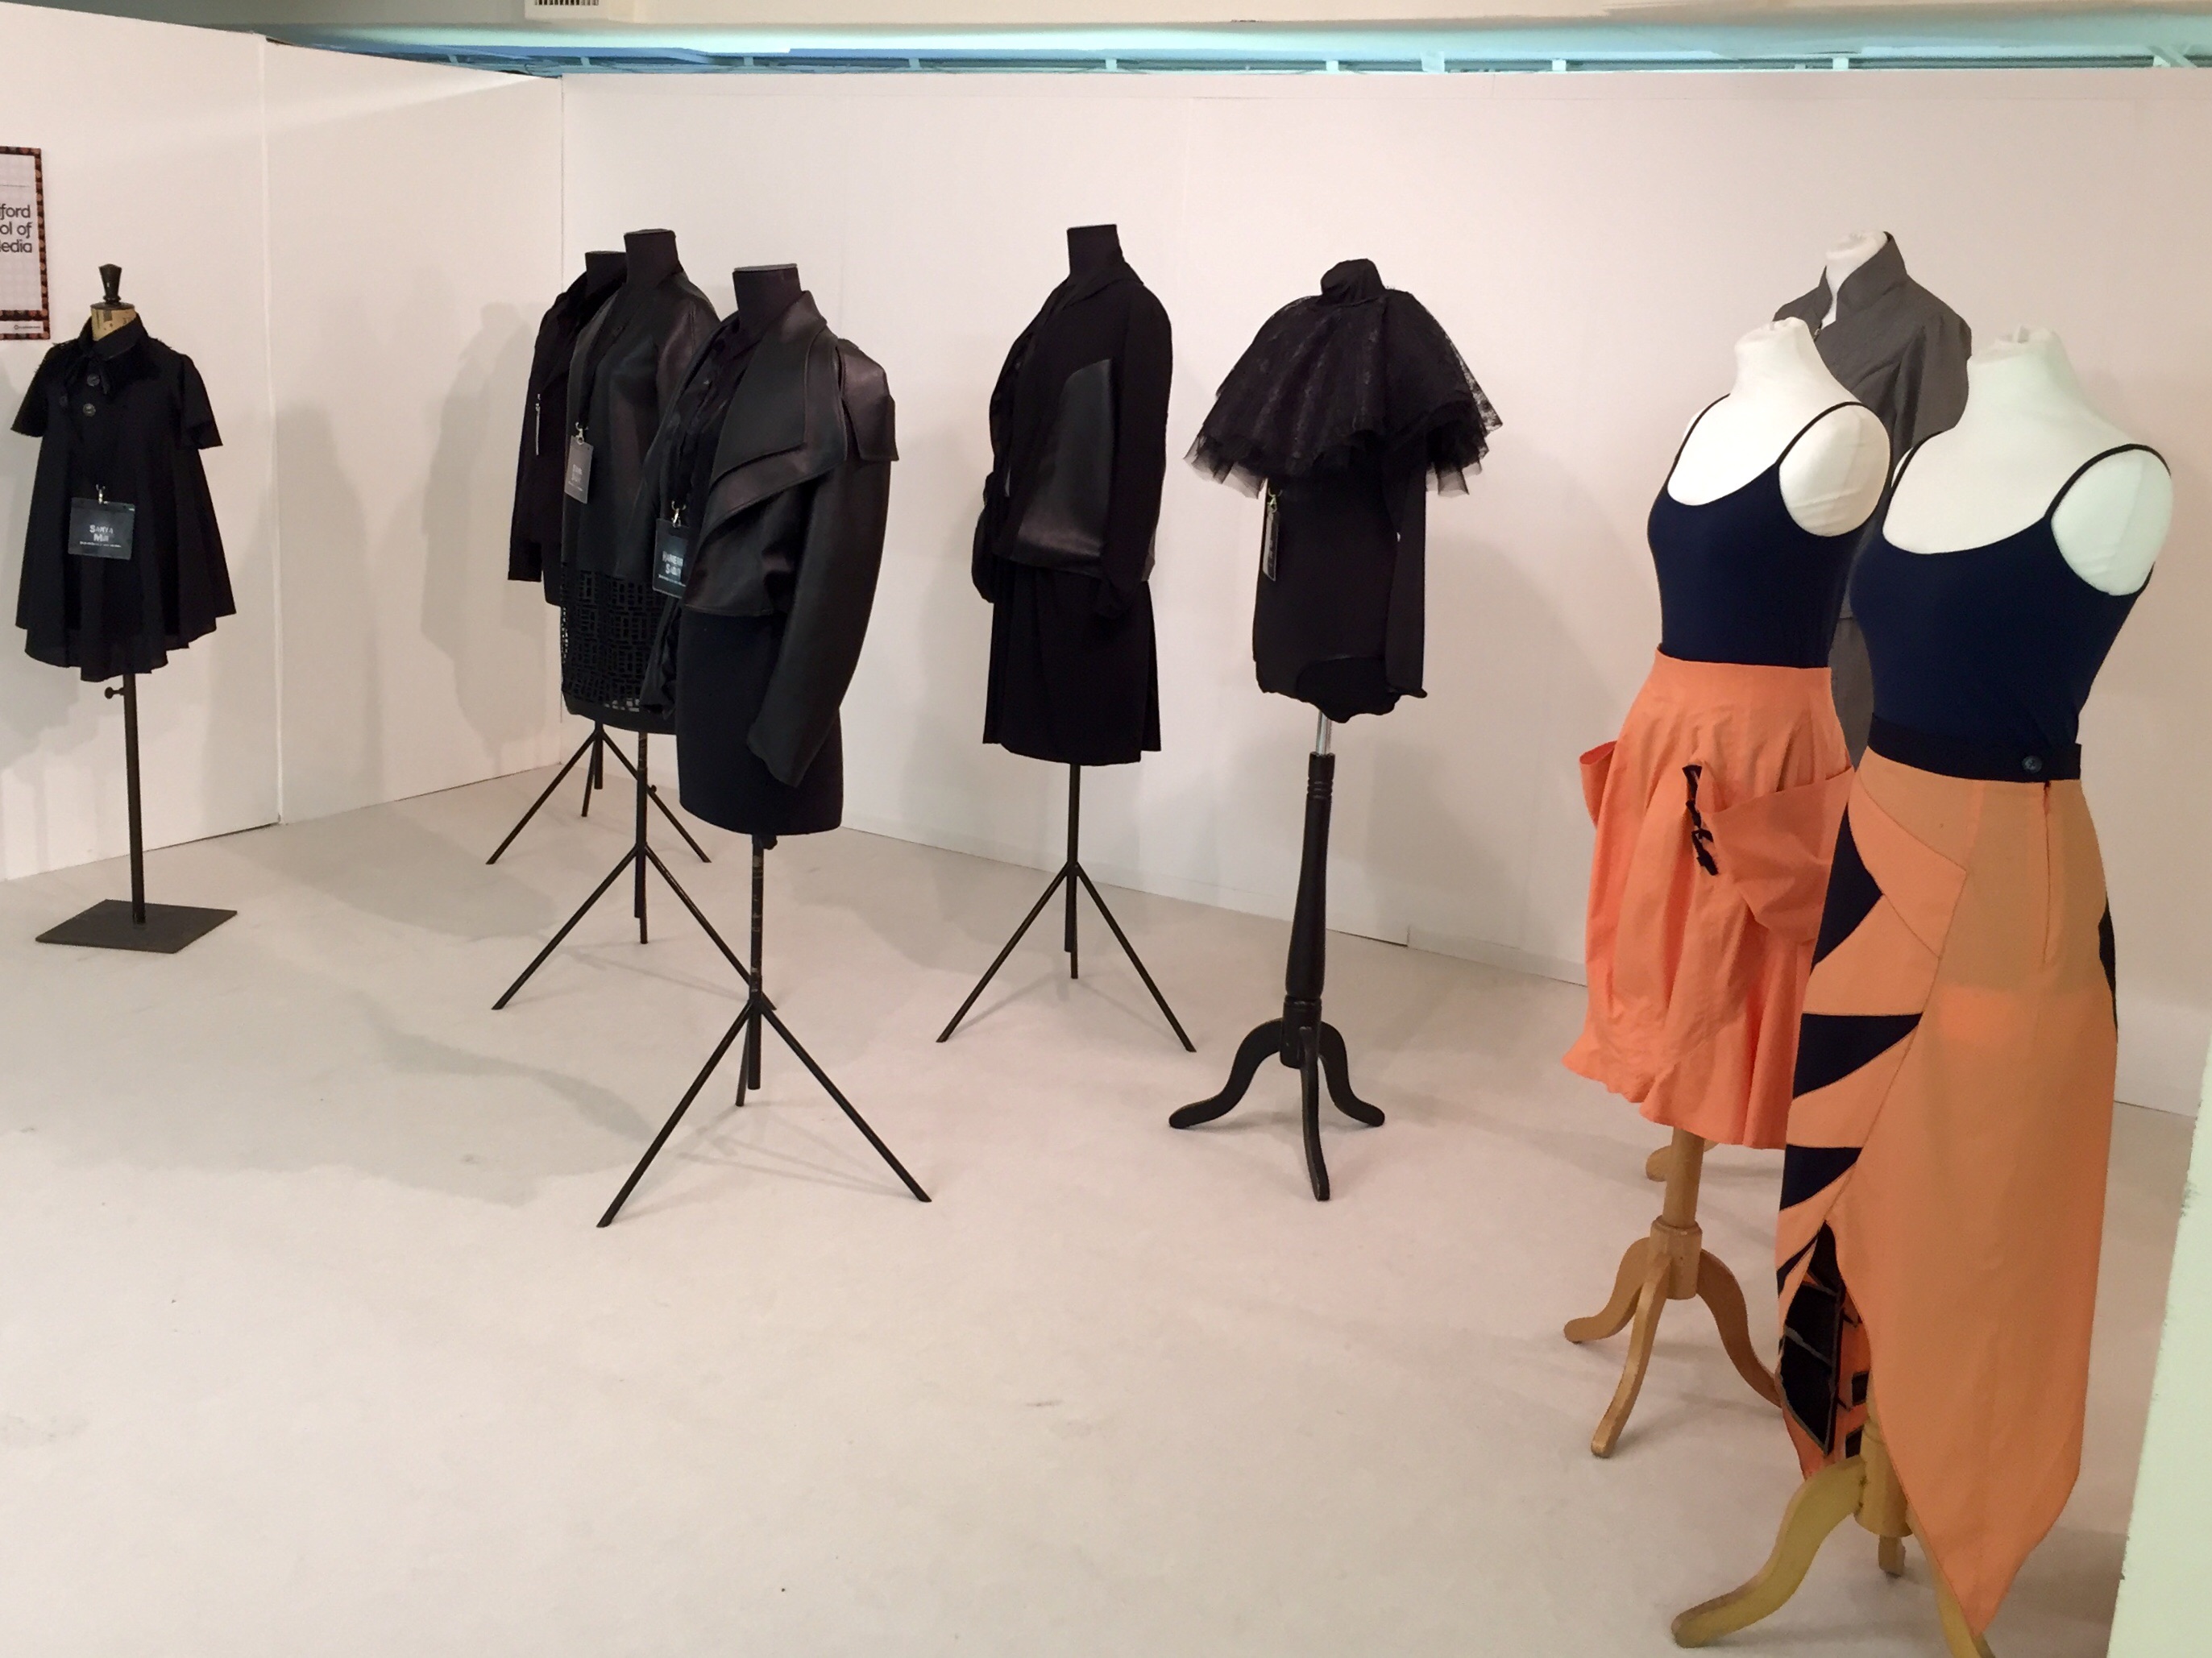
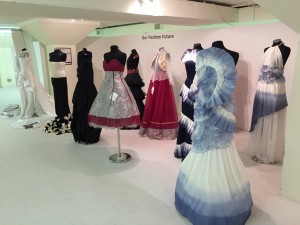
Downstairs there was a number of displays showcasing the fabulous work of fashion and textile students from a number of different universities and colleges:


Stalls
The wide range of stalls at this years show spanned 3 different large halls, offering a wide range of knitting and stitching supplies and services. Nele was looking to buy an overlocker, so spend a fair amount of time at the sewing machine stalls and eventually managed to get a great deal on a Janome, which she is very excited about being delivered soon! A few of my favourites stalls:
Simply Solids.
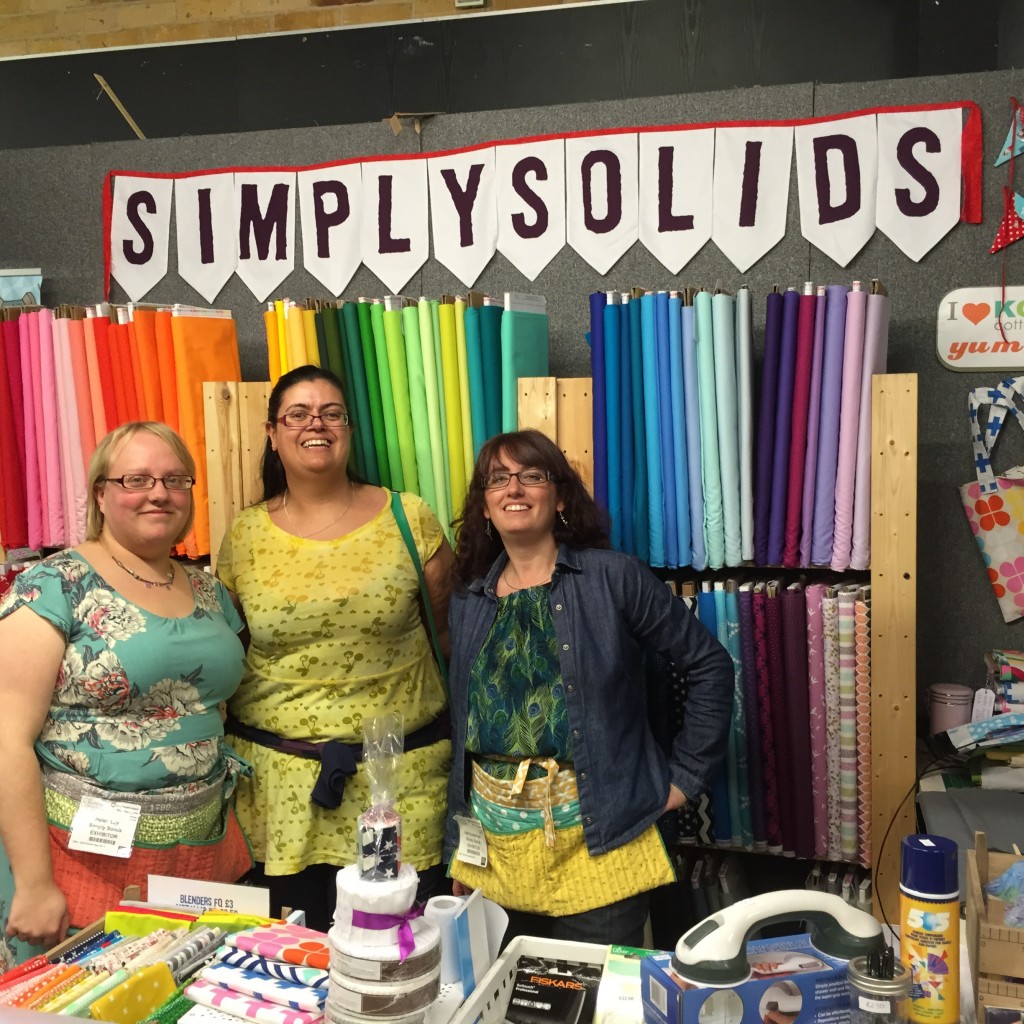
Helen, me & Lisa on the Simply Solidas stall
I love the rainbow of bright solids on display here as well as the textured basics. Pollie bought some of the 505 spray for basting as they’re one of the cheapest around for this and it can difficult to buy online due to legal restrictions on posting aerosols! Had a good natter with the lovely Lisa and Helen who was helping out due to Justine’s rather recent delivery of her daughter
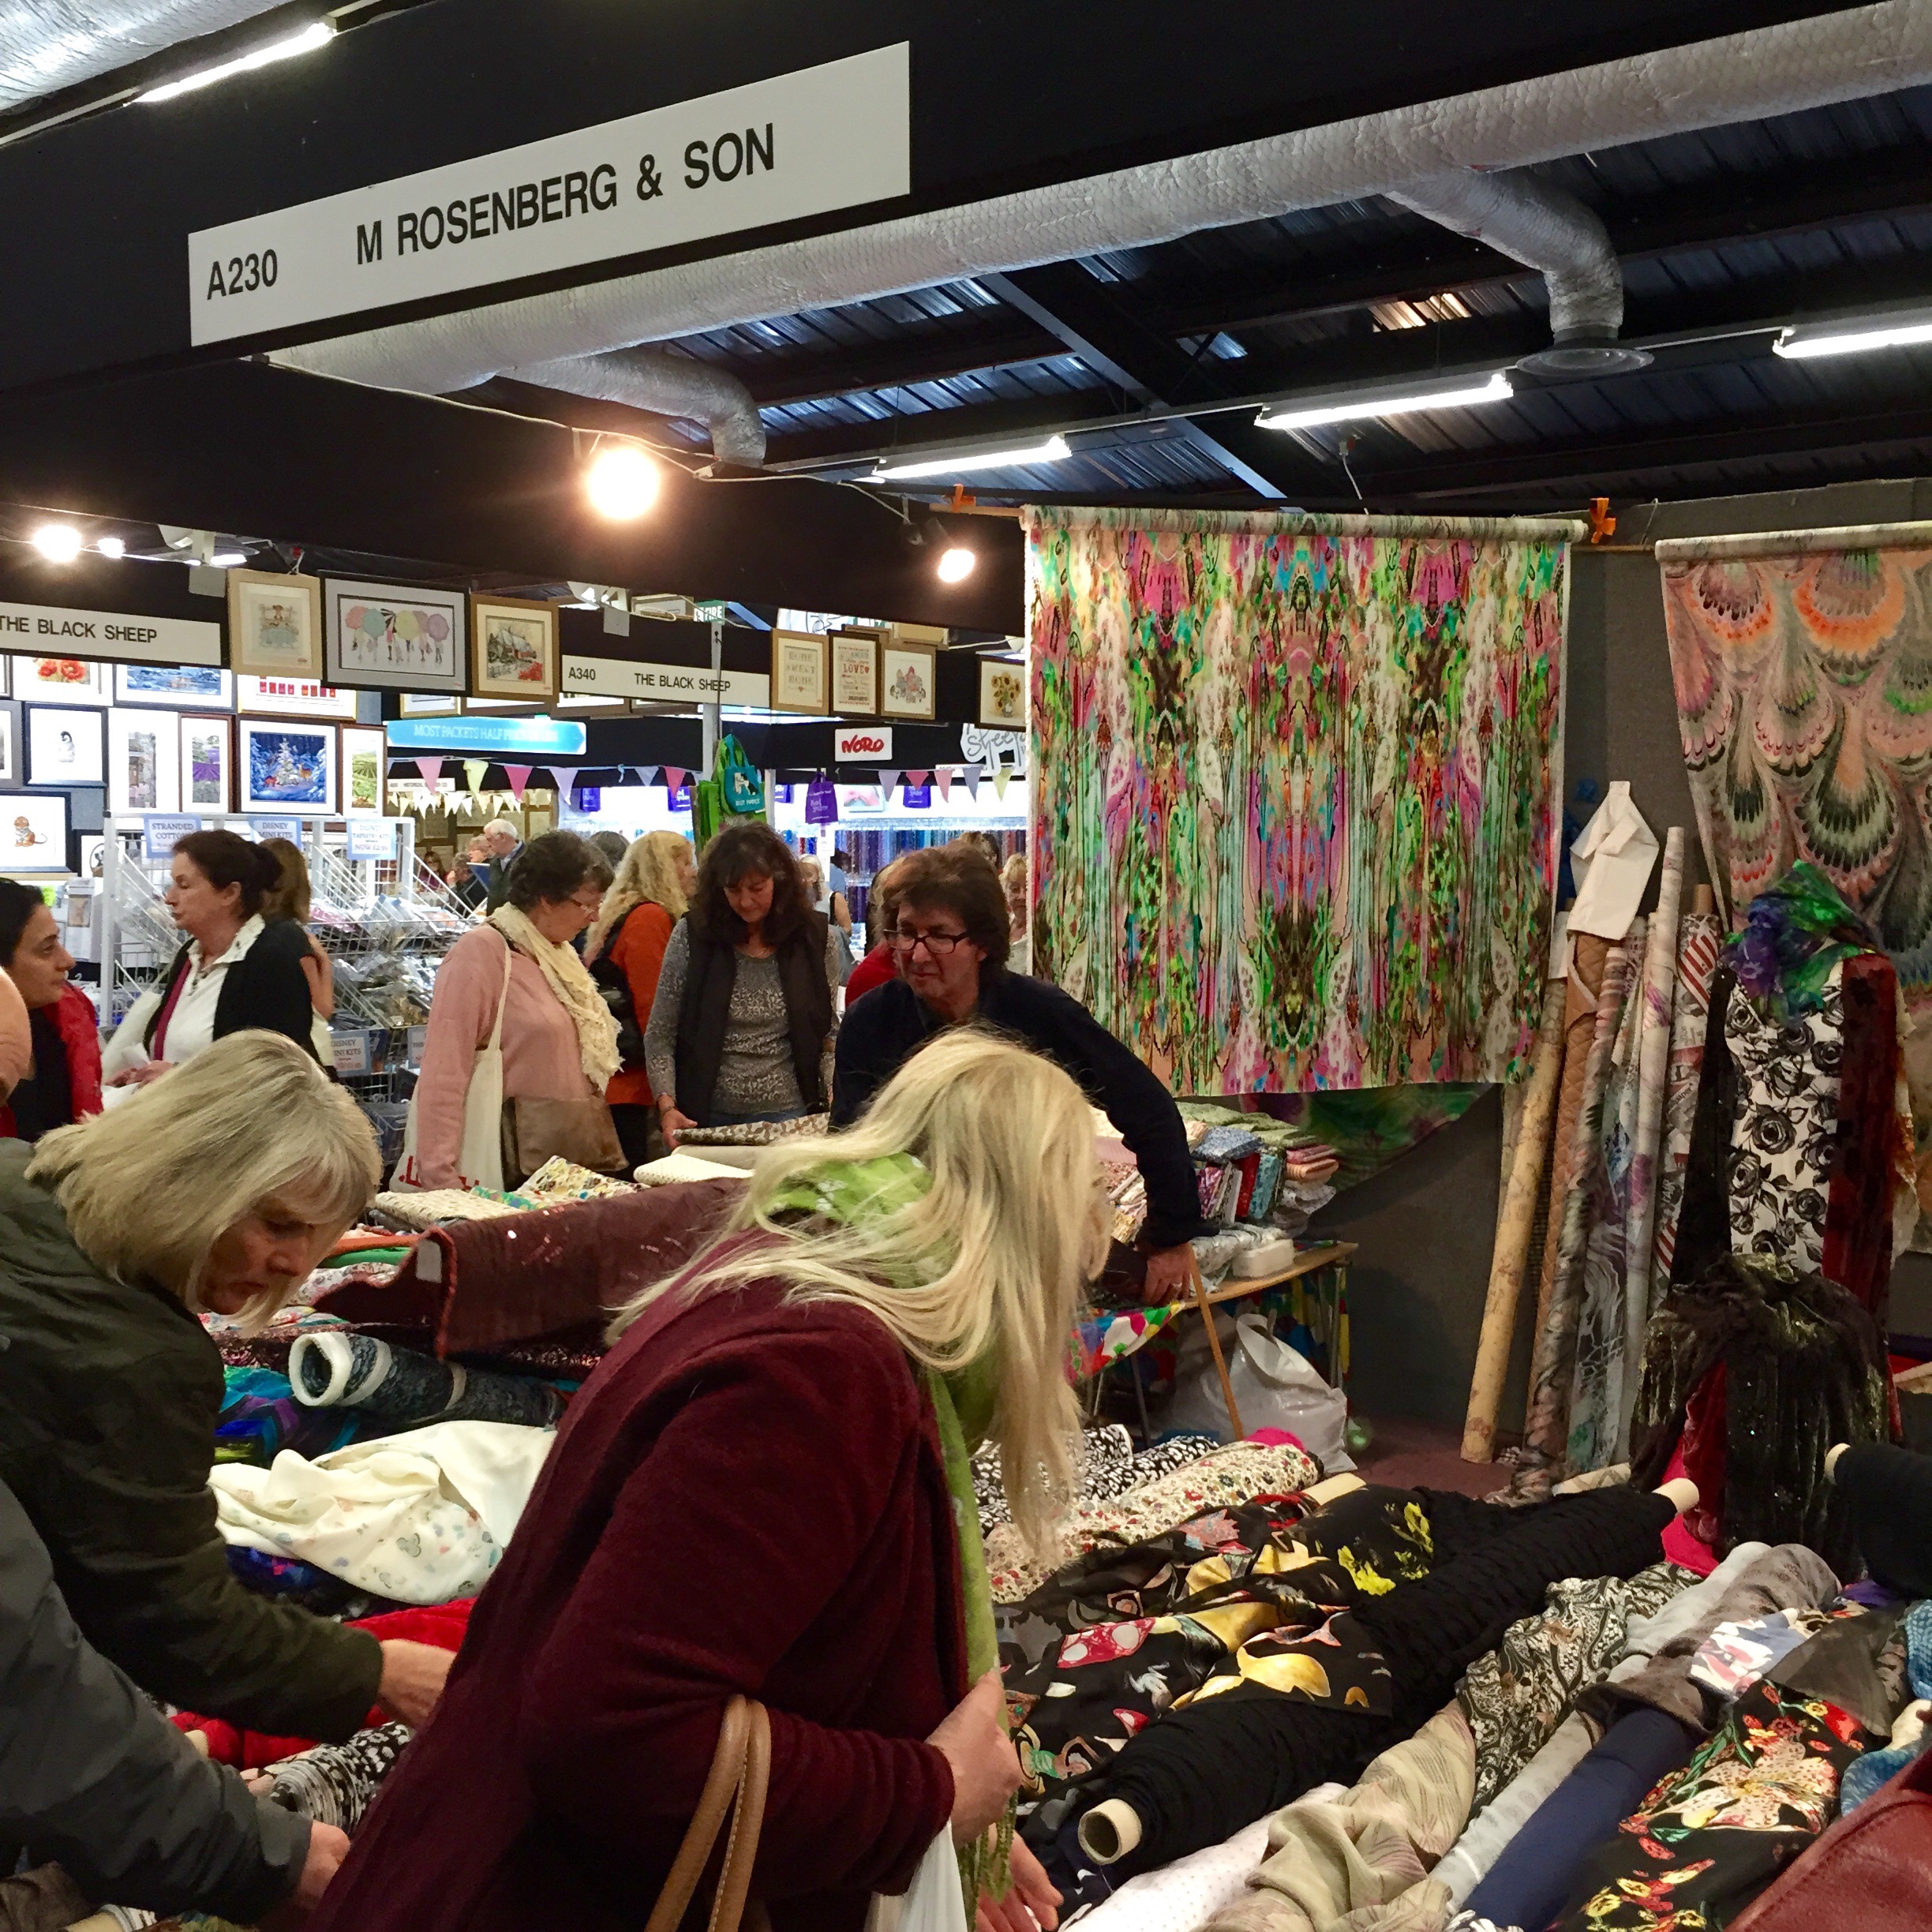
M Rosenberg & Son

I always make sure I visit these at any sewing shows as they usually have bold bright abstract fabrics, according to the staff they are Italian silk designs printed onto high quality cotton. I love these designs and the cotton is soft and silky, an example can be seen in the back of this photo. Unfortunately as this visit was in the afternoon of the last day of the show they’d sold out, so no purchase for me this time!
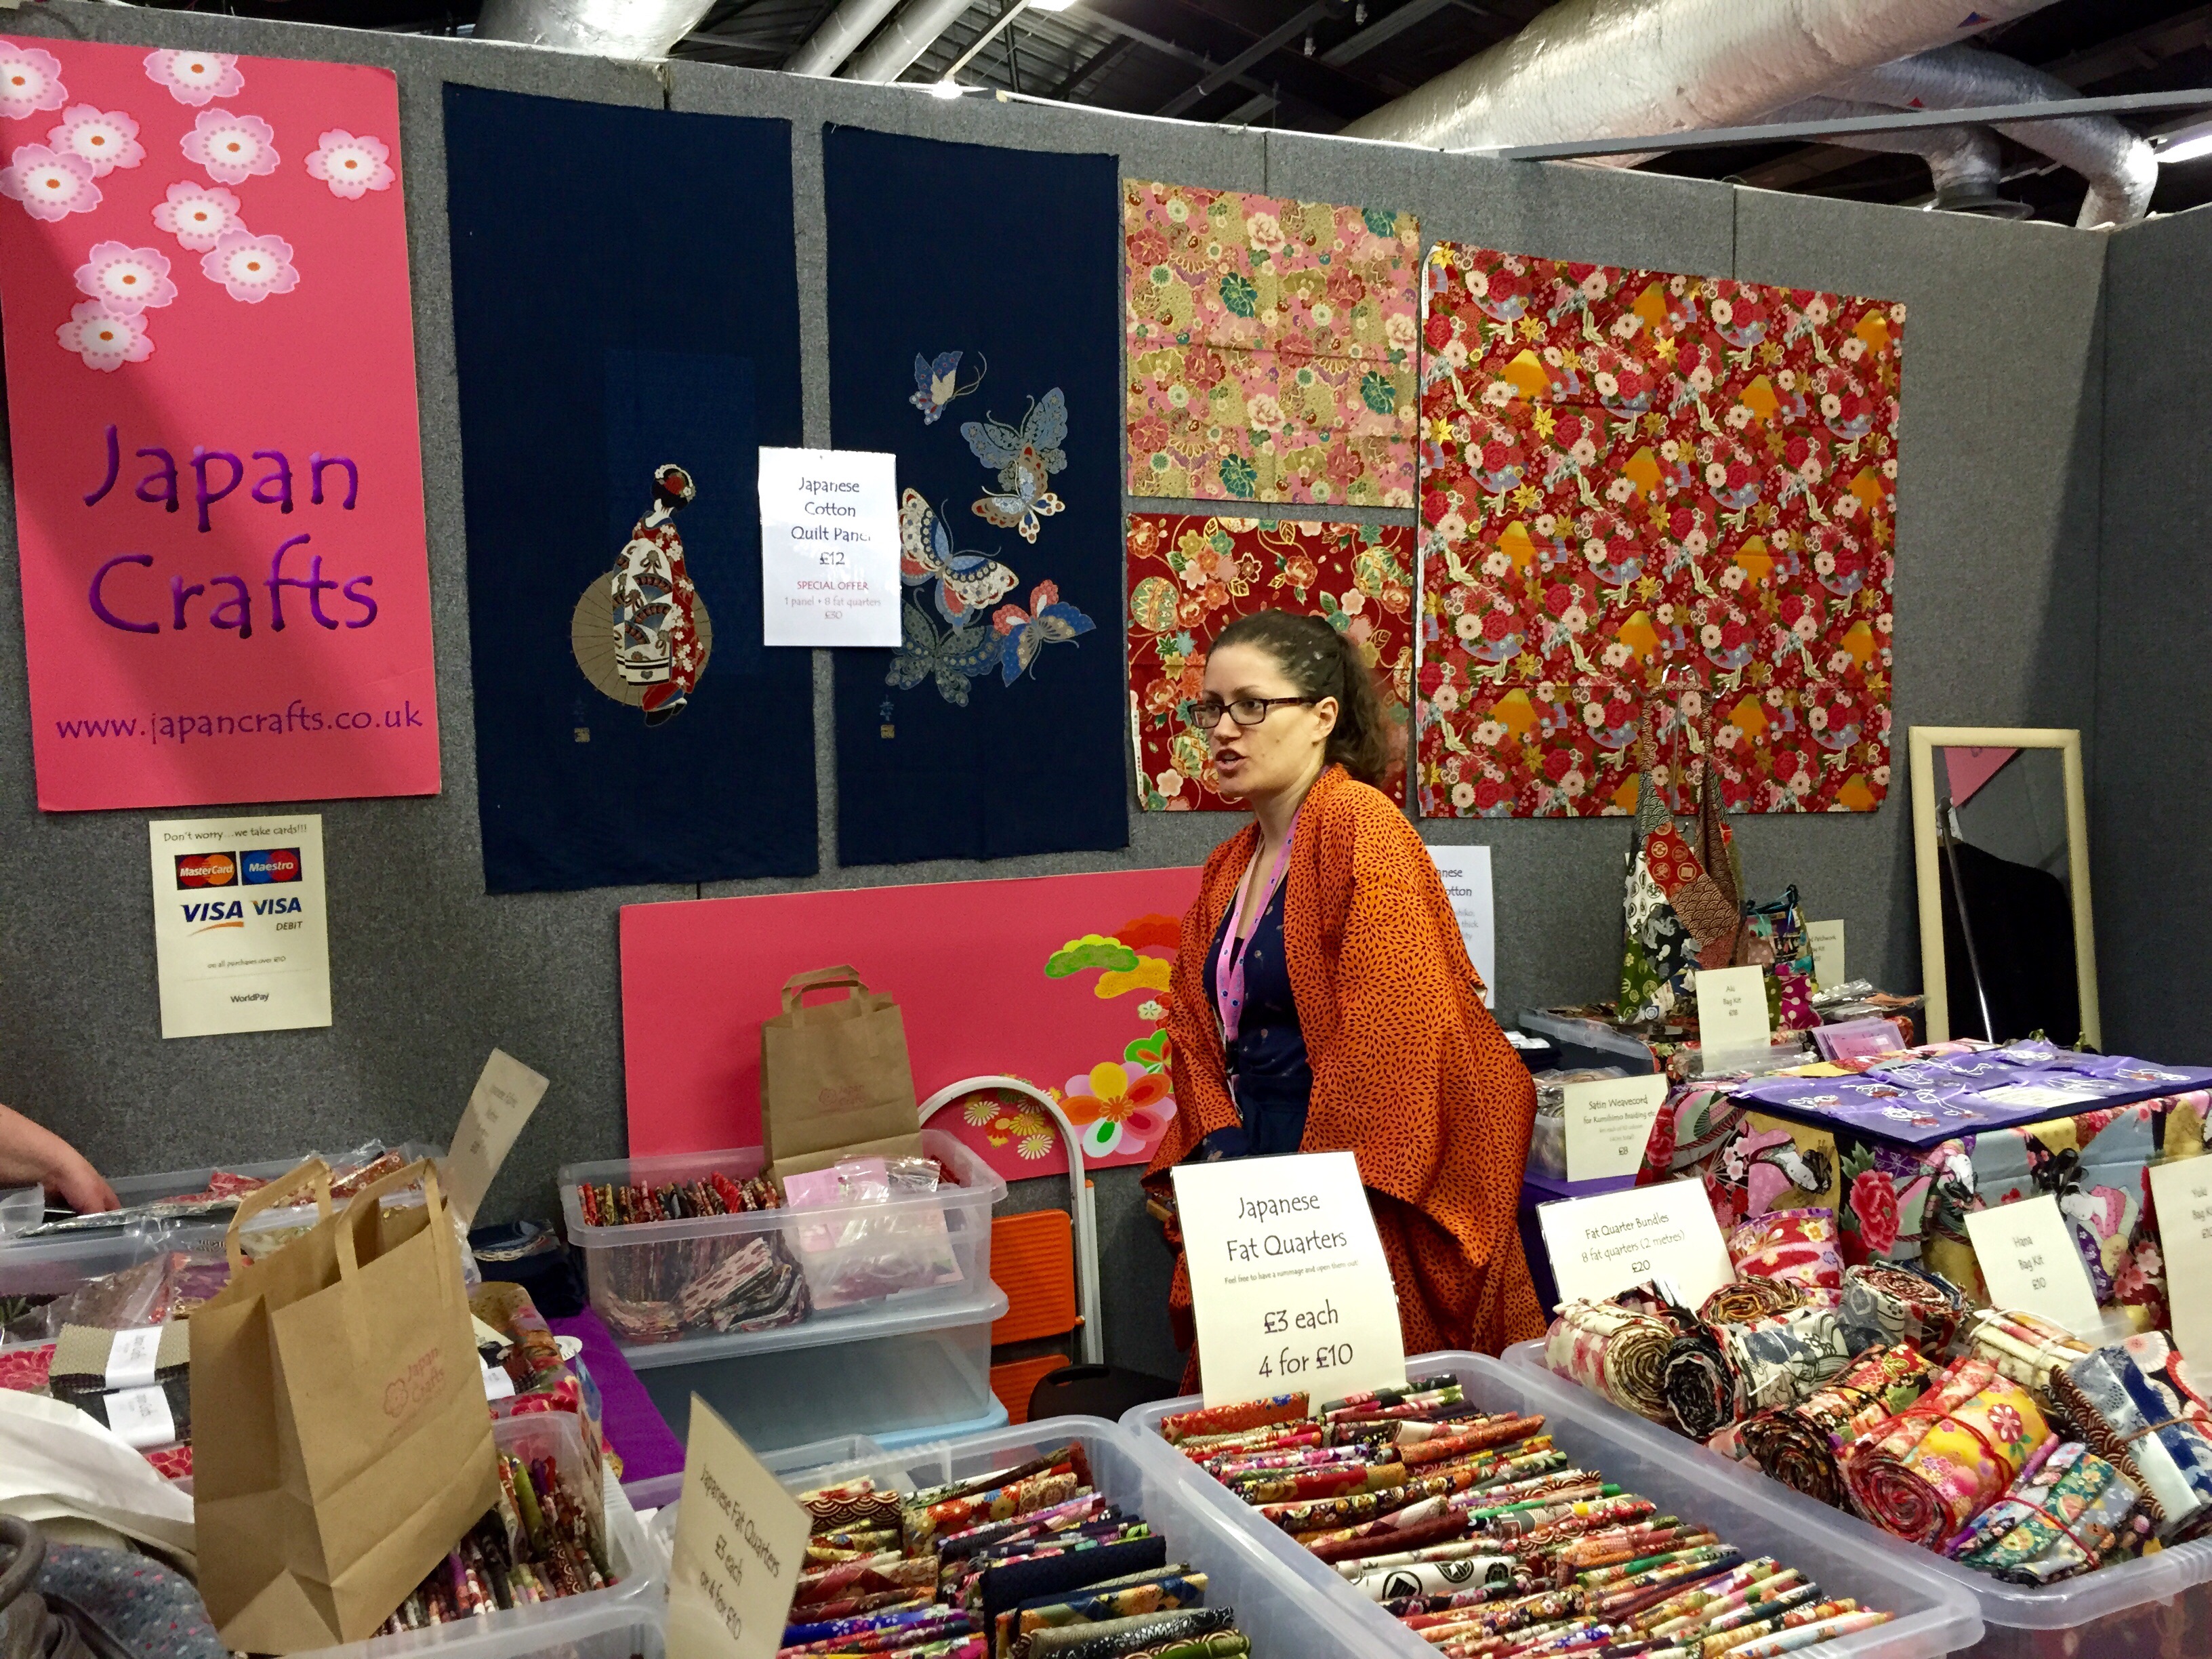
Japan Crafts
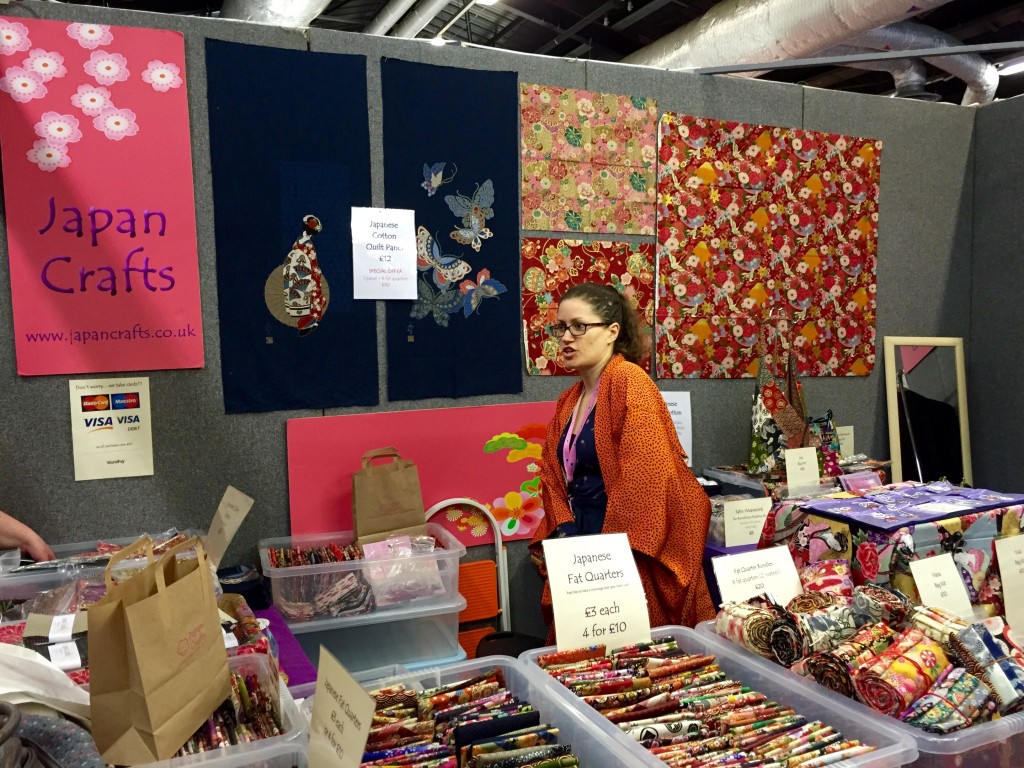
I love the fabrics available from Japan Crafts, so unusual with beautiful intricate designs. They also sell great craft kits to make some unusual bags and brooches. I’ve bought the Kanzashi Flower Brooch Kit and some of their unique mini charm packs from previous shows which I’ve made into the flap on a messenger bag and an autumn themed cushion. I bought another one from the show as it was really pretty but not sure yet what it’ll be come!
Simple Way
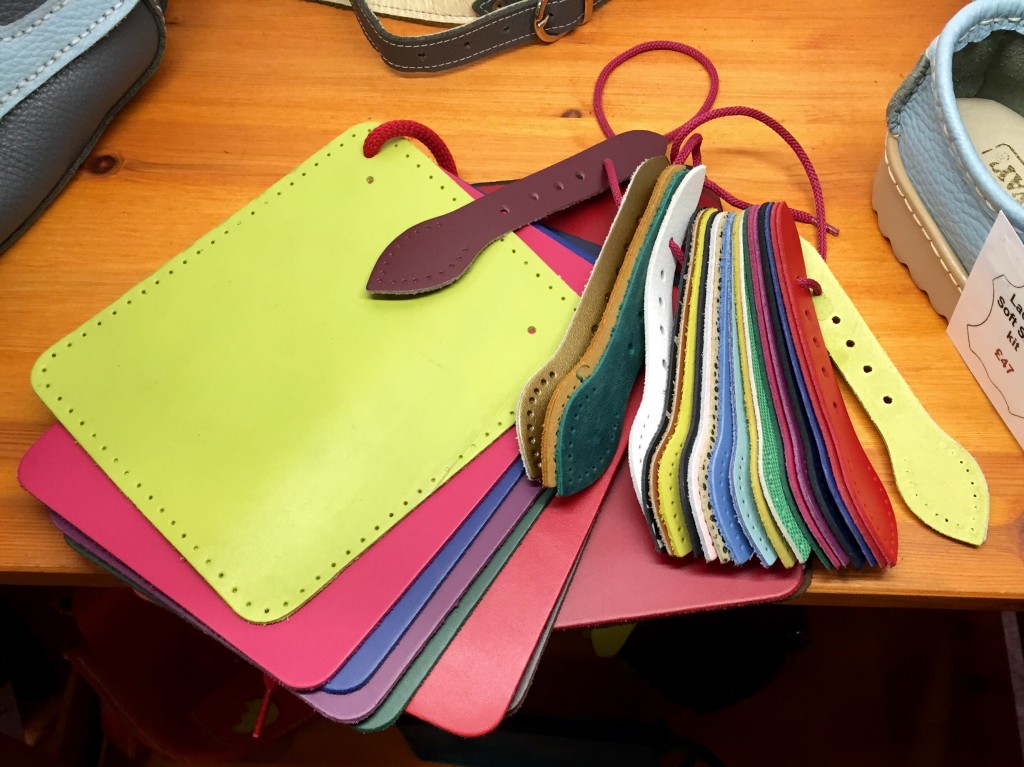
Lots of Leather choices from Simple Way
Simple way sell unique leather kits so that you can make your own leather bags and accessories. I’ve already made a purple and green leather satchel from one of their kits which I love and get lots of compliments on. The kits are great value and work out a lot cheaper than a mass produced, machine made commercial leather satchel. Plus you get to say “I made this” and get all the compliments! The kits come with everything you need, even including the blunt needle and leather thread to sew with.
I decided to treat myself to another kit at the show but wanted something a little different from the satchel, so went with the Monet Messenger Bag Kit. You can also buy these on their website and just choose a colour and it’ll be sent out to you in the post. However as they make these kits themselves and the staff are lovely and friendly they’ll let you customise he kit, which is what I did last time by ringing them. This kit I have chose the bright pink leather as the body and then they’ll add a buckle to the flap for me as I’m not comfortable without a proper fastening on a bag. I chose both the buckle and strap to be in black leather, and added a shoulder pad top make it more comfortable as I tend to put loads of stuff in my bag! The shoulder pad will be in the pink to match the bag body. All of that for just £44, isn’t that great value! So excited for my kit to be delivered in a few weeks.
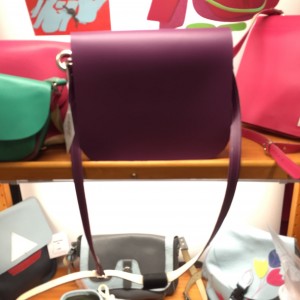
Simple Way’s Monet Messenger Bag
Fabrics Galore
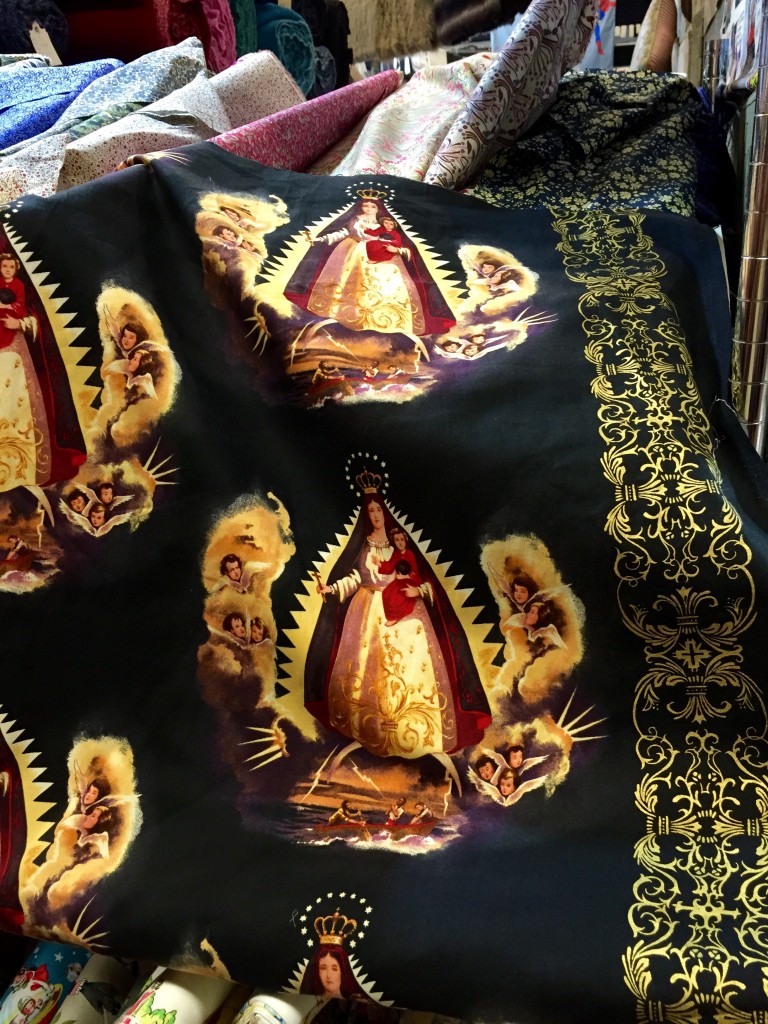
The Virgin Of Guadalupe fabric
I always like to have a look at this stall as they always have a great selection of Liberty Fabrics and Alexander Henry Fabrics. I love both of these designers, the abstract designs of some Liberty and the soft luxurious feel of their tana lawn whilst the unusual, fun and often daft designs of Alexander Henry always keep me intrigued. I just loved this “Virgin Of Guadalupe” design of Alexander Henry’s and was very tempted to buy half a meter as I reckon it’d make a fabulous messenger bag flap!
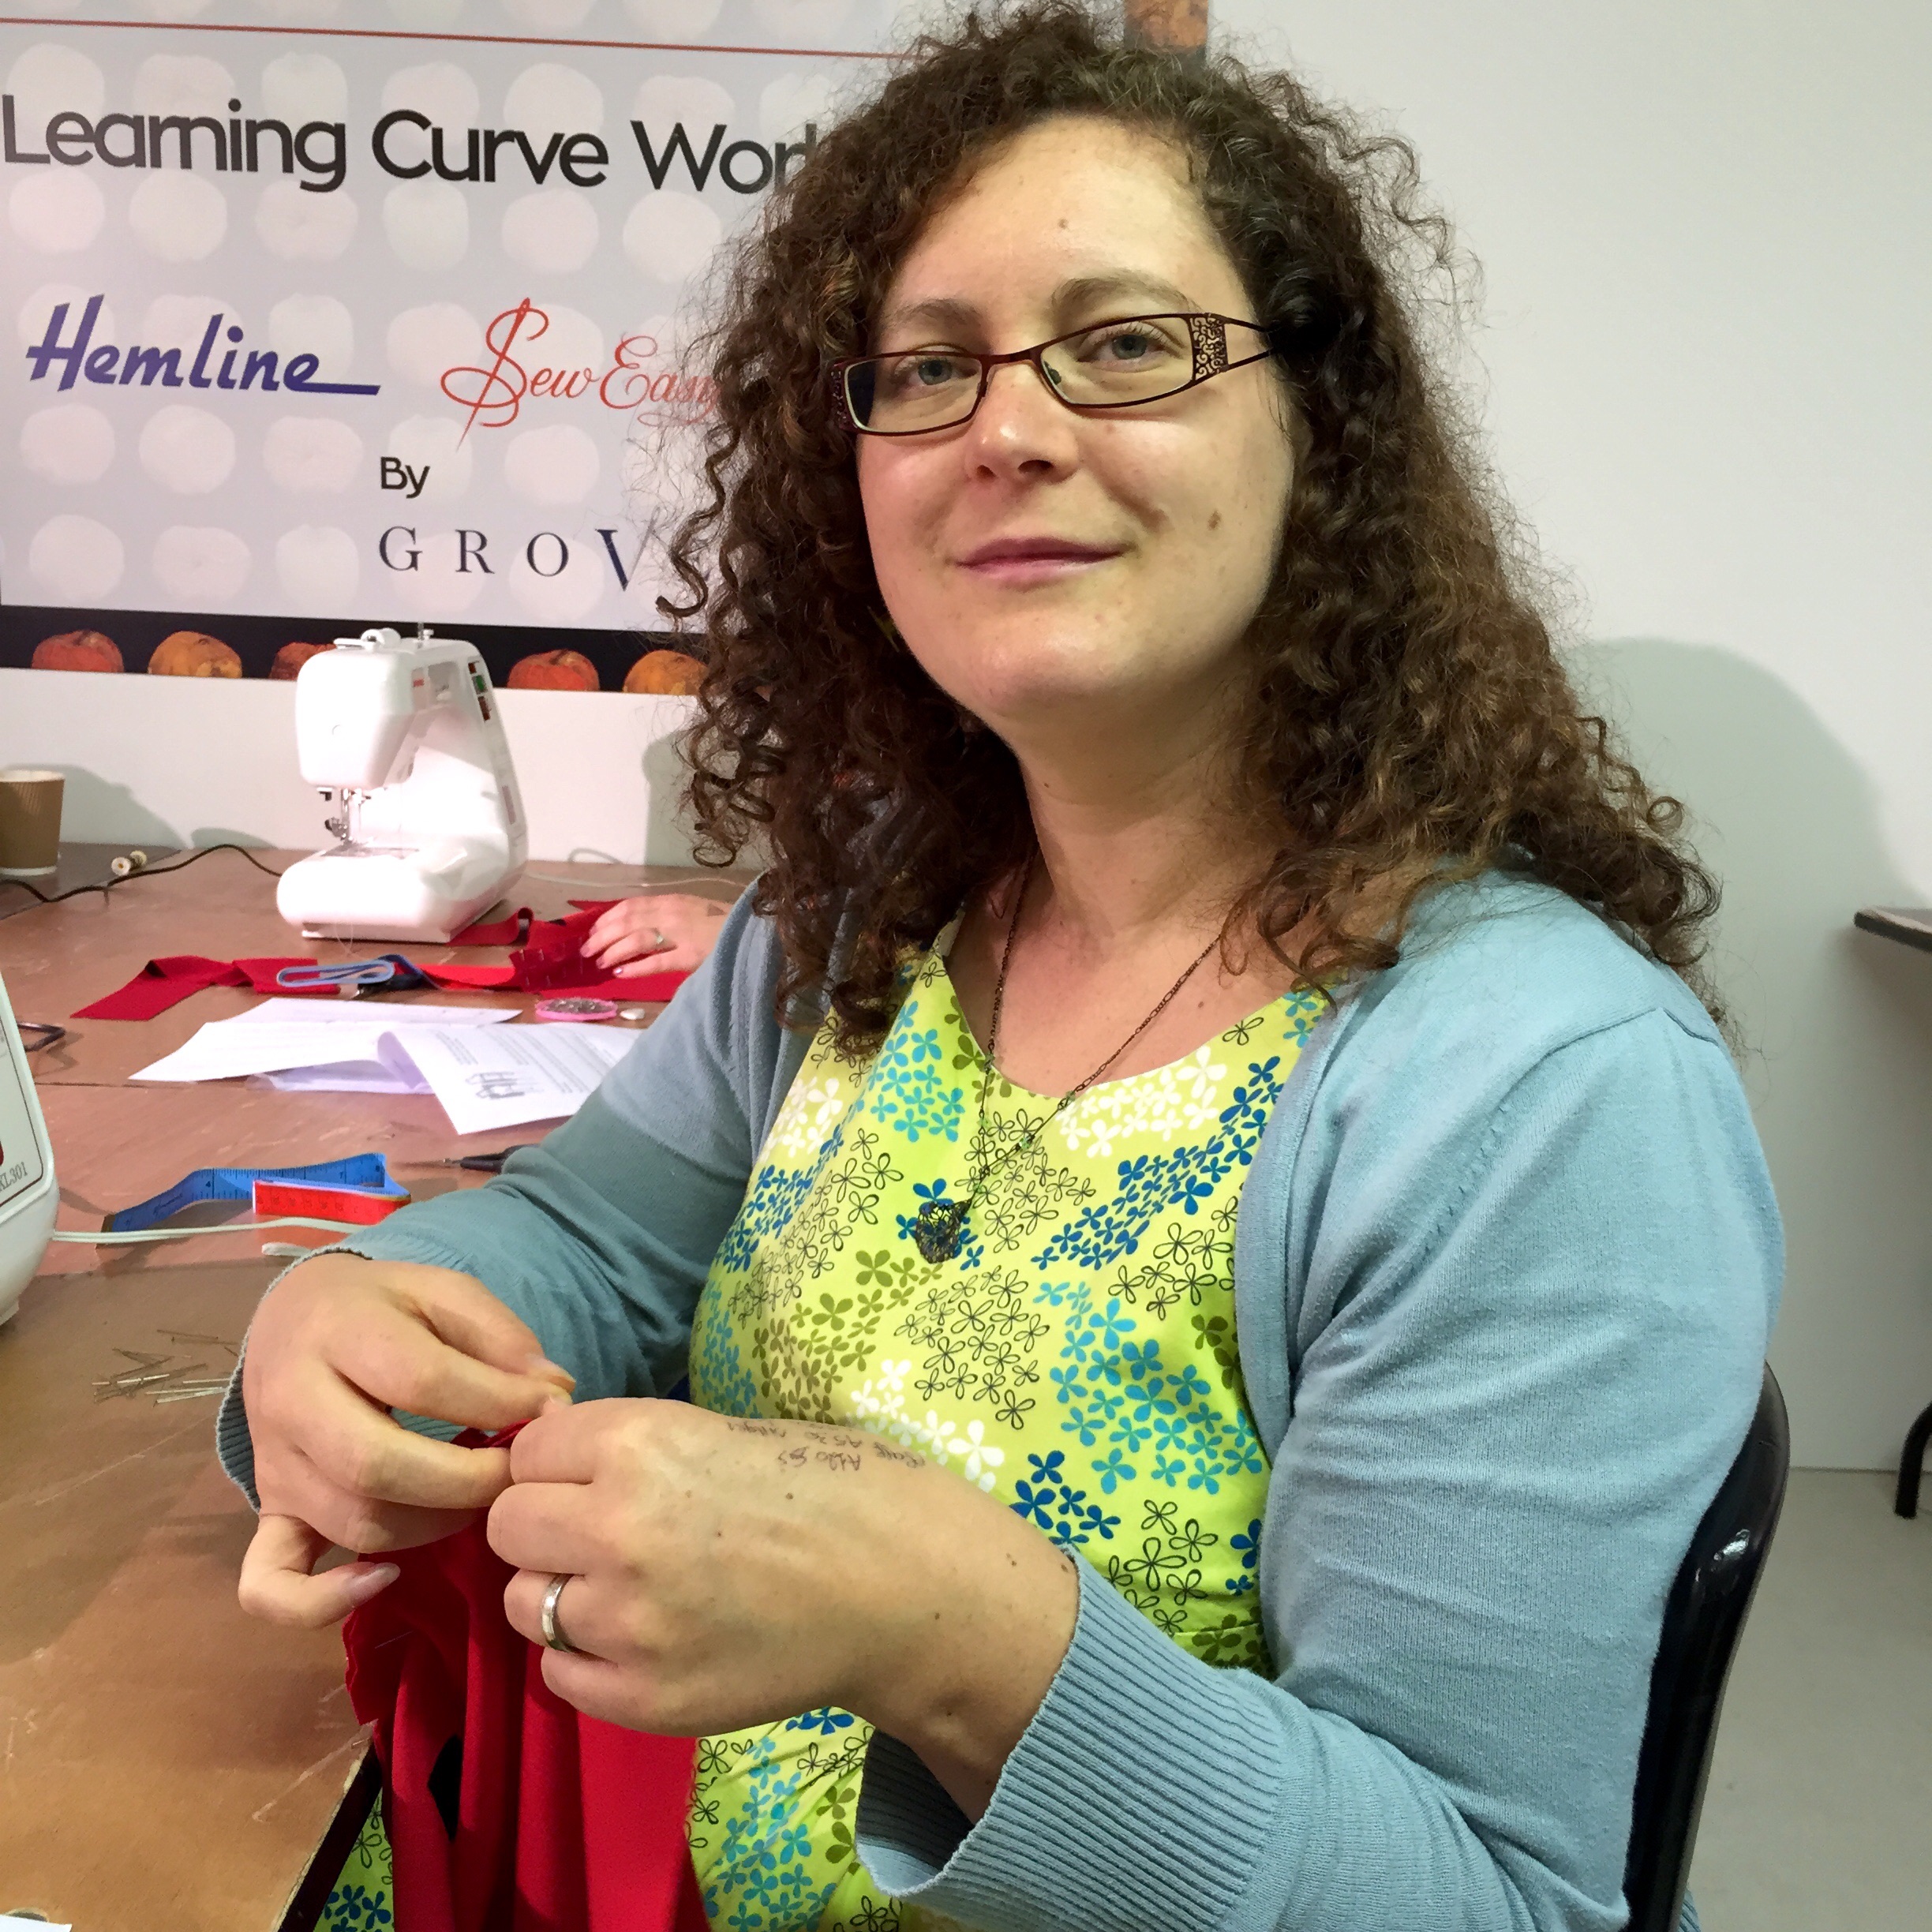
Workshop – Perfect Fit & Finish, Bust & Neckline
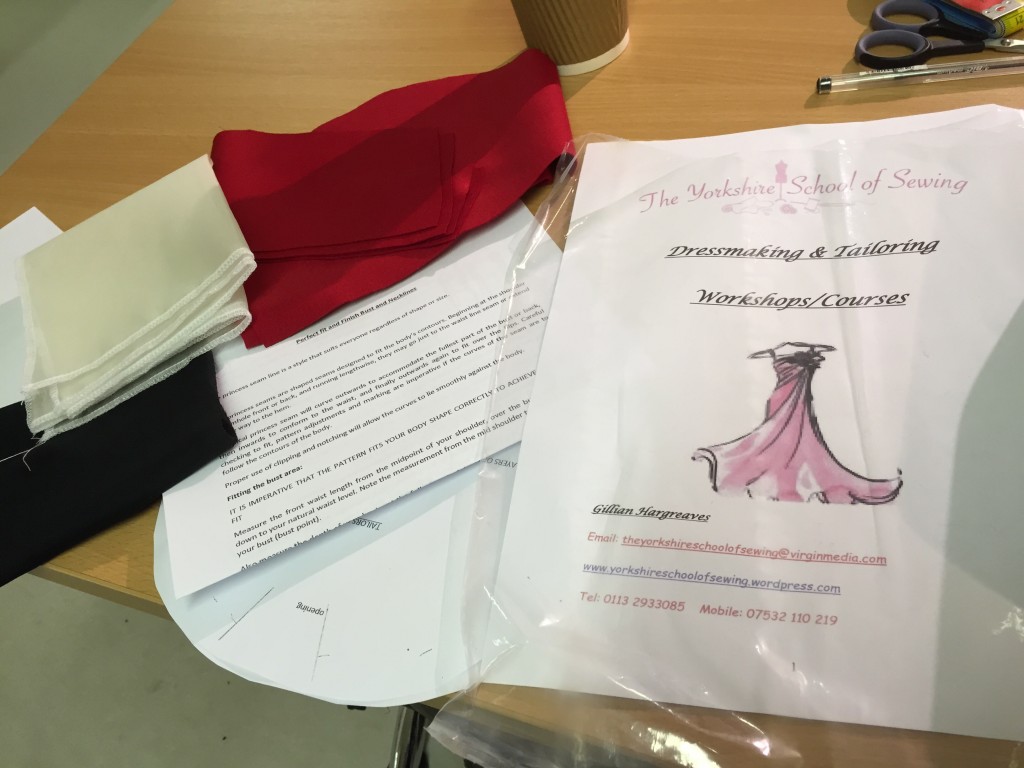
Workshop Handouts
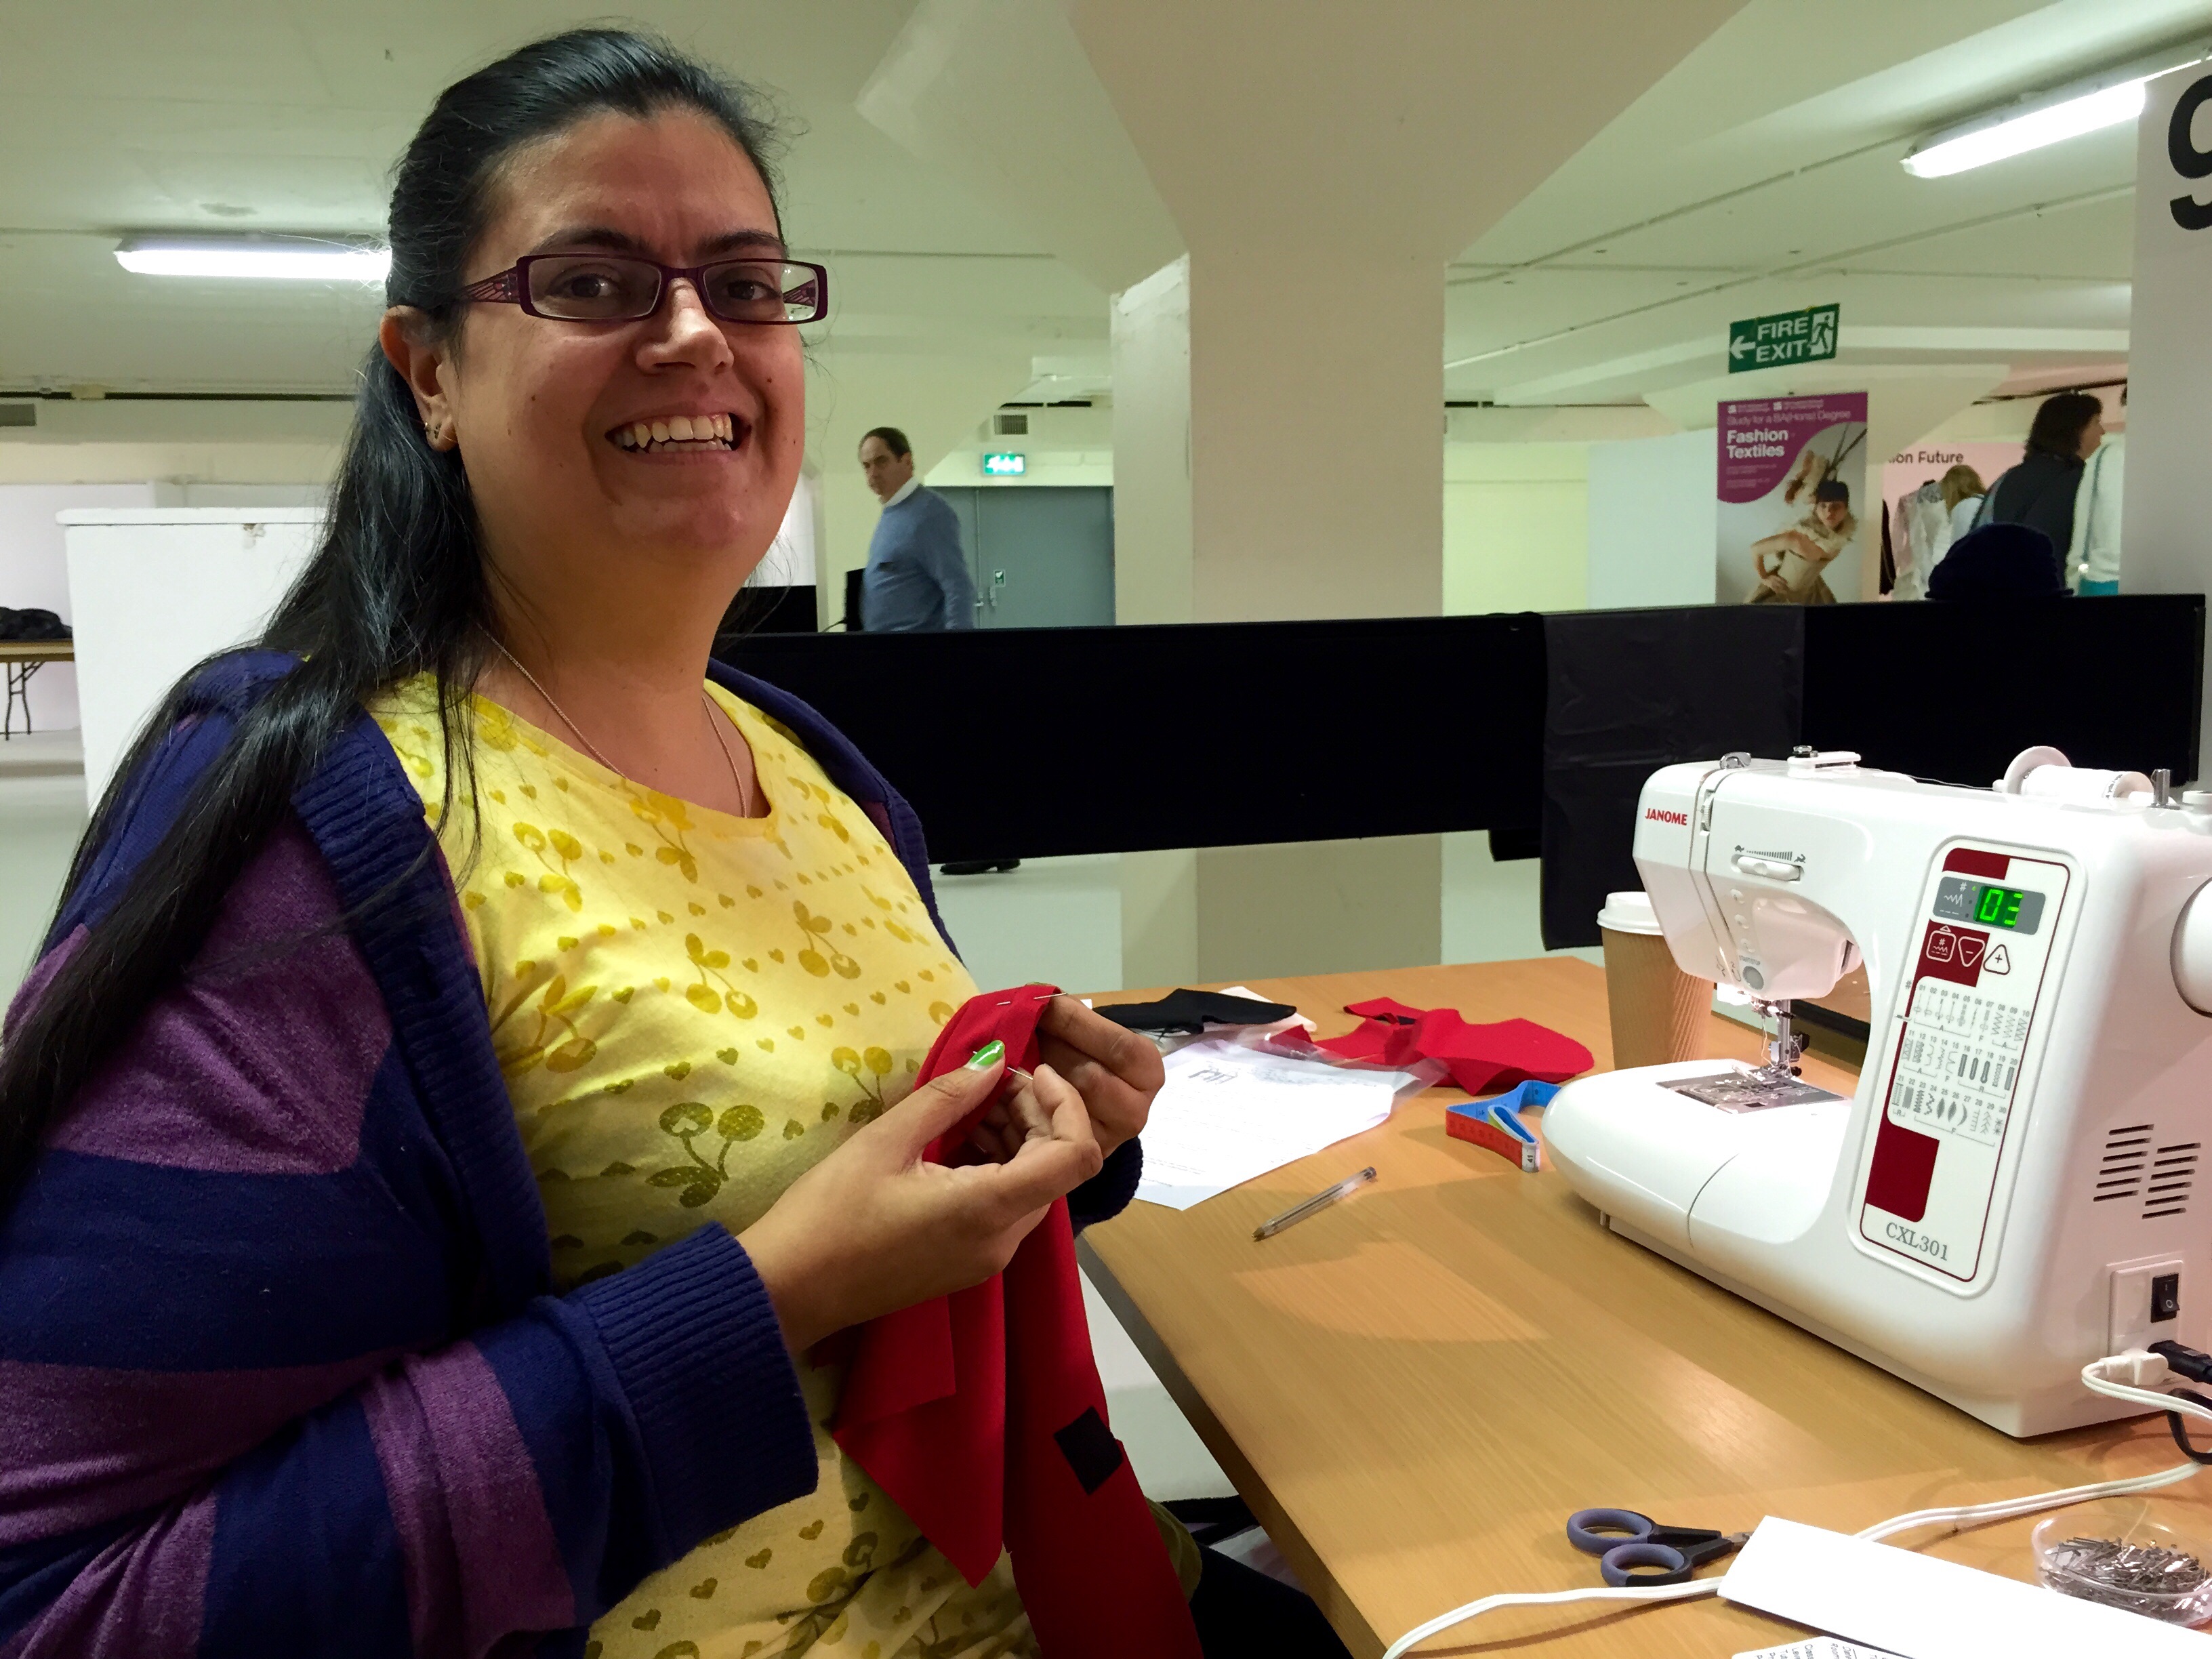
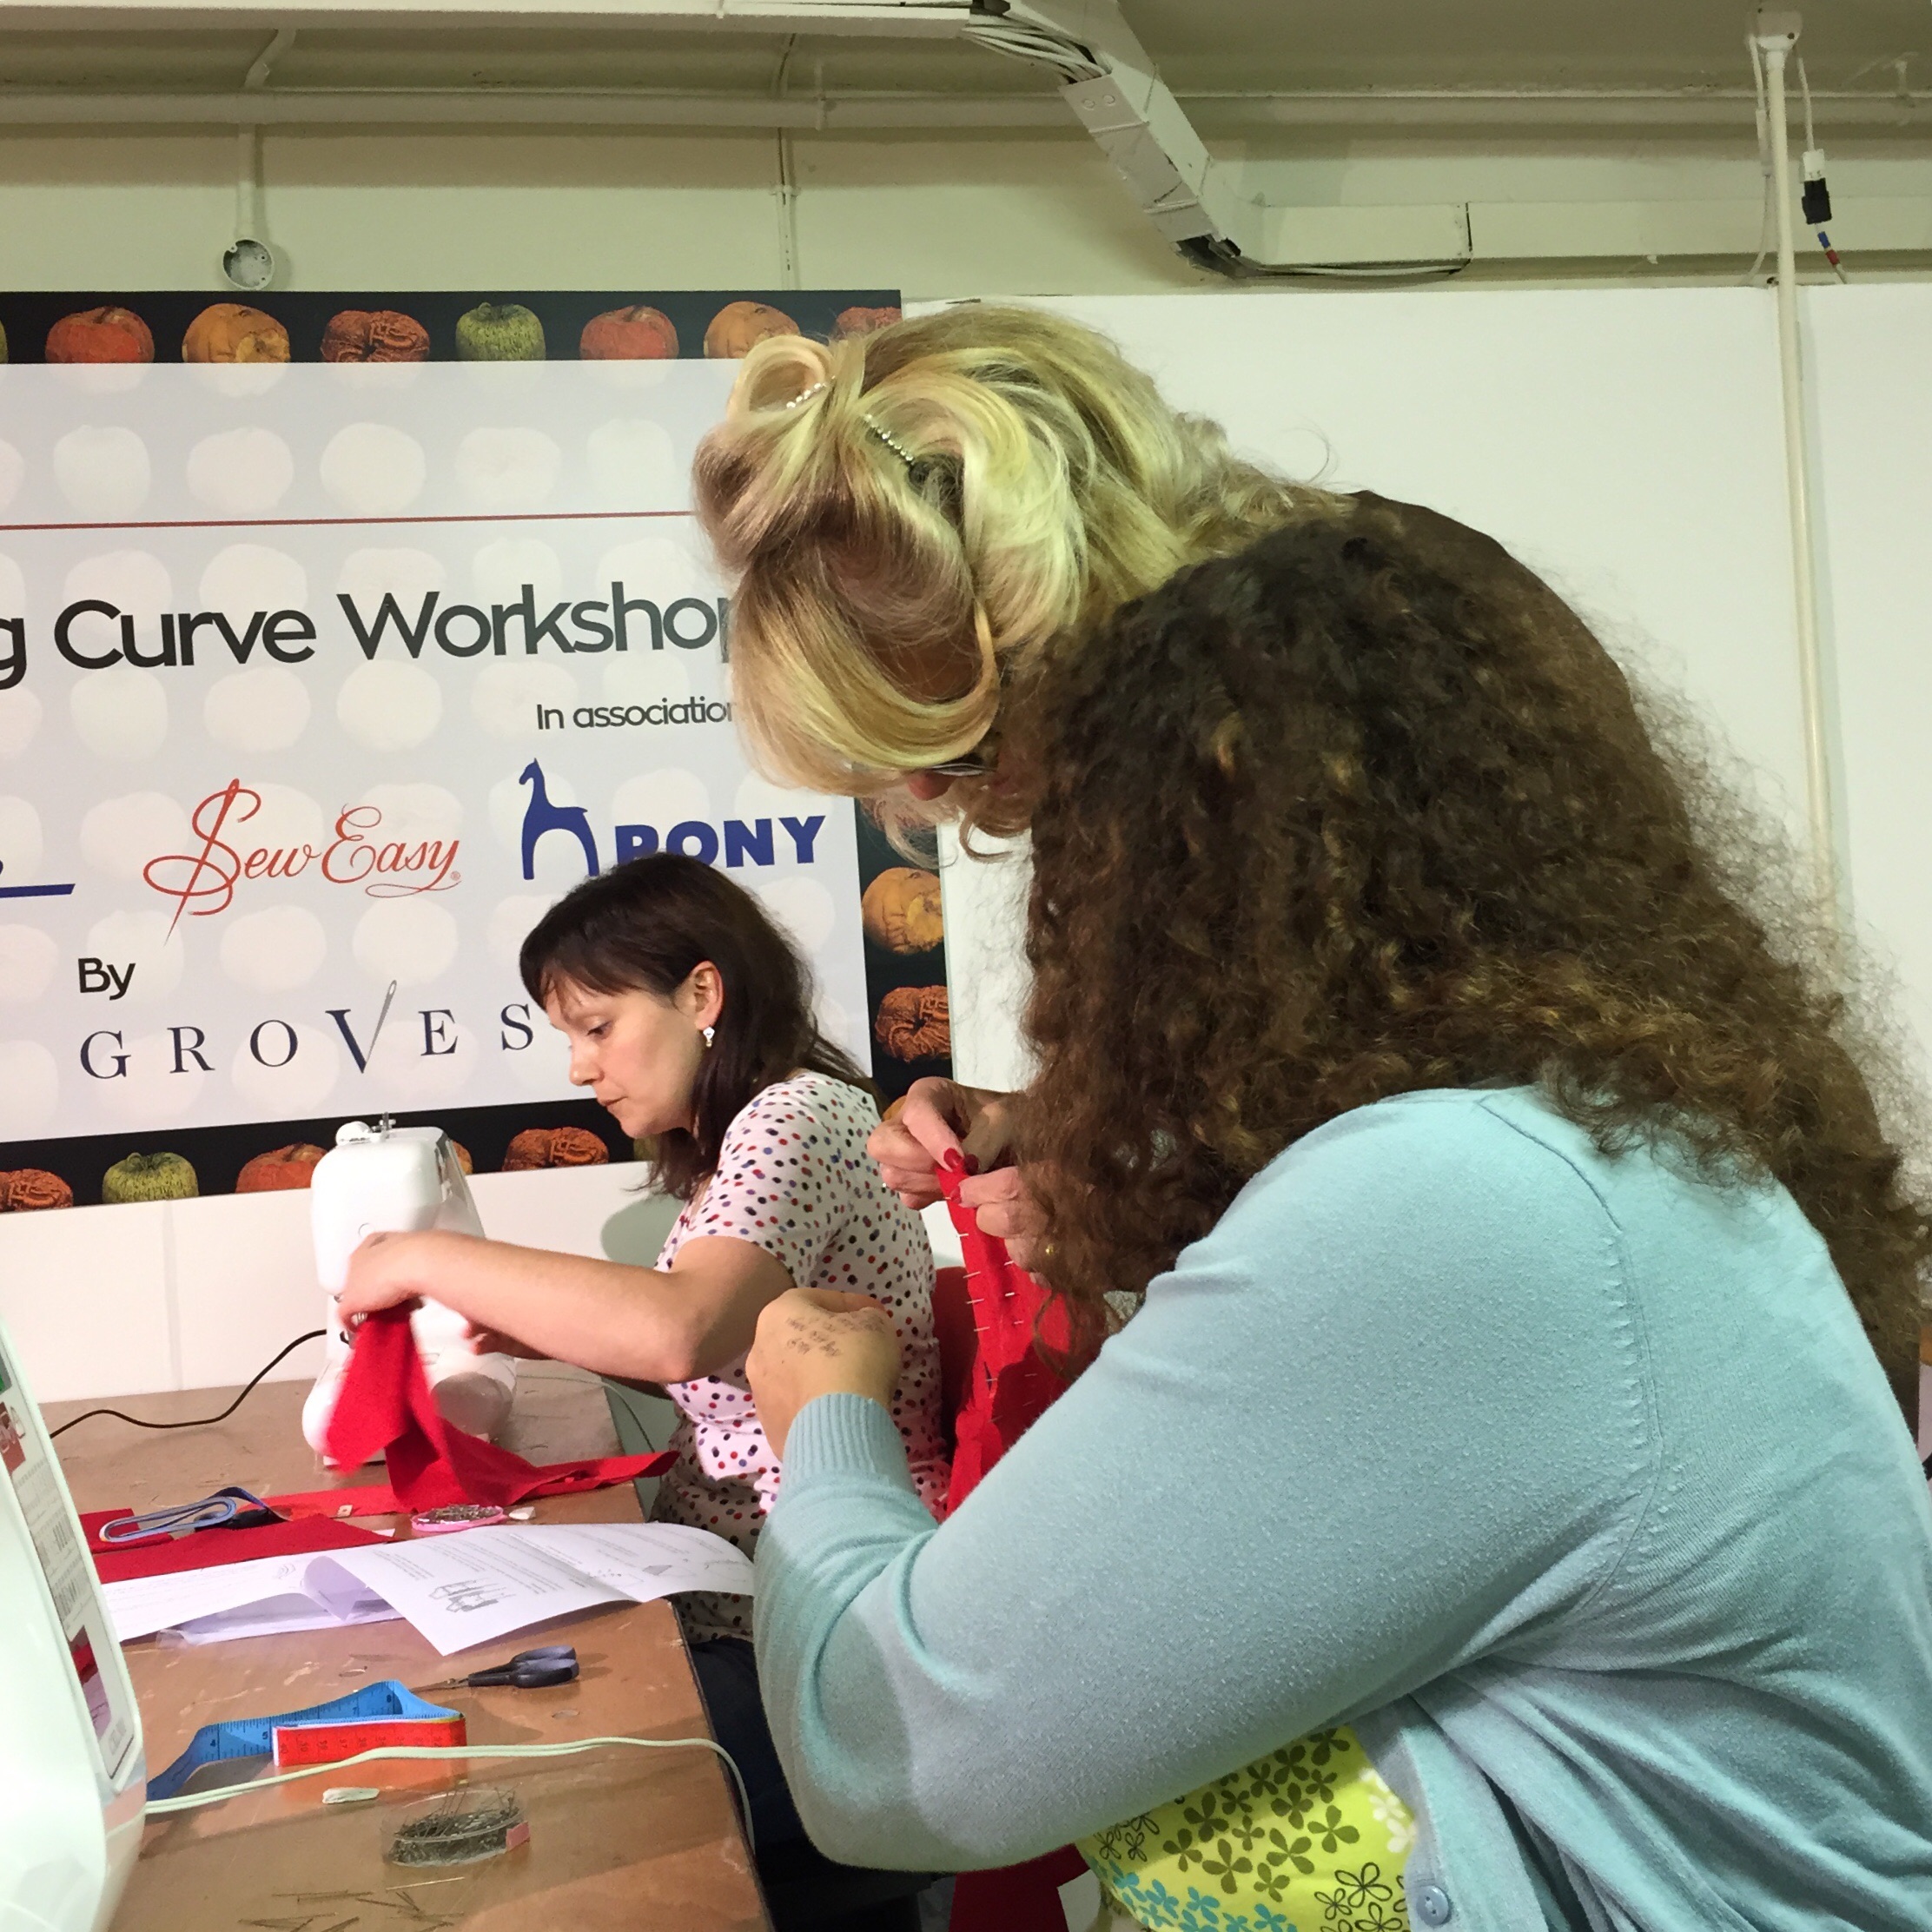
This year I chose to do a workshop along with Nele. The workshop was run by Gillian Hargreaves from The Yorkshire School of Sewing. Gillian is a very good teacher, patient, well spoken and happy to explain things. However I was rather disappointed with the class. I expected to learn how to fit a bust and neckline, and all I really learnt was how to sew a curve and how to under stitch, both of which I could already do. The fact that the sewing machines provided by the show clearly weren’t checked or in full working order was also disappointed. A number of them still had the free machine embroidery feet on from the previous class, so students had to waste precious time changing them back. Also my machine had been left on an odd stitch, so didn’t sew properly at first. After a ‘reboot’ it started sewing correctly but the started skipping stitches and gathering the fabric so badly that I had to unpick it twice and ended up missing what Gillian was saying! Another lady had left the class early, so I was able to use her machine and Gillian was very happy to help me catch up.

Me at the workshop

Nele at the Workshop

Gillian assisting Nele
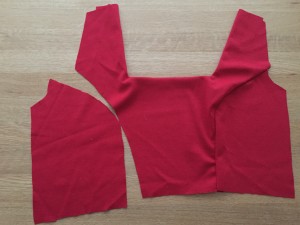
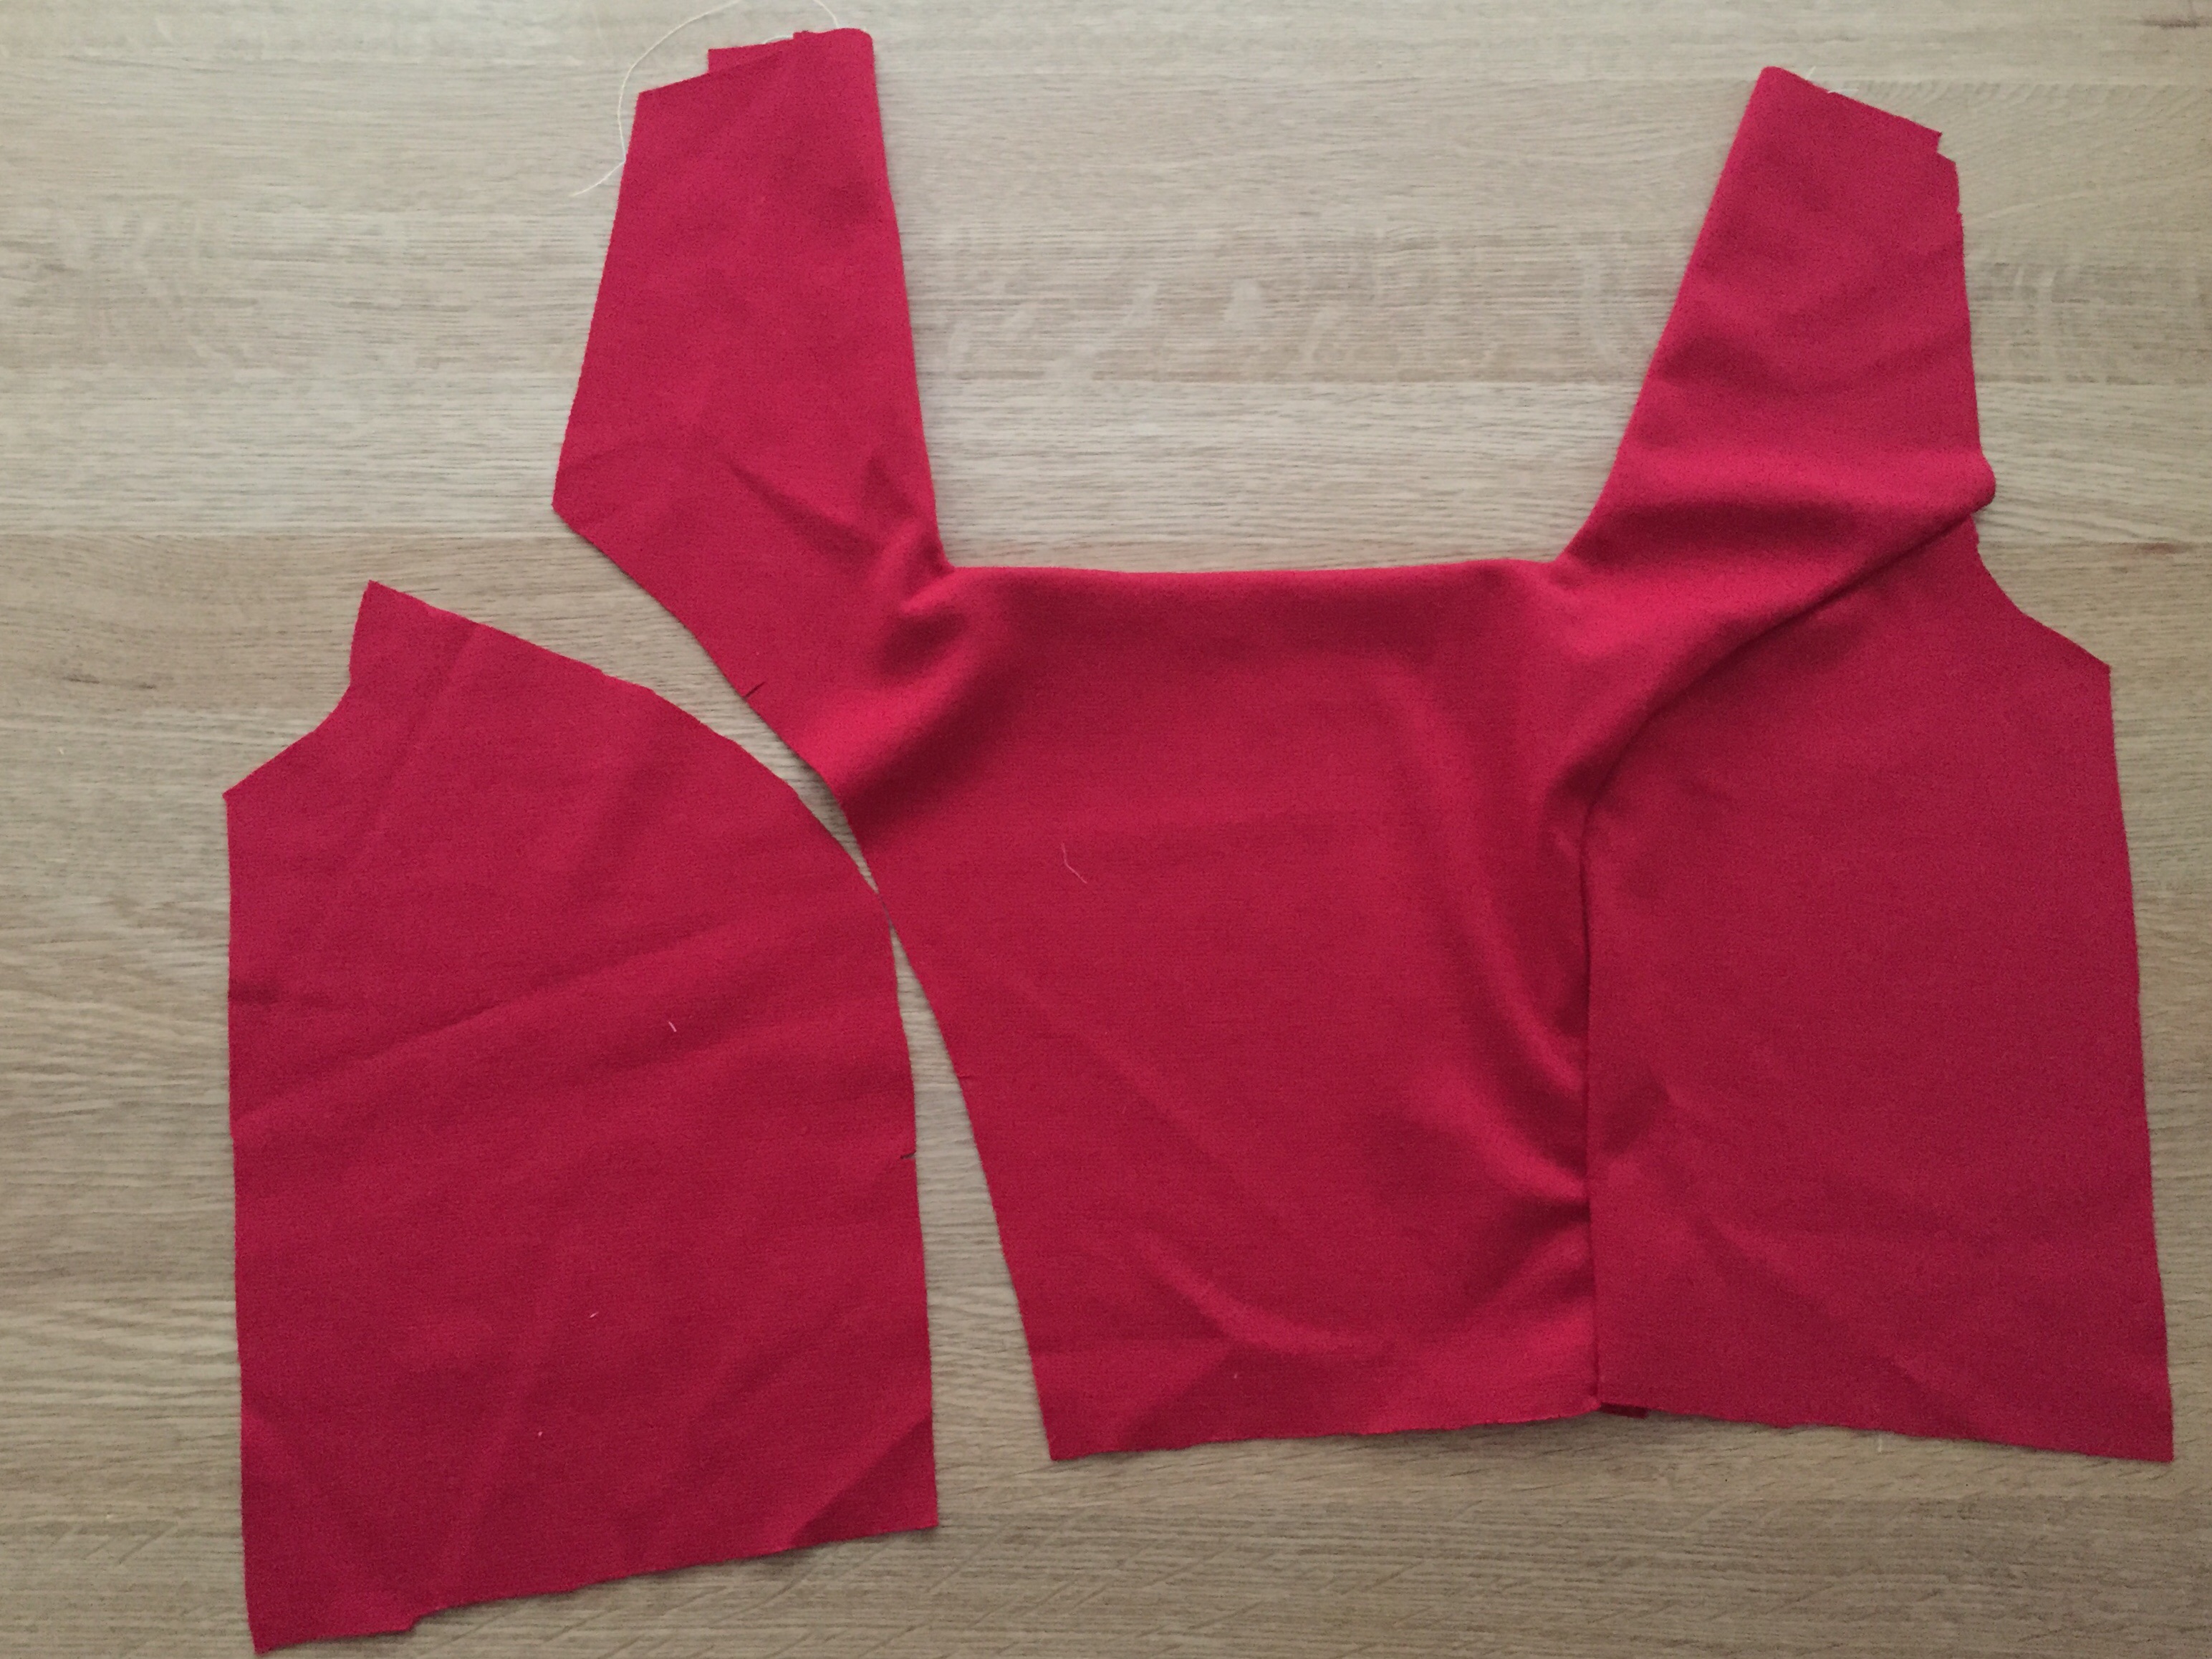
My ‘completed’ bodice front
Therefore I would recommend investigating thoroughly what is to be taught in a class before signing up and I don’t recommend taking a class on a Sunday as the sewing machines don’t appear to be very well taken care of over the weekend and by Sunday afternoon, are too tired!
Swag
This least amount I’ve ever come home with from a sewing show, partly due to time spent at the workshop, having an injury to my foot, which meant walking slowly round as well as M Rosenberg not having any of the Italian cotton left. However I did also make a purchase from Simple Way who will deliver my kit in approximately 3 weeks.
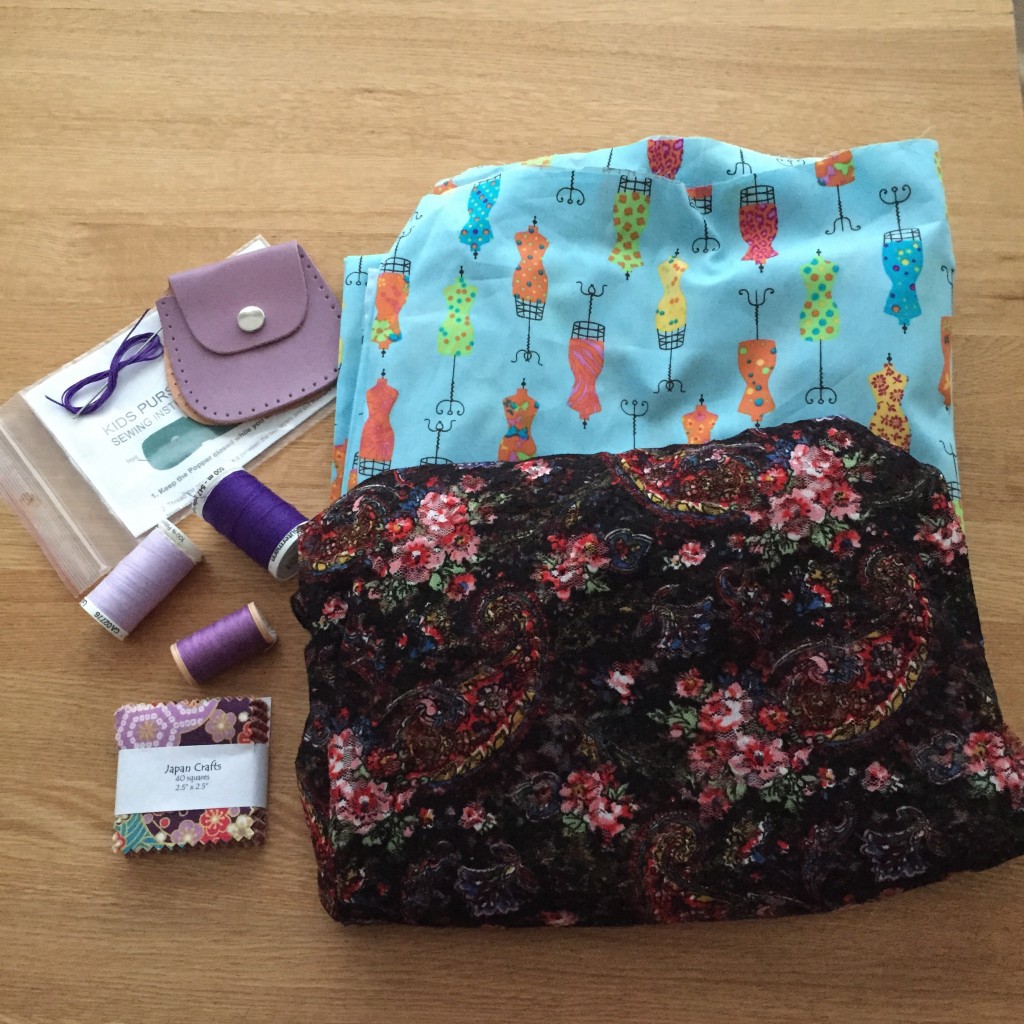
Little purse kit from Simple Way, dress stand cotton fabric (can’t remember who from), stained glass stretch lace from The Shuttle, mini charm pack from Japan Crafts and Gutterman threads from Elna
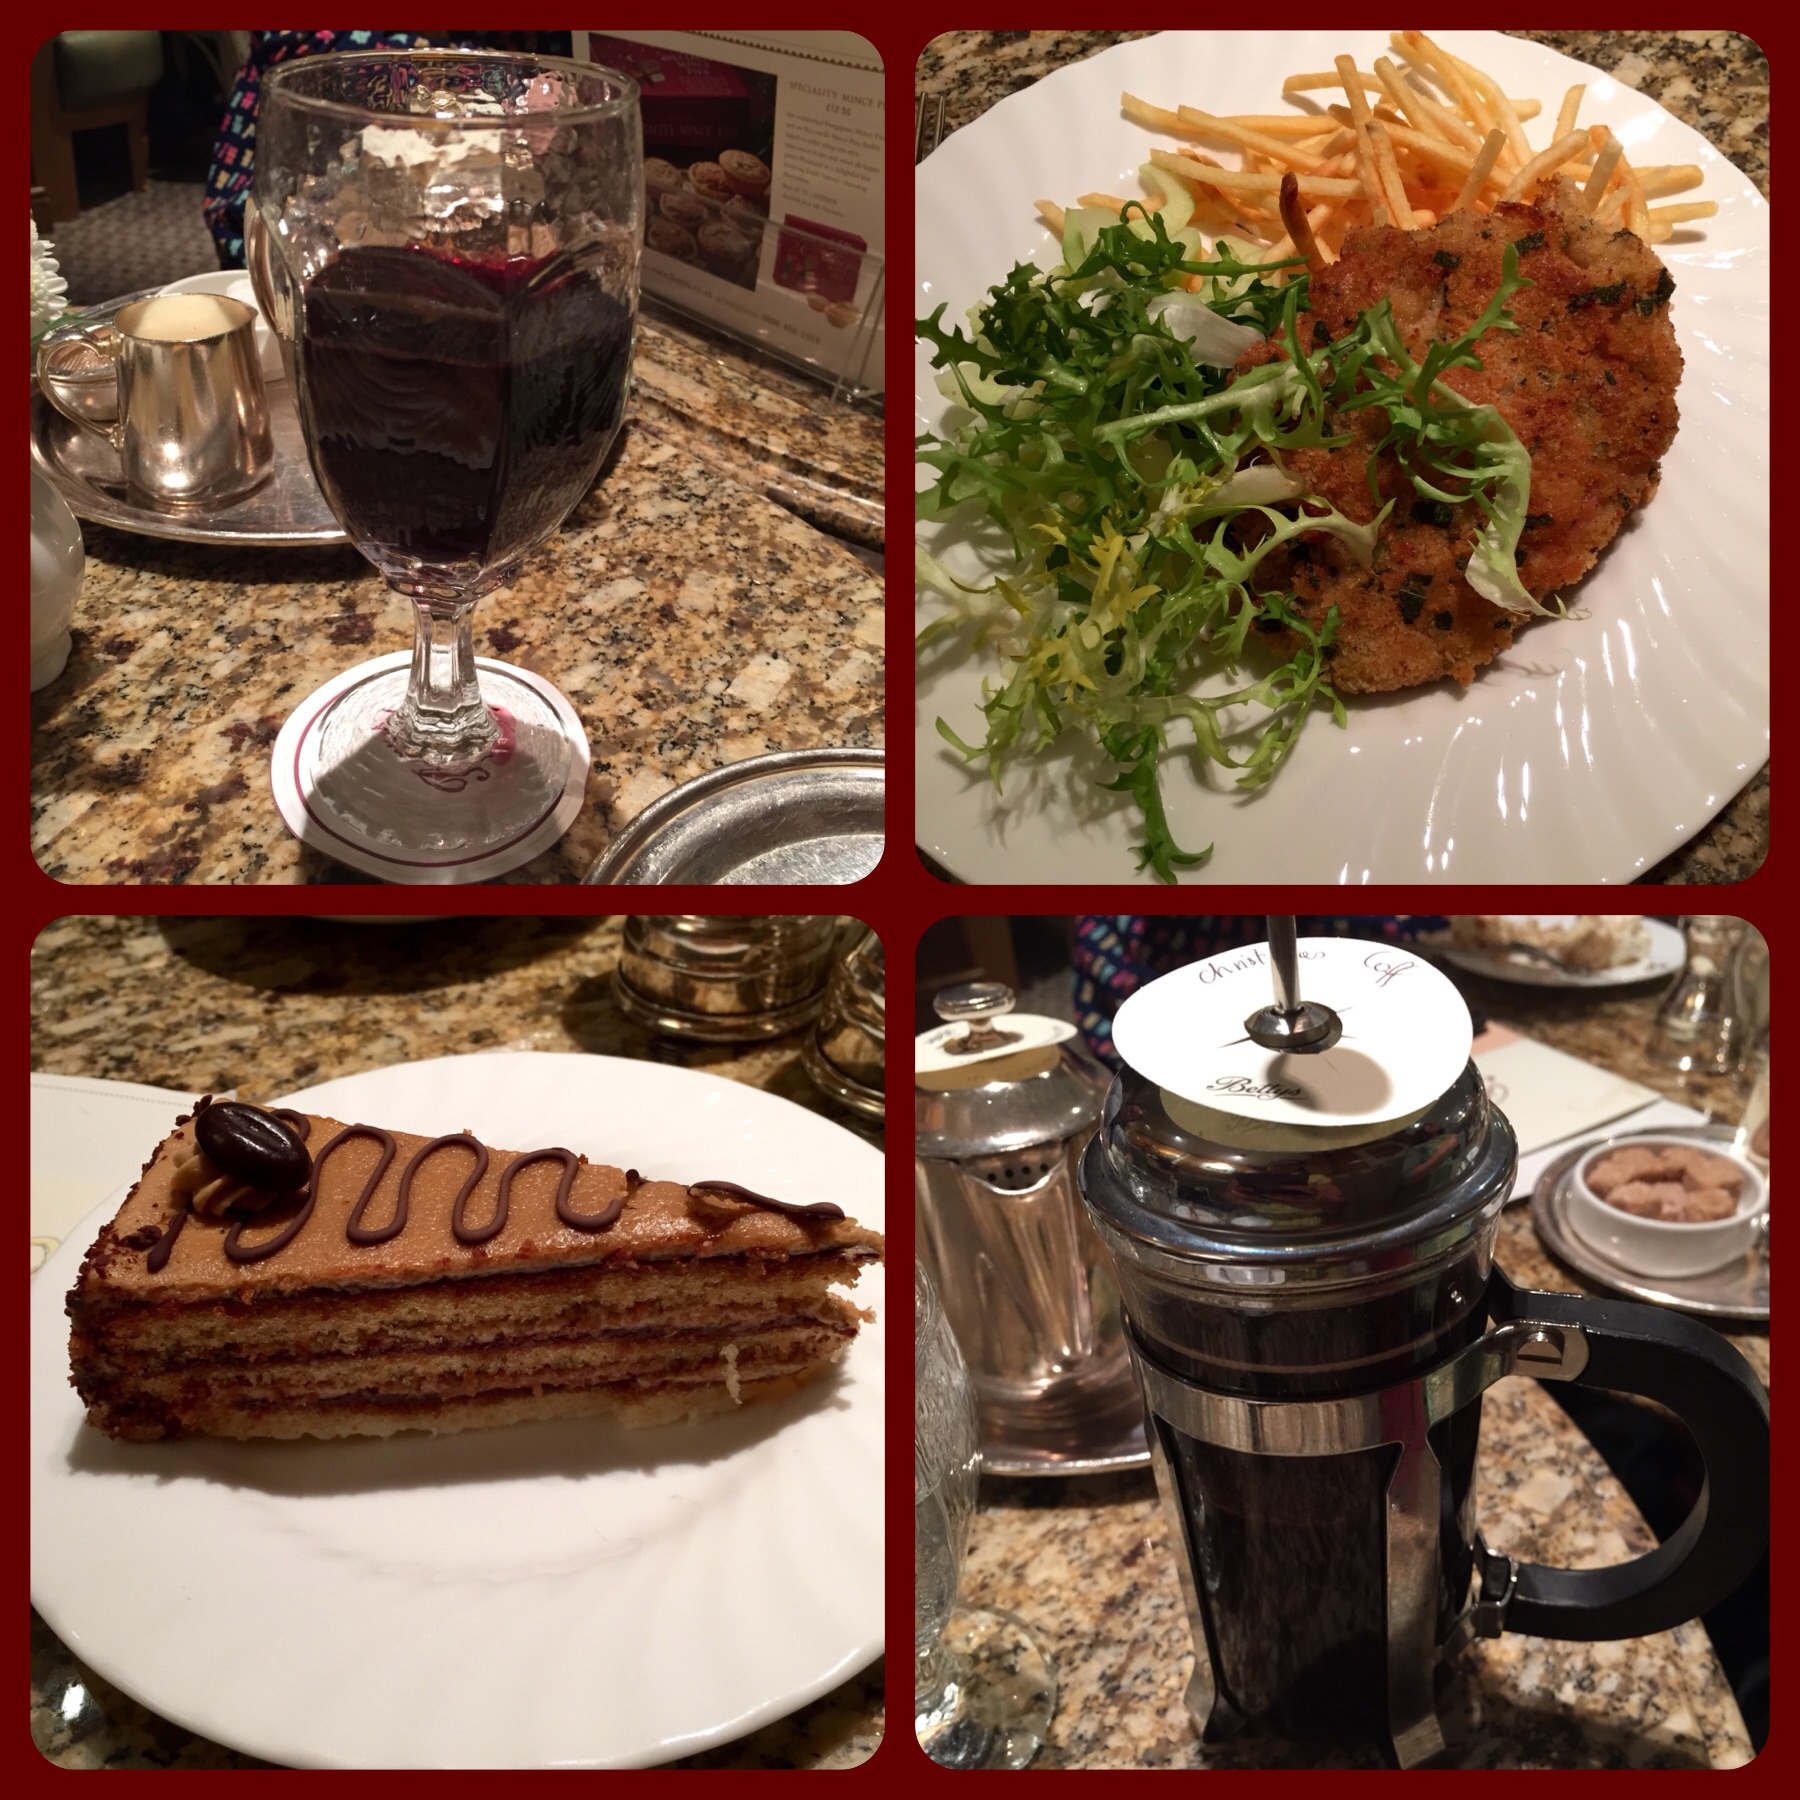
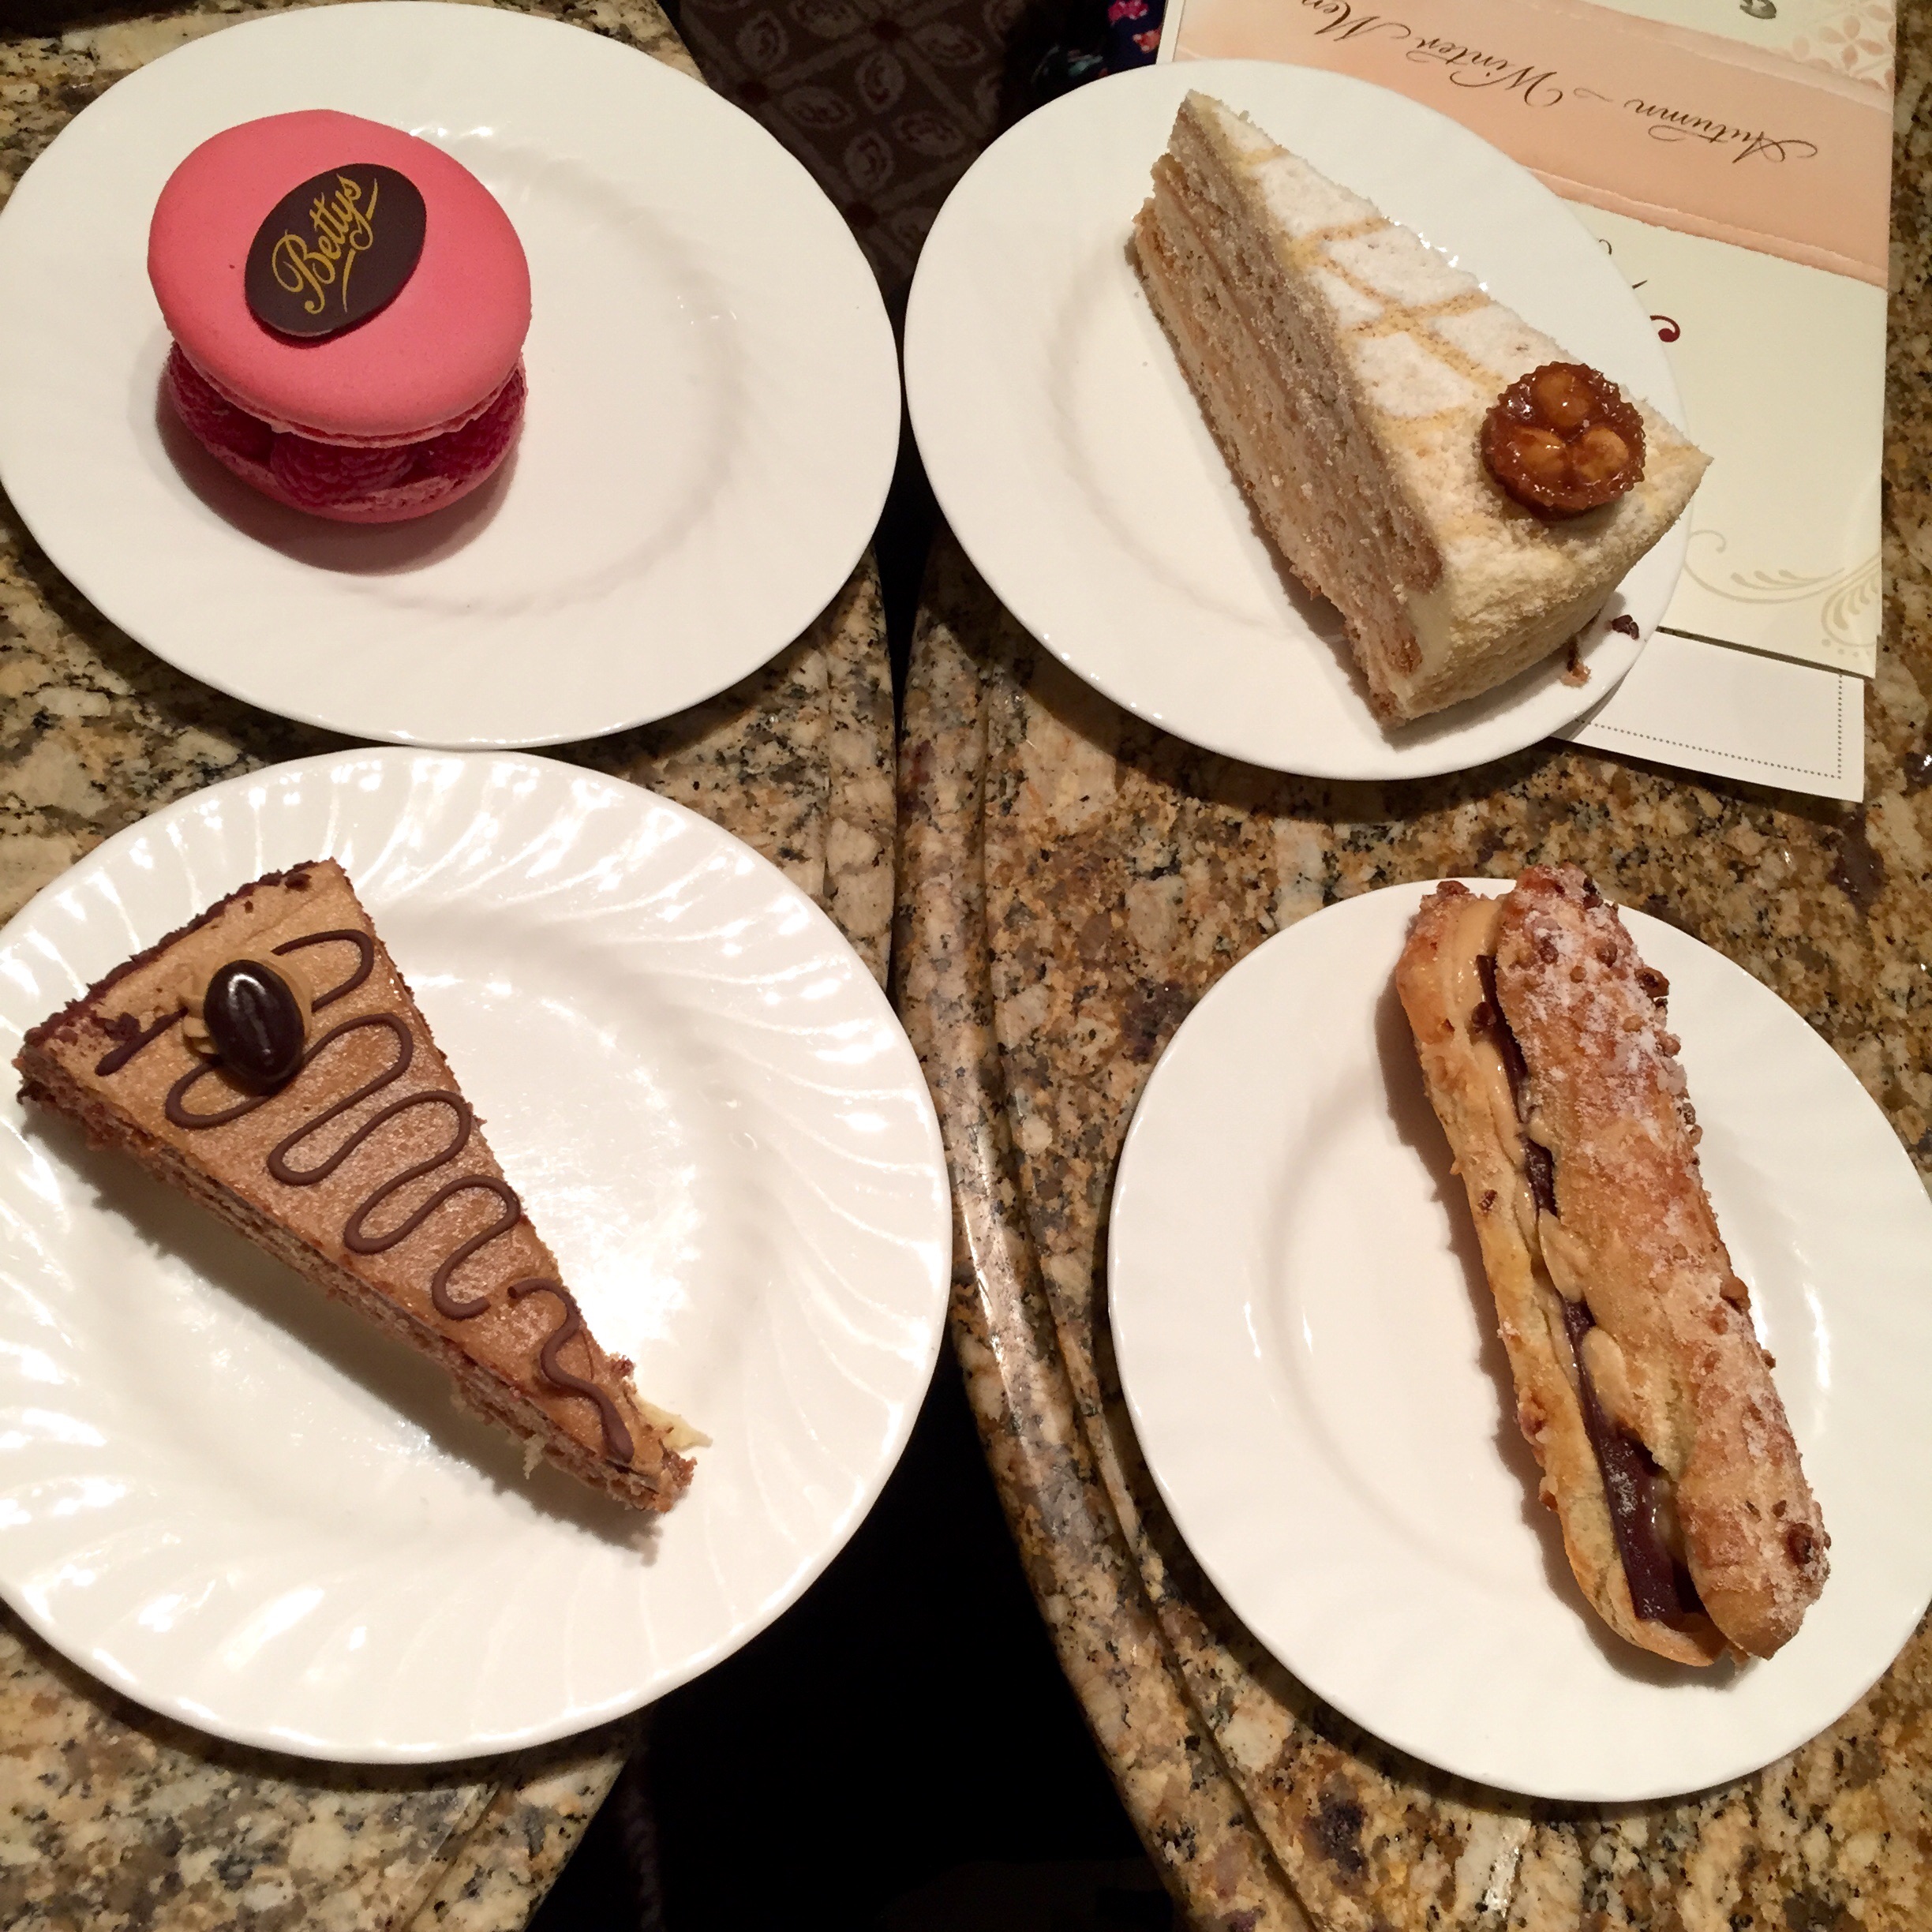
After a long day the Knitting & Stitching Show it’s great to retire to Betty’s Tea Rooms for dinner and of course a glass of mulled wine and a selection from the dessert trolley! This visit is now becoming a sewing club tradition and was greatly enjoyed by all of us. A great way to finish up a great visit to Harrogate.

My meal at Betty’s Team Rooms – mulled wine, pork schnitzel, mocha toret adn finished off with Christmas coffee
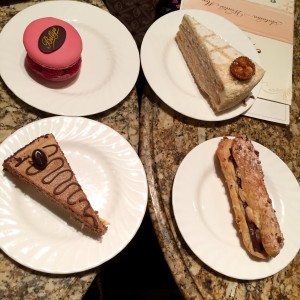
Our desserts – raspberry macaroon, engadine torte, praline & chocolate eclair and mocha torte
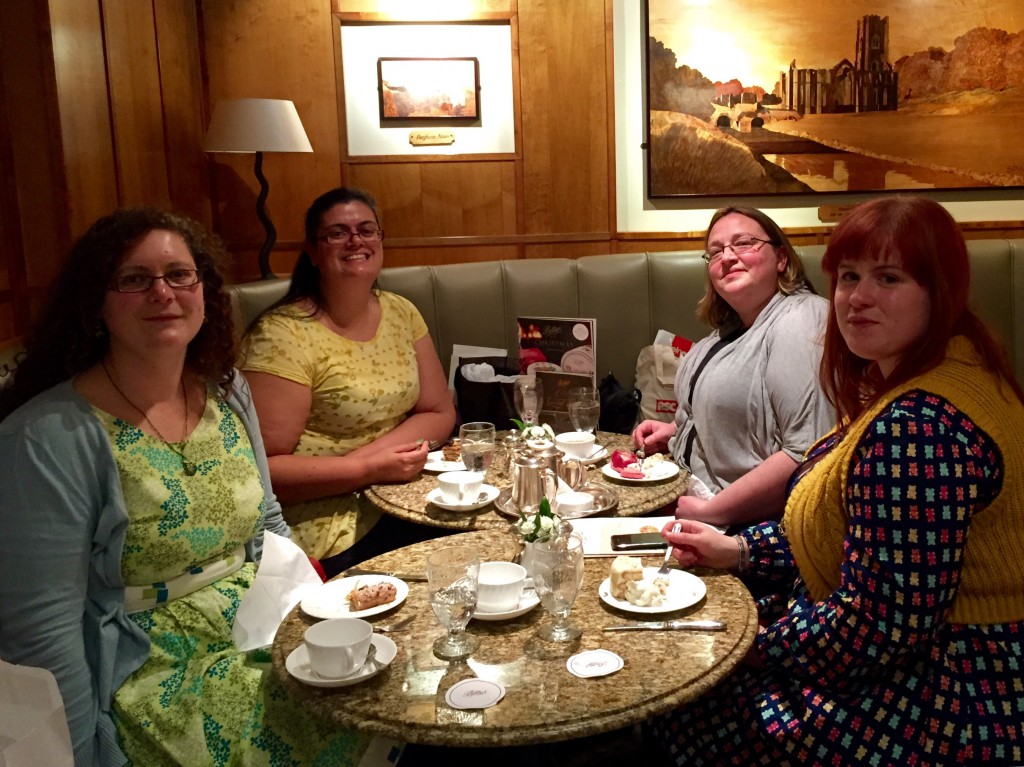
Enjoying our desserts at Betty’s Tea Rooms
Did you visit the show this year? What did you think? What were your highlights? Please go share in the comments below.
1 Comment

I was recently given the opportunity to pattern test Bluegingerdoll’s new Bonnie Sweater pattern. This is their first pattern designed specially for knits so I jumped at the chance as I love knit fabrics, so comfy and easy to wear.
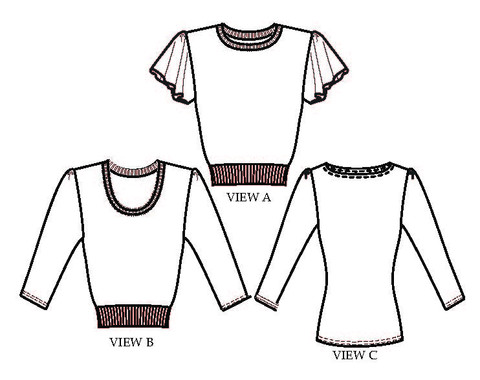
Designed for comfort and elegance Bonnie is a vintage inspired sweater that works in every season and for any occasion. Made with knit fabric Bonnie is a quick and easy make and can be created in a matter of hours.
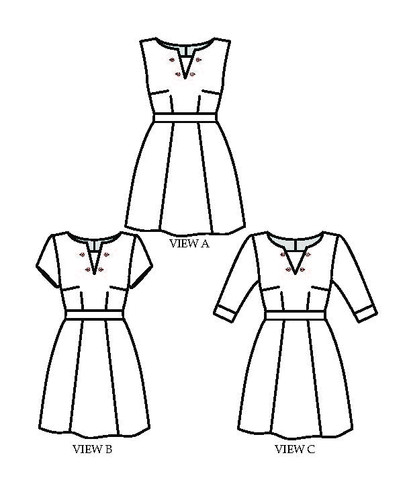
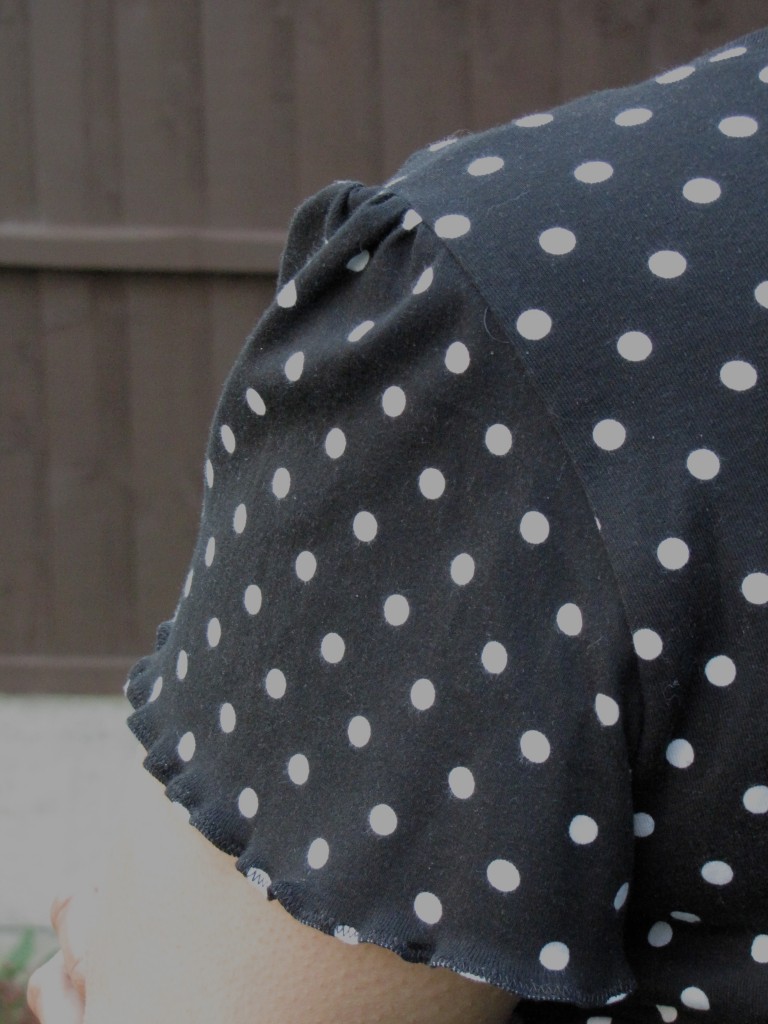
View A is an iconic 1940’s inspired cropped sweater design, featuring flutter sleeves and fitted waistband its perfect to pair with those high waisted skirts and pants.
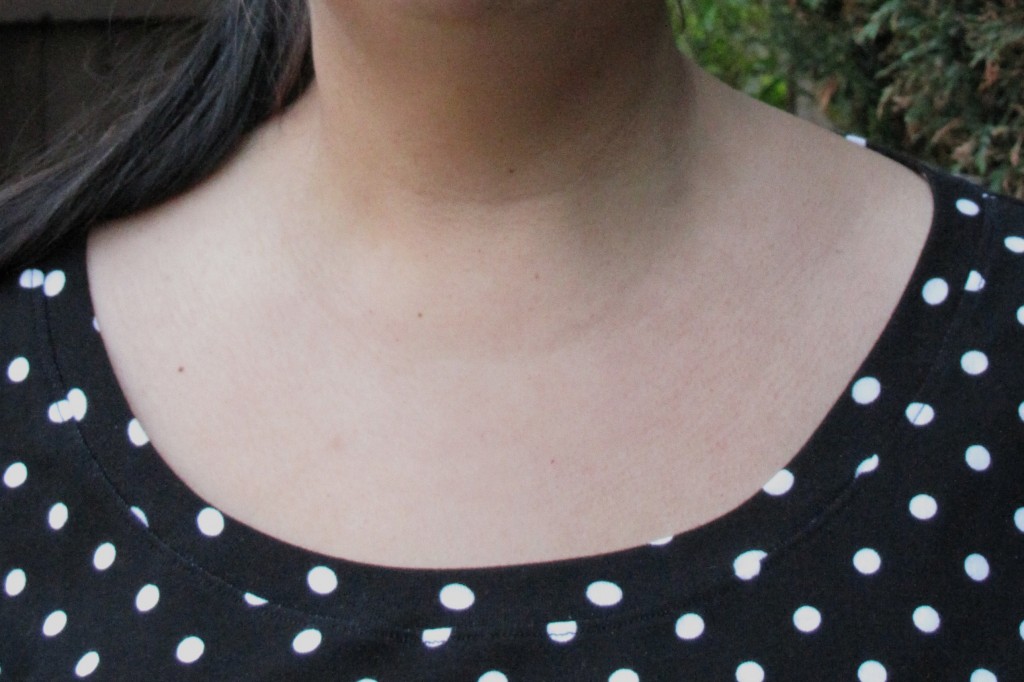
View B also cropped at the waistline and features a scooped neckline and 3/4” sleeves.
View C features a boat neckline, long sleeves and hip length bodice. All three variations feature subtle, feminine gathers at the top of each sleeve reminiscent of a bygone era.
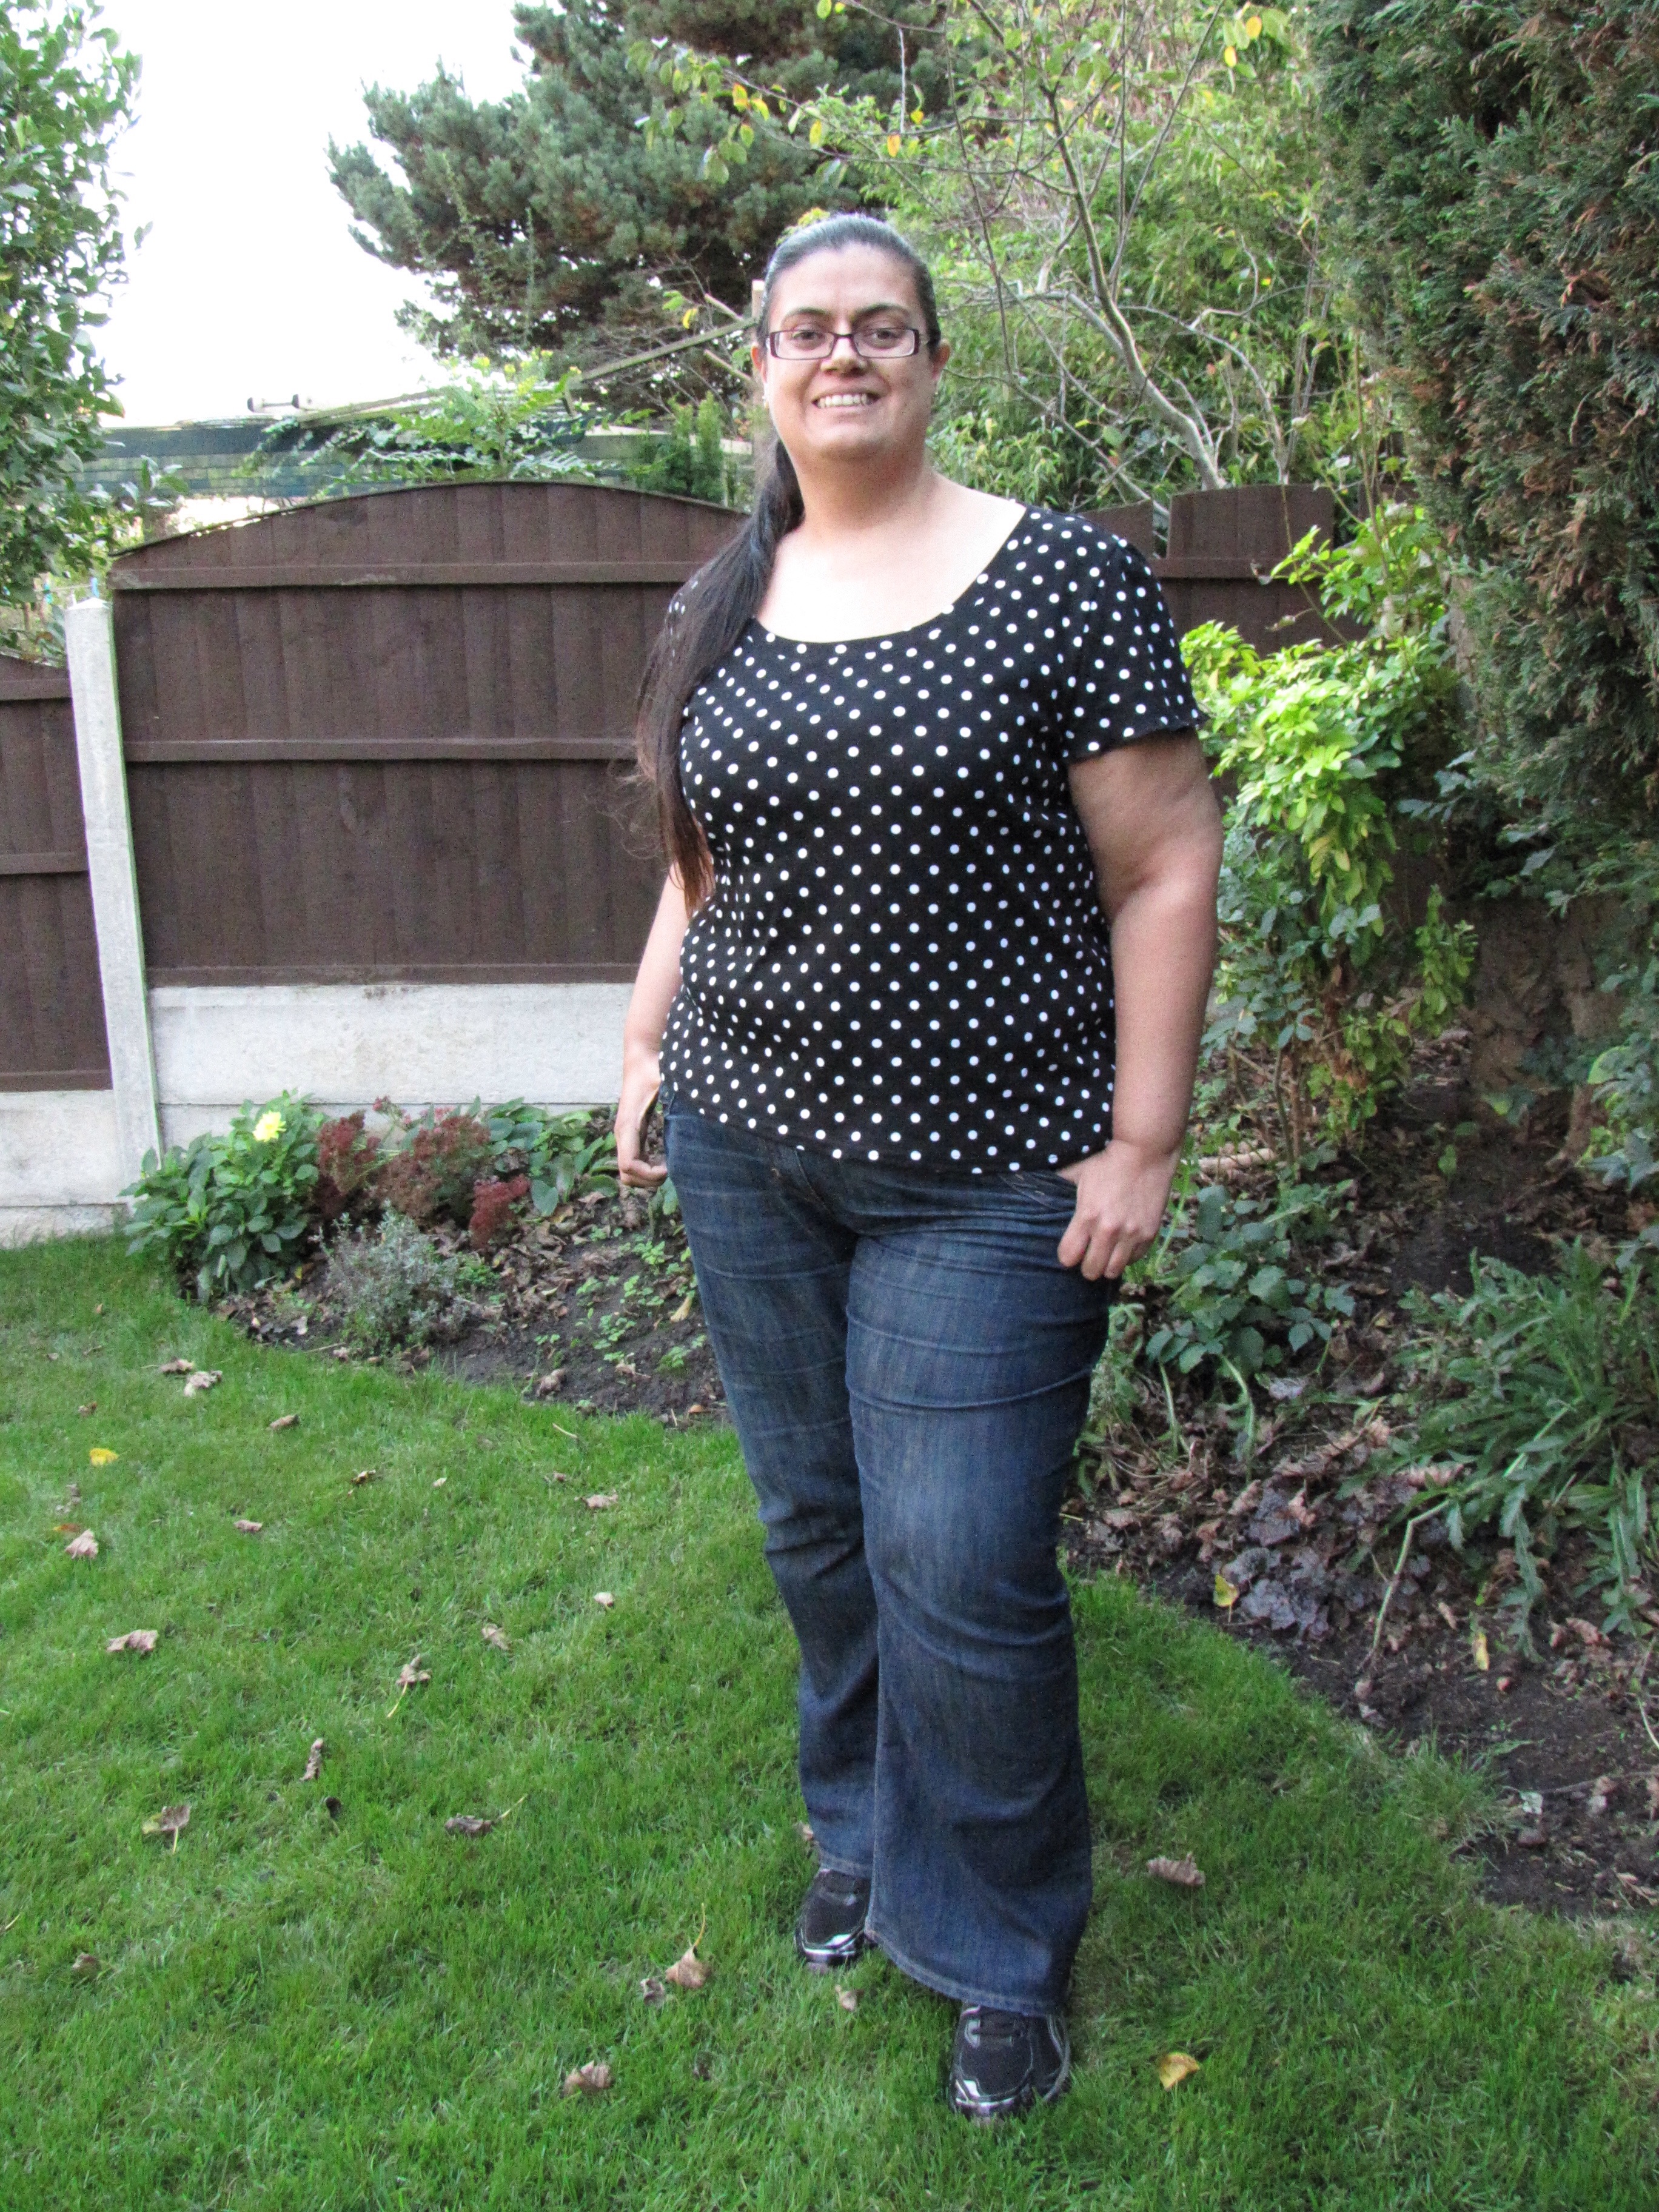
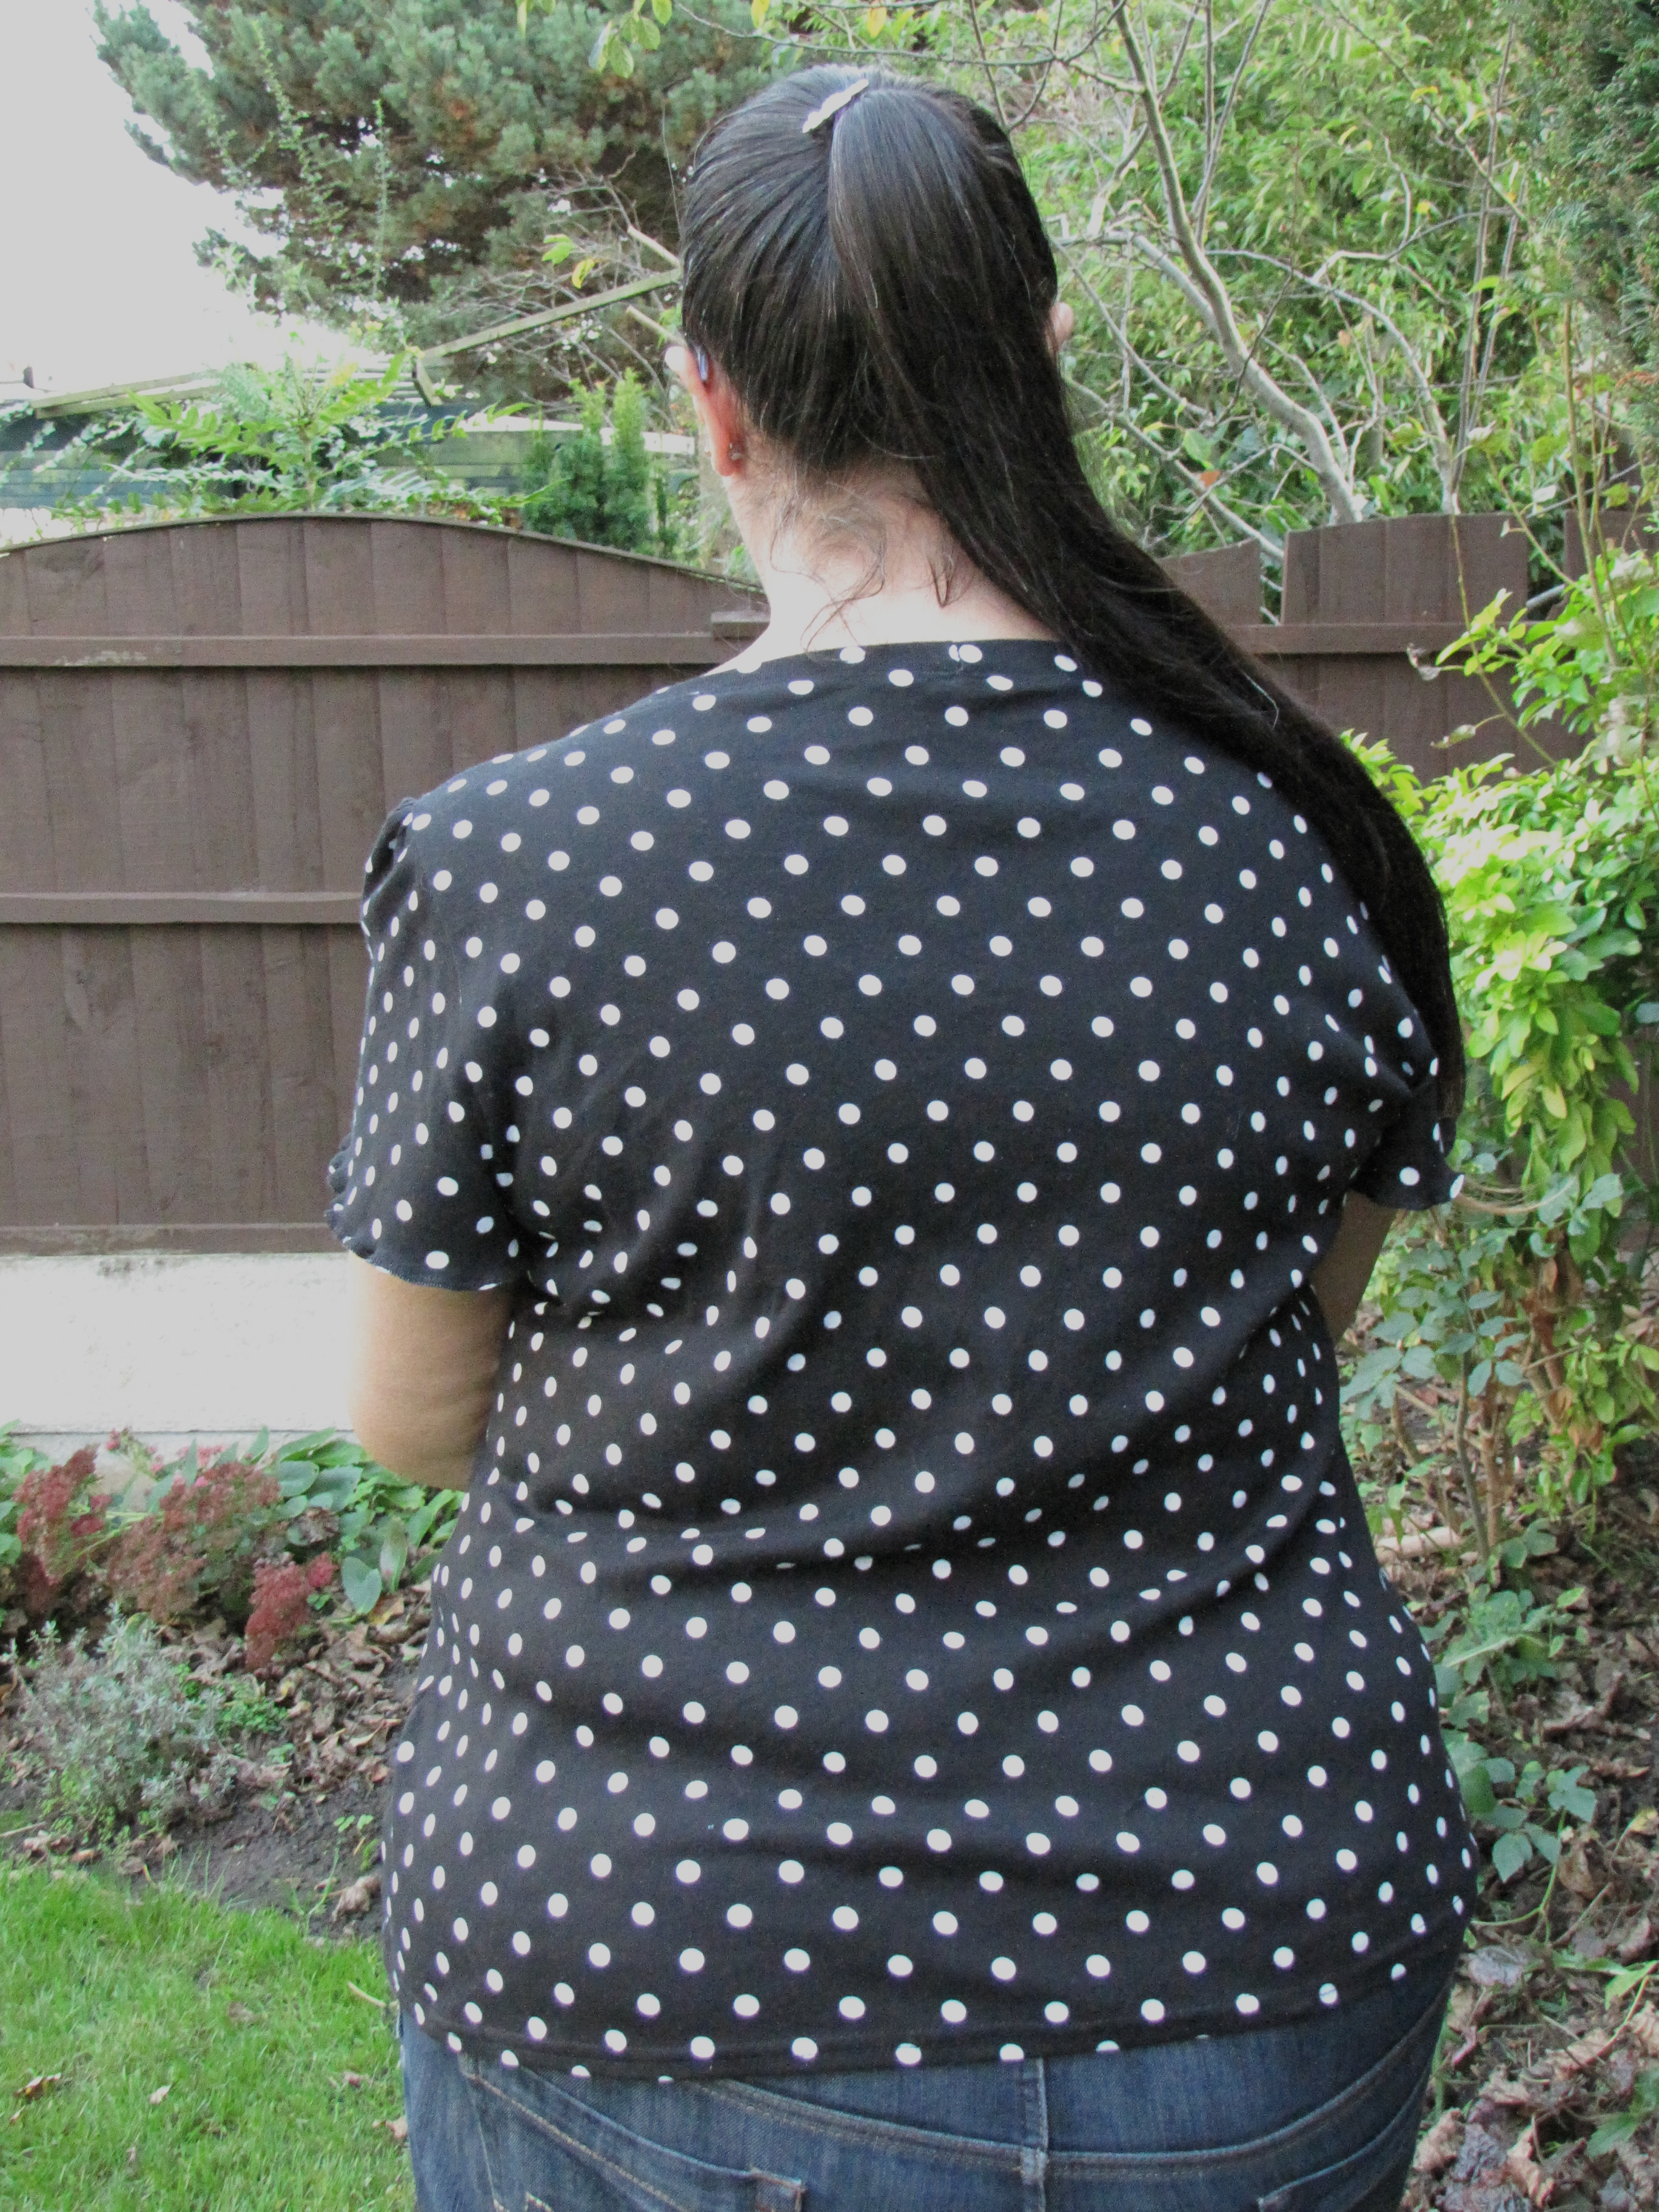
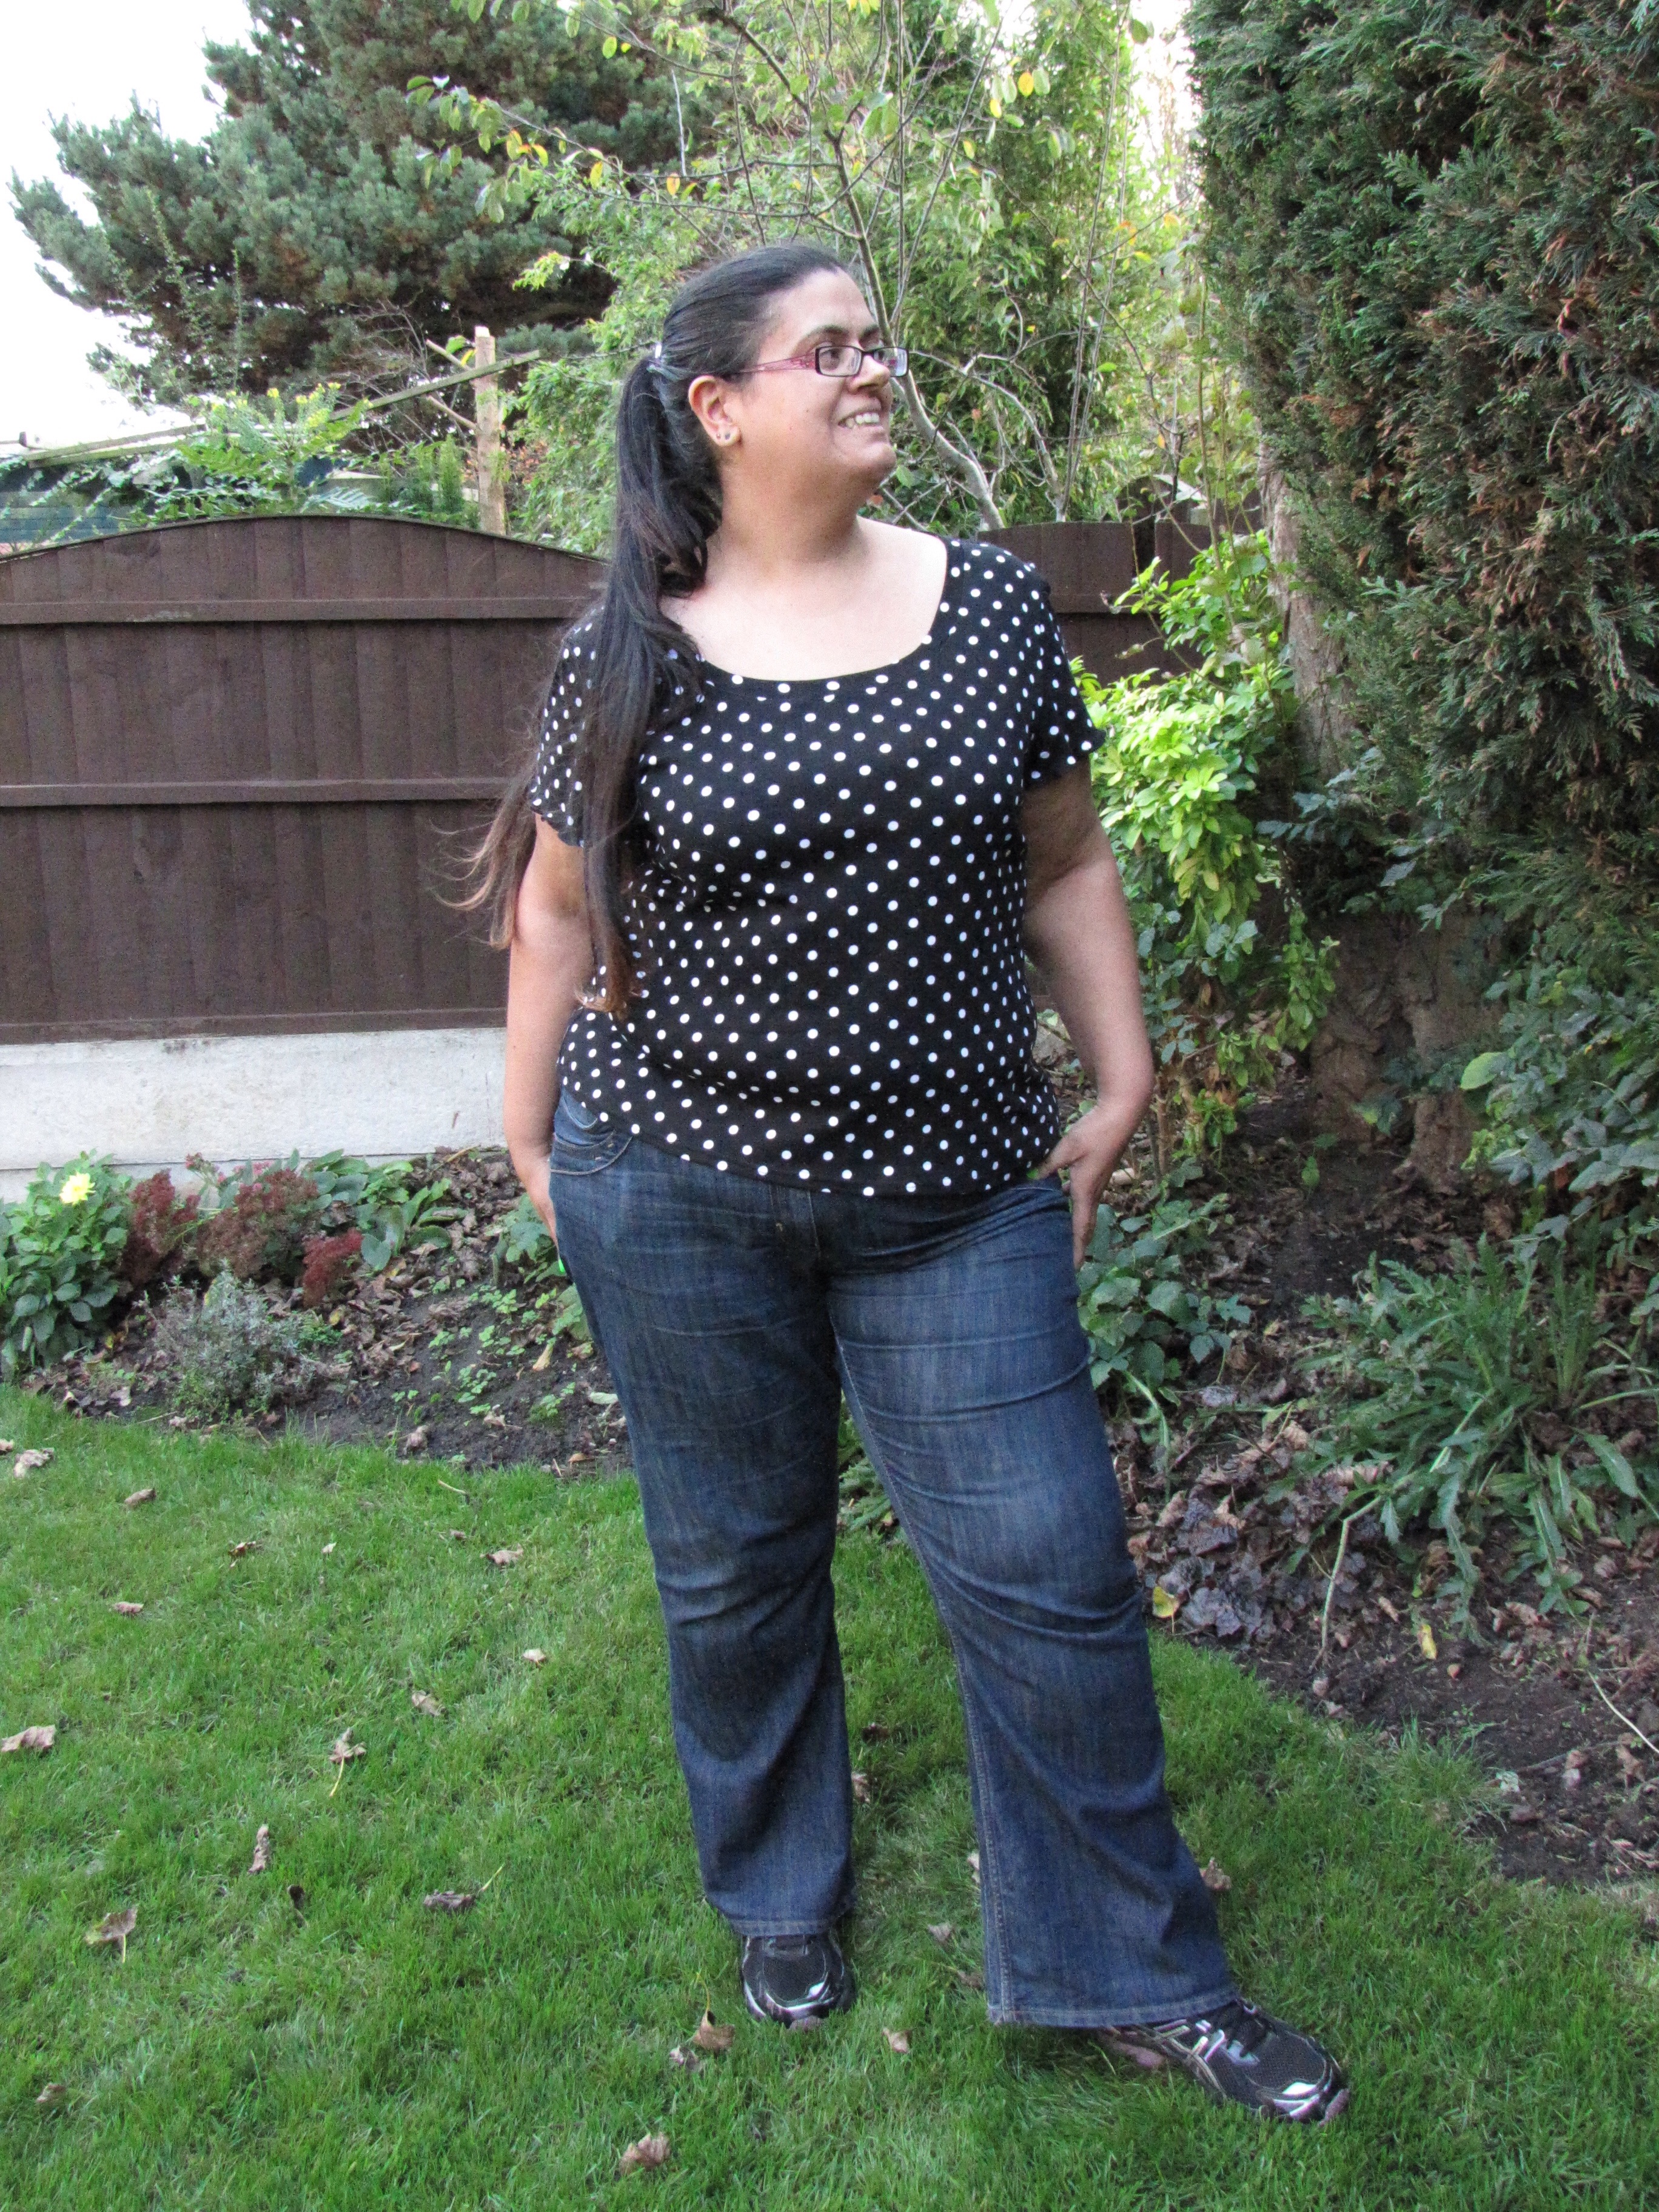
I love polka dots, so chose to use this black and white spotty jersey from my stash, which had originally been purchased from Abakhan Fabrics. After checking that I had enough of it in my stash I went ahead and checked the garment measurements against my body measurements.
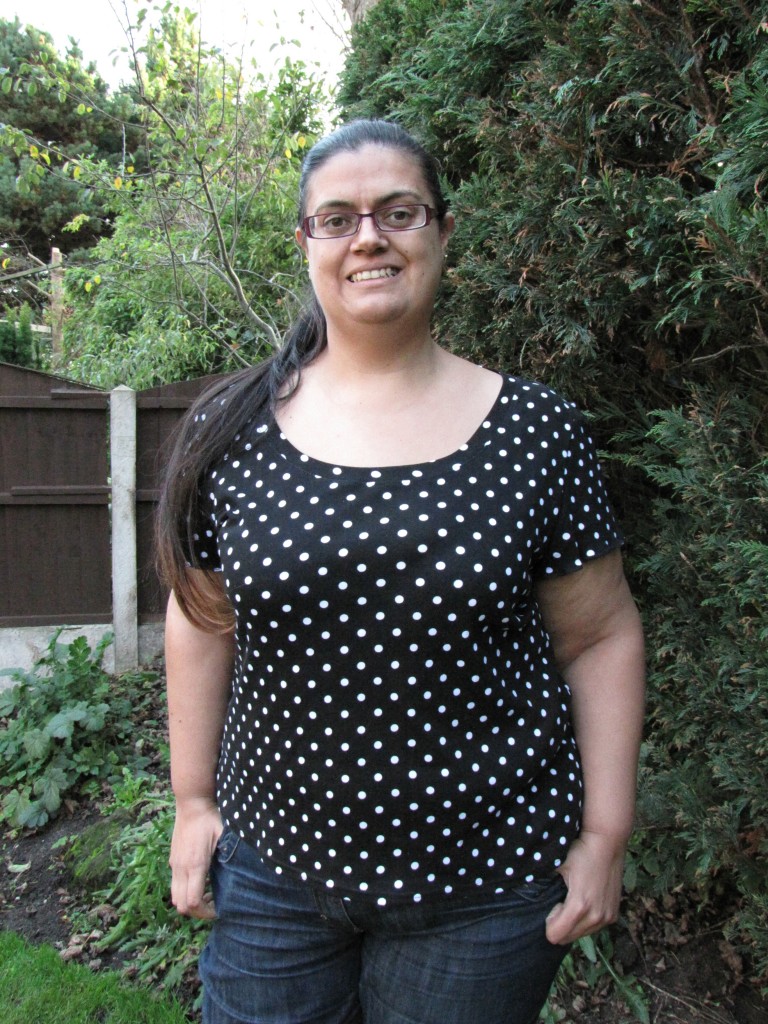
I love the fact that there’s such a variety of mix and match options for this pattern – 3 different neckline, 3 sleeve options and 2 different bodice lengths. I chose to use the lower neckline (seen on view B in the pattern line drawings and the longer length of view C, as being pear-shaped and long-bodied a hip length top suits my shape better. I then chose the shorter flutter sleeves as these tend to suit my bingo wings better and as I’m a fan of layers I wear short sleeves tops all year round.

As is a common pattern fitting alteration for myself, due to being very pear-shaped, I graded the side seams from a 20 at the bust down to a 24 at the hips. Cutting out took a very short time as with the options I chose there’s only 4 pattern pieces involved. Construction was also rather speedy using my trusty overlocker and it all went together very quickly. The instructions were easy to read and follow with detailed diagrams where needed.
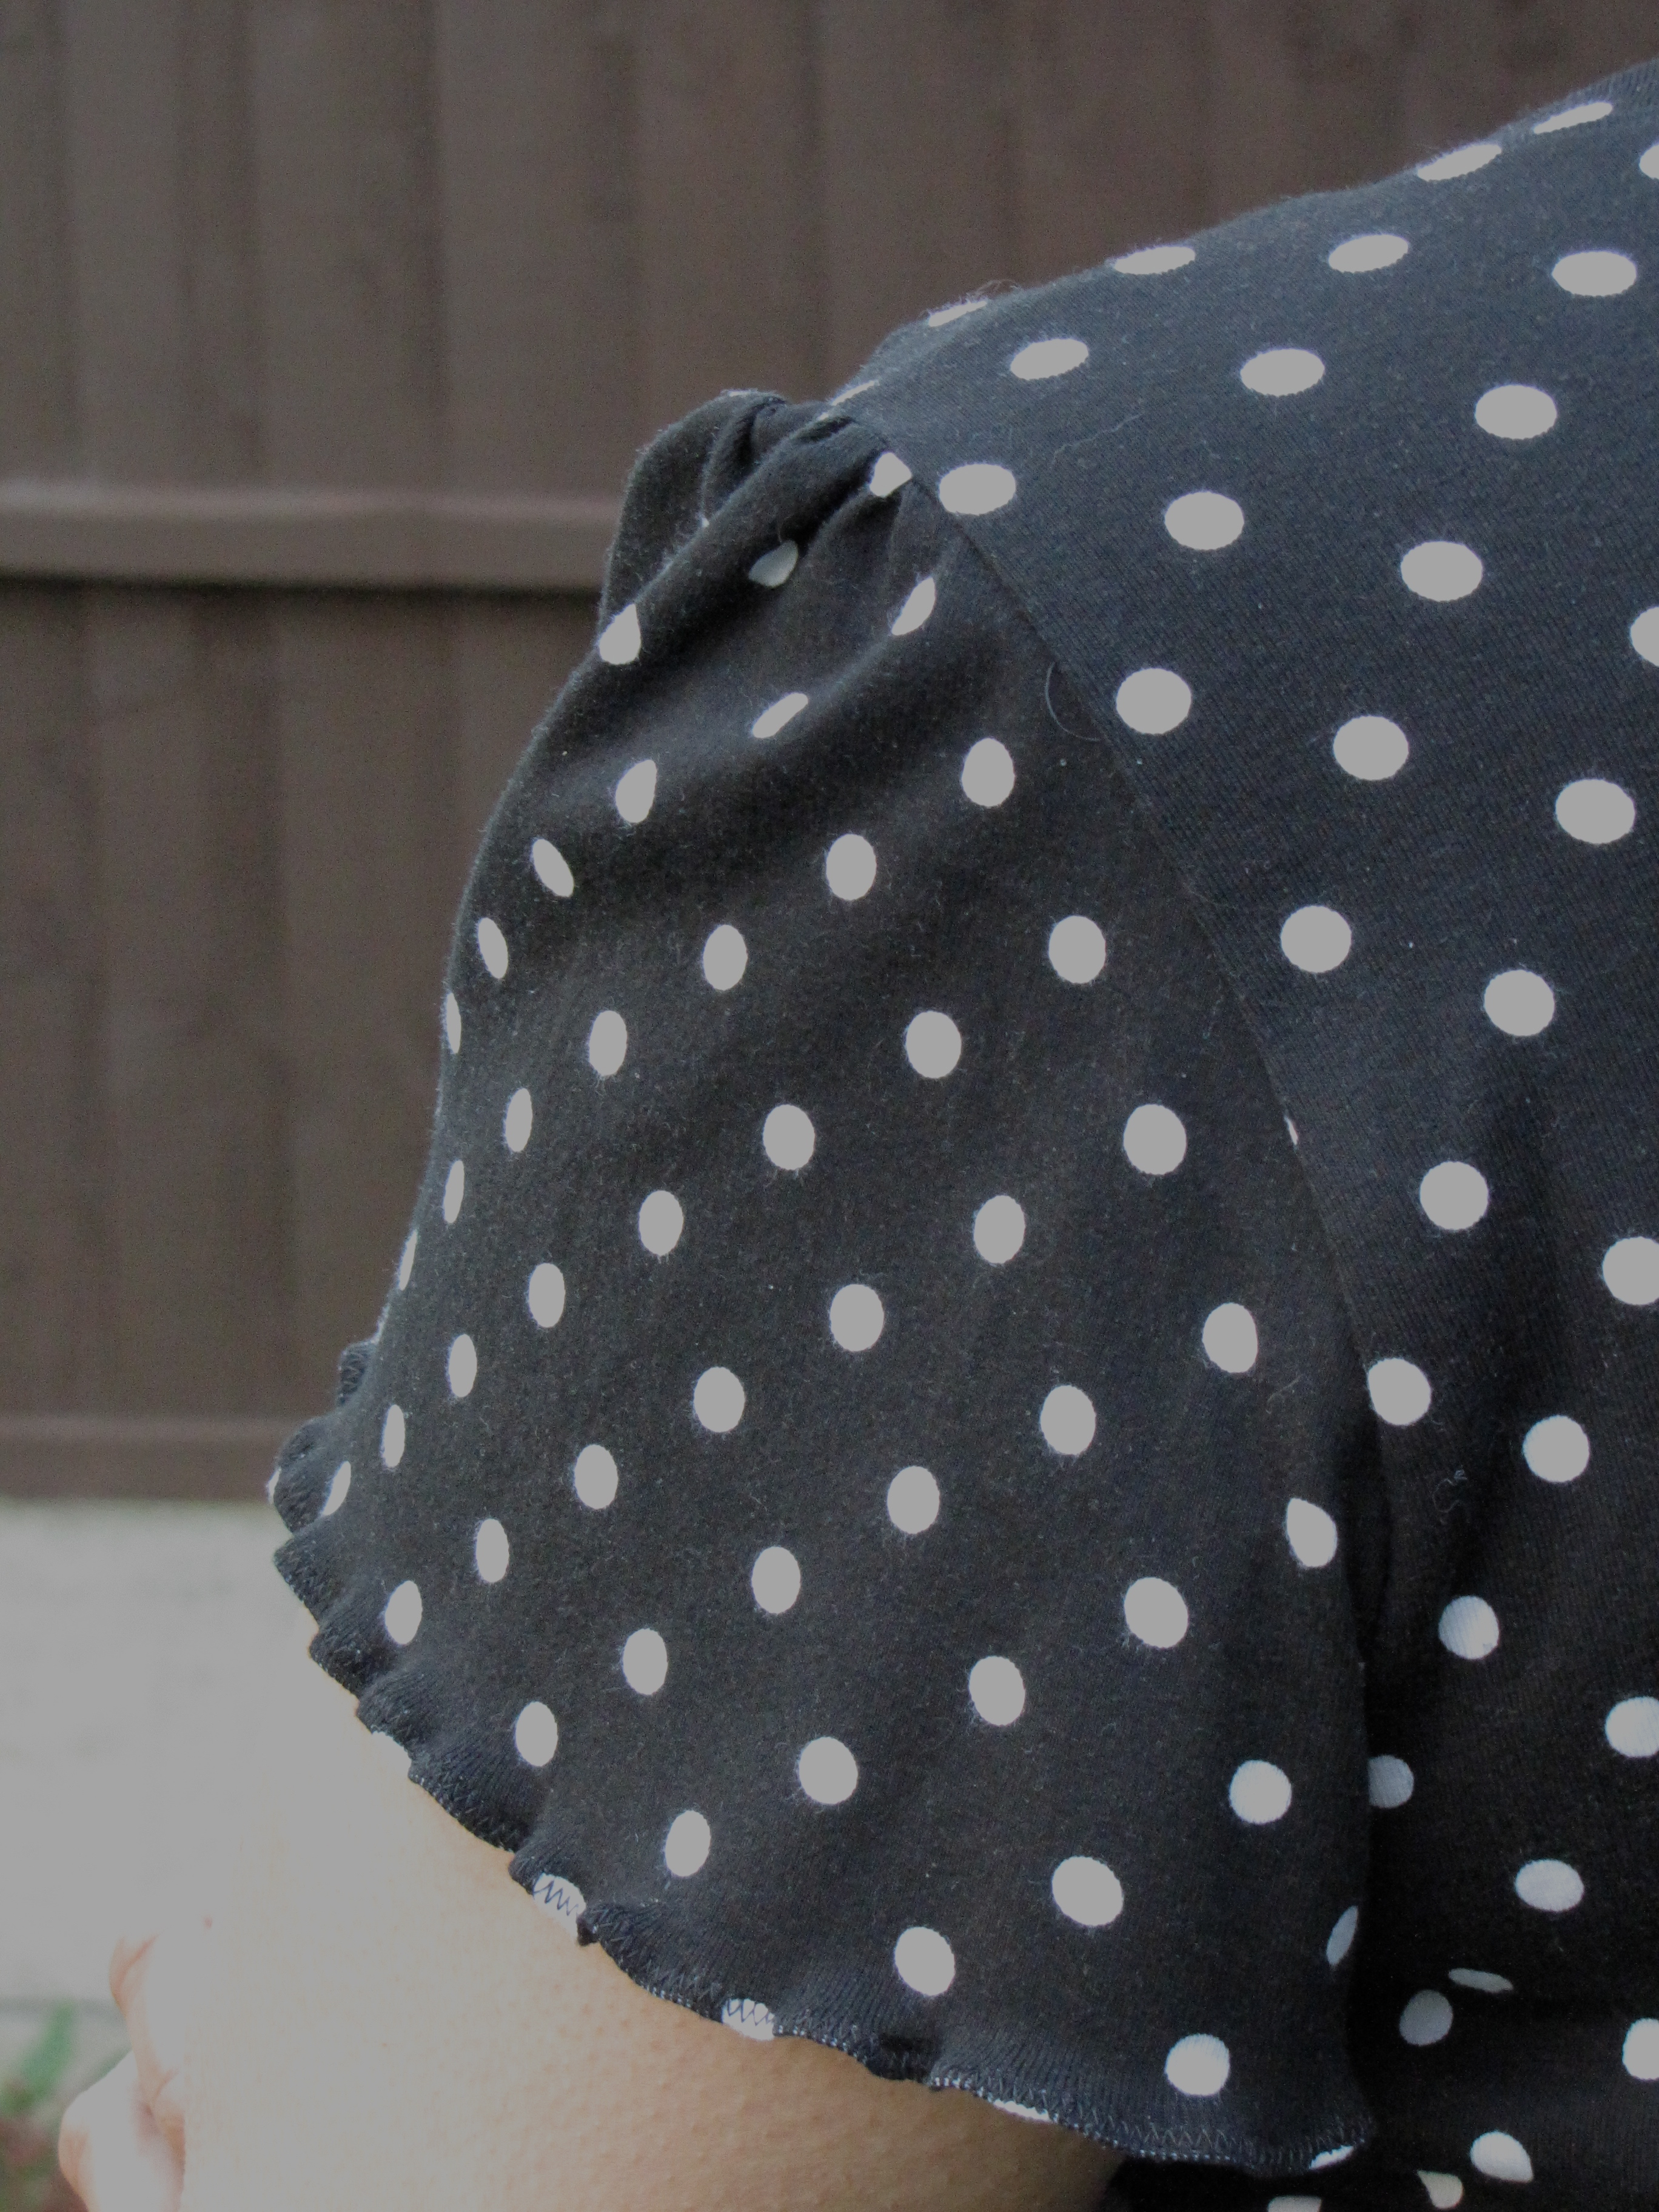
I instantly loved the shape and fit of the Bonnie sweater and found it very comfortable. The little details included in the Bonnie pattern are also very cute, the gathers on the sleeves give them a lovely effect. Since my bingo wings are a tad on the larger side I didn’t think the sleeve ‘fluttered’ as much as I’d like, so to give them a little more flutter-ability I finished them with a narrow hem and zigzag stitch as suggested in the pattern but pulled at the jersey whilst doing this to create a ‘lettuce-edge hem’ which even if I do say so myself, looks fab!
I can easily see this being one of my wardrobe staples. Plain fabrics and simple patterns such as polka dots and stripes will be great for work wear and the more funky patterns will be great for the weekends with my trusty jeans. I already have a great hot air balloon print in my stash which I reckon will suit the Bonnie sweater pattern perfectly!

The wide variety of differing Bonnie sweaters that have been created by the pattern testers shows just how versatile this pattern is: A Stitching Odyssey – Pattern Testing: Bonnie Knit Top – Bluegingerdoll Patterns; Made by Meg: Bonnie Top; Handmade by Heather B – A Pair of Bonnies; Sewn by Elizabeth – Bluegingerdoll Bonnie Knit Top and Tanya Maile.
To buy your own copy of the Bonnie sweater sewing pattern visit the Bluegingerdoll website: http://bluegingerdoll.com/products/bonnie
NB: As part of the testing process, I received this pattern free of charge. All opinions and the decision to blog about it are however are fully my own.
Share your thoughts
A few months ago I used the then newly released Bluegingerdoll Winifred dress to make a dress to wear to my friend’s wedding and made 2 ‘wearable toiles’ first. As this was a new pattern Bluegingerdoll ran a great sewalong, which I found very helpful & entered my dresses into the sewalong competition. I was lucky enough to win the competition! More information about my dresses can be found on the Bluegingerdoll blog when Abby interviewed me.
I was then lucky enough to be chosen to pattern test their latest pattern, the Odette dress.
‘Odette is a one of a kind dress for your wardrobe. A fitted, fully lined bodice featuring a bateau ‘V’ neckline with a distinctive contrasting insert that frames the face.
The waistband highlights the waistline along with a seven gored skirt that skims the hips and has just the right amount of flare, as well as in-seam pockets for added practicality.
Your choice of three sleeve variations:
View A – Sleeveless, View B- Short sleeve and View C – 3/4 sleeves with complimenting cuffs’

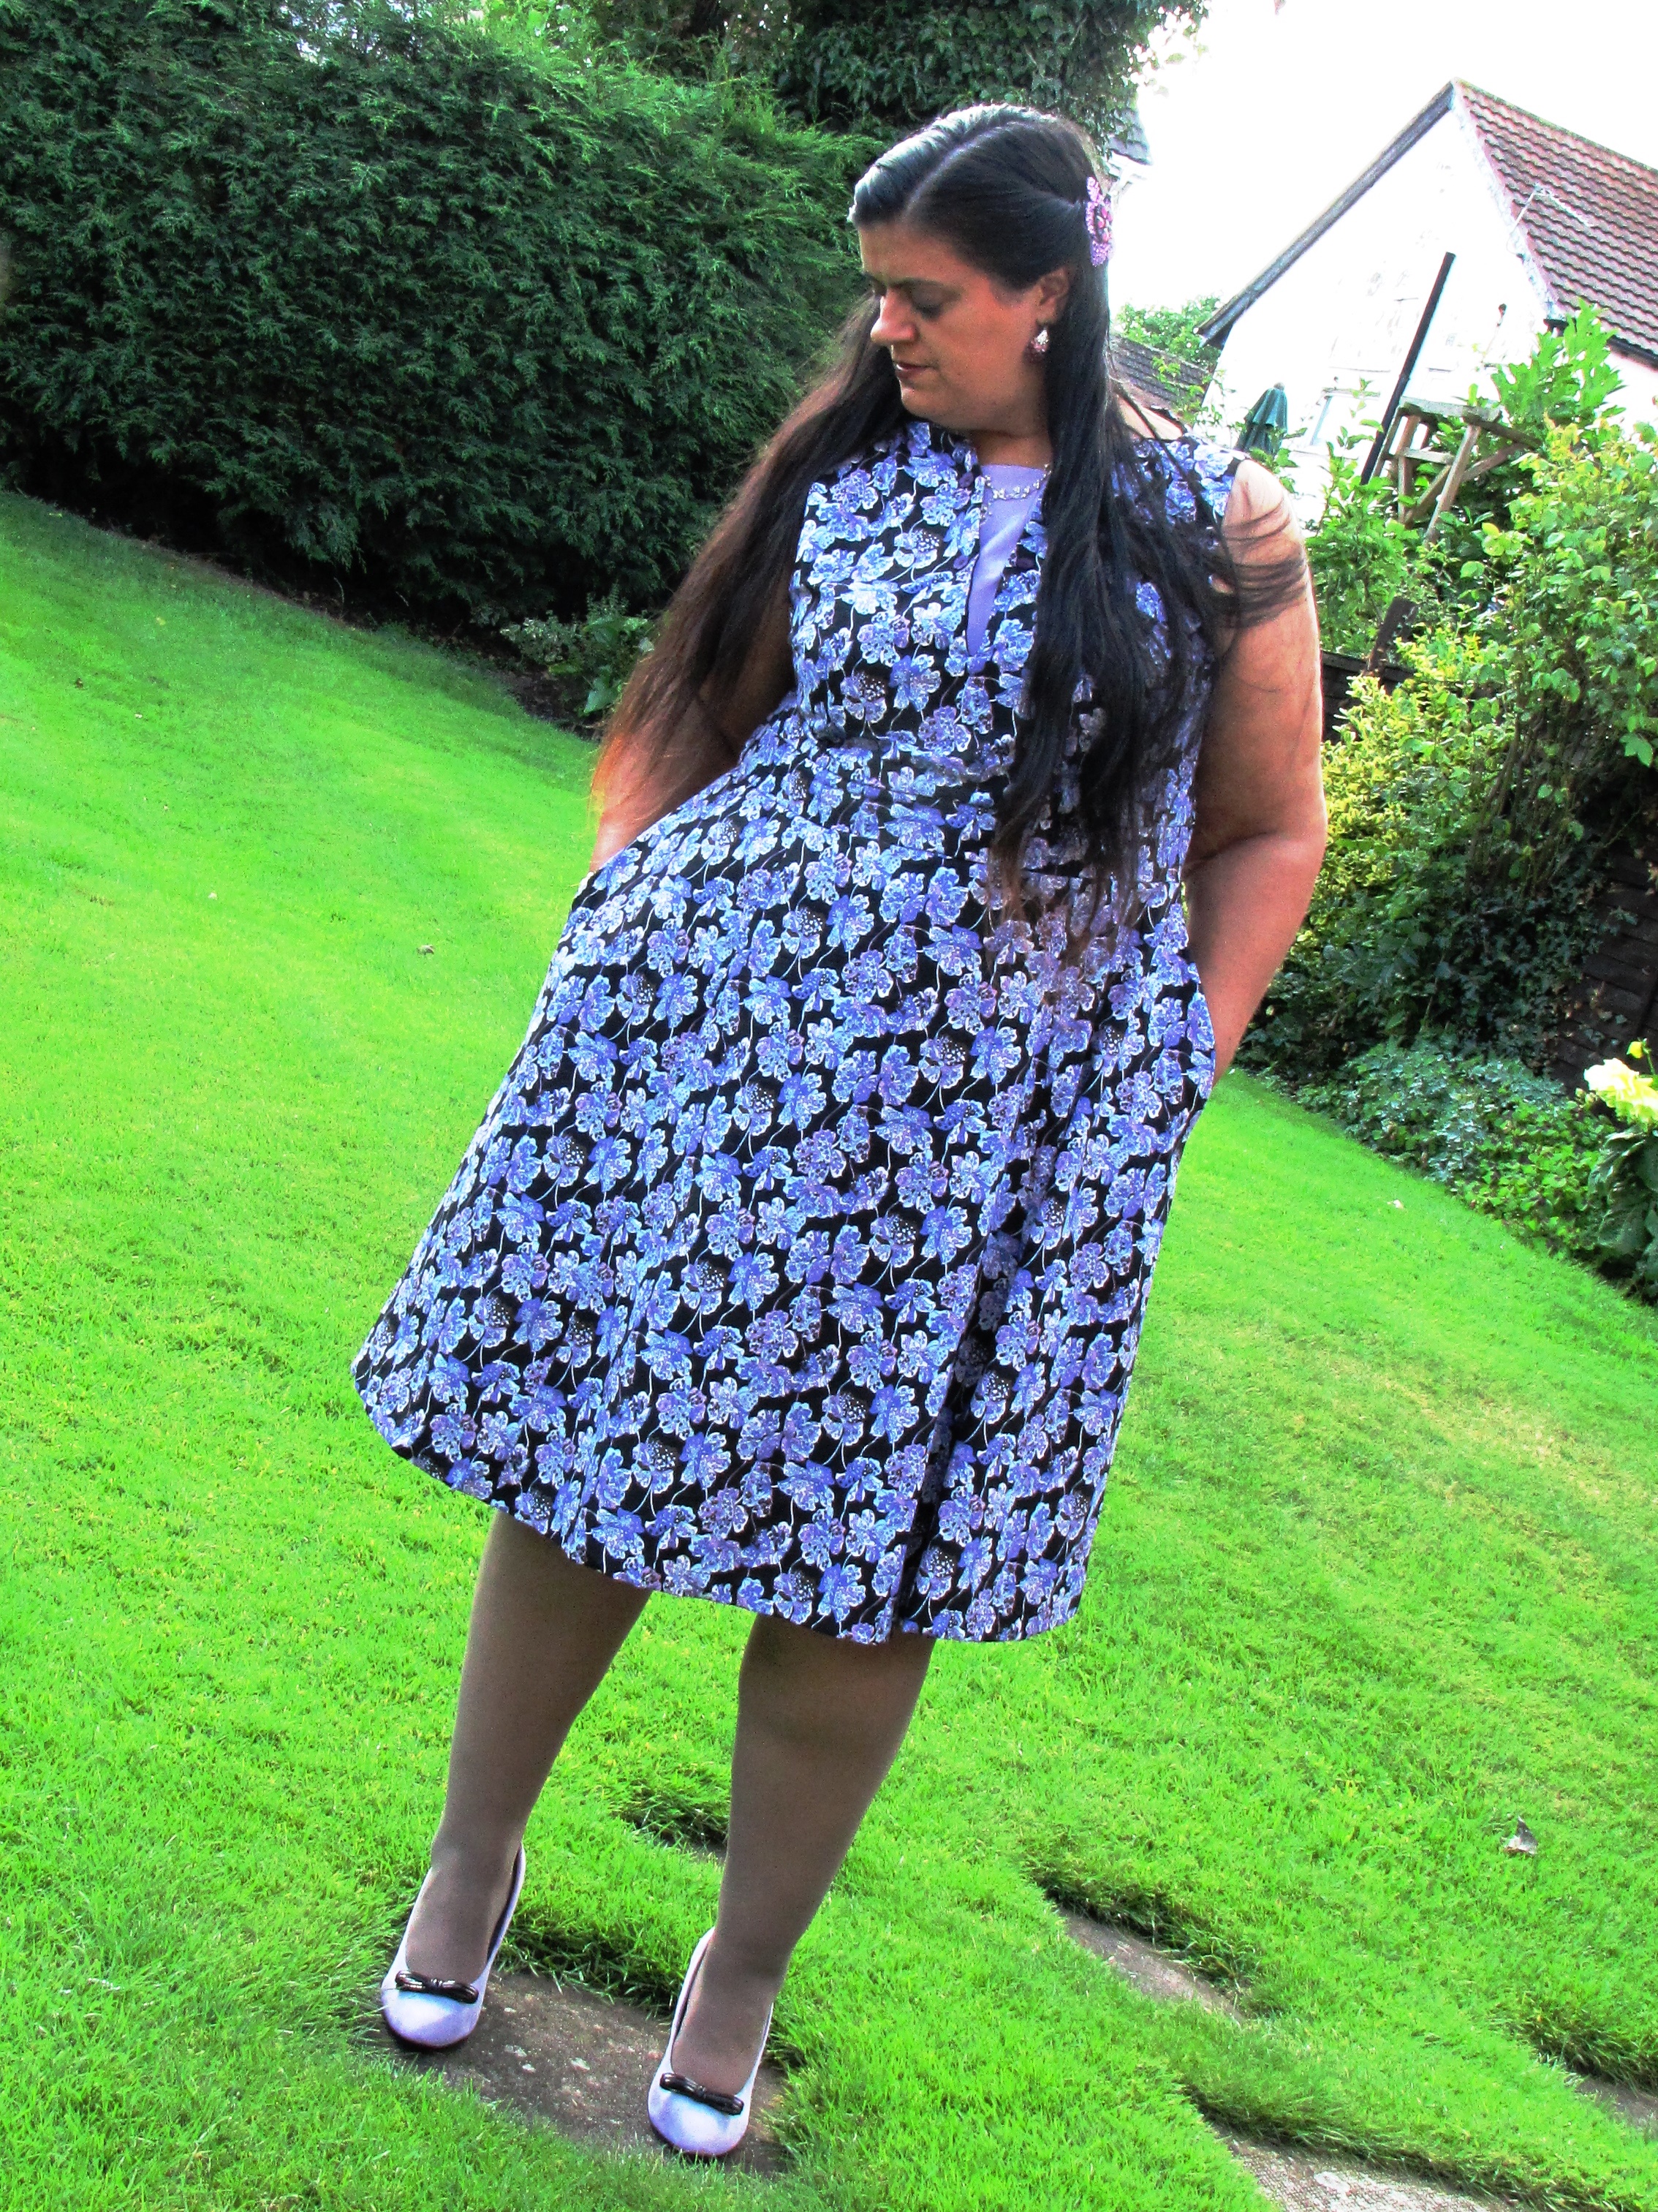
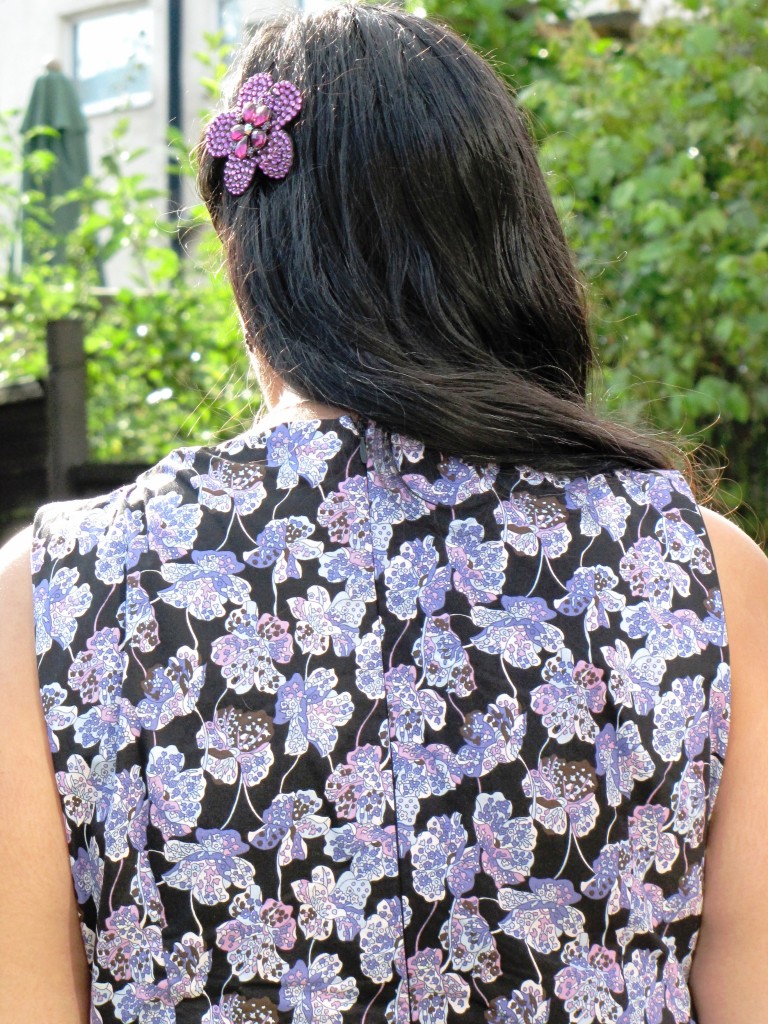
As 2014 seems to be the year of the weddings for me (6 in total!) and the timing was just rightfor the next wedding – Shannon & Peter Marsh on the 1st August I decided to make my Odette to wear on this special occasion. Those of you that know me know that I love purple (kinda obsessed) and I suppose the name of by blog The Purple Stitcher, probably gives that away! I went on the hunt for the perfect purple fabric. Generally I only do floral when they’re abstract and I was luck enough to find this beautiful almost pop art cotton in my local Abakhan Fabrics store in Birkenhead.
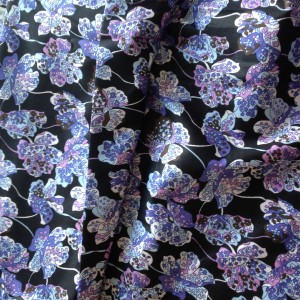
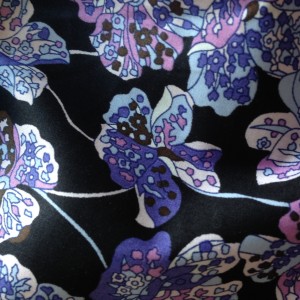
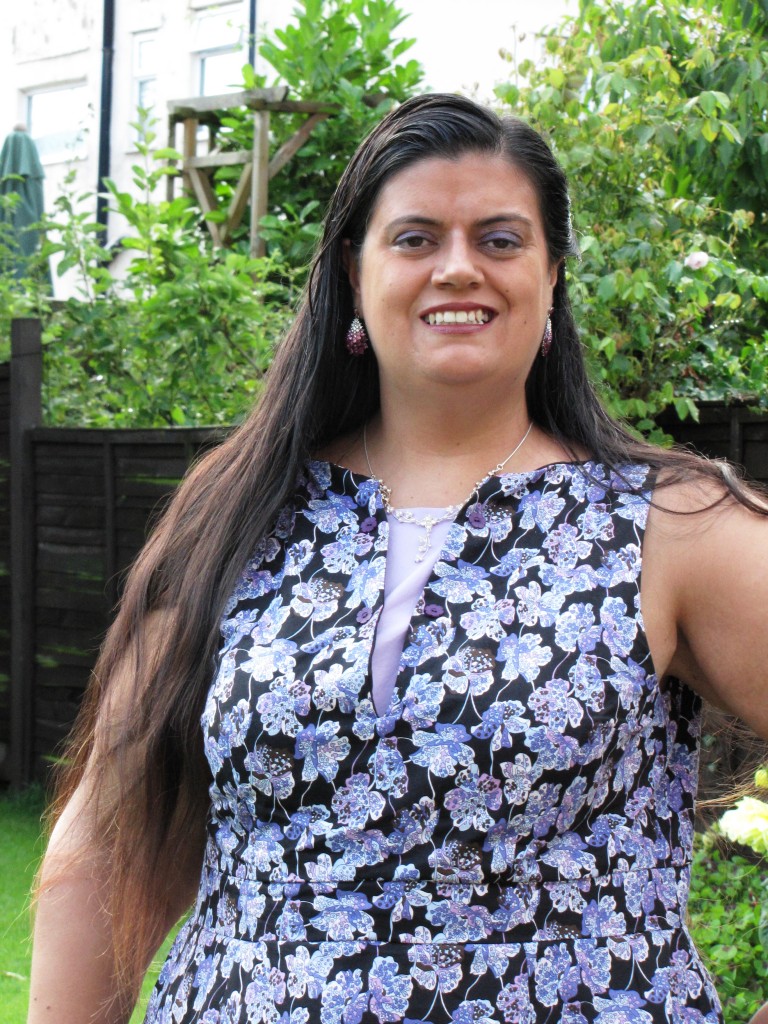
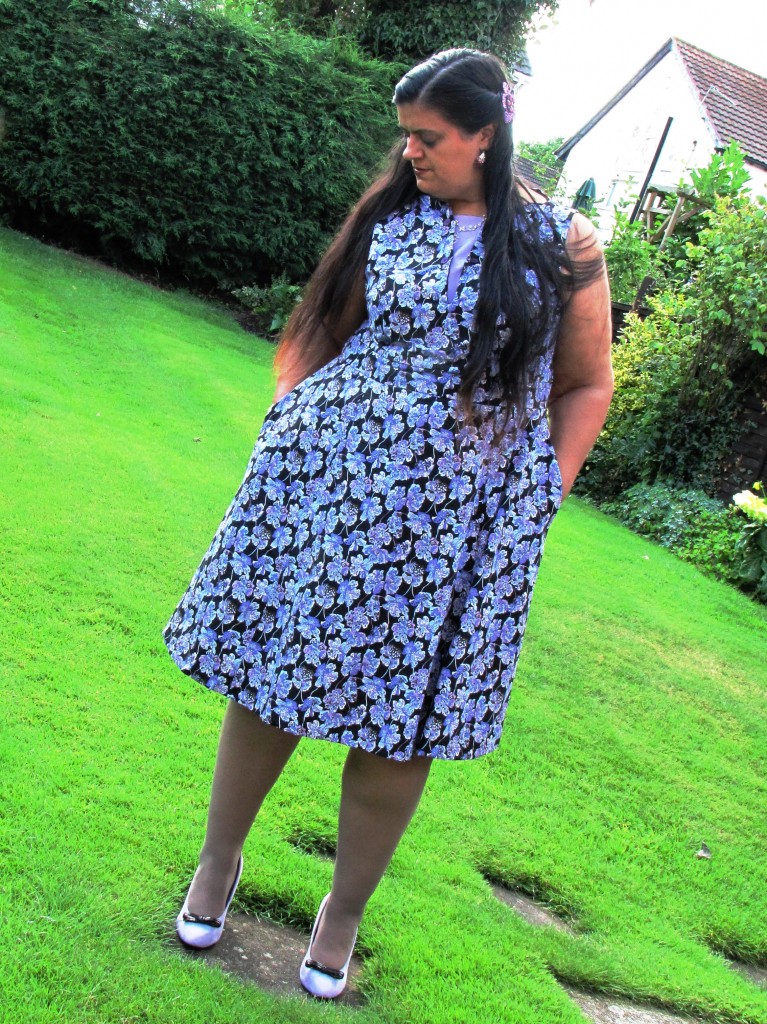
As I wanted to wear the dress at the height of the British ‘summer’ I decided to go with view A, the sleeveless version and to use a lightweight black cotton lawn for the lining and a lilac polycotton for the insert with cute flower shapped buttons, all purchased from my local Abakhan Fabrics store.

As always when using a new pattern I made a toile and is my usual style it was a charity shop duvet cover! This enabled me to get the fit just right. The fact that the bodice, waistband and skirt are all separate pieces was very useful as it enabled me to grade between these areas much easier. I’m very much pear-shaped, with my size going up by 1 from bust to waist to hips, so this is a very common pattern alteration for me. Now that Bluegingerdoll sizes come in plus-sizes this means there was no redrafting involved, which is a great time saver. I cut the bodice at size 20, the waist at a 22 and the hips at a 24 and with some help from the ladies at Liverpool Sewing Club I was able to check the fit and am very happy with the final results.
I’ve never actually sewn inseam pockets before on a dress, so was very excited to find these on the Odette and was very please at how quick and easily they went together. I also love having pockets on a dress how fun and practical is that! I also reckon they look fab and add another dimension to the dress:
It’s also been a very long time since I made a dress with an invisible zip, so used the fab tutorial on Bluegingerdoll blog to insert this and was once again pleased just how quick and easy this went in.
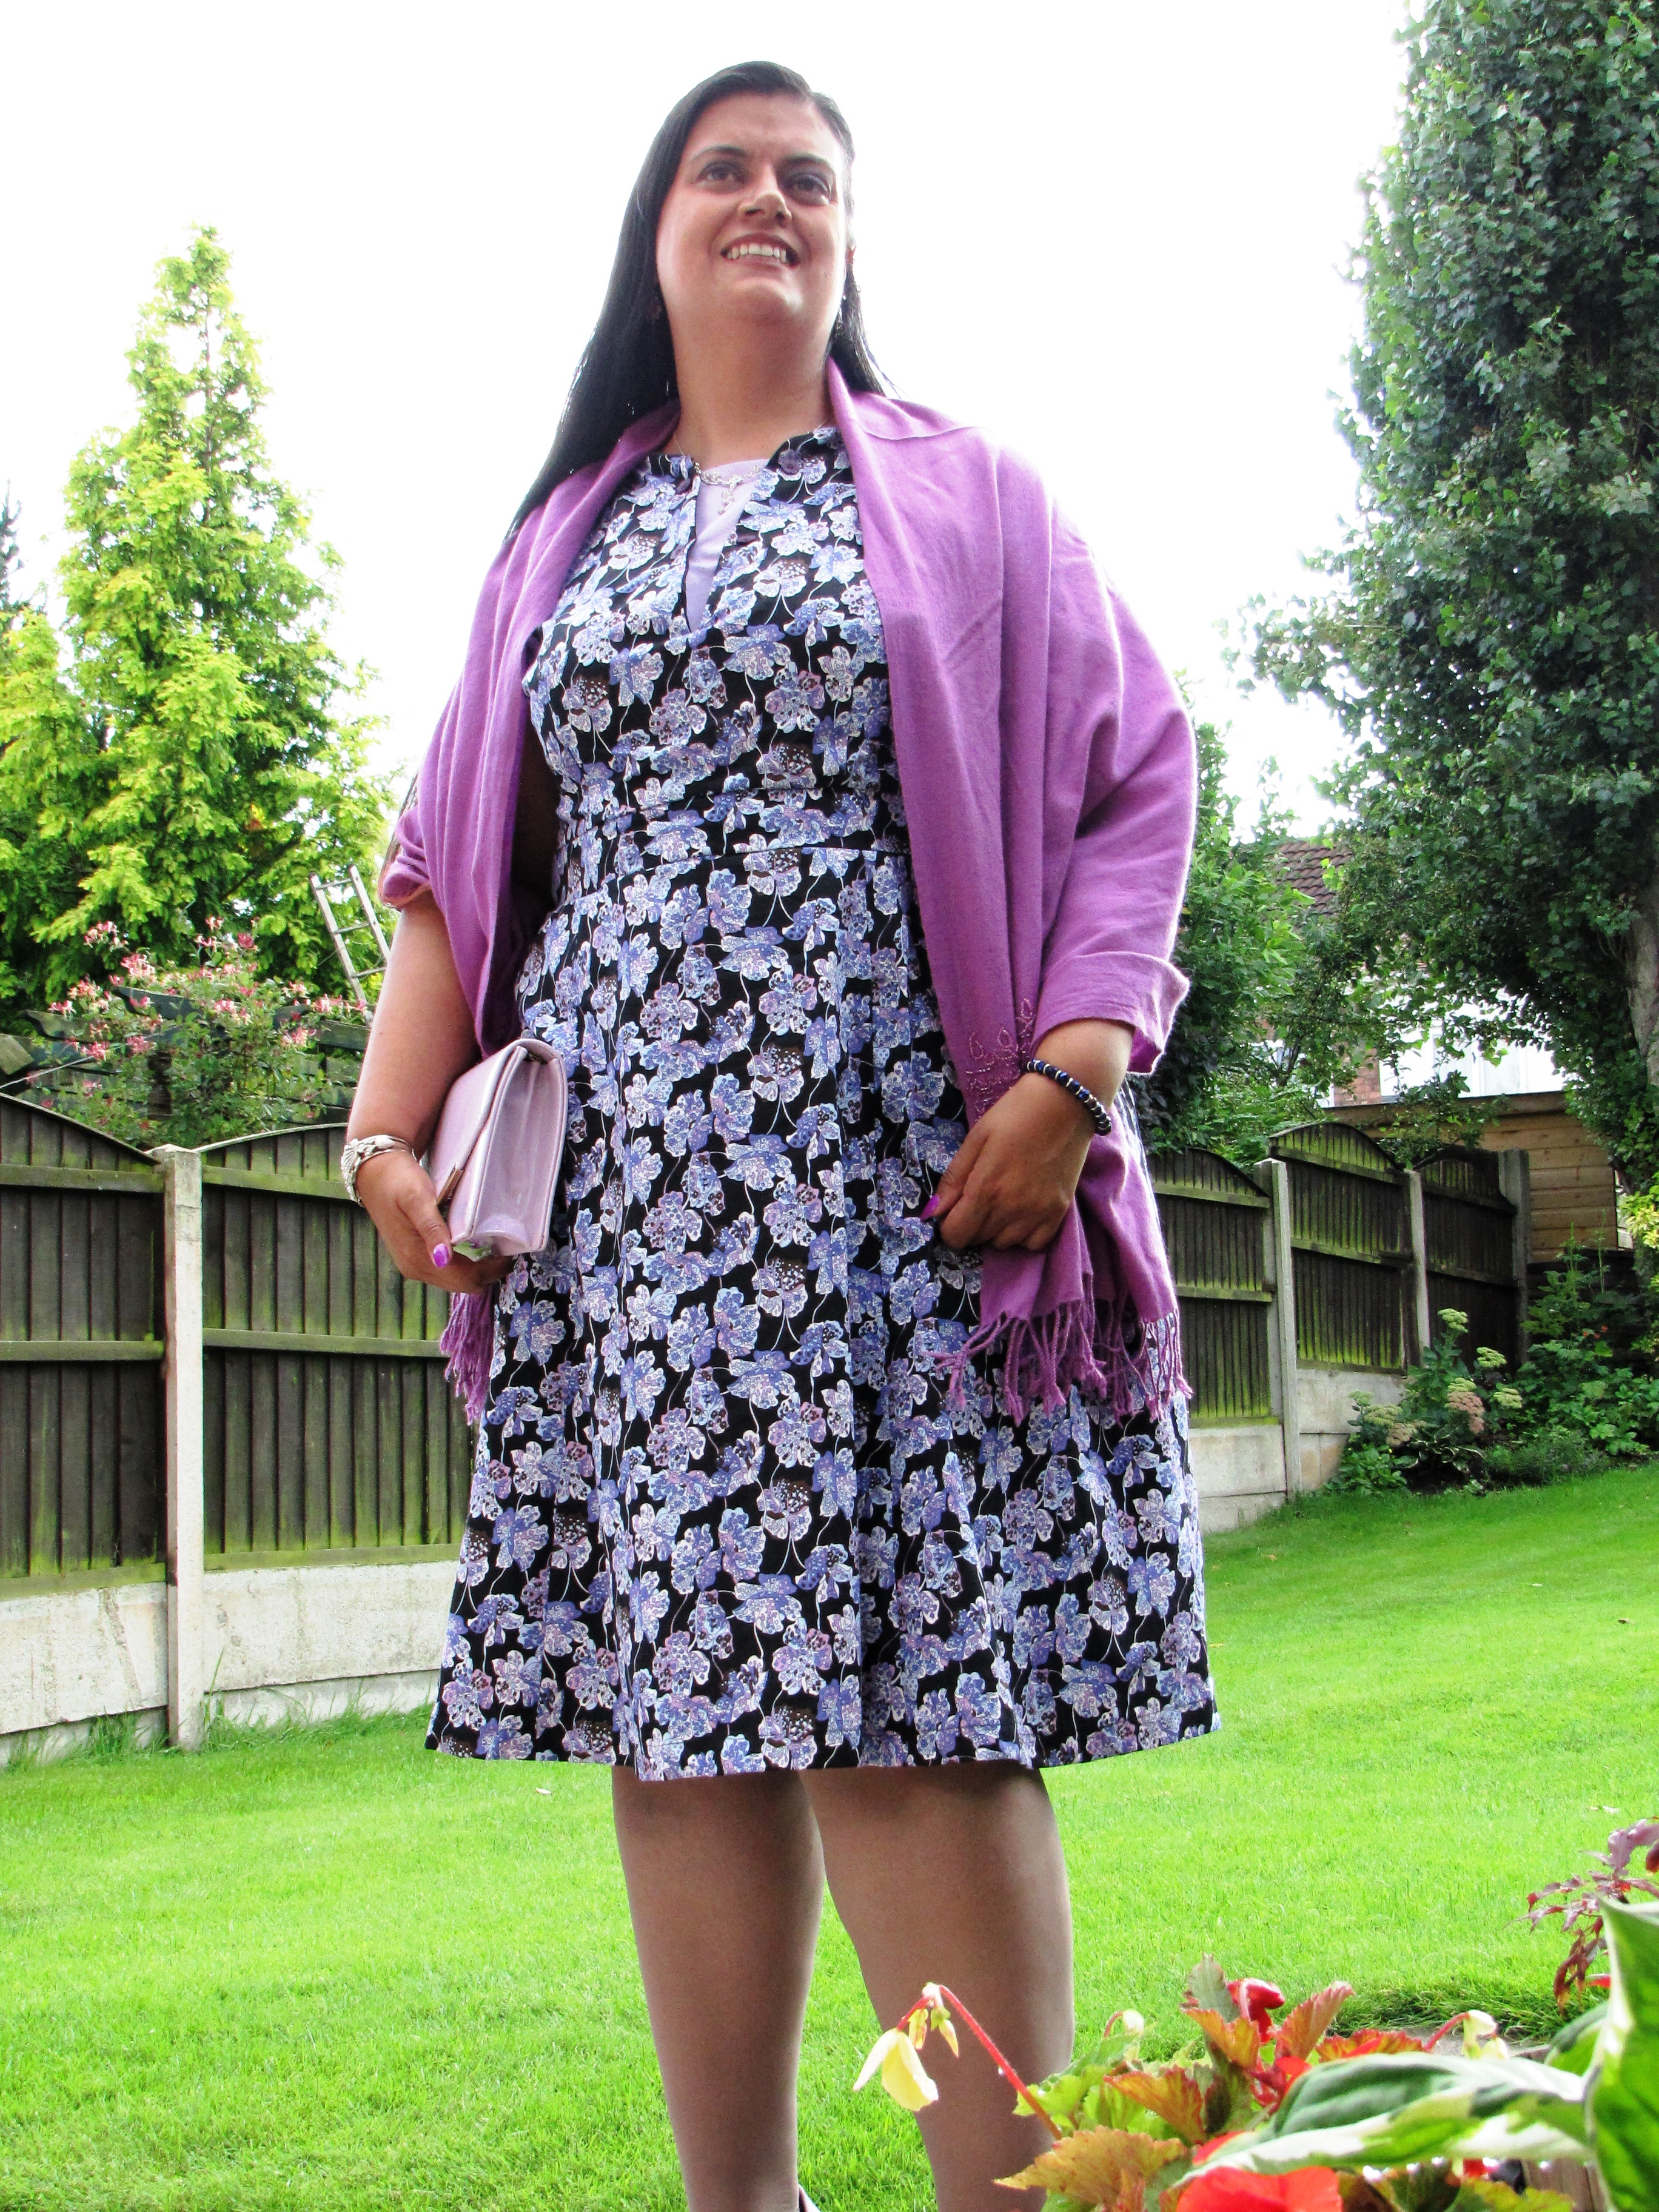
I’m very pleased with my Odette, the pattern is very flattering especially to pear-shapes like myself, and the extra little details like the interchangeable insert and in-seam pockets, add those extra special touches. I also love the fact that depending on your fabric choice it can be a more chilled day time summer dress, as seen in some of the other pattern testers blogs – Made by Meg, Handmade by Heather B, use pinstripes and make it workwear as seen by Kadiddlehopper or as with mine, add some glamorous heels, a beaded pashmina, fabulous jewellery and an evening clutch and suddenly it’s an elegant evening dress!

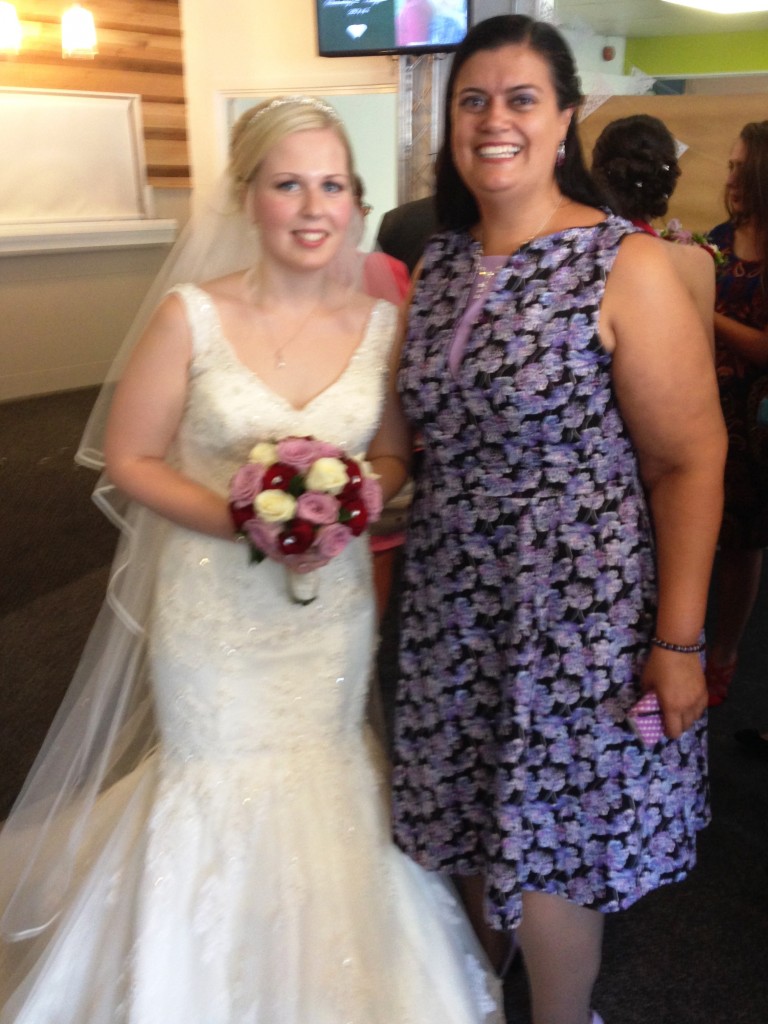
I loved wearing my dress to Shannon & Pete’s wedding, it was comfortable to wear all day long and managed to survive my enthusiastic dancing! Here I am with the beautiful bride at the wedding, doesn’t she look stunning!
To buy your own copy of the Odette dresssewing pattern please go here: http://bluegingerdoll.com/products/the-odette-dress
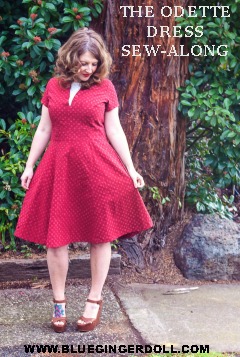
Bluegingerdoll have written a great sew-along for the Odette Dress with some great hints, tips and detailed photos for the steps involved:
NB: As part of the testing process, I received this pattern free of charge. All opinions and the decision to blog about it are however are fully my own.
2 Comments
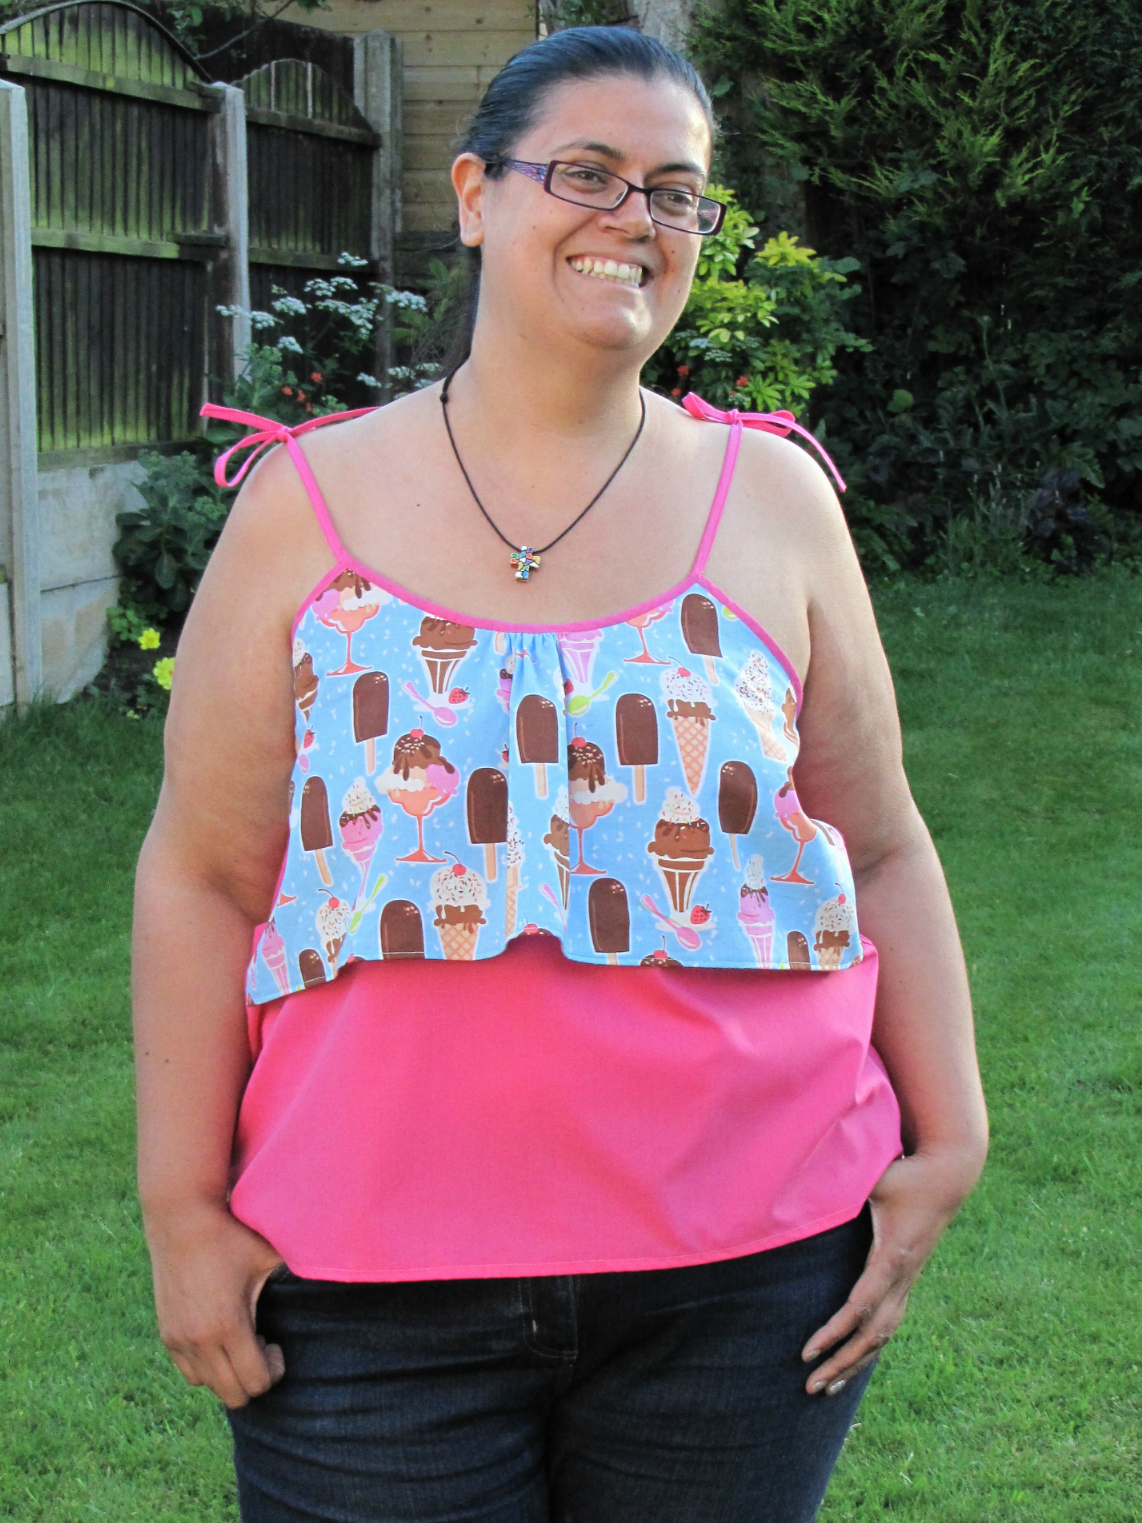
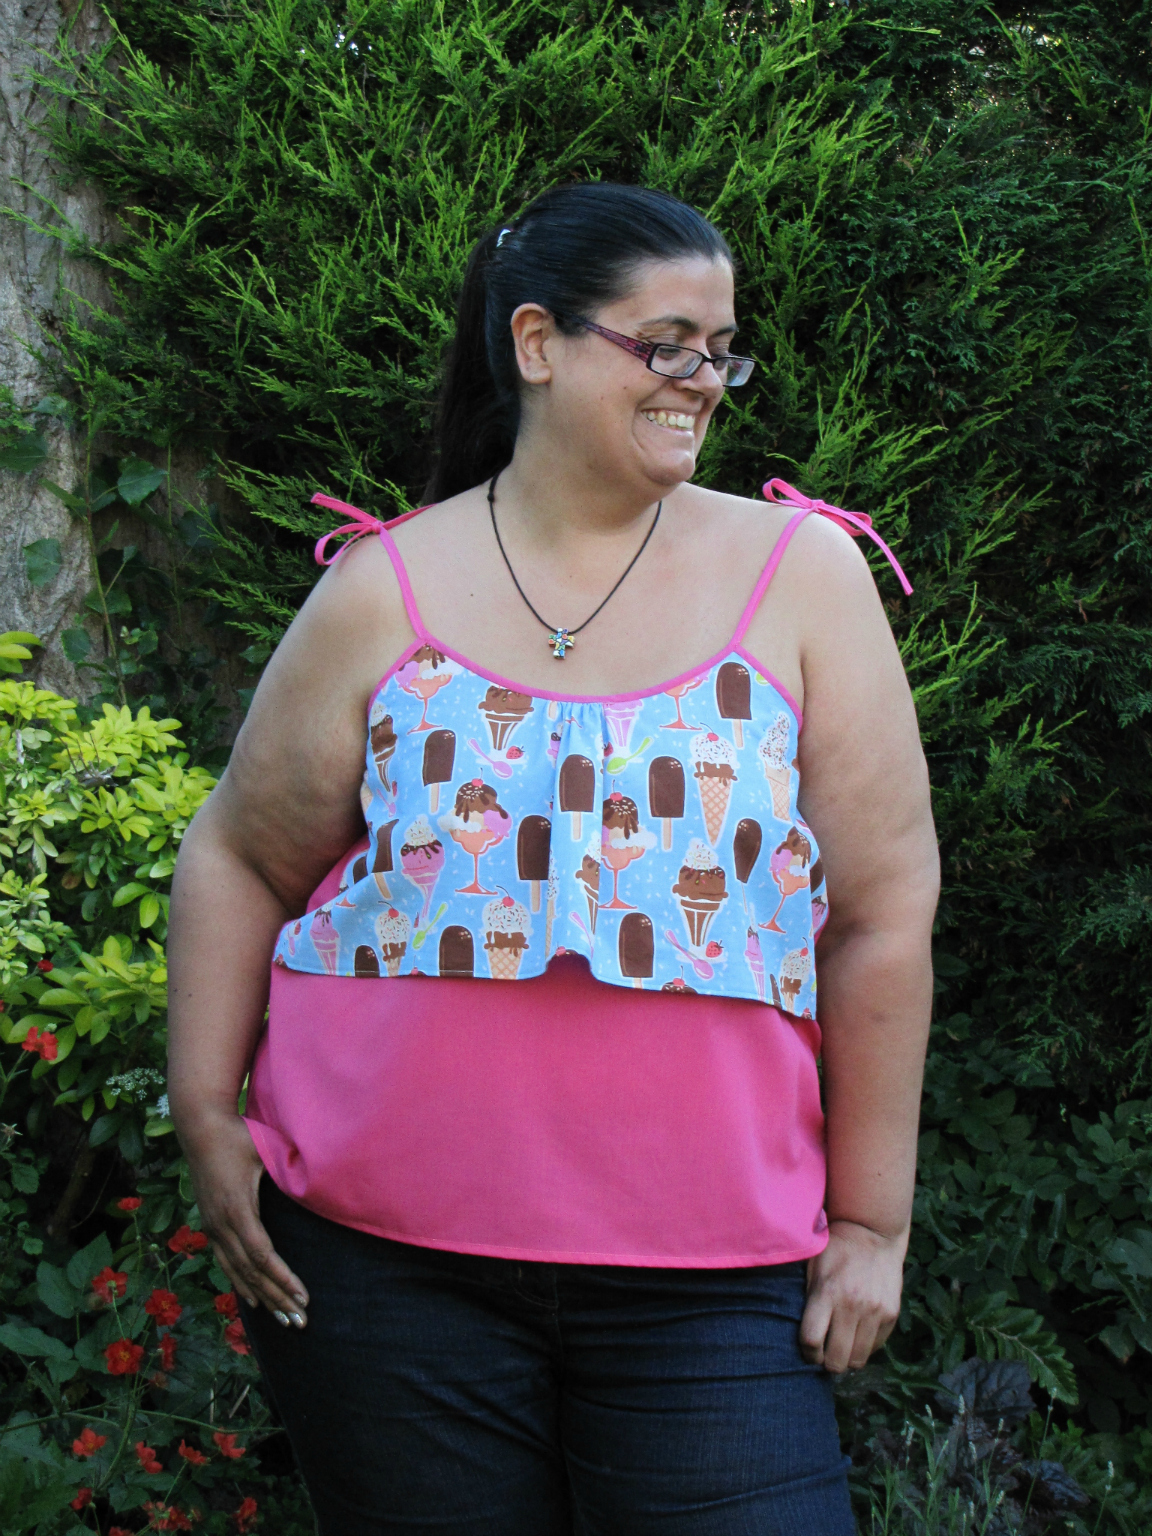
Recently I was given the opportunity to test a new pattern, the ‘Waterfall Tank’ for the fab indie designer Sew Caroline.
The Waterfall Tank is a really cute little tank top, aka a vest top, with a really pretty ruffled double layer top bodice, hence the name – waterfall tank. It is finished with bias binding, which is then used to create the straps, with 2 options here – either tie or fitted straps.
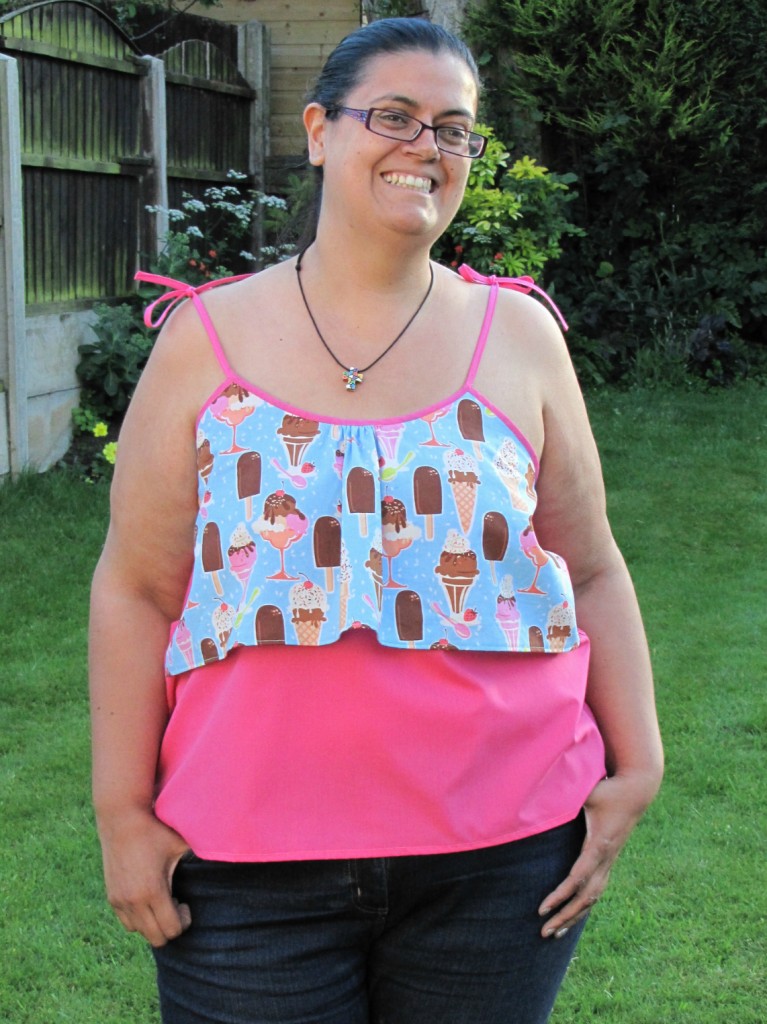
As soon as I saw this top previewed on Sew Caroline’s Instagram feed my mind immediately went to all those short lengths of funky and designer fabrics that I have and no idea what to use for other than a bag! I love the fact that there are so many different options for the waterfall tank you could o as I have and use a different fabric for the ruffle and main body. Or you could use 3 different fabrics, one for each section, or just use the same fabric and make your own bias biding – the instructions for doing this come with the pattern!
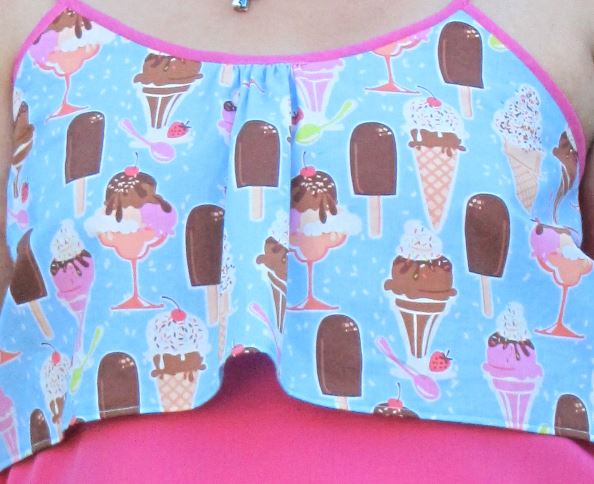
Having a rummage through my stash I found a lovely Michael Millar Ice-Cream fabric that I cough just under half a meter of last year. So off I toddled to my local Abakhan Fabrics store in Birkenhead and found a hot pink polycotton an bias binding to coordinate.
I chose the tie strap version as it looks like fun and I like the idea that I can wear it at different levels of revelling, depending on the situation! Sew Caroline’s instructions are very easy to follow, with lots of useful photos and great instructions on making your own bias binding, if you choose to. Sew Caroline also suggests using French seams and offers great, easy to follow instructions for doing this, which is very handy.
I’d recommend the pattern for advanced beginners for the fixed straps as the mitred corners & French seams could be tricky for complete beginners. Otherwise it comes together very quickly and easily. From printing the pdf to completing it took me approximately 3 hours to make. The only change I made to the pattern was to grade up a little in the hips due to being very pear-shaped. For the next version I’ll probably add a couple of inches to the length as being 5ft 9in and long bodied I prefer a longer length bodice.

The waterfall tank is comfortable to wear and flattering to a pear shape like myself, especially if you use a different fabric for the ruffle as it draws the eye to my slimmest part! As it’s a cotton, not jersey like most tank/vest tops, it skims over any problem areas, so again is more flattering. I feel that conformable in it that it’s going on my summer holiday with me this year!
If you want to see more versions of this top in a variety of different fabrics and sizes there are two round ups on Sew Caroline’s blog – Waterfall Tester Round Up Part One and Waterfall Tester Round Up Part Two
The Waterfall Tank pattern is now available from Sew Caroline’s online store, so if you fancy making your own version then why not hop over there and take a look.
Have you made your own version, or have any ideas or suggestions? If so, why not let me know in the comments below.
2 Comments
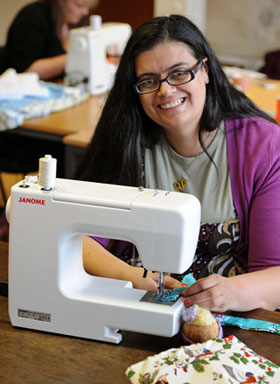
Me Sewing!
I love sewing and being creative, having tried a few different types of sewing, my preference is definitely for dressmaking. I have made a wide variety of garments over the years and thought I’d like to start a blog to share my creations, tips and techniques that I’ve developed.
As purple is most definitely my favourite colour then The Purple Stitcher seemed like a good choice for a blog name.
This is just a quick post to saw hello to everyone and introduce my new blog. Please bear with me as I’ve never written a blog before, so it’ll probably take me a while to get settled into this blogging malarkey!
It’s not my first time at writing though. Over the past few years I’ve written articles and reviews for Fiona over at The Sewing Directory, a great resource for anyone who loves stitching, so please do go over there and have a look at her fab website.
Follow my blog with Bloglovin

6 Comments